Klarstein 10035202 Manuel D'utilisation
Table des Matières
Les langues disponibles
Les langues disponibles
Liens rapides
BERN | LUCERNE
AARGAU SMART
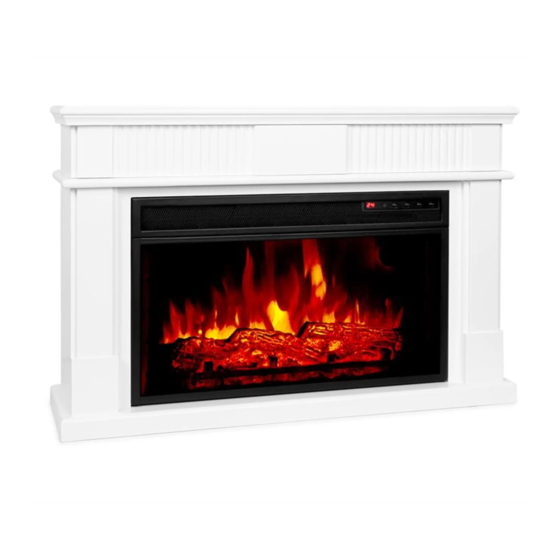
Elektrischer Kamin
Fireplace Heater
Cheminée électrique
Camino elettrico
Chimenea eléctrica
10035202 10035203 10035204
www.klarstein.com
Hinweis: Das Gerät eignet sich nicht zur Nutzung als
primäre Heizquelle.
Note: The device is not suitable for use as a primary
heat source.
Remarque : l'appareil ne convient pas en tant que
source principale de chauffage.
Nota: il dispositivo non è idoneo ad essere utilizzato
come fonte di riscaldamento primaria.
Advertencia: el aparato no es apto para utilizar como
fuente de calefacción primaria.
Chapitres
Table des Matières

Manuels Connexes pour Klarstein 10035202


Sommaire des Matières pour Klarstein 10035202
- Page 1 AARGAU SMART Elektrischer Kamin Fireplace Heater Cheminée électrique Camino elettrico Chimenea eléctrica 10035202 10035203 10035204 www.klarstein.com Hinweis: Das Gerät eignet sich nicht zur Nutzung als primäre Heizquelle. Note: The device is not suitable for use as a primary heat source.
-
Page 45: Fiche Technique
Nettoyage et entretien 53 Contrôle de l‘appareil par smartphone 54 Fiche de données produit 56 Informations sur le recyclage 57 Déclaration de conformité 57 FICHE TECHNIQUE Numéro d’article 10035202, 10035203, 10035204 Alimentation électrique 220-240 V ~ 50/60 Hz Puissance 2000 W WiFi standard 802.1 1 b/g/n WiFi fréquence... -
Page 46: Consignes De Sécurité
CONSIGNES DE SÉCURITÉ • Avant utilisation, vérifi ez la tension sur l‘étiquette de l‘appareil et ne branchez l‘appareil que sur des prises correspondant à la tension de l‘appareil. • Si le câble d‘alimentation est endommagé, faites-le remplacer par un professionnel qualifi é. -
Page 47: Aperçu De L'appareil Et Touches
APERÇU DE L‘APPAREIL ET TOUCHES Sortie d‘air Panneau de commande Sortie d‘air Panneau de commande Sortie d‘air Panneau de commande... -
Page 48: Assemblage 10035204
ASSEMBLAGE 10035204... -
Page 49: Montage Mural
MONTAGE MURAL La cheminée peut être fixée au mur. Avant de fixer la cheminée, assurez-vous qu‘elle est sur une surface plane. Marquez la position des trous avec un stylo pour le support fourni. Percez des trous à l‘arrière de la cheminée à l‘aide d‘un foret fin (2 mm). Fixez les supports à... -
Page 50: Panneau De Commande
PANNEAU DE COMMANDE Minuterie Réglage des Réglage de la Marche/arrêt flammes chaleur TÉLÉCOMMANDE Touche de • Appuyez sur cette touche pour allumer et éteindre marche/arrêt l‘appareil Réglage des • Pour régler la luminosité de la flamme : appuyez sur flammes une fois et ajustez la luminosité... -
Page 51: Affichages À L'écran
Touche de • L‘appareil étant allumé, appuyez sur cette touche minuterie pour régler le délai avant l‘arrêt automatique. Vous pouvez définir 0 à 9 heures par intervalles d‘une heure. Dès que la durée définie est écoulée, le feu s‘éteint automatiquement. •... -
Page 52: Mise En Marche Et Utilisation
MISE EN MARCHE ET UTILISATION Marche /Arrêt • Appuyez sur la touche d‘alimentation pour allumer / éteindre l‘appareil. • En veille, appuyez et maintenez la touche d‘alimentation pendant 3 secondes pour réinitialiser le WiFi. • En veille, appuyez et maintenez le bouton d‘alimentation pendant 5 secondes pour basculer entre Celsius et Fahrenheit. -
Page 53: Nettoyage Et Entretien
Minuterie • Vous pouvez régler une minuterie de démarrage en appuyant plusieurs fois sur la touche Timer en mode veille. La minuterie de démarrage est réglable entre 0 et 9 heures. Chaque fois que vous appuyez sur la touche de la minuterie, l‘heure est ajustée par intervalle d‘une heure. -
Page 54: Contrôle De L'appareil Par Smartphone
à distance l‘appareil via votre smartphone, mais vous donne également accès à des recettes et à des informations supplémentaires. Procédez comme suit pour connecter votre smartphone avec votre appareil Klarstein : Téléchargez d‘abord l‘application Klarstein en scannant le code QR avec votre smartphone (voir ci-dessous) ou téléchargez-le directement depuis l‘App Store ou... - Page 55 Dépannage des problèmes de connexion Si votre appareil Klarstein ne se trouve pas dans le WLAN, vérifiez les points suivants : • L‘appareil est-il branché ? • La fonction WiFi de mon téléphone est-elle activée ? • La fonction WiFi de l‘appareil Klarstein est-elle activée ? (Suivez les instructions dans l‘application)
-
Page 56: Fiche De Données Produit
FICHE DE DONNÉES PRODUIT Référence (s) du produit 10035202, 10035203, 10035204 Donnée Symbole Valeur Unité Donnée Unité Puissance calorifique Uniquement pour les radiateurs électriques à accumulation : Type de régulation de l'apport de chaleur Puissance calorifique Régulation manuelle de l'apport de chaleur n.c. -
Page 57: Informations Sur Le Recyclage
Chal-Tec GmbH, Wallstraße 16, 10179 Berlin, Allemagne. Importateur pour la Grande Bretagne : Chal-Tec UK limited Unit 6 Riverside Business Centre Brighton Road Shoreham-by-Sea BN43 6RE United Kingdom La déclaration complète de conformité du fabricant est accessible par le lien suivant : use.berlin/10035202...