Table des Matières
Publicité
Les langues disponibles
Les langues disponibles
Liens rapides
Publicité
Table des Matières

Manuels Connexes pour Wine Cell'R WC18FGBK5


Sommaire des Matières pour Wine Cell'R WC18FGBK5
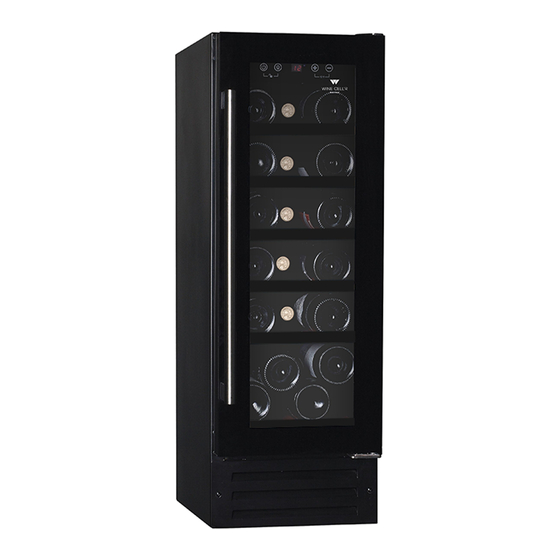
- Page 23 Modèles : WC18FGBK5 (1 zone) WC32FGDZ5 (2 zones) WC46FGDZ5 (2 zones) WC94FGB5 (2 zones) WC194FGB5 (1 zone) VEUILLEZ LIRE ATTENTIVEMENT CE MANUEL AVANT L'INSTALLATION ET L'UTILISATION 23 ...
-
Page 24: Table Des Matières
Inversion de la porte Disposition des bouteilles et entreposage OPÉRATIONS 32 à 38 Fonctionnement du cellier Affichage du panneau WC18FGBK5 Affichage du panneau WC46FGDZ5 Affichage du panneau WC32FGDZ5, WC94FGB5, WC194FGB5 Température idéale pour servir le vin ... -
Page 25: Informations/Consignes De Sécurité
INFORMATIONS/CONSIGNES DE SÉCURITÉ Avant d’utiliser votre appareil Retirez le matériel d’emballage intérieur et extérieur. • Laissez reposer l’appareil en position verticale pour environ 24 heures avant de le • brancher afin d’éviter toute complication au niveau du système de refroidissement. Utilisez un chiffon doux avec de l’eau tiède pour nettoyer l’intérieur et l’extérieur. -
Page 26: Conseils Avant L'installation
Conseils avant l’installation Cet appareil est conçu pour une installation encastrable ou autoportante L'appareil est destiné à être utilisé exclusivement pour l’entreposage du vin. • Placez votre cellier sur un sol plat suffisamment résistant pour le supporter lorsqu'il • est complètement chargé. •... -
Page 27: Installation
Ces dimensions découpées indiquent l'espace minimum requis pour que votre cellier fonctionne comme prévu. Notez que la fiche de la prise demande 38 mm à de dégagement l’arrière une fois branchée et la poignée est de 45 mm de profondeur maximum, selon les modèles. WC18FGBK5 ... - Page 28 WC32FGDZ5 WC46FGDZ5 28 ...
- Page 29 WC94FGB5 WC194FGB5 29 ...
-
Page 30: Installation De La Poignée
Installation de la poignée (modèles WC18FGBK5 et WC46FGDZ5 seulement) 1. Déplacez le joint d’étanchéité de la porte derrière la poignée avec votre doigt. Dans certains modèles, des capuchons de plastique recouvrent les vis ; retirez-les afin d’exposer les vis. - Page 31 2. Retirez la porte de la charnière supérieure et retirez la tige de métal. 3. Utilisez un petit tournevis à tête plate pour soulever et enlever le capuchon en plastique sur le centre supérieur (trou de verrouillage) de la porte et insérez-le dans le trou central inférieur.
-
Page 32: Disposition Des Bouteilles Et Entreposage
Votre cellier dispose d’un panneau de contrôle avec afficheur sur le devant de la porte. Il inclut plusieurs fonctions qui permettent de contrôler la température des zones inférieure et supérieure de votre cellier. Affichage du panneau, modèle WC18FGBK5 ... -
Page 33: Affichage Du Panneau Wc32Fgdz5, Wc94Fgb5, Wc194Fgb5
Allume et éteint l'éclairage intérieur (3 options). Panneau contrôle (cadenas) WC18FGBK5: Appuyez sur les deux boutons de gauche simultanément pendant 3 secondes pour verrouiller ou déverrouiller le panneau de contrôle. WC46FGDZ5: Appuyez sur le bouton cadenas 3 secondes pour déverrouiller le panneau de contrôle. - Page 34 ● Pour fermer votre cellier lors du nettoyage ou d’une absence prolongée, appuyez de nouveau sur ce bouton et le cellier se fermera. Une fois que l’appareil a émis un bip, maintenez le bouton d’alimentation pendant 10 secondes et votre cellier se fermera par lui-même. Une fois que le cellier est fermé, veuillez allouer 5 minutes avant de le démarrer à...
- Page 35 Lorsque le panneau de contrôle est déverrouillé, l’affichage de température indiquera la température préenregistrée et quand le panneau de contrôle est verrouillé, c’est l’affichage de la température réelle qui est affichée. IMPORTANT : Pour que l’appareil fonctionne à un niveau optimal, la zone du haut doit avoir un écart de 4 à...
- Page 36 La fenêtre d’affichage peut être réglée sur la position arrêt (OFF) pour une apparence plus discrète. Votre cellier continuera de fonctionner, mais l’écran d’affichage ne sera pas visible. Vous pouvez vérifier la température de votre cellier en appuyant sur le bouton alimentation.
-
Page 37: Température Idéale Pour Servir Le Vin
températures de dégustation recommandées pour un goût optimal. Les plages de température recommandées pour servir différents cépages sont énumérées ci-dessous. 59-65 °F Vins rouges 15-18 °C 45-52 °F Vins blancs 7-11 °C 40-45 °F Champagnes 4-7 °C Note: Si l'appareil est débranché, s’il perd son alimentation ou est éteint, vous devez attendre 5 minutes avant de le redémarrer. -
Page 38: Comment Retirer Une Tablette Télescopique
Comment retirer une tablette télescopique 1. Retirez toutes les bouteilles. 2. Tirez la tablette le plus loin possible. 3. Tenez la tablette télescopique d'une main et de l'autre main, soulevez doucement l'avant de la tablette par la languette avant, puis poussez vers l'arrière pour déverrouiller le crochet arrière. -
Page 39: Remplacement Du Filtre
Passez l'aspirateur sur la grille avant et l'arrière de l'appareil deux fois par an. Assurez-vous que l'alimentation soit coupée avant de nettoyer. • Il est recommandé de nettoyer l'appareil complètement à l'intérieur et à l'extérieur une fois par an pour maximiser la longévité... -
Page 40: Dépannage
DÉPANNAGE Beaucoup de problèmes communs peuvent être résolus très facilement. Suivez les conseils de dépannage ci-dessous si vous rencontrez des problèmes : PROBLÈME CAUSES & SOLUTIONS Vérifier s’il est branché. Le cellier n’est pas à ON. Le circuit est fermé ou un fusible est brûlé. Le cellier ne fonctionne pas Il devrait être le seul appareil branché... - Page 41 PROBLÈME CAUSES & SOLUTIONS Le bruit peut parvenir du liquide réfrigérant ce qui est normal. À chacun des fins de cycle, vous pouvez entendre un gargouillement causé par le liquide réfrigérant. L’expansion et la contraction des murs intérieurs peuvent causer des bruits de craquements. Le cellier semble faire trop L’appareil n’est pas à...
-
Page 42: Votre Garantie Wine Cell'r
VOTRE GARANTIE WINE CELL’R L’appareil doit avoir été utilisé dans les conditions normales recommandées par le fabricant. Une preuve de la date d’achat est requise pour obtenir le service de garantie, ainsi que le numéro de série de l’appareil (collant blanc à l’intérieur, en bas à... -
Page 43: Conditions & Exclusions
Conditions & Exclusions Les pièces en plastique sont garanties pendant trente (30) jours seulement à partir de la date d’achat, sans aucune prolongation prévue. Ce que Wine Cell’R ne couvre pas Visite d’un technicien à domicile pour expliquer le fonctionnement du cellier. ... -
Page 44: Contactez-Nous
Contactez-nous Merci d’avoir acheté un appareil de qualité Wine Cell’R. Nous vous conseillons d’activer votre garantie dès maintenant. Il suffit de remplir le formulaire d’enregistrement ci-joint et de nous le retourner par la poste ou par courriel à service@eurocelcanada.com ou par télécopieur au 450 688-2324.