Table des Matières
Publicité
Les langues disponibles
Les langues disponibles
Liens rapides
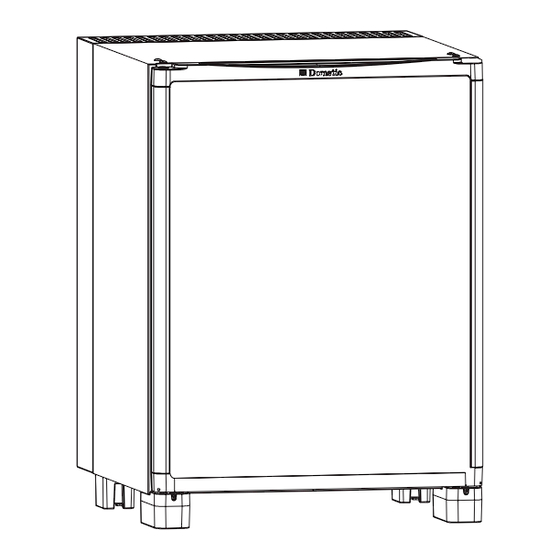
Frei stehende Versionen und Einbauversionen.
Versiónes de unidad libre y versiónes de unidad empotrada
207.5396.41
miniBar
RH 423 LDA
RH 439LD
Type: MB20-60
Free-standing and Built-in versions
Version pose libre et version encastrable.
Versione normale e versione da incasso.
Vrijstaand model en inbouw model.
Versão isolada e Versão incorporada.
RH 449LD
Operating Instructions
Bedienungsanleitung
Mode d'emploi
Istruzioni per l'uso
Handleiding
Manual de Instrucciones
Instruções de Utilização
GB
DE
BE
IT
NL
ES
PT
Publicité
Chapitres
Table des Matières

Manuels Connexes pour Dometic RH 423LDA


Sommaire des Matières pour Dometic RH 423LDA
- Page 1 miniBar RH 423 LDA RH 439LD RH 449LD Type: MB20-60 Free-standing and Built-in versions Frei stehende Versionen und Einbauversionen. Version pose libre et version encastrable. Versione normale e versione da incasso. Vrijstaand model en inbouw model. Versiónes de unidad libre y versiónes de unidad empotrada Versão isolada e Versão incorporada.
- Page 2 Please read these operating instructions carefully before putting the refrigeration unit into operation. If you later sell or dispose of it, please ensure that the new owner receives these operating instructions. Please follow the installation details below carefully. Guarantee is valid for products installed as described only.
-
Page 3: Table Des Matières
Warranty arrangements are in accordance with EC Directive 44/1999/CE and the normal conditions applicable in the country concerned. For warranty or other servicing, such as spare-parts, please contact our Dometic Service Network. The warranty does not cover any damage due to improper use. -
Page 4: Unpacking
12. ADC LED (if available) 6. Evaporator sensor (behind evaporator) 13. Cowl 7. Evaporator IN CASE IF YOUR REFRIGERATOR IS EQUIPPED WITH LOCK, DOMETIC ZRT DO NOT ACCEPT LIABILITY FOR LOSS OR DAMAGE OF KEYS. HOWEVER A COMPLETE LOCK CAN BE SUPPLIED. -
Page 5: Cleaning
3. Cleaning Clean the refrigerator thoroughly at intervals, as necessary. Remove the shelves; these, parts, as well as the cabinet interior and the door should be washed with a warm solution of sodium bi-carbonate. Finally wipe over with a cloth rinsed in warm water only, and dry with a clean cloth. -
Page 6: Using The Appliance
Dometic service. 6. Ice cubes (if available) Fill the ice tray up to 4/5 with drinking water, cover with the lid and place the closed ice tray on the ice- tray shelf. -
Page 7: Interior Light
8.2. Interior light (fig. 6.) Top of the miniBar Two light-emitting diodes (A) on an electronic PCB illuminate the cooling compartment when the door is opened. Two sensors (B) control whether the door is open or not and the LEDs and the door control as well will work accordingly. -
Page 8: Reversing The Door Hang
9. Reversing the door hang 10. Replacing the decorative (Fig. 13.) Reversing is suggested to perform in the following door panel (Fig. 13., 14.) way, in order to avoid breaking of the hinge bolt: (only free-standing model) Removing and mounting of the door is similar to that of described in the previous, 9 chapter. -
Page 9: Putting Into Operation
It is not permitted that this product be disposed of by way of the normal household refuse collection system. Dometic refrigerators bear this symbol on the specifications plate (data plate) to be found in the interior of the unit. This appliance complies with the following EEC... - Page 10 Bitte lesen Sie diese Anleitung sorgfältig, bevor Sie das Gerät einsetzen. Sollten Sie das Gerät weiter verkaufen oder entsorgen, übergeben Sie bitte diese Anleitung dem neuen Besitzer. Bitte beachten folgenden Installationsanweisungen genau. Garantieleistungen können nur in Anspruch genommen werden, wenn die Installation gemäß...
- Page 11 Die Garantie erlischt, wenn das Gerät nicht gemäß den Anweisungen installiert und benutzt wird. Nennen Sie bitte das Modell sowie die Produkt- und die Seriennummer des Geräts, wenn Sie sich mit dem Dometic Servicenetzwerk in Verbindung setzen. Diese Informationen finden Sie auf dem Typenschild im Innern des Kühlgerätes.
-
Page 12: Auspacken Des Geräts
12. ADC-LED (falls vorhanden) 6. Verdampfersensor (hinter dem Verdampfer) 13. Abluftgitter 7. Verdampfer FALLS IHR KÜHLGERÄT MIT EINEM TÜRSCHLOSS AUSGESTATTET IST, ÜBERNIMMT DOMETIC ZRT KEINE HAFTUNG FÜR VERLOREN GEGANGENE ODER BESCHÄDIGTE SCHLÜSSEL. SCHLÖSSER SIND ALS KOMPLETTE EINHEIT ALS ERSATZTEIL ERHÄLTLICH. -
Page 13: Reinigung
3. Reinigung werden. Achten Sie vor der endgültigen Montage darauf, dass nur die flache Seite des Scharniers Reinigen Sie das Kühlgerät gründlich in ein störungsfreies Öffnen und Schließen der Tür regelmäßigen Abständen und bei Bedarf. erlaubt (Abbildung 2). Räumen Sie das Gerät aus und entfernen Sie die Beachten beim Einbau... -
Page 14: Frei Stehende Version
Dadurch wird die Elektronik zurückgesetzt und das Gerät sollte wieder normal arbeiten. Beginnt das Gerät nicht zu miniCool miniBar kühlen, liegt eine ernsthafte Störung vor und Sie sollten Ihren Dometic Kundendienst informieren. Lufteingang Lufteingang 6. Eiswürfel (falls vorhanden) Abbildung 4. -
Page 15: Automatische Abtaufunktion
Einbauversionen: Die LED muss oben an der Tür auf der Scharnierseite montiert werden. Die LED kann mit dem Komponenten-Kit (Abb. 8) befestigt werden. Abbildung 5. Abbildung 8. 8.1. Automatische Abtaufunktion 1. Befestigen Sie das Kabel mit der Haltelasche (A) an der Seitenwand auf der Scharnierseite. Die erste Abtauphase beginnt 39 Stunden nach dem Bohren Sie dazu Löcher entsprechend der ersten Einschalten und dauert zwei Stunden. -
Page 16: Umkehrung Des Türanschlags
3. Setzen Sie die LED-Halterung von außen in die Montieren Sie die starren Füße (3) mit den Löcher ein. gegenüber montierten Scharnierbolzen (9) 4. Rasten Sie das Kabel mit der Isolierung (C) in die Montieren Sie die beiden Schraubfüße (1) LED-Halterung ein und schließen es an (Abb. -
Page 17: Kundendienst
Dieses Produkt darf nicht über den normalen Netzstecker des Geräts darf nur an eine geerdete und Haushaltsabfall entsorgt werden. den örtlichen Vorschriften entsprechende Steckdose Kühlschränke von Dometic enthalten das Symbol angeschlossen werden. auf dem Datenschild (Typenschild) im Inneren des Notwendige elektrische Installationen zum Anschluss Gerätes. - Page 18 Veuillez bien lire attentivement ce mode d'emploi avant de mettre cet appareil en service. Si vous deviez vendre ou céder l'appareil ultérieurement, veuillez bien remettre ce mode d'emploi à son nouveau propriétaire. Veillez à respecter scrupuleusement les directives suivantes d'installation. Au cas où vous n'auriez pas installé...
- Page 19 Les dommages résultant d'un usage inapproprié de l'appareil ne sont pas couverts par la garantie. Les modifications apportées à l'appareil ou l'utilisation de pièces de rechange qui ne sont pas d'origine Dometic, ne sont pas couvertes par la garantie. Le non-respect des instructions d'installation ou du mode d'emploi, entraîne l'extinction totale de cette garantie.
-
Page 20: Déballage De L'appareil
6. Capteur de l'évaporateur (derrière l'évaporateur) 13. Grille d'aération 7. Évaporateur AU CAS OÙ LE RÉFRIGÉRATEUR EST ÉQUIPÉ D'UNE SERRURE, DOMETIC ZRT N'ASSUME AUCUNE GARANTIE POUR DES CLÉS PERDUES OU ENDOMMAGÉES. VOUS POURREZ COMMANDER UNE NOUVELLE SERRURE SOUS FORME D'UNITÉ COMPLÈTE. -
Page 21: Nettoyage
3. Nettoyage utilisant les dispositifs de fixation, prévus à cet effet, situés au fond de l'appareil. Ce qui se fera en Nettoyez le réfrigérateur à intervalles utilisant les vis (Fig. 2). réguliers et en cas de besoin. Videz Des écarts entre les points de pivotement l'appareil, puis retirez les clayettes et les pourront être compensés à... -
Page 22: Version Pose Libre
Si l'appareil ne recommence pas à fonctionner, vous devrez en informer immédiatement votre service aprèsvente Dometic. miniCool miniBar 6. Glaçons (si existante) Remplissez quatre cinquièmes du bac à glaçons d'eau potable, fermez le couvercle, Sortie d’air Sortie d’air... -
Page 23: Éclairage Intérieur
8. Dégivrage, nettoyage et entretien La formation de givre après une certaine période d'exploitation est normale. Cette couche de givre ne devra cependant pas par trop s'épaissir, en raison de son influence négative sur la performance frigorifique. Le réglage de la température du miniBar se fait automatiquement, par commande électronique. -
Page 24: Door Front
9. Inverser le sens d'ouverture F a c e supérieure de la porte (Figure 13) du miniBar Afin de ne pas endommager le boulon de charnière, veillez à respecter l'ordre suivant en inversant le sens d'ouverture de la porte : Paroi latérale droite (à... -
Page 25: Service Après-Vente
Vous trouverez son adresse dans l'annuaire (Vous trouverez tous les détails sur le modèle téléphonique. 13. Mise en marche Caractéristiques techniques : Modèle RH 423LDA RH 439LD RH 449LD Type MB20-60 MB20-60 MB20-60... -
Page 26: Raccordement Au Secteur
Il est interdit de jeter ce produit dans vous que la tension de secteur correspond à la les ordures ménagères. valeur indiquée sur la plaque signalétique. Sur les réfrigérateurs Dometic, le symbole 4. Informations relatives à figure sur la plaque des caractéristiques la protection de (plaque signalétique) apposée à... - Page 27 Leggere attentamente le presenti istruzioni per l'uso prima di mettere in funzione il refrigeratore. Nel caso di eventuale rivendita o smaltimento del frigorifero, il presente manuale d'uso dovrà essere consegnato al nuovo proprietario. Seguire attentamente le istruzioni d'installazione qui elencate: La garanzia è valida esclusivamente nel caso in cui il prodotto venga installato come specificato qui di seguito.
- Page 28 La garanzia decade in caso di inosservanza delle istruzioni di installazione e uso. Nel contattare Dometic Service Network occorre segnalare il modello, il codice prodotto e il numero di serie. Queste informazioni sono riportate sulla targhetta identificativa applicata all'interno del frigorifero.
-
Page 29: Rimozione Dell'imballaggio
6. Sensore dell'evaporatore (situato dietro l'evaporatore) 13. Griglia di copertura 7. Evaporatore SE IL FRIGORIFERO FOSSE DOTATO DI SERRATURA, DOMETIC ZRT. NON È RESPONSABILE DELL'EVENTUALE PERDITA O DANNEGGIAMENTO DELLE RELATIVE CHIAVI. TUTTAVIA POTRÀ ESSERE FORNITA UNA SERRATURA DI RICAMBIO COMPLETA. -
Page 30: Pulizia
3. Pulizia corretto funzionamento e la massima efficienza refrigerante. Pulire regolarmente i ripiani del frigorifero a 4.1.1. Versione da incasso seconda della necessità. Rimuovere i vari ripiani del frigorifero. Si consiglia di lavare i ripiani Questa versione è stata progettata per essere del vano frigorifero e quelli della porta utilizzando incassata. -
Page 31: Funzionamento Dell'apparecchio
Dometic. 4.1.2. Versione normale Questa versione è stata progettata e costruita per il funzionamento come apparecchio indipendente, non da incasso. I ripari di copertura del gruppo refrigerante fanno da protezione alle parti calde del gruppo stesso. -
Page 32: Produzione Cubetti Di Ghiaccio
6. Produzione cubetti di Per spegnere l'apparecchio scollegarlo dalla rete di alimentazione elettrica e lasciare la ghiaccio (se presente) porta del frigorifero aperta. A sbrinamento terminato, si consiglia di pulire le parti interne Per la produzione di cubetti di ghiaccio riempire del frigorifero utilizzando un panno umido e l'apposita vaschetta con 4/5 di acqua potabile e pulito. -
Page 33: Inversione Del Senso Di Apertura Della Porta
Versione da incasso: 3. Inserire dall'esterno porta-LED nell'apposito foro. Il LED deve essere inserito sul pannello della 4. Inserire il cavo completo di isolamento (C) porta nella parte superiore, lato cerniere. nel morsetto fissacavo presente sul porta Il LED può essere montato usando l'apposito kit LED e collegare il cavo (fig. -
Page 34: Sostituzione Del Pannello Decorativo Frontale
Montare i piedini di fissaggio (3) con i perni delle cerniere (9) posizionati nella parte opposta dei piedini stessi; Rimontare i due pezzi regolabili (1); Verificare che la porta si chiuda con facilità garantendo la corretta sigillatura del frigorifero. 10. Sostituzione del pannello decorativo frontale Figure 14. -
Page 35: Messa In Servizio
Questo prodotto non deve essere smaltito con i sulla targhetta identificativa dell'apparecchio normali rifiuti domestici. stesso. Il simbolo si trova sulla targhetta dei dati tecnici dei frigoriferi Dometic (targhetta del modello) 14. Informazioni per la all'interno dell'apparecchio. protezione dell'ambiente Il frigorifero non contiene CFC/HCFC. -
Page 36: Norme Di Garanzia
NORME DI GARANZIA Il periodo di garanzia per i nostri prodotti è di un anno dalla data di vendita. Durante il periodo di garanzia la Società si impegna a sostituire gratuitamente tutte le parti Che presentassero difetti di fabbricazione esclusi i pezzi ad usura. Le riparazioni in garanzia si intendono franco Electrolux Commerciale S.r.l. - Page 37 Lees de gebruiksaanwijzing aandachtig door voordat u het apparaat in gebruik neemt. Als u het apparaat verkoopt of weggeeft, zorg er dan voor dat de nieuwe eigenaar de gebruiksaanwijzing krijgt. Neem aanwijzingen uit de handleiding zorgvuldig in acht. Garantie geldt alleen voor apparaten welke conform de hier beschreven aanwijzingen zijn geinstalleerd.
- Page 38 Voor vragen over garantie, klantenservice en onderdelen kunt u contact opnemen met Dometic servicedienst. Schade veroorzaakt door verkeerd gebruik, valt niet onder de garantie. Schade als gevolg van modificaties of gebruik van onjuiste onderdelen valt niet onder de garantie.
-
Page 39: Uitpakken
11. Deurvakken 5. Verdamperdeksel 12. ADC LED (indien ingebouwd) 6. Verdampervoeler (achter verdamper) 13. Kap 7. Verdamper WANNEER U EEN KOELKAST MET SLOT HEEFT, IS DOMETIC NIET AANSPRAKELIJK VOOR VERLIES OF BESCHADIGING VAN SLEUTELS. SLOTEN KUNNEN ALS COMPLEET ONDERDEEL WORDEN VERVANGEN. -
Page 40: Plaatsing Van De Koelkast
3. Reinigen Reinig de koelkast zorgvuldig voor de eerste ingebruikname en daarna indien nodig. Maak de koelkast schoon met handwarm water en een zacht niet bijtend reinigingsmiddel. Neem daarna af met een droge zachte doek. Droog de koelkast nooit met behulp van droge warme lucht. -
Page 41: Vrijstaand Model
de koelkast minstens voor 10 seconden uit het stopcontact trekken en weer aansluiten. De koeleenheid wordt gereset en begint weer te werken. Mocht u merken, dat het toestel niet koelt, dan is er waarschijnlijk een probleem en dient u contact op te nemen met de klantenservice. 6. -
Page 42: Automatische Ontdooiing
8.1. Automatische ontdooiing 1. Monteer de kabel met een kabelbrug (A) aan de zijwand aan de kant van het scharnier door gaten De eerste ontdooifase begint 39 uur na het eerste te boren volgens afb. 9. inschakelen en duurt twee uur. Daarna koelt het apparaat 22 uur aan een stuk, opgevolgd door een m i n i B a r - ontdooifase, die twee uur duurt. -
Page 43: Assemblage Van De Deurklink
10. Verwisselen van het deurpaneel (afb. 13-14) (allen voor vrijstaande versie) Het verwijderen en weer monteren van de deur functioneert net als beschreven in hoofdstuk 9 (echter alleen de poot aan de scharnierzijde verwijderen). Afbeelding 12. Verwijder de schroeven (4) en trek de rand van het 5. -
Page 44: Klantenservice
Neem hiervoor eventueel contact op met uw plaatselijke dealer. Het adres staat in uw telefoongids of in de Goude 13. Inwerkingstelling Technische gegevens: Model RH 423LDA RH 439LD RH 449LD Type MB20-60 MB20-60 MB20-60... -
Page 45: Informatie Omtrent Milieubescherming
LVD-Richtlijn 72/23/EEG, gewijzigd Ze mogen niet via het gewone huisafval 90/683/EEG worden weggegooid. EMC-Richtlijn 89/336/EEG Bij koelkasten van Dometic staat het symbool op RoHS - Richtlijn 2002/95/EG het typeplaatje aan de binnenkant van het apparaat. - Page 46 Lea atentamente este Manual de Instrucciones antes de poner este aparato en marcha. Si en el futuro Ud. lo vende o se deshace de él, asegúrese entonces de que el nuevo propietario reciba también este Manual de Instrucciones. Le rogamos seguir atentamente los detalles de instalación que presentamos a continuación.
- Page 47 Indique por favor el nombre del modelo así como el número del producto y su número de serie al comunicarse con la Red de Servicio de Dometic. Hallará estos datos en la placa de características técnicas situada en el...
-
Page 48: Componentes Del Aparato
6. Sensor del evaporador (detrás del evaporador) 13. Cubierta de ventilación 7. Evaporador EN EL CASO DE QUE SU REFRIGERADOR ESTÉ EQUIPADO CON UNA CERRADURA, DOMETIC ZRT NO ACEPTA NINGUNA RESPONSABILIDAD POR LA PÉRDIDA O EL DAÑO DE LAS LLAVES. SE PUEDE SUMINISTRAR UNA CERRADURA COMPLETA. -
Page 49: Ubicación Del Aparato
3. Limpieza sujetarse con tornillos al mueble usando los accesorios de soporte en su parte inferior. Para Limpie minuciosamente el refrigerador con ello, apriete los tornillos (Figura 2). regularidad, según sea necesario. Retire las La diferencia de separación respecto a la bandejas de los estantes para lavarlas, al igual puerta del mueble puede compensarse que debe lavar la parte interior y la puerta del... -
Page 50: Versión De Unidad Libre
Servicio de Cliente Dometic. Figura 4. Durante la instalación, asegúrese de que 6. Cubitos de hielo la toma de electricidad esté accesible en (si está... -
Page 51: Sugerencias Útiles
8.2. Luz interna (figura 6) 7. Sugerencias útiles Dos diodos luminosos (A) situados en una No cargue excesivamente el refrigerador. Siempre placa de circuitos impresos electrónicos que sea posible, guarde en el refrigerador iluminan el compartimento de refrigeración al alimentos y bebidas previamente enfriados. Es abrir la puerta. -
Page 52: Inversión De Las Bisagras De La Puerta
1. Sujete el cable con la lengüeta de retención (A) 5. Conecte el miniBar a la toma de corriente. en la pared lateral en el lado de bisagra. Para Después de abrir la puerta, el diodo rojo se ello taladre los orificios según se ilustra en la iluminará. -
Page 53: Reemplazo Del Panel Decorativo De La Puerta
10. Reemplazo del panel decorativo de la puerta (Figuras 13-14) (sólo en la versión del refrigerador como unidad libre) La puerta se desmonta y se monta en forma similar a la manera descrita en la sección 10 (¡en Figura 14. este caso sólo se deben retirar las patas en el lado de la bisagra!) 11. -
Page 54: Puesta En Servicio
Requisitos eléctricos convencional. Antes de conectar la unidad, compruebe si la Los refrigeradores de Dometic llevan el tensión de la red eléctrica se corresponde con símbolo en la placa de datos (placa indicadora) tensión indicada placa situada en el interior del aparato. - Page 55 Antes de utilizar esta unidade de refrigeração leia atentamente este manual de instruções. Caso, mais tarde queira vende-lo ou reciclá-lo, assegure que o novo proprietário receba este manual de instruções. Por favor siga os seguintes detalhes de instalação com cuidado. A garantia é...
- Page 56 A garantia não será aplicada, se as instruções de instalação e funcionamento não forem seguidas. Ao contactar o Serviço de Rede Dometic, mencione por favor, o modelo, número do produto e número de série. Encontrará esta informação na placa de dados, colocada na parte interior da geladeira.
-
Page 57: Vista Do Aparelho
12. Díodo luminoso ADC (se disponível) 6. Sensor do evaporador (atrás do evaporador) 13. Grelha 7. Evaporador EM CASO DA SUA MINIBAR SE ENCONTRAR EQUIPADA COM FECHAUDA, A DOMETIC ZRT NÃO SE RESPONSABILIZA POR PERDA OU DANOS DE CHAVES. PODE SER FORNECIDO UM FECHADURA COMPLETA. -
Page 58: Colocação Do Aparelho
3. Limpeza antes da montagem final, de que a parte plana da dobradiça permite uma abertura normal da Limpe O MINIBAR bem e regularmente, porta, de modo a prevenir que a porta encrave sempre necessário. Retirar (figura 2). prateleiras. No interior, as prateleiras e a porta, devem ser lavadas com uma solução morna de bicarbonato de sódio. -
Page 59: Versão Isolada
Assim o dispositivo voltará a funcionar. Se não, existe um problema e devia-se contactar o Figura 4. serviço da Dometic. 4. A conduta de ventilação tem de medir no mínimo 105 mm x a largura da geladeira. 6. Cubos de gelo (se disponível) -
Page 60: Função De Descongelamento Automático
não é necessário esvaziar o recipiente. 2. Reinicialize o sinal de controlo da porta ao segurar o telecomando contra o sensor de Para desligar a unidade, desligue o miniBar do abertura da porta (Fig. 6 B) e carregue no fornecimento de electricidade e deixe a porta do botão aparelho aberta. -
Page 61: Trocar O Painel Decorativo Da Porta
Remover os quatro parafusos (7), a dobradiça superior (5) e a tampa (6) Parte dianteira Door front Remover a porta (8) juntamente com a da porta dobradiça superior (5) do cárter Inserir a dobradiça superior (fixada ao miniBar) e a placa de cobertura na ranhura Posiçăo do diodo no lado oposto e fixá-la com quatro luminoso... -
Page 62: Serviço De Cliente
Se, após verificar todos os pontos acima mencionados e, mesmo assim, o miniBar continua a não funcionar satisfatoriamente, contacte um serviço técnico Dometic. Mencione o problema, modelo, produto e número de série. (Detalhes do modelo, produto e número de série,... -
Page 63: Informações Sobre A Protecção Ambiental
Este aparelho não deve ser jogado fora junto com o lixo doméstico normal! Os frigoríficos da Dometic levam um símbolo na placa de características técnicas (placa do tipo) no interior do aparelho. Este aparelho está de acordo com as...