Oceanic OCEAHC180B8 Guide D'utilisation

Manuels Connexes pour Oceanic OCEAHC180B8


Sommaire des Matières pour Oceanic OCEAHC180B8
- Page 1 HOTTE DE CUISINE Guide d’utilisation RANGE HOOD Instruction booklet CAMPANA EXTRACTORA Manual de instrucciones CAPA DE COZINHA Manual de instruções OCEAHC180B8/OCEAHC180S8/OCEAHC180W8...
-
Page 2: Table Des Matières
Trouver des informations Lisez ce guide et conservez-le Merci d'avoir choisi Oceanic. Ce Guide d’Utilisation et d’Entretien est conçu pour vous fournir toutes les informations nécessaires concernant l’installation, l’utilisation et l’entretien de l’appareil. Afin de faire fonctionner l’appareil correctement et de manière sécurisée, lisez ce guide d’utilisation attentivement avant d’installer et d’utiliser le produit. -
Page 3: Instructions De Sécurité Importantes
Instructions de sécurité importantes Instructions de sécurité importantes Lisez les instructions dans leur totalité avant de faire fonctionner cet appareil. Conservez ce guide pour consultation ultérieure. N’essayez pas d’installer, ni de faire fonctionner l’appareil sans avoir lu les consignes de sécurité fournies dans ce guide. Les mises en garde de sécurité... - Page 4 Instructions de sécurité importantes engendrer des blessures corporelles ou des dégâts matériels. LISEZ LE GUIDE EN ENTIER AVANT TOUT. L’INSTALLATION DOIT ÊTRE CONFORME AUX RÉGLEMENTATIONS LOCALES. IMPORTANT : Conservez ce guide pour l’organisme de contrôle des installations électriques. INSTALLATEUR : Laissez ce guide avec l’appareil à...
- Page 5 Instructions de sécurité importantes LISEZ ET CONSERVEZ CES INSTRUCTIONS Instruction sécurité importantes compris les normes anti-incendie. La hotte doit être Afin de réduire les installée conformément risques d’incendie, de aux instructions choc électrique et de d’installation et toutes blessures corporelles, les distances doivent être respectées.
- Page 6 Instructions de sécurité importantes En ce qui concerne les informations détaillées sur la méthode et la fréquence du nettoyage, référez-vous à la section “Entretien et nettoyage”. En ce qui concerne les informations détaillées sur la méthode d’installation de l’appareil à poste fixe et comment l'appareil doit être fixé...
- Page 7 Instructions de sécurité importantes Lors de l’installation de ou percez dans un mur la hotte, il faut veiller à ou un plafond, veillez à respecter les distances ne pas endommager de La distance minimale à câblage électrique, respecter entre la surface conduit, canalisation, support des récipients de etc.
- Page 8 8 Instructions de sécurité importantes qu’il y ait un apport d’air avec une table de suffisant dans la pièce. cuisson à gaz. Quand la hotte est La responsabilité du utilisée avec sa fonction fabricant ne peut être d’extraction, veillez à ce engagée en cas de que le conduit soit dommage dû...
- Page 9 Instructions de sécurité importantes N’installez pas la hotte électrique qu’un autre au-dessus d’une table appareil électrique, afin d’éviter que le circuit ne de cuisson comportant un grill surélevé. soit en surcharge, ce Ne laissez jamais une qui peut provoquer un ...
- Page 10 Instructions de sécurité importantes qualification similaire Les réglementations concernant afin d'éviter un danger. l'évacuation de l'air Une ventilation doivent être convenable de la respectées. pièce doit être prévue Cet appareil peut être lorsqu’une hotte de utilisé par des enfants cuisine est utilisée âgés d'au moins 8 ans et par des personnes...
- Page 11 Instructions de sécurité importantes 11 Si les aliments débordent durant la cuisson, cela peut provoquer Les parties l’émission de accessibles de cet appareil peuvent fumées et des devenir chaudes projections de lorsqu’il est utilisé graisse qui avec des appareils de peuvent cuisson.
- Page 12 12 Instructions de sécurité importantes s’accumule pas sur les ventilateurs ou les filtres. Utilisez des récipients de cuisson dont la taille est appropriée. Utilisez toujours des récipients de cuisson appropriés à la taille des éléments chauffants.
-
Page 13: Exigences Concernant L'installation
Exigences concernant l’installation rectiligne ou ATTENTION: Ne pas suivre les comportant un instructions pour l’installation minimum de coudes. des vis ou dispositifs de fixation peut entraîner des dangers électriques Le conduit d’ évacuation de I’appareil doit donner UTILISER impérativement et EXCLUSIVEMENT POUR exclusivement à... - Page 14 Exigences concernant l’installation 4) Dans un climat froid, il est conseillé POUR RÉDUIRE LES d’installer un clapet de RISQUES D’INCENDIE, retenue UTILISEZ UNIQUEMENT supplémentaire afin DES CONDUITS de minimiser les MÉTALLIQUES. retours d’air froid, Installez cette hotte en ainsi qu’une barrière respectant toutes les thermique non exigences spécifiées.
-
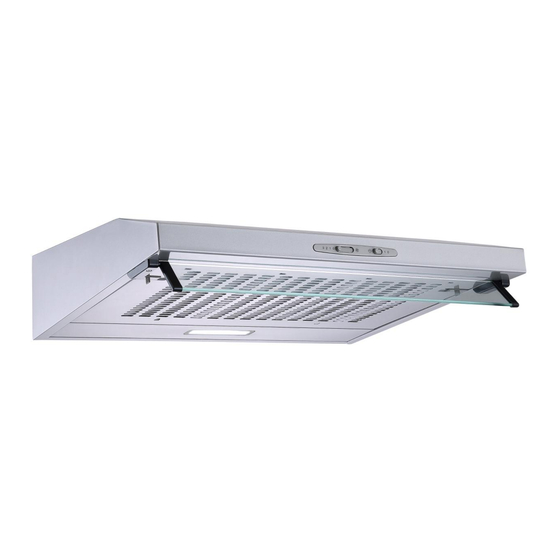
Page 15: Liste Des Pièces
Liste des pièces Description du produit : 1 Valve de sortie d’air 2. Panneau de contrôle Description des pièces : Index Description Photo Quantité PL-1 Boîtier principal de la hotte PL-2 Couvercle de sortie d’air (en mode recyclage) PL-3 Valve de sortie d’air anti-retour PL-4 Vis (4mm x 35mm) PL-5... - Page 16 16 Installation de la hotte INSTALLATION Méthode n°1: 1. La hotte doit être place à environ 65-75cm de la surface de la plaque cuisson pour une esthétique optimale. 2. Pour la fixer au mur, percez 4 trous en les plaçant de façon correspondant au perçage à...
-
Page 17: Installation De La Hotte 17
Installation de la hotte 17 5. Accrochez la hotte aux vis après serrage. 6. Placez la valve antiretour sur la hotte. 7. Ouvrez le filtre à graisses, fixez la hotte avec les 2 vis fournies. (Longueur maximale de 30 MM) - Page 18 18 Installation de la hotte Méthode n°2: Percez 4 trous de 6mm de diamètre et un trou de 130mm de diamètre dans la base du placard suspendu. Placez la valve antiretour sur la hotte, puis places la hotte sous le placard. Fixer la hotte à...
- Page 19 Entretien et nettoyage UTILISATION ET ENTRETIEN Nous vous conseillons de mettre la hotte en marche avant de commencer à cuisiner. Pour évacuer complètement les fumées et les odeurs, il est également recommandé de laisser fonctionner l'appareil pendant 15 minutes après la fin de la cuisson. Le fonctionnement correct de la hotte est conditionné...
- Page 20 Entretien et nettoyage réclamation de votre part. Ces parties ne sont pas réutilisables ni lavables et doivent être remplacées au moins tous les quatre mois. La saturation du filtre à charbon actif dépend de l'utilisation plus ou moins prolongée de la hotte, du type de cuisson et du nettoyage régulier du filtre à...
-
Page 21: Entretien Et Nettoyage
Entretien et nettoyage Démonter le filtre à graisse L’efficacité de la hotte est métallique : conditionnée par la propreté de l'entrée d'air et du filtre. · Éteignez l’aspiration et la lampe. La fréquence de nettoyage · Détachez le filtre à graisse dépend de la quantité... - Page 22 Entretien et nettoyage la vie du globe. · Détachez la grille. · Remplacez le filtre à Changer le luminaire : charbon CF152. • Desserrez les 2 vis auto- taraudeuses ST4 * 8mm du pan- neau d'éclairage, Sortez le lumi- naire de sa fixation. •...
-
Page 23: Touches De Contrôle
Touches de contrôle FONCTIONNEMENT 1. Branchez la fiche du cordon d’alimentation dans une prise électrique. 2. Faites glisser l'interrupteur ① en "1" pour allumer la lampe puis en “0”pour éteindre. 3. Faites glisser l'interrupteur② en “1 ou 2 ou 3” selon la puissance d’aspiration désirée, puis en "0" pour éteindre l’aspiration. -
Page 24: Informations Complémentaires
Informations complémentaires Dépannage PANNE RAISON POSSIBLE SOLUTION La lumière est La pale du ventilateur Éteignez l'appareil. Toute réparation doit allumée, mais le est endommagée. être uniquement effectuée par un technicien ventilateur ne fonctionne qualifié. Le moteur est pas. endommagé. La lumière et le L’ampoule halogène de Remplacez l’ampoule avec une ampoule ventilateur ne... - Page 26 Informations complémentaires Modèle:SY-6001B1-P1-C72-L41-600 CDEFG BCDEFG ABCD...
- Page 27 Informations complémentaires Remarque : Les recommandations suivantes précisent comment réduire l'impact environnemental global du processus de cuisson. (1) Installer la hotte de cuisson à un endroit approprié disposant d'une bonne ventilation. (2) Nettoyer la hotte de cuisson régulièrement afin que rien ne bloque l'air. (3) Ne pas oublier d'éteindre la lampe de la hotte de cuisine une fois la cuisson terminée.
- Page 29 HOTTE DE CUISINE Guide d’utilisation RANGE HOOD Instruction booklet CAMPANA EXTRACTORA Manual de instrucciones CAPA DE COZINHA Manual de instruções OCEAHC180B8/OCEAHC180S8/OCEAHC180W8...