Oceanic OCEAHC440S9 Guide D'utilisation
Table des Matières
Les langues disponibles
Les langues disponibles
Liens rapides
Chapitres
Table des Matières

Manuels Connexes pour Oceanic OCEAHC440S9


Sommaire des Matières pour Oceanic OCEAHC440S9
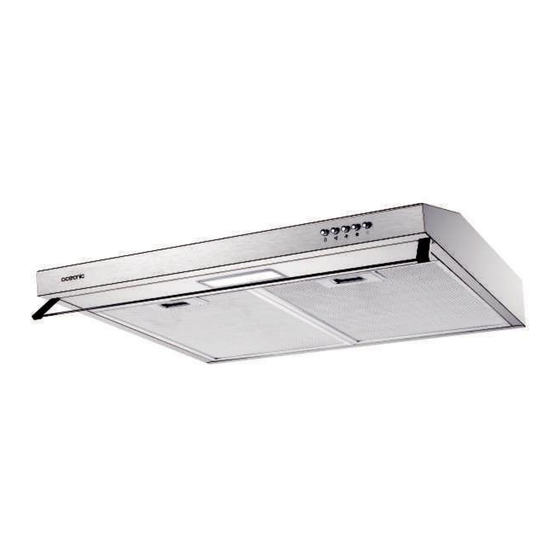
- Page 1 Hotte Visière Guide d’utilisation Visor Hood User manual OCEAHC440S9 OCEAHC440B9 OCEAHC440W9...
-
Page 2: Table Des Matières
Lisez ce guide attentivement avant d’installer et d’utiliser ce produit et conservez-le pour consultation ultérieure. Merci d'avoir choisi Oceanic. Ce Guide d’Utilisation et d’Entretien est conçu pour vous fournir toutes les informations nécessaires concernant l’installation, l’utilisation et l’entretien de l’appareil. -
Page 3: Instructions De Sécurité Importantes
Instructions de sécurité importantes IMPORTANT : Conservez ce guide pour consultation ultérieure. Lorsque vous utilisez appareils électriques, les précautions de sécurité essentielles doivent toujours être suivies, notamment les suivantes: • Ces instructions sont fournies dans l’intérêt de votre sécurité, lisez-les soigneusement avant d’installer ou d’utiliser cet appareil. - Page 4 Instructions de sécurité importantes • Gardez les enfants éloignés de cet appareil. • Il est fortement recommandé que cet appareil soit tenu à l’écart des bébés et des jeunes enfants. • Cet appareil peut être utilisé par des enfants âgés d'au moins 8 ans et par des personnes ayant des capacités physiques, sensorielles ou mentales réduites ou dénuées d’expérience ou connaissance,...
- Page 5 Instructions de sécurité importantes • Ne pas laisser le câble d'alimentation toucher les parties chaudes de l’appareil. • Afin d’éviter d’endommager câble d’alimentation, assurez-vous qu’il n’est pas coincé en dessous de l’appareil ou dans l’appareil. • Ne pas utiliser d’aérosols à proximité immédiate de l’appareil.
- Page 6 Instructions de sécurité importantes • MISE GARDE: Lors d'une utilisation enextraction, référez-vous aux réglementations nationales sur les systèmes de ventilation des bâtiments. Ne reliez pas le tuyau d'évacuation à un système de ventilation de type VMC, à un conduit de fumée (cheminée, chaudière,...). Vérifiez également l'absence de perturbation avec la ventilation de la pièce lors de la présence...
-
Page 7: Afin D'éviter Le Risque D'incendie, Nettoyez
Instructions de sécurité importantes • MISE EN GARDE: L’appareil peut s’arrêter defonctionner lors d’une décharge électrostatique (par exemple, la foudre.) Cela ne comporte aucun risque de dommages. Eteignez l’appareil et débranchez-le de la prise de courant. Branchez l’appareil de nouveau après une minute. -
Page 8: Risque Du Choc Electrique
Instructions de sécurité importantes • MISE EN GARDE : Avant de brancher l’appareil,coupez l’électricité et vérifiez que l’alimentation électrique à votre domicile correspond à celle indiquée sur sa plaque signalétique • MISE EN GARDE : Il y des risques de chocélectrique et d’incendie, si le nettoyage n’est pas effectué... -
Page 9: Lampe
Lampe Les ampoules disponibles, et les codes ILCOS D correspondants et les images de ces lampes : Utilisation dans une lampe de type (ou utilisation dans une lampe de type alternatif) DBL-2-H-120 (code ILCOS D respectant la norme IEC 61231). –... -
Page 10: Description Du Produit
Description du produit 1. Caisson de la hotte 2. Sortie d'évacuation / Clapet anti-retour... -
Page 11: Description Des Pièces
Description des pièces Index Description Illustration Quantité PL-1 Caisson de la hotte Sortie PL-2 d’évacuation / Clapet anti-retour PL-3 Couvercle rond PL-4 Vis (ST4 * 30 mm) PL-5 Filtre plat carbone... -
Page 12: Installation De La Hotte
Installation de la hotte Préparation avant installation Retirez précautionneusement le carton. Portez des gants pour protéger vos mains des arêtes coupantes Retirez le film de protection du produit avant de le mettre en service. Installation (Mode extraction) Si le mur comporte une ouverture donnant sur l’extérieur, votre hotte peut être raccordée comme indiqué... - Page 13 Installation de la hotte Installation dela gaine(non fournie) : • Déterminez la position d'installation exacte de la hotte. • Planifiez le chemin du conduit d’extraction de l’air vers l’extérieur • Veillez à ce que le conduit soit le plus court et rectiligne possible.
-
Page 14: Installation (Mode Recyclage)
Installation de la hotte • Les coudes retournés et les profils en S ne permettent pas une extraction d’air efficace et ne sont donc pas recommandés Installation (Mode recyclage) Si vous n'avez pas de sortie vers l'extérieur, gaine d'extraction n'est nécessaire, et les procédures d'installation sont identiques à... -
Page 15: Recommandations Pour La Fixation Murale
Installation de la hotte Recommandations pour la fixation murale N'apportez aucune modification à l’appareil ou à son support de fixation sur le mur ! Avant d'installer l’appareil, vérifiez l’état du mur sur lequel il sera fixé : le mur doit être en bonétat, il ne doit pas présenter de dommages (fissures, affaissement, humidité, …). -
Page 16: Préparation Avant Installation
Installation de la hotte Préparation avant installation • Avant de procéder à l’installation, assurez-vous que l’appareil n'est branché prise électrique. • Les schémas suivants indiquent les distances et l’ordre des trous à percer. Les 2 vis de suspension du bloc principal doivent être fixées au maximum à 820 mm au- dessus du foyer. - Page 17 Installation de la hotte Déterminez l’emplacement du caisson de la hotte. Celle-ci doit être mise en place à une distance maximale de 820 mm de la table de caisson. Pour la fixer au mur, percez 4 trous en les plaçant de façon à...
-
Page 18: Installation (Fixation Au-Dessous D'un Placard)
Installationde la hotte INSTALLATION (Fixation au-dessous d’un placard) Placez le clapet antiretour sur la hotte. Fixez la hotte au placard à l’aide de 4 vis ST4x30 ATTENTION ! En mode extraction, la fixation en dessous d'un placard nécessite l'utilisation d'une gaine d'évacuation d'air allant jusqu'au-dessus du placard. - Page 19 Installation de la hotte Il existe deux modes d'évacuation, l'évacuation horizontale et l'évacuation verticale. Merci de prêter attention au mode de ventilation lors de l’installation. Ventilation verticale : Voir schéma A. Veuillez utiliser un outil pour retirer le couvercle rond avant de l'utiliser, l'air pourra ainsi être évacué vers le haut.
-
Page 20: Réglage De La Ventilation
Réglage de la ventilation • Évacuation extérieure (mode extraction) : Tournez l’ajusteur sur laposition extérieure, installez la sortie d’évacuation appropriée verticale horizontale, allumez la hotte, l'air est ainsi évacué vers l’extérieur du bâtiment. • Évacuation intérieure (mode recyclage) : Tournez l'ajusteur sur la position intérieure, les couvercles ronds et rectangulaires doivent être en place. -
Page 21: Informations Sur Le Filtre Plat À Charbon
Informations sur le filtre plat à charbon Remplacement du filtre plat (1) Retirez les deux grilles (4) Retournez la grille (5) Retirez les fixations et placez le nouveau filtre plat carbone • Remarque : Le filtre plat à charbon est installé à l’arrière de la grille et doit être changé... -
Page 22: Nettoyage
Nettoyage Attention! Avant nettoyage, éteignez l’appareilet débranchez-le. • Nettoyage régulier Utilisez un chiffon doux imbibé d'eau tiède savonneuse tiède ou de détergent ménager. N'utilisez jamais de tampons métalliques, de produits chimiques, de matériaux abrasifs ou de brosses dures pour nettoyer l'unité. •... -
Page 23: Fonctions Du Panneau De Contrôle
Fonctions du panneau de contrôle Fonctions du panneau de contrôle : Interrupteur d’arrêt du moteur Appuyez sur ce bouton pour arrêter le fonctionnement du moteur. Bouton Vitesse faible Appuyez sur ce bouton pour faire fonctionner le système à faible vitesse. Bouton Vitesse moyenne Appuyez sur ce bouton pour faire fonctionner le système à... -
Page 24: Dépannage
Dépannage Erreur Cause Solution La turbine de Eteignez l'appareil et ventilateur est coincée Lumière allumée mais faites intervenir un aucune ventilation Le moteur est professionnel pour la endommagé réparation Vérifiez le Aucune lumière, Défaut d'alimentation branchement et le aucune ventilation électrique tableau électrique La lampe ne peut être... -
Page 25: Informations Techniques
Informations techniques Symbole Valeur Unité Identification des modèles OCEAHC440B9 / OCEAHC440W9 / OCEAHC440S9 (HJ2903L156) Consommation d'énergie annuelle 73,4 kWh/a hotte Classe d'efficacité énergétique Facteur d'accroissement dans le temps Efficacité fluidodynamique hotte Classe d'efficacité fluidodynamique Indice d'efficacité énergétique 91,5 hotte Débit d'air mesuré au point de... -
Page 26: Informations Complémentaires
Informations complémentaires OCEANIC 120-126 quai de Bacalan CS11584 33000 Bordeaux Importé par A.M.C. 123 quai JulesGuesde 94400 Vitrysur Seine... - Page 27 Informations complémentaires Remarque : Les recommandations suivantes précisent comment réduire l'impact environnemental global du processus de cuisson. (1) Installer la hotte de cuisson à un endroit approprié disposant d'une bonne ventilation. (2) Nettoyer la hotte de cuisson régulièrement afin que rien ne bloque l'air. (3) Ne pas oublier d'éteindre la lampe de la hotte de cuisine une fois la cuisson terminée.
- Page 53 www.oceanic.eu...