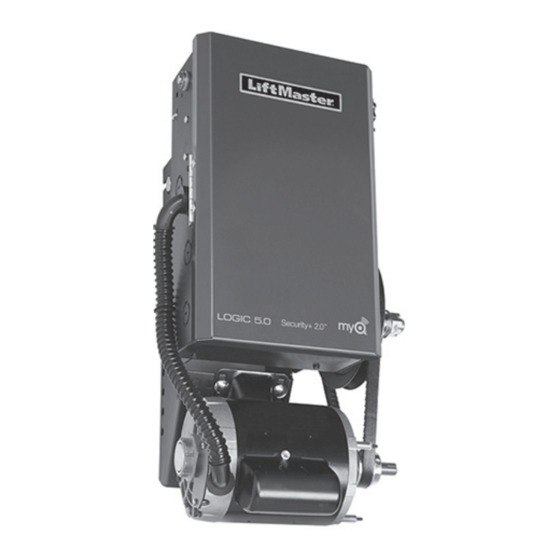
Télécharger Imprimer la page

Publicité

Les langues disponibles

Les langues disponibles

Liens rapides

This service kit provides all the necessary components to upgrade
Logic 5.0 operators to include current sensing technology. Not all
components are required for all applications.
INSTALLATION
FOR MODELS T, SD, GSD, GT, GH
& DAMP ENVIRONMENT (C-PREFIX)
NOT COMPATIBLE WITH N4/N4X MODELS
DO NOT connect the power or activate the operator until
instructed to do so.
REMOVE LOGIC CONTROL BOARD
NOTE: Label wires for reinstallation. See enclosed wiring diagram
for proper connections.
1. Disconnect power from the operator.
2. Disconnect all wires from the board:
• Control Wiring Terminal Block
• System Wiring Connector (J3)
• Coaxial Antenna
3. Remove option boards on slots 1 and/or 2 (if present) set aside.
4. Remove the logic control board from its four mounting posts
using needle nose pliers or a flathead screwdriver.
LOGIC 5.0 CONTROL BOARD OVERVIEW
Slots for option boards
Current Sense
Motor direction
jumper
Coaxial antenna
connecter
System wiring
connector (J3)
LOGIC 5.0 CONTROL & POWER BOARDS
WITH CURRENT SENSE FOR 3 PHASE OPERATORS
To reduce the risk of SERIOUS INJURY or DEATH:
• Disconnect electric power at the fuse box BEFORE proceeding.
• ALL electrical connections MUST be made by a qualified
individual.
• Upon completion of kit installation, the area MUST be cleared
and secured. At that time the unit may be returned to service.
INSTALL NEW LOGIC CONTROL BOARD
1. Install the logic control board into the operator. Position the
board onto mounting posts pressing firmly to ensure posts are
completely through mounting holes.
2. Reconnect all wires:
• Control Wiring Terminal Block
• System Wiring Connector (J3)
• Coaxial Antenna
3. Install option boards in slots 1 and/or 2 (if present).
4. Make sure the electrical box is clear of all debris and tools.
Proceed to remove L1, L2, & L3 terminal block & power board.
Control wiring
terminal block

Publicité

loading

Sommaire des Matières pour LiftMaster LOGIC 5.0

  • Page 1 WITH CURRENT SENSE FOR 3 PHASE OPERATORS This service kit provides all the necessary components to upgrade Logic 5.0 operators to include current sensing technology. Not all components are required for all applications. To reduce the risk of SERIOUS INJURY or DEATH: •...
  • Page 2 BLACK T_COMM WHITE WHITE T_460V T_230V PURPLE or 575V GRAY PURPLE Modifications Bracket Black Wire 3 PHASE POWER BOARD Terminal Block Assembly Yellow Wires Models T, SD, GSD, GT, GH LOGIC 5.0 CONTROL BOARD & Damp Environment (C-Prefix)
  • Page 3 6. Disconnect all wires from the power board. 7. Use needle nose pliers to remove power board from standoffs. The power board and terminal block assembly should come out as one piece. LOGIC 5.0 CONTROL & POWER BOARDS OVERVIEW LOGIC 5.0 CONTROL BOARD Control wiring terminal block...
  • Page 4 7. Reconnect L1, L2, L3 and Ground power wires to terminal block. See PROGRAMMING to complete installation. BLACK T_COMM WHITE WHITE T_460V T_230V PURPLE or 575V GRAY PURPLE Terminal Block Assembly Models H and J Black Wire 3 PHASE POWER BOARD Yellow Wires LOGIC 5.0 CONTROL BOARD...
  • Page 5 Open, Close and Stop buttons are mounted directly on the logic INTRODUCTION TO PROGRAMMING control board making it easy to program as well as have door Many programmable functions require that a LiftMaster control at the electrical box. Entrapment Protection (LMEP) device be installed in order to Either the stop control or a jumper MUST be wired between function.
  • Page 6 PROGRAMMING REMOTE CONTROLS To prevent possible SEVERE INJURY or DEATH: • Activate door ONLY when it can be seen clearly, is properly • Install a LiftMaster Monitored Entrapment Protection (LMEP) adjusted and there are no obstructions to door travel. device.
  • Page 7 THREE BUTTON REMOTE CONTROL PROGRAMMED FOR OPEN/ REMOTE CONTROL PROGRAMMING FEATURE CLOSE/STOP Program Remote Controls from the 3-button control station NOTE: The following programming requires a LiftMaster (3BCS). Monitored Entrapment Protection (LMEP) device. This feature allows the user to add additional remote controls ®...
  • Page 8 SETUP (OPTIONAL) To Erase All MyQ ® Devices: For Smartphone App, tablet or PC control, LiftMaster MyQ Internet 1. Press and release the RADIO button on the logic control board Gateway (model 828LM) is required. (the RADIO LED will light).
  • Page 9 Timer automatically closes door after preset time. All entrapment protection devices must be unobstructed. To prevent possible SEVERE INJURY or DEATH: The operator MUST have at least one LiftMaster Monitored • Install a LiftMaster Monitored Entrapment Protection (LMEP) Entrapment Protection (LMEP) device installed (refer to the device.
  • Page 10 Set to PROG treadle, photoelectric sensor or loop detector accessory to the SBC input and must have at least one LiftMaster Monitored Entrapment Protection (LMEP) device installed (refer to the installation manual). Wiring type must be set to TS or T.
  • Page 11 MAXIMUM RUN TIMER (MRT) The operator can learn the time it takes to open or close the door plus and an additional 10 seconds. If the operator does not meet its open or close limit within the set time, it will stop, limiting damage to the door and operator.
  • Page 12 ® devices will still be learned. g. Remote control programming via the 3-button station. h. The LiftMaster Monitored Entrapment Protection (LMEP) device will be unprogrammed. NOTE: Life of Operator feature (Odometer/Cycle Counter) and programmed remote controls and MyQ devices are not cleared.
  • Page 13 ACTIONNEURS TRIPHASÉS Ce nécessaire de service fournit tous les composants nécessaires pour mettre à niveau les actionneurs Logic 5.0 pour inclure une technologie de détection de courant. Les composants ne sont pas Pour réduire les risques de GRAVES BLESSURES ou de MORT: tous requis pour toutes les applications.
  • Page 14 ENLEVER LE BORNIER L1, L2 ET L3 ET LE TABLEAU INSTALLER L’ENSEMBLE NEUF DE TABLEAU D’ALIMENTATION D’ALIMENTATION ET BORNIER REMARQUE IMPORTANTE : S’assurer que TOUTE alimentation 1. Installer le tableau d’alimentation neuf dans l’actionneur. électrique est déconnectée AVANT de continuer. Positionner le tableau sur ses montants en exerçant une pression ferme de manière à...
  • Page 15 INSTALLATION POUR MODÈLES H ET J Pour réduire les risques de GRAVES BLESSURES ou de MORT: NE PAS connecter l’alimentation ni activer l’actionneur avant de • Débranchez l’alimentation électrique sur la boîte de fusible recevoir des instructions à cet effet. AVANT de commencer.
  • Page 16 INSTALLER L’ENSEMBLE NEUF DE TABLEAU D’ALIMENTATION INSTALLATION DU NOUVEAU TABLEAU ET BORNIER 1. Placer le nouveau tableau dans l’actionneur. Positionner le 1. Installer le tableau d’alimentation neuf dans l’actionneur. tableau sur ses montants en exerçant une pression ferme de Positionner le tableau sur ses montants en exerçant une manière à...
  • Page 17 Les boutons d’ouverture, de fermeture et d’arrêt sont montés Plusieurs fonctions programmables exigent qu’un dispositif de directement sur la carte logique pour faciliter la programmation et Protection contre le piégeage LiftMaster (LMEP) soit installé pour permettre de commander la porte au niveau du coffret pour fonctionner.
  • Page 18 30 secondes. Les boutons DEL MAS et RADIO REMARQUE : La programmation suivante nécessite un dispositif clignoteront brièvement pour indiquer que le mode de de Protection contre le piégeage avec surveillance LiftMaster programmation de la carte RADIO est désactivé pour les (LMEP).
  • Page 19 Programmation de télécommandes à partir de la station de commande à 3 boutons (3BCS). REMARQUE : La programmation suivante nécessite un dispositif de Protection contre le piégeage avec surveillance LiftMaster (LMEP). Cette fonction permet à l’utilisateur d’ajouter des télécommandes supplémentaires à partir du 3BCS. Par défaut, l’option Votre télécommande Security+ 2.0...
  • Page 20 ® (EN OPTION) Pour supprimer tous les dispositifs MyQ : La passerelle Internet LiftMaster MyQ est exigée (modèle 828LM) 1. Pressez et relâchez sur le bouton RADIO de la carte logique (le pour l’application pour téléphone intelligent, commande par voyant lumineux DEL RADIO clignotera).
  • Page 21 Pour empêcher une BLESSURE GRAVE ou une MORT possible: Au moins un dispositif de Protection contre le piégeage avec surveillance LiftMaster (LMEP) DOIT être installé (se référer à la ATTENTION • Installer un dispositif de Protection contre le piégeage avec manual du installation).
  • Page 22 à l’entrée SBC et au moins un dispositif de Protection contre le piégeage avec surveillance LiftMaster (LMEP) doit être installé (se référer à la manual d’installation). Le type de câblage doit être configuré à TS ou T.
  • Page 23 MINUTERIE DE FONCTIONNEMENT MAXIMAL (MRT) L’ouvre-porte peut apprendre le temps nécessaire pour ouvrir ou fermer la porte plus ajouter un 10 secondes supplémentaires. Si l’ouvre-porte n’atteint pas la fin de course ouvert ou fermée dans le temps configuré, il s’arrêtera, limitant le dommage à la porte et à...
  • Page 24 La programmation des télécommandes se fait par la station à 3 boutons. h. Le dispositif de Protection contre le piégeage avec surveillance LiftMaster (LMEP) sera déprogrammé. REMARQUE : La fonctionnalité Durée de vie de l’actionneur (odomètre/compteur de cycles), les télécommandes ainsi que les...
  • Page 25 5.0 CON SENSOR DE CORRIENTE PARA OPERADORES TRIFÁSICOS Este juego de servicio ofrece los componentes necesarios para actualizar operadores Logic 5.0 para incluir tecnología de detección de corriente. No todos los componentes son necesarios Para reducir el riesgo de LESIONES GRAVES o la MUERTE: para todos los tipos de instalación.
  • Page 26 WHITE WHITE T_460V T_230V PURPLE or 575V GRAY PURPLE Soporte de modificaciones Cable negro TARJETA DE ALIMENTACIÓN TRIFÁSICA Bornera completa Modelos T, SD, GSD, GT, GH y Cable amarillo TARJETA DE CONTROL LOGIC 5.0 condiciones húmedas de servicio (prefijo C)
  • Page 27 7. Extraer la tarjeta de alimentación con una pinza de punta. La tarjeta de alimentación y la bornera deberían salir como una sola pieza. DESCRIPCIÓN DE LAS TARJETAS DE ALIMENTACIÓN Y CONTROL LOGIC 5.0 TARJETA DE CONTROL LOGIC 5.0 Bloque de Receptáculos opcionales de terminales de...
  • Page 28 7. Volver a conectar los cables de alimentación L1, L2, L3 y tierra a la bornera. BLACK T_COMM WHITE WHITE T_460V T_230V PURPLE or 575V GRAY PURPLE Bornera completa Modelos H y J Cable negro TARJETA DE ALIMENTACIÓN TRIFÁSICA Cable amarillo TARJETA DE CONTROL LOGIC 5.0...
  • Page 29 Muchas de las funciones programables requieren la instalación la tarjeta lógica de control, por lo cual es fácil programarlos, al de un dispositivo de protección contra atrapamientos LiftMaster igual el control de la puerta en el tablero eléctrico. (LMEP) para su funcionamiento. Consulte la sección Protección Se DEBE cablear el control de parada o un puente entre las contra atrapamientos.
  • Page 30 NOTA: La siguiente programación requiere un dispositivo de durante 150 segundos para los dispositivos MyQ ® y se protección contra atrapamientos controlado por LiftMaster (LMEP). cancelará si no detecta actividad. NOTA: El control remoto de un sólo botón no es compatible con CONTROL REMOTO ESTÁNDAR los modos de conexión de D1 y E2.
  • Page 31 Programe los controles remotos desde la estación de control de 3 botones (3BCS, por sus siglas en inglés). NOTA: La siguiente programación requiere un dispositivo de protección contra atrapamientos controlado por LiftMaster Esta función permite que el usuario agregue controles remotos (LMEP).
  • Page 32 1. Pulse y suelte el botón RADIO en la tarjeta lógica (se encenderá Para usar la aplicación de control con teléfono, tableta o el LED RADIO). computadora es necesario instalar el LiftMaster MyQ Internet Gateway (modelo 828LM). 2. Mantenga presionado el botón MAS durante 5 segundos. El LED RADIO parpadeará...
  • Page 33 Se debe tener al menos un dispositivo de protección contra controlado por LiftMaster (LMEP). atrapamientos controlado por LiftMaster (LMEP) instalado (consultar • NUNCA permita que los niños operen o jueguen con los el manual de instalación). El tipo de conexión debe estar establecido botones de control de la puerta o con los controles remotos.
  • Page 34 SBC y se debe tener instalado al menos un dispositivo de protección contra atrapamientos controlado por LiftMaster (LMEP) (consultar el manual de instalación). El tipo de conexión debe estar establecido en TS o T.
  • Page 35 TEMPORIZADOR DE FUNCIONAMIENTO MÁXIMO (MRT) El operador puede programar el tiempo que lleva abrir o cerrar la puerta más 10 segundos adicionales. Si el operador no cumple con su límite de apertura o cierre dentro del límite establecido de tiempo, se detendrá limitando el daño a la puerta y al operador. Para programar: Gire a PROG NOTA: La configuración de fábrica para el MRT es de 90 segundos.
  • Page 36 Programación del control remoto por medio de la estación de 3 botones h. El dispositivo de protección contra atrapamientos controlado por LiftMaster (LMEP) se desprogramará NOTA: La función de vida útil del operador (odómetro y contador de ciclos), los controles remotos y los dispositivos MyQ programados no fueron borrados.