Technibel SCDV106C5VA Notice D'utilisation
Masquer les pouces Voir aussi pour SCDV106C5VA:

Publicité

Les langues disponibles
  • FR

Les langues disponibles

Liens rapides

OPERATING INSTRUCTION ISTRUZIONI D'USO
NOTICE D'UTILISATION BEDIENUNGSANWEISUNGEN
INSTRUCCIONES DE USO
COOL / DRY / FAN
SCDV106C5VA-
SCDV136C5VA-
Room air conditioner with remote condenser
Condizionatore d'ambiente con condensatore remoto
Climatiseur avec condenseur a air exterieur • Klimagerät mit außenkondensator
Acondicionador de ambiente con condensador a distancia
Klimatistiko kleistwn cwrwn me sumpuknwth
O
O
DHLIES CRHSEWS
COOL / DRY / HEAT / FAN
SCDV106R5VA-
37.4148.153.0
01/2002
EG
I
F
D
E
GR

Publicité

Chapitres

Table des Matières
loading

Sommaire des Matières pour Technibel SCDV106C5VA

  • Page 1 NOTICE D’UTILISATION BEDIENUNGSANWEISUNGEN DHLIES CRHSEWS INSTRUCCIONES DE USO COOL / DRY / FAN COOL / DRY / HEAT / FAN SCDV106C5VA- SCDV106R5VA- SCDV136C5VA- Room air conditioner with remote condenser Condizionatore d’ambiente con condensatore remoto Climatiseur avec condenseur a air exterieur • Klimagerät mit außenkondensator...
  • Page 2 CONTENTS PRODUCT IDENTIFICATION ......... . . MONITOR PANEL.
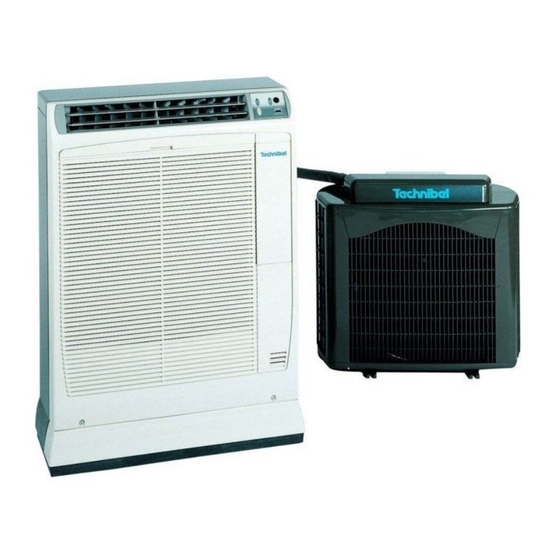
  • Page 3 PRODUCT IDENTIFICATION 01 Infrared rays remote control unit 02 Air filter handle 03 Air outlet 04 Monitor panel 05 Quick coupling cover 06 Outdoor unit 07 Outdoor unit basket or support 08 Flexible tube 09 Air intake 10 Electric cable with plug MONITOR PANEL COOL / DRY / FAN COOL / DRY / HEAT / FAN...
  • Page 4 Install a double - pole switch, protected fuses of the delayed type, TEMPERATURE SENSOR SELECTOR upstream the electricity wall socket 10A. Under normal conditions the room temperature is detected and Make sure that circuit breakers, fuses, etc. are of sufficient checked by the temperature sensor placed in the air conditioner.
  • Page 5 REMOTE CONTROL UNIT SENSOR DISPLAY TEMPERATURE SETTING BUTTONS Information are displayed when the remote control unit is switched on. A temperature — (cooler) sensor inside the remote control unit Press this button to decrease the set temperature. Operation Mode detects the room + (warmer) Automatic temperature.
  • Page 6 HOW TO SET THE PRESENT TIME HEATING PERFORMANCE A heat pump conditioner heats a room by taking heat from outside Press the SET button for five seconds. The time indication air. The heating efficiency will fall off when the outdoor temperature alone flashes.
  • Page 7 COOLING AND DEHUMIDIFYING ADJUSTING THE FAN SPEED Setting temperature Room temperature AUTOMATIC Simply set the FAN SPEED selector to the position . A microcomputer automatically controls the fan speed when the 1°C AUTO mode is selected. When the air conditioner starts operating, 1°C the difference between the room temperature and the set temperature is detected by the microcomputer which then...
  • Page 8 ADJUSTING THE AIR FLOW DIRECTION CARE AND CLEANING HORIZONTAL The horizontal air flow can be adjusted by moving the vertical CAUTION blades to the left or right, as indicated in the following figure. For safety, be sure to turn the air conditioner off and also to disconnect the power before cleaning.
  • Page 9 Storage • If your air conditioner does not work properly, first check the following points before requesting service. If you are not going to use the air-conditioner for a long If it still does not work properly, contact your dealer or service period, clean the air filters, evacuate the condensate from center.
  • Page 10 INDICE IL PRODOTTO ......................PANNELLO SEGNALAZIONI ..................LUOGO DI INSTALLAZIONE ..................REQUISITI ELETTRICI ....................ISTRUZIONI DI SICUREZZA..................USO DEL TELECOMANDO ..................Inserimento delle batterie ..................Selettore del sensore di temperatura................ Funzionamento con il telecomando ................TELECOMANDO ......................COME REGOLARE L'OROLOGIO ................RAFFREDDAMENTO - RISCALDAMENTO ...............
  • Page 11 IL PRODOTTO 01 Telecomando a raggi infrarossi 02 Maniglia filtro aria 03 Mandata aria 04 Pannello segnalazioni 05 Coperchio attacchi rapidi 06 Unità esterna (valigetta) 07 Contenitore o supporto unità esterna 08 Tubo flessibile di collegamento 09 Griglia di aspirazione 10 Cavo elettrico con spina PANNELLO SEGNALAZIONI COOL / DRY / FAN...
  • Page 12 Installare un interruttore bipolare, con fusibile di protezione del SELETTORE DEL SENSORE DI TEMPERATURA tipo ritardato, a monte della presa d'alimentazione di 10A. In condizioni normali la temperatura ambiente viene rilevata Assicuratevi che interruttori automatici e valori di protezione e controllata dal sensore di temperatura posizionato all’interno dell'impianto siano in grado di sopportare la corrente di spunto del condizionatore.
  • Page 13 TELECOMANDO SENSORE VISORE PULSANTI SELEZIONE TEMPERATURA Un sensore di tem- Visualizza le informazioni quando il telecomando è acceso. — (più freddo) peratura all’interno Premere questo pulsante per diminuire la temperatura del telecomando ri- Modo di funzionamento selezionata. leva la temperatu- Automatico ra ambiente.
  • Page 14 COME REGOLARE L'OROLOGIO FUNZIONAMENTO E CAPACITÀ DI UN SISTEMA IN “POMPA DI CALORE” Premere il pulsante SET per cinque secondi. Lampeggia solo Un condizionatore in versione pompa di calore riscalda l’ambiente l’indicazione dell’ora. sottraendo il calore all’aria esterna. La capacità (efficienza) del sistema si riduce quando la temperatura esterna scende sotto lo zero.
  • Page 15 RAFFREDDAMENTO E DEUMIDIFICAZIONE SCELTA VELOCITÀ VENTILATORE Temperatura ambiente Temperatura impostata AUTOMATICO Impostare pulsante SPEED Il microprocessore controllerà automaticamente la velocità del 1°C ventilatore. Quando il climatizzatore comincia a funzionare il 1°C sensore temperatura rileva la differenza tra la temperatura ambiente e la temperatura impostata e la trasmette al 1 ora 1 ora TEMPO...
  • Page 16 REGOLAZIONE DEL FLUSSO D'ARIA MANUTENZIONE E CURA ORIZZONTALE PRECAUZIONE Il flusso d’aria può essere regolato orizzontalmente spostando le alette verticali verso sinistra o verso destra come indicato nella Prima di procedere ad operazioni di pulizia e manutenzione, figura successiva. spegnere il condizionatore, quindi togliere la spina dalla presa VERTICALE di corrente.
  • Page 17 Conservazione • Se il vostro condizionatore non funziona regolarmente, prima di chiamare il Servizio Assistenza eseguite i controlli sottoelencati. Quando prevedete di non utilizzare il climatizzatore per un lungo Se il problema permane, contattare il Rivenditore o il Servizio periodo, pulite i filtri e scaricare l'acqua di condensa dall'unità Assistenza.
  • Page 18: Table Des Matières

    TABLE DE MATIERES DESCRIPTION DU PRODUIT ..................PANNEAU DE SIGNALISATION ................. EMPLACEMENT D’INSTALLATION ................PRECAUTIONS ELECTRIQUES ................INSTRUCTIONS DE SECURITE ................. UTILISATION DE LA TELECOMMANDE..............Installation des piles ....................Sélecteur de la sonde de température..............Fonctionnement avec la télécommande ..............TELECOMMANDE ......................
  • Page 19: Description Du Produit

    DESCRIPTION DU PRODUIT 01 Télécommande à infrarouge 02 Filtre à air 03 Sortie d'air 04 Panneau de signalisation 05 Couvercle raccords rapides 06 Unité extérieure 07 Panier ou support pour unité extérieure 08 Liaison frigorifique flexible 09 Grille d'aspiration 10 Câble électrique avec fiche PANNEAU DE SIGNALISATION COOL / DRY / FAN COOL / DRY / HEAT / FAN...
  • Page 20: Instructions De Securite

    un fusible de protection à retardement, au-dessus de la fiche SELECTEUR DE LA SONDE DE TEMPERATURE d'alimentation. En conditions normales, la température ambiante est détectée Assurez-vous que les disjoncteurs automatiques et les organes de protection de l'installation soient calibrés pour supporter un et contrôlée par la sonde de température placée dans le courant de pointe (pendant une période inférieure à...
  • Page 21: Telecommande

    TELECOMMANDE CAPTEUR AFFICHAGE BOUTONS DE REGLAGE DE LA TEMPERATURE (SENSOR) Les informations sur le mode de fonctionnement s’affichent lorsque la télécommande capteur — (plus froid) est en fonction. température incorporé Appuyer sur ce bouton pour réduire la température. Mode de fonctionnement à...
  • Page 22: Reglage De L'heure

    REGLAGE DE L'HEURE FONCTIONNEMENT ET RENDEMENT D'UN SYSTEME "REVERSIBLE" Appuyer sur le bouton SET pendant cinq seconds. L’indication de Un climatiseur en version "Réversible" réchauffe l'air ambiance en prélevant l’heure seule clignote. la chaleur de l'air extérieur. La capacité (rendement) du système diminue donc lorsque la température extérieure descend au-dessous de zéro.
  • Page 23: Reglage De La Vitesse Du Ventilateur

    REFROIDISSEMENT ET DESHUMIDIFICATION REGLAGE DE LA VITESSE DU VENTILATEUR Température sélectionnée Température ambiante AUTOMATIQUE Mettre le sélecteur FAN SPEED (vitesse du ventilateur) en position . Le microprocesseur du climatiseur règle automatiquement la 1°C vitesse du ventilateur. Quand le climatiseur commence à fonctionner, 1°C la différence entre la température de la pièce et la température sélectionnée est détectée par le microprocesseur qui règle alors...
  • Page 24: Fonctionnement Sans La Telecommande

    REGLAGE DU FLUX D’AIR ENTRETIEN ET NETTOYAGE HORIZONTALEMENT Le flux de l’air peut être réglé horizontalement en déplaçant les ATTENTION ailettes verticales vers la gauche ou vers la droite, comme indiqué dans la figure suivante. Avant d'effectuer les opérations d'entretien et de nettoyage, arrèter le climatiseur et le débrancher de l'alimentation générale.
  • Page 25: Conseils Pour Le Confort Et L'economie De L'energie

    Rangement • Si le climatiseur ne marche pas correctement, effectuer les vérifications suivantes avant d'appeler le Service Après Vente. Si le climatiseur doit être rangé pendant une longue période, Si le problème persiste, prendre contact avec le vendeur ou le nettoyez le filtre, vidangez les condensâtes en utilisant le tuyau Service Après Vente.
  • Page 26: Cool /Dry/Heat/Fan

    INHALTSVERZEICHNIS DAS PRODUKT ......................DISPLAY ........................AUFSTELLUNGSORT ....................ELEKTRISCHE ERFORDERNISSE ................SICHERHEITS-ANWEISUNGEN................. BENUTZUNG DER FERNBEDIENUNG ..............Einsetzen der Batterien .................... Wahlschalter des Temperatursensors............... Betrieb mit Fernbedienung ..................FERNBEDIENUNG ..................... EINSTELLUNG DER UHR ..................KÜHLUNG - HEIZUNG ....................AUTOMATISCHER BETRIEB ..................ENTFEUCHTUNG .......................
  • Page 27: Das Produkt

    DAS PRODUKT 01 Fernbedienung mit Infrarot-Signalen 02 Luftfiltergriff 03 Luftzufuhr 04 Display 05 Abdeckung der Schnellanschlüsse 06 Außeneinheit 07 Außeneinheit Stützkorb oder Halter 08 Verbindungsschlauch 09 Luftansauggrill 10 Stromkabel mit Stecker DISPLAY COOL / DRY / FAN COOL / DRY / HEAT / FAN 1.
  • Page 28: Sicherheitsanweisungen

    Es ist ein zweipoliger Schalter mit Schutzsicherung (träge) zu WAHLSCHALTER DES TEMPERATURSENSORS 10 A vor dem Versorgungsstecker anzubringen. Unter normalen Bedingungen wird die Raumtemperatur von dem in der Inneneinheit angebrachten Sensor gemessen und Vergewissern Sie sich, daß die automatischen Schalter und kontrolliert.
  • Page 29: Fernbedienung

    FERNBEDIENUNG SENSOR ANZEIGE TEMPERATURWAHLTASTEN Zeigt Informationen an, wenn die Fernbedienung in Betrieb ist. Ein Temperatursen- — (kälter) sor im Innern der Diese Taste zur Senkung der gewählten Temperatur Fernbedienung mißt drücken. Betriebsweise die Raumtemperatur. Automatik + (wärmer) Datenverkehrsbestatigung oder Kuhlung Fernbedienung Sperre Diese Taste zur Erhöhung der gewählten Temperatur drücken.
  • Page 30: Einstellung Der Uhr

    BETRIEB UND LEISTUNG EINES SYSTEMS EINSTELLUNG DER UHR IN WÄRMEPUMPEN-AUSFÜHRUNG Die Taste SET während fünf Sekunden drücken. Die Stundenanzeige nur blinkt. Ein Klimagerät in Wärmepumpen-Ausführung heizt den Raum, indem es der Außenluft Wärme entzieht. Wenn die Außentemperatur unter 0°C Die Taste + oder - solange drücken, bis die aktuelle Stunde ange- absinkt, kann sich die Leistung des Gerätes vermindern.
  • Page 31: Wahl Der Ventilator-Geschwindigkeit

    KÜHLUNG UND ENTFEUCHTUNG WAHL DER VENTILATOR-GESCHWINDIGKEIT Eingegebene Temperatur Raumtemperatur AUTOMATIK Mit der Taste FAN SPEED die Position “AUTO” eingeben. Der 1°C Mikroprozessor wird automatisch die Ventilator-Geschwindigkeit 1°C kontrollieren. Beim Anlauf des Klimageräts wird der Unterschied zwischen Raumtemperatur und eingegebener Temperatur vom Temperatur-Sensor 1 Stunde 1 Stunde ZEIT...
  • Page 32: Luftstrom Einstellung

    LUFTSTROM-EINSTELLUNG PFLEGE UND WARTUNG HORIZONTAL Der Luftstrom kann horizontal eingestellt werden, indem die VORSICHT vertikalen Luftleitlamellen nach links oder rechts gestellt werden, wie auf nächsten Abbildung gezeigt ist. Vor Beginn der Reinigungs- und Wartungsvorgänge ist die Klimaanlage abzuschalten und der Stecker aus der Steckdose VERTIKAL zu ziehen.
  • Page 33: Ratschläge Für Höchsten Komfort Und Niedrigsten Verbrauch

    Lagerung Kondenswasser von dem rückseitigen linken Rohr in ein ziemlich kleines Behälter ausläßt, das Röhrchen ausziehen und den Stopfen Falls die Klimaanlage für eine längere Zeit nicht benutzt werden entfernen. soll, sind die Filter zu reinigen und das Kondenswasser der •...
  • Page 34 INDICE EL PRODUCTO ......................PANEL SEÑALIZACIONES ..................LUGAR DE INSTALACION ..................INSTRUCCIONES DE CONEXION ELECTRICA ............NORMAS DE SEGURIDAD ..................INSTALACION Y USO DEL MANDO A DISTANCIA ............ Colocación de las pilas ..................... Selector del sensor de temperatura................Funcionamiento de la unidad con el mando a distancia........... MANDO A DISTANCIA ....................
  • Page 35 EL PRODUCTO 01 Mando a distancia de rayos infrarrojos 02 Manilla filtro aire 03 Salida del aire 04 Panel señalizaciones 05 Tapa conexiones rápidas 06 Unidad exterior 07 Contenedor o soporte unidad exterior 08 Tubo flexible de conexión 09 Rejilla de aspiración aire 10 Cable eléctrico con enchufe PANEL SEÑALIZACIONES COOL / DRY / FAN...
  • Page 36 SELECTOR DEL SENSOR DE TEMPERATURA retardado, antes de la toma de alimentación. Asegurarse de que los interruptores automáticos, y las válvulas de En condiciones normales la temperatura ambiente es detectada protección de la instalación estén en condiciones de soportar una y controlada por el sensor del acondicionador.
  • Page 37 MANDO A DISTANCIA SENSOR PULSADORES DE SELECCION VISOR TEMPERATURA Este sensor Visualiza las informaciones cuando el mando a distancia está encendido. temperatura interna — (más frío) detecta la temperatura Presionar este pulsador para disminuir la temperatura Modo de funcionamiento ambiente. seleccionada.
  • Page 38 AJUSTE DE LA HORA FUNCIONAMIENTO COMO “BOMBA DE CALOR” Un acondicionador de aire que funciona como bomba de calor calienta el Presionar el pulsador SET durante cinco segundos. La indicación de ambiente absorbiendo calor del aire exterior. La capacidad (eficiencia) del la hora solamente parpadea en el visor.
  • Page 39 REFRIGERACION Y DESHUMIDIFICACION SELECCION DE LA VELOCIDAD DEL VENTILADOR Temperatura introducida Temperatura ambiente AUTOMATICO Activar pulsador SPEED posición . El microprocesador controlará automáticamente la velocidad 1°C del ventilador. Cuando el climatizador comienza a funcionar el sensor 1°C de temperatura detecta la diferencia entre la temperatura ambiente y la temperatura introducida y la transmite al microprocesador, que 1 hora 1 hora...
  • Page 40 REGULACION DE LA DIRECCION DEL FLUJO DEL AIRE MANTENIMIENTO Y LIMPIEZA HORIZONTAL El flujo del aire puede ser regulado en sentido horizontal, moviendo PRECAUCION las aletas verticales con los dedos, hacia la izquierda o la derecha como se indica en las siguientes figuras para cada modelo. Antes de realizar operaciones de limpieza y mantenimiento, VERTICAL apagar el acondicionador, luego desenchufar el aparato.
  • Page 41 Conservación recipiente con una limitada. Sacar el tubo y quitar el tapón. (Véase la figura 1). Cuando se preve que no se va a usar el acondicionador durante • Si su acondicionador de aire no funciona correctamente, un período largo, limpiar los filtros y descargar el agua de compruebe los siguientes aspectos antes de llamar al servicio condensación de la unidad interior a través del tubo de descarga de reparación.
  • Page 42 PERIECOMENA TO PROION ......................... PINAKAS SHMATODOTHSHS ................... EGKATASTASH ......................HLEKTROLOGIKES APAITHSEIS ................ODHGIES GIA ASFALEIA ..................... CRHSH TOU THLECEIRISTHRIOU ................Topoqev t hsh mpatariwv n ................... Epilogev a " tou aisqhthv r a qermokrasiv a " ..............Leitourgiv a me to thleceiristhv r io ................THLECEIRISTHRIO .....................
  • Page 43 TO PROION 01 Thleceiristhv r io me uperiwv d ei" aktiv n e" 02 Labhv fiv l trou aev r a 03 Exodo" aev r a 04 Piv n aka" Shmatodov t hsh" 05 Kapav k i tacev w n sundev s ewn 06 Exwterikhv monav d a (balitsav k i) 07 Bav s h exwterikh"...
  • Page 44 EPILOGEAS TOU AISQHTHRA QERMOKRASIAS Egkatasthv s te ev n a dipolikov diakov p th, me epibradunov m enh asfav l eia, ston reumatolhv p th trofodosiv a " 10A . Upov kanonikev " sunqhv k e" h qermokrasiv a tou peribav l lonto" Sigoureuteiv t e ov t i oi autov m atoi diakov p te"...
  • Page 45 THLECEIRISTHRIO AISQHTHRAS MPOUTON EPILOGHS OQONH Sto eswterikov tou QERMOKRASIAS Emfaniv z ontai oi plhroforiv e " ov t an to thleceiristhv r io eiv n ai anammev n o. thleceiristhriv o u, ev n a" — (perissov t ero kruv o ) aisqhthv r a"...
  • Page 46 LEITOURGIA KAI APODOSH ENOS RÁQMISH WROLOGIOÁ SUSTHMATOS ME QERMOANTLIA Pathv s te to plhv k tro SET gia pev n te deuterov l epta. Anabosbhv n ei mov n o VEna klimatistikov sthn ev k dosh me qermoantliv a qermaiv n ei to peribav l lon h ev n deixh th"...
  • Page 47 EPILOGH TACUTHTAS EXAERISTHRA RAFFREDDAMENTO E DEUMIDIFICAZIONE Temperatura impostata Temperatura ambiente AUTOMATH LEITOURGIA Me to mpoutov n FAN SPEED phgaiv n ete sth qev s h . O mikroepexergasthv " qa elev g xei autov m ata thn tacuv t hta tou exaeristhv r a. v O tan to klimatistikov 1°C arciv s ei na leitourgeiv o aisqhthv r a"...
  • Page 48 RÁQMISH THS ROHS KAI KATEÁQÁNSHS TOÁ AERA SUNTHRHSH KAI FRONTIDA ORIZONTIA Ruqmiv s te allav z onta" th qev s h twn persiv d wn aristerav hv dexiav PROFULAXH ov p w" faiv n etai oti" eikov n e" pou akolouqouv n gia kav q e montev l o . Prin kav n ete kaqariov t hta kai sunthv r hsh, sbhv s te to klimatistikov KAQETA kai bgav l te ton reumatolhv p th apov thn priv z a.
  • Page 49 Apoqhv k eush • An to klimatistikov den leitourgeiv , prin kalev s ete tou" tecnikouv " kav n te tou" parakav t w elev g cou". VOtan skopeuv e te na mhn crhsimopoihv s ete to klimatistikov gia An exakolouqeiv na mh leitourgeiv kanonikav tov t e epikoinwnhv s te me to mia megav l h periv o do, kaqariv s te ta fiv l tra kai bgav l te to nerov katav s thma pwv l hsh"...
  • Page 50: Symbole Der System-Schaltplanen

    lectric wiring diagrams’ symbols / Simboli schemi elettrici / Symboles des schemas électriques Symbole der System-Schaltplanen / Símbolos de los esquemas eléctricos / Sumblov l wn HLEKTRIKO DIAGRAMMA TWN SUSTHMATWN SYMBOL ANTLIA APOSTRAGGISHS CONDENSATE PUMP POMPA SCARICO CONDENSA POMPE D’EVACUATION DES CONDENSATS KONDENSWASSERAUSLASS-PUMPE BOMBADE DESCARGADELLIQUIDO DE COND.
  • Page 51 In order to carry on a constant improvement, our products can be modified without prior notice. Per garantire un costante miglioramento dei nostri prodotti, ci riserviamo di modificarli senza preavviso. Par souci d’amélioration constante, nos produits peuvent être modifiés sans préavis. Unsere Produkte werden laufend verbessert und können Vorankündigung abgeändert Werden.
Ce manuel est également adapté pour:

Scdv136c5vaScdv106r5va

Table des Matières