Publicité

Les langues disponibles

Les langues disponibles

Liens rapides

EN
User Manual
Dishwasher
FR
Notice d'utilisation
Lave-vaisselle
RU
Инструкция по эксплуатации
Посудомоечная машина
2
23
45
F56302M0
F56302W0

Publicité

Table des Matières
loading

Sommaire des Matières pour AEG F56302M0

  • Page 1 User Manual F56302M0 Dishwasher F56302W0 Notice d'utilisation Lave-vaisselle Инструкция по эксплуатации Посудомоечная машина...
  • Page 2: Table Des Matières

    13. TECHNICAL INFORMATION................21 FOR PERFECT RESULTS Thank you for choosing this AEG product. We have created it to give you impeccable performance for many years, with innovative technologies that help make life simpler features you might not find on ordinary appliances. Please spend a few minutes reading to get the very best from it.
  • Page 3: Safety Information

    ENGLISH SAFETY INFORMATION Before the installation and use of the appliance, carefully read the supplied instructions. The manufacturer is not responsible if an incorrect installation and use causes injuries and damages. Always keep the instructions with the appliance for future reference.
  • Page 4: Safety Instructions

    Put knives and cutlery with sharp points in the cutlery • basket with the points down or in a horizontal position. Do not keep the appliance door open without • supervision to prevent to fall on it. Before maintenance, deactivate the appliance and •...
  • Page 5 ENGLISH • The appliance can release hot steam if you open the door while a programme operates. • Do not put flammable products or items that are wet with flammable products in, near or on the appliance. 2.5 Service • Contact the Authorised Service Centre to repair the appliance.
  • Page 6: Product Description

    3. PRODUCT DESCRIPTION Worktop Rinse aid dispenser Upper spray arm Detergent dispenser Lower spray arm Cutlery basket Filters Lower basket Rating plate Upper basket Salt container Air vent...
  • Page 7: Control Panel

    ENGLISH 4. CONTROL PANEL On/off button Start button Program button Indicators Programme indicators Option button Display Delay button 4.1 Indicators Indicator Description Washing phase. It comes on when the washing phase operates. Drying phase. It comes on when the drying phase operates. XtraDry indicator.
  • Page 8: Programmes

    5. PROGRAMMES Programme Degree of soil Programme phases Options Type of load • Normal soil • Prewash • ExtraHygiene • Crockery and cut- • Wash 50 °C • XtraDry lery • Rinses • Dry • All • Prewash • ExtraHygiene •...
  • Page 9: Settings

    ENGLISH Water Energy Duration Programme (kWh) (min) 1) The pressure and the temperature of the water, the variations of the mains supply, the options and the quantity of dishes can change the values. 5.2 Information for test info.test@dishwasher-production.com institutes Write down the product number (PNC) that is on the rating plate.
  • Page 10 German de- French degrees mmol/l Clarke de- Water softener lev- grees (°dH) (°fH) grees 37 - 42 65 - 75 6.5 - 7.5 46 - 52 29 - 36 51 - 64 5.1 - 6.4 36 - 45 23 - 28 40 - 50 4.0 - 5.0...
  • Page 11: Options

    ENGLISH 1. To enter the user mode press and • The indicator hold simultaneously Delay and Start continues to flash. • The display shows the current until the indicators setting. start to flash – = rinse aid empty and the display is blank. notification activated.
  • Page 12: Before First Use

    7.2 XtraDry How to activate XtraDry Activate this option when you want to Press Option until the indicator boost the drying performance. With the comes on. use of this option, the duration of some If the option is not applicable to the...
  • Page 13: Daily Use

    ENGLISH 8.2 How to fill the rinse aid CAUTION! dispenser Only use rinse aid specifically designed for dishwashers. 1. Press the release button (D) to open the lid (C). 2. Pour the rinse aid in the dispenser (A) until the liquid reaches the fill level 'max'.
  • Page 14 • The programme duration starts to decrease with steps of 1 minute. Starting a programme with delay start 1. Set a programme. 2. Press Delay again and again until the display shows the delay time you want to set (from 1 to 24 hours).
  • Page 15: Hints And Tips

    ENGLISH End of the programme 1. Press the on/off button or wait for the Auto Off function to When the programme is completed the automatically deactivate the display shows 0:00. The phase indicators appliance. are off. If you open the door before the activation of Auto Off, the appliance All buttons are inactive except for the is automatically deactivated.
  • Page 16: Care And Cleaning

    • Do not put in the appliance items that • The cap of the salt container is tight. can absorb water (sponges, • The spray arms are not clogged. household cloths). • There is dishwasher salt and rinse aid •...
  • Page 17 ENGLISH 7. Reassemble the filters (B) and (C). 8. Put back the filter (B) in the flat filter (A). Turn it clockwise until it locks. 2. Remove the filter (C) out of filter (B). 3. Remove the flat filter (A). 4.
  • Page 18: Troubleshooting

    • If you regularly use short duration • To maintain the performance of your programmes, these can leave appliance at its best, we recommend deposits of grease and limescale to use monthly a specific cleaning inside the appliance. To prevent this, product for dishwashers.
  • Page 19 ENGLISH Problem and alarm code Possible cause and solution The anti-flood device is on. • Close the water tap and contact an Authorised Service Centre. The display shows The appliance stops and • It is normal. It provides optimal cleaning results and en- starts more times during op- ergy savings.
  • Page 20 12.1 The washing and drying results are not satisfactory Problem Possible cause and solution Poor washing results. • Refer to "Daily use", "Hints and tips" and basket loading leaflet. • Use more intensive washing programmes. • Clean spray arm jets and filter. Refer to "Care and Cleaning".
  • Page 21: Technical Information

    ENGLISH Problem Possible cause and solution There are residues of deter- • The detergent tablet got stuck in the dispenser and gent in the dispenser at the therefore was not completely washed away by water. end of the programme. • Water cannot wash away the detergent from the dis- penser.
  • Page 22 Return the product to...
  • Page 23 13. CARACTÉRISTIQUES TECHNIQUES..............43 POUR DES RÉSULTATS PARFAITS Merci d'avoir choisi ce produit AEG. Nous l'avons conçu pour qu'il vous offre des performances irréprochables pour longtemps, en intégrant des technologies innovantes qui vous simplifient la vie grâce à des caractéristiques que vous ne trouverez pas forcément sur des appareils ordinaires.
  • Page 24: Consignes De Sécurité

    CONSIGNES DE SÉCURITÉ Avant d'installer et d'utiliser cet appareil, lisez soigneusement les instructions fournies. Le fabricant ne peut être tenu pour responsable des dommages et blessures liés à une mauvaise installation ou utilisation. Conservez toujours cette notice avec votre appareil pour vous y référer ultérieurement.
  • Page 25: Instructions De Sécurité

    FRANÇAIS Respectez le nombre maximum de 13 couverts. • Si le câble d'alimentation est endommagé, il doit être • remplacé par le fabricant, son service après-vente ou des personnes de qualification similaire afin d'éviter un danger. Placez les couteaux et les couverts avec des bouts •...
  • Page 26 • Uniquement pour le R-U et l'Irlande. • Les produits de lavage pour lave- L'appareil dispose d'une alimentation vaisselle sont dangereux. Suivez les secteur de 13 A. S'il est nécessaire de consignes de sécurité figurant sur changer le fusible de la fiche l'emballage du produit de lavage.
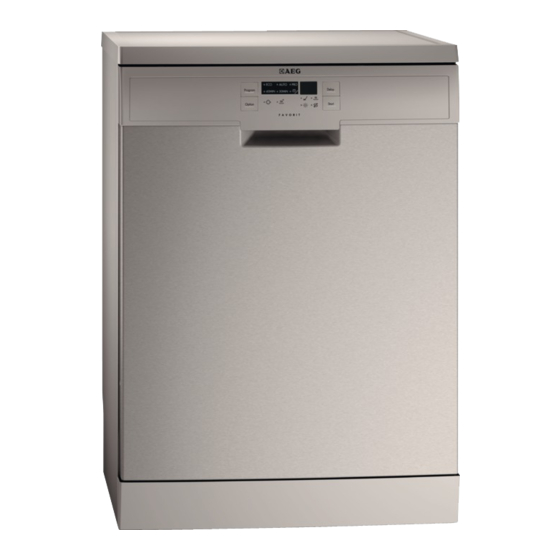
  • Page 27: Description De L'appareil

    FRANÇAIS 3. DESCRIPTION DE L'APPAREIL Plan de travail Distributeur de liquide de rinçage Bras d'aspersion intermédiaire Distributeur de produit de lavage Bras d'aspersion inférieur Panier à couverts Filtres Panier du bas Plaque de calibrage Panier du haut Réservoir de sel régénérant Fente d'aération...
  • Page 28: Bandeau De Commande

    4. BANDEAU DE COMMANDE Touche Marche/Arrêt Touche Start Touche Program Voyants Voyants de programme Touche Option Affichage Touche Delay 4.1 Voyants Indicateur Description Phase de lavage. Il s'allume au cours de la phase de lavage. Phase de séchage. Il s'allume au cours de la phase de séchage.
  • Page 29: Programmes

    FRANÇAIS 5. PROGRAMMES Programme Degré de salissure Phases du program- Options Type de vaisselle • Normalement sa- • Prélavage • ExtraHygiene • Lavage à 50 °C • XtraDry • Vaisselle et cou- • Rinçages verts • Séchage • Tous • Prélavage •...
  • Page 30: Réglages

    Consommation Durée Programme électrique (min) (kWh) 7 - 12 0.6 - 1.4 40 - 150 13 - 15 1.5 - 1.6 150 - 170 8 - 9 1.1 - 1.3 55 - 65 1) Les valeurs de consommation peuvent changer en fonction de la pression et de la température de l'eau, des variations de l'alimentation électrique, de la quantité...
  • Page 31 FRANÇAIS Plus la teneur en minéraux est élevée, vous indiquer la dureté de l'eau dans plus l'eau est dure. La dureté de l'eau est votre région. Il est important de régler mesurée en échelles d'équivalence. l'adoucisseur d'eau sur un niveau adéquat pour vous garantir de bons L'adoucisseur doit être réglé...
  • Page 32 6.3 Notification de liquide de 3. Appuyez sur Option pour modifier le réglage. rinçage vide 4. Appuyez sur la touche Marche/Arrêt pour confirmer le réglage. Quand la chambre du liquide de rinçage est vide, le voyant de liquide de rinçage 6.4 Signaux sonores...
  • Page 33: Options

    FRANÇAIS 7. OPTIONS Si cette option n'est pas compatible avec Vous devez activer les le programme, le voyant correspondant options souhaitées à chaque ne s'allume pas ou bien clignote fois avant de lancer un rapidement pendant quelques secondes programme. puis s'éteint. Vous ne pouvez pas activer L'écran affiche la nouvelle durée du ni désactiver d'options...
  • Page 34 8.2 Comment remplir le Le sel permet de recharger la résine dans l'adoucisseur d'eau et de garantir de distributeur de liquide de bons résultats de lavage en utilisation rinçage quotidienne. Remplissage du réservoir de sel régénérant 1. Tournez le couvercle du réservoir de sel régénérant vers la gauche et...
  • Page 35: Utilisation Quotidienne

    FRANÇAIS 9. UTILISATION QUOTIDIENNE 1. Ouvrez le robinet d'eau. petite quantité de produit de lavage 2. Appuyez sur la touche Marche/Arrêt dans le compartiment (D). 4. Fermez le couvercle. Assurez-vous pour allumer l'appareil. Assurez-vous que l'appareil est en mode que le bouton d'ouverture se Programmation.
  • Page 36: Conseils

    (de 1 à Appuyez simultanément sur les touches 24 heures). Program et Option et maintenez-les Le voyant du programme sélectionné enfoncées jusqu'à ce que l'appareil se clignote. mette en mode Sélection de 3. Appuyez sur la touche Start.
  • Page 37 FRANÇAIS degré de salissure. Le programme 1. Réglez l'adoucisseur d'eau au niveau ECO vous permet d'optimiser votre maximal. consommation d'eau et d'énergie 2. Assurez-vous que le réservoir de sel pour la vaisselle et les couverts régénérant et le distributeur de normalement sales.
  • Page 38: Entretien Et Nettoyage

    • Les bras d'aspersion ne sont pas vaisselle encore chaude est sensible obstrués. aux chocs. • Vous avez utilisé du sel régénérant et 2. Commencez par décharger le panier du liquide de rinçage (sauf si vous inférieur, puis le panier supérieur.
  • Page 39 FRANÇAIS ATTENTION! Une position incorrecte des filtres peut donner de mauvais résultats de lavage et endommager l'appareil. 11.2 Nettoyage des bras d'aspersion Ne retirez pas les bras d'aspersion. Si des résidus ont bouché les orifices des bras d'aspersion, éliminez ceux-ci à l'aide d'un objet fin et pointu.
  • Page 40: En Cas D'anomalie De Fonctionnement

    12. EN CAS D'ANOMALIE DE FONCTIONNEMENT Si l'appareil ne démarre pas ou s'arrête Pour certaines anomalies, l'écran en cours de programme. Avant de affiche un code d'alarme. contacter le service après-vente agréé, La plupart des problèmes peuvent être vérifiez si vous pouvez résoudre le résolus sans avoir recours au service...
  • Page 41 FRANÇAIS Problème et code d'alarme Cause et solution possibles Le système de sécurité anti- • Fermez le robinet d'eau et contactez le service après- débordement s'est déclen- vente agréé. ché. L'affichage indique L'appareil s'arrête et redé- • C'est normal. Cela vous garantit des résultats de lavage marre plusieurs fois en cours optimaux et des économies d'énergie.
  • Page 42 12.1 Les résultats de lavage et de séchage ne sont pas satisfaisants Problème Cause et solution possibles Résultats de lavage insatisfai- • Reportez-vous aux chapitres « Utilisation quotidien- sants. ne », « Conseils » et au manuel de chargement du pa- nier.
  • Page 43: Caractéristiques Techniques

    FRANÇAIS Problème Cause et solution possibles Mousse inhabituelle en cours • Utilisez uniquement des produits de lavage pour lave- de lavage. vaisselle. • Il y a une fuite dans le distributeur de liquide de rinça- ge. Faites appel à un service après vente agréé. Traces de rouille sur les cou- •...
  • Page 44 Pression de l'arrivée d'eau Min. / max. bar (MPa) 0.5 (0.05) / 8 (0.8) Arrivée d'eau max. 60 °C Eau froide ou eau chaude Capacité Couverts Consommation électrique Mode « Veille » (W) Consommation électrique Mode « Éteint » (W) 0.10...
  • Page 45 12. ПОИСК И УСТРАНЕНИЕ НЕИСПРАВНОСТЕЙ..........62 13. ТЕХНИЧЕСКИЕ ДАННЫЕ................66 ДЛЯ ИДЕАЛЬНЫХ РЕЗУЛЬТАТОВ Благодарим Вас за выбор данного изделия AEG. Оно будет безупречно служить Вам долгие годы – ведь мы создали его, призвав на помощь инновационные технологии, которые помогают облегчить жизнь и реализуют...
  • Page 46: Сведения По Технике Безопасности

    СВЕДЕНИЯ ПО ТЕХНИКЕ БЕЗОПАСНОСТИ Перед установкой и эксплуатацией прибора внимательно ознакомьтесь с приложенным руководством. Производитель не несет ответственность за травмы и повреждения, полученные/вызванные неправильной установкой и эксплуатацией. Позаботьтесь о том, чтобы данное руководство было у Вас под рукой на протяжении...
  • Page 47 РУССКИЙ персонала в магазинах, офисах и на других рабочих местах; для использования клиентами отелей, мотелей – мини-гостиниц типа «ночлег и завтрак» и других мест проживания. Не изменяйте параметры данного прибора. • Рабочее давление воды (минимальное и • максимальное) должно находиться в пределах 0.5 (0.05) / 8 (0.8) бар...
  • Page 48: Указания По Безопасности

    2. УКАЗАНИЯ ПО БЕЗОПАСНОСТИ 2.1 Установка электропитания следует использовать предохранитель: 13 • Удалите всю упаковку. amp ASTA (BS 1362). • Не устанавливайте и не подключайте прибор, если он имеет 2.3 Подключение к повреждения. водопроводу • Не устанавливайте и не...
  • Page 49: Описание Изделия

    РУССКИЙ • Не извлекайте посуду из прибора предоставить следующие до завершения программы. На сведения, имеющиеся на табличке посуде может оставаться моющее с техническими данными. средство. Модель: • Если открыть дверцу прибора во PNC (код изделия): время выполнения программы, из Серийный номер: него...
  • Page 50: Панель Управления

    Нижняя корзина Верхняя корзина 4. ПАНЕЛЬ УПРАВЛЕНИЯ Кнопка «Вкл/Выкл» Кнопка Start Кнопка Program Индикаторы Индикаторы программ Кнопка Option Дисплей Кнопка Delay 4.1 Индикаторы Индикатор Описание Этап мойки. Загорается, когда выполняется этап мойки. Этап сушки. Загорается на время этапа сушки.
  • Page 51: Программы

    РУССКИЙ 5. ПРОГРАММЫ Программа Степень загряз‐ Этапы программы Режимы ненности Тип загрузки • Обычная загряз‐ • Предваритель‐ • ExtraHygiene ненность ная мойка • XtraDry • Посуда и столо‐ • Мойка 50°C вые приборы • Ополаскивания • Сушка • Все • Предваритель‐...
  • Page 52: Параметры

    5.1 Показатели потребления Вода Энергопотребле‐ Продолжитель‐ Программа (л) ние ность (кВт·ч) (мин) 1.050 7 - 12 0.6 - 1.4 40 - 150 13 - 15 1.5 - 1.6 150 - 170 8 - 9 1.1 - 1.3 55 - 65 1) Указанные...
  • Page 53 РУССКИЙ 6.2 Смягчитель для воды Смягчитель для воды необходимо настроить в соответствии с уровнем Смягчитель для воды удаляет из жесткости воды, используемой в подаваемой в прибор воды Вашем регионе. Информацию о минеральные вещества, которые в жесткости воды в Вашем районе противном...
  • Page 54 • Индикаторы и • Индикаторы и погаснут. погаснут. • Индикатор продолжит • Индикатор мигать. продолжит мигать. • На дисплее отобразится • На дисплее отобразится текущая настройка. текущая настройка, напр., уровень 5. – = уведомление о том, 3. Для изменения установки нажмите...
  • Page 55: Режимы

    РУССКИЙ 3. Для изменения установки нажмите 4. Нажмите кнопку «Вкл/Выкл» для на Delay. подтверждения настройки. 7. РЕЖИМЫ соответствующий индикатор не Требуемые режимы загорится или быстро замигает на необходимо включать несколько секунд, а затем погаснет. перед каждый запуском На дисплее отобразится обновленное программы.
  • Page 56 Этап мойки начнется, как только При заполнении емкости данная процедура будет завершена. для соли из нее может Процедура будет повторяться с вылиться вода с солью. определенной периодичностью. Существует опасность 8.1 Емкость для соли коррозии. Для того, чтобы ее предотвратить, после...
  • Page 57: Ежедневное Использование

    РУССКИЙ тканью, хорошо впитывающей Селектор количества жидкость. выдаваемого 4. Закройте крышку. Убедитесь, что ополаскивателя (B) кнопка блокировки защелкнулась. позволяет выбрать значения от 1 (минимальное количество) до 4 или 6 (максимальное количество). 9. ЕЖЕДНЕВНОЕ ИСПОЛЬЗОВАНИЕ 1. Откройте вентиль подачи воды. 2. Включите прибор нажатием на кнопку...
  • Page 58 Запуск программы закрывании дверцы работа продолжается с момента, на котором 1. Включите прибор нажатием на она была прервана. кнопку «Вкл/Выкл». Убедитесь, что В случае открывания прибор находится в режиме дверца более чем на 30 выбора программы. секунд во время этапа...
  • Page 59: Полезные Советы

    РУССКИЙ 10. ПОЛЕЗНЫЕ СОВЕТЫ 10.1 Общие положения использования в регионах с жесткостью воды до 21°dH. В Приведенные ниже рекомендации регионах, где жесткость превышает обеспечат оптимальные результаты данный уровень, в дополнение к мытья и сушки в ходе каждодневного таблетированному моющему использования прибора, а также средству...
  • Page 60: Уход И Очистка

    10.5 Перед запуском смягчителя для воды в соответствии с жесткостью воды в программы Вашем регионе. 5. Задайте дозировку Убедитесь, что: ополаскивателя. • Фильтры очищены и установлены 6. Включите дозатор ополаскивателя. должным образом. • Крышка емкости для соли плотно 10.4 Загрузка корзин...
  • Page 61 РУССКИЙ 5. Убедитесь, что внутри или по краям отстойника нет остатков 1. Поверните фильтр (B) против пищи или других загрязнений. часовой стрелки и извлеките его. 6. Установите обратно на место плоский фильтр (A) Убедитесь, что он установлен правильно – под двумя...
  • Page 62: Поиск И Устранение Неисправностей

    11.4 Чистка внутренних ОСТОРОЖНО! частей Неверная установка фильтров может привести • Тщательно очистите прибор, к неудовлетворительным включая резиновый уплотнитель результатам мойки и дверцы, мягкой влажной тряпкой. повреждению прибора. • При регулярном использовании программ с малой 11.2 Чистка продолжительностью внутри...
  • Page 63 РУССКИЙ Неисправность и код не‐ Возможная причина неисправности и способ ее ус‐ исправности транения Прибор не включается. • Убедитесь, что вилка сетевого шнура вставлена в розетку электропитания. • Убедитесь, что предохранитель на электрощите не поврежден. Программа не запускается. • Убедитесь, что дверца прибора закрыта. •...
  • Page 64 Неисправность и код не‐ Возможная причина неисправности и способ ее ус‐ исправности транения Имеется небольшая утеч‐ • Прибор не выровнен. Слегка вывинтите или завинти‐ ка со стороны дверцы при‐ те регулировочные ножки (если предусмотрено в бора. данной модели). •...
  • Page 65 РУССКИЙ Неисправность Возможная причина неисправности и способ ее устранения Неудовлетворительные ре‐ • Столовые приборы слишком долго находились в зультаты сушки. закрытом приборе. • Ополаскиватель отсутствует, или дозировка опола‐ скивателя слишком мала. Установите более высо‐ кую дозировку ополаскивателя. • Возможно, предметы из пластика потребуется вы‐ тереть...
  • Page 66: Технические Данные

    Неисправность Возможная причина неисправности и способ ее устранения На столовых приборах • В воде, используемой для мойки, слишком высоко имеются следы ржавчины. содержание солей. См. Главу «Смягчитель для воды». • Столовые приборы из серебра и нержавеющей стали оказались рядом друг с другом. Избегайте...
  • Page 67 РУССКИЙ Подключение к электросе‐ Напряжение (В) 220 - 240 ти Частота (Гц) Давление в водопроводной Мин. / макс. бар (МПа) 0.5 (0.05) / 8 (0.8) сети Водоснабжение Холодная или горячая во‐ макс. 60°C да Вместимость Комплектов посуды Потребляемая мощность При оставлении во вклю‐ ченном...
  • Page 68 www.aeg.com/shop...

Ce manuel est également adapté pour:

F56302w0

Table des Matières