Panasonic NN-GD452W Mode D'emploi
Masquer les pouces Voir aussi pour NN-GD452W:
Table des Matières

Publicité

Les langues disponibles
  • FR

Les langues disponibles

  • FRANÇAIS, page 95

Liens rapides

Operating Instructions
Bedienungsanleitung
Gebruiksaanwijzing
Mode d'emploi
Manuale di istruzioni
Instrucciones de funcionamiento
Instrukcja obs ugi
Návod k obsluze
Kezelési útmutató
Instruc iuni de operare
Microwave /Grill Oven
Mikrowellengerät mit Grill
Magnetron/Grill Oven
Four à Micro-ondes-Gril
Forno a Microonde e Grill
Horno Microondas/Grill
Kuchenka Mikrofalowa z Grillem
Mikrovlnná / trouba/ Gril
Grillez s/mikrohullámú s t
Cuptor cu microunde
NN-GD452W / NN-GD462M

Publicité

Table des Matières
loading

Sommaire des Matières pour Panasonic NN-GD452W

  • Page 1 Instruc iuni de operare Microwave /Grill Oven Mikrowellengerät mit Grill Magnetron/Grill Oven Four à Micro-ondes-Gril Forno a Microonde e Grill Horno Microondas/Grill Kuchenka Mikrofalowa z Grillem Mikrovlnná / trouba/ Gril Grillez s/mikrohullámú s t Cuptor cu microunde NN-GD452W / NN-GD462M...
  • Page 2 Important safety instructions. Before operating this oven, please read these instructions carefully and keep for future reference. This appliance can be used by children aged from 8 years and above and persons with reduced physical, sensory and mental capabilities or lack of experience and knowledge if they have been given supervision or instruction by a person responsible for their safety concerning the...
  • Page 3 Warning! The appliance should be inspected for damage to the door seals and door seal areas and if these areas are damaged the appliance should not be operated until it has been repaired by a service technician trained by the manufacturer.
  • Page 4 and understands the hazards of improper use. For Countertop use: Allow 15 cm of space on the top of the oven, 10 cm at the back, 5 cm on one side, and the other side must be opened more than 40 cm. When heating food in plastic or paper containers, check the oven frequently as these types of containers ignite if...
  • Page 5 The contents of feeding bottles and baby food jars are to be stirred or shaken. The temperature has to be checked before consumption to avoid burns. Do not cook eggs in their shells and whole hard-boiled eggs by MICROWAVE. Pressure may build up and the eggs may explode, even after the microwave heating has ended.
  • Page 6 Failure to maintain the oven in a clean condition could lead to deterioration of surfaces that could affect the life of the appliance and possibly result in a hazardous situation. Warning! The accessible parts may become hot in combination use. Young children should be kept away.
  • Page 7 take care when opening or closing the door and when inserting or removing food and accessories. This appliance is not intended to be operated by means of an external timer or separate remote-control system. Only use utensils that are suitable for use in microwave ovens.
  • Page 8: Table Des Matières

    Using the memory function ....................22 Turbo defrost ........................23 Auto sensor programs ....................24-26 Auto weight Panacrunch programs .................27 Panacrunch pan ......................28 Questions and answers ....................29 Care of your oven ......................30 Technical speci cations ....................31 Thank you for purchasing a Panasonic Microwave Oven.
  • Page 9: Installation & Connection

    Installation and connection Examine your microwave oven If your AC outlet is not grounded, it is the personal responsibility of the customer to Unpack the oven, remove all packing have it replaced with a properly grounded material, and examine the oven for any wall socket.
  • Page 10: Important Safety Instructions

    Important safety instructions WARNING! If the supply cord is damaged, it must be replaced by the manufacturer or its Important safety instructions service agent or a similarly uali ed person in order to avoid a hazard. The door seals and seal areas should be cleaned with a damp cloth.
  • Page 11 Important safety instructions Use of your oven hot. Care should be taken to avoid touching the heating elements inside Do not use the oven for any reason the oven. other than the preparation of food. This oven is speci cally designed to heat or cook food.
  • Page 12 Important safety instructions Roller ring Important! The roller ring and the oven oor If the recommended cooking times are should be cleaned frequently to exceeded the food will be spoiled and prevent noise and build-up of in extreme circumstances could catch remaining food.
  • Page 13 Important safety instructions Liquids Utensils/foil When heating liquids, e.g. soup, Do not heat any closed cans or bottles sauces and beverages in your because they might explode. microwave oven, overheating the liquid beyond boiling point can occur Metal containers or dishes with without evidence of bubbling.
  • Page 14: Outline Diagram

    Outline diagram Door release Control panel Press to open the door. When you Power supply cord open the oven door during cooking, Plug the cooking is stopped temporarily Identi cation Label without clearing earlier made settings. Glass tray The cooking is resumed as soon Roller ring as the door is closed and Start button Grill Elements...
  • Page 15: Control Panel Nn-Gd452W/Nn-Gd462M

    Control panel NN-GD452W/NN-GD462M * Display window Microwave power levels button Grill button Turbo defrost programs button Auto sensor reheat programs button Auto sensor cook vegetables / sh programs button Auto sensor cook rice / pasta programs button Auto weight Panacrunch...
  • Page 16: Control & Operation Procedure

    Controls and operation procedure Word Prompting: Word Prompting Plug-in “88:88” Press "FRANCAIS" In French Press "ITALIANO" In Italian Press "DEUTSCH" In German Press "NEDERLANDS" In Dutch Press "ESPANOL" In Spanish Press "POLSKI" In Polish Press "CESKY" In Czech Press "ENGLISH" In English These models have a unique function “Word Prompting”...
  • Page 17: Setting The Clock

    Setting the clock When the oven is rst plugged in 88:88 appears in display window. Press Clock once Turn Time / Weight Dial. Press Clock A colon starts to blink. Enter the time by turning the Time/ The colon stops blinking. Weight dial.
  • Page 18: Microwave Cooking And Defrosting

    Microwave cooking and defrosting The glass tray must always be in position when using the oven. Press Microwave Power. Set the cooking time Press Start Button. Select desired power level. using the Time/Weight The cooking program Dial (1000 W power: up to will count down 30 minutes Other powers: up to 90 minutes).
  • Page 19: Grilling

    Grilling The glass turntable must always be in position when using the oven. Press Grill to select level Set Time Press Start Select Cooking time by The time counts 1 press Grill 1 1100 W (high) turning the Time/Weight Dial. down in the display.
  • Page 20: Combination Cooking

    Combination cooking Select desired power level Set Time Press Start Button Select cooking time by The time counts 1 Press Grill 1 1100 W (high) 1 Press Medium 600 Watts turning Time/Weight Dial. down in the display. 2 Presses Grill 2 800 W (medium) 2 Presses 440 Watts Time can be set up to...
  • Page 21: Using The Timer

    Using the timer Delay start cooking By using the Timer, you are able to program Delay Start cooking. example Set the delay time by Set the desired cooking Press Timer. Press Start turning the Time/ Weight program and cooking time. Dial (up to 9 hours).
  • Page 22: Multi-Stage Cooking

    Multi-stage cooking 2 or 3 stage cooking Example: Press Press Press Start. Set the cooking Set the cooking Microwave Microwave time using the time using the The cooking program Power. Select Power. Select will start and the time Time/Weight Dial. Time/Weight Dial.
  • Page 23: Using The Memory Function

    Using the memory function This feature allows you to pre-program your oven for a regular reheating or cooking task (for instance the manual Preheating of the Panacrunch pan). You are able to pre-program your oven for a speci c power level and time that is convenient for you. You can only pre-program one memory task with this oven.
  • Page 24: Turbo Defrost

    Turbo defrost With this feature you can defrost frozen food according to the weight. Select the desired Turbo Defrost Set the weight of the frozen food Press Start program by using the Time/Weight Dial. Remember to stir or 1 Press Small Pieces Turning the dial slowly will count turn the food during up in 10 g steps.
  • Page 25: Auto Sensor Programs

    Auto sensor programs A variety of food may be cooked without having to enter the cooking time, weight or the power level. e.g. Select the desired Press Start Button. Auto Sensor Program. Plus/Minus Control: Preferences for degree of cooking vary for each individual. After having used Auto Sensor Programs a few times, you may decide you would prefer your food cooked to a different degree of cooking.
  • Page 26 Auto sensor programs Program Weight Accessories Instructions For reheating chilled and ambient soup. Place soup into a suitable sized container. 4. SOUP Foods should be at refrigerator temperature approx +5 °C or room temperature. Cover with cling lm. Pierce cling lm with a sharp 150 g - 1000 g knife once in the centre and four times around the edge.
  • Page 27 Auto sensor programs Program Weight Accessories Instructions 8. FROZEN To cook frozen vegetables. Place vegetables into a suitable sized container. VEGETABLES Sprinkle with 1-3 tbsp water. If cooking vegetables with high water content, such as spinach or tomatoes, do not add water. 200 g - 1000 g Cover with cling lm.
  • Page 28: Auto Weight Panacrunch Programs

    Auto weight Panacrunch programs Select the desired Press Start to After pre-heating Press Start program and place preheat the Pizza beeps sound. Place Button the Pizza pan in the pan. the food in the pan, oven directly on the set weight. glass tray.
  • Page 29: Panacrunch Pan

    (see page 22 EN). quiches, pies, breaded products just as a conventional oven. Your Panasonic Always place the pan in the centre of Panacrunch Pan works in three ways: the glass tray and ensure it does heating the pan by absorbing microwaves, not touch the wall of the oven cavity.
  • Page 30: Questions And Answers

    Questions and answers Why won’t my oven turn on? may be used. If in a hurry, cook food manually by selecting the correct When the oven does not turn on, cooking mode and cooking time check the following: yourself. Is the oven plugged in securely? Remove the plug from the outlet, wait Can I use a conventional oven 10 seconds and reinsert.
  • Page 31: Care Of Your Oven

    Care of your oven Turn the oven off before cleaning. The roller ring and oven cavity oor should be cleaned regularly to avoid Clean the inside of the oven, door excessive noise. Simply wipe the seals and door seal areas regularly. bottom surface of the oven with mild When food splatters or spilled liquids detergent and hot water then dry with...
  • Page 32: Technical Speci Cations

    Pursuant to the directive 2004/108/EC, & Electronic Equipment article 9(2) article 9(2) Panasonic Testing Centre (private households) Panasonic Testing Centre Panasonic Marketing Europe GmbH Panasonic Marketing Europe GmbH This symbol on the products and/ Winsbergring 15,22525 Hamburg, Winsbergring 15,22525 Hamburg, or accompanying documents F.R.Germany F.R.Germany...
  • Page 33 WICHTIGE SICHERHEITSANWEISUNGEN. Bitte sorgfältig durchlesen und zur weiteren Bezugnahme aufbewahren. Dieses Gerät darf von Personen ab 8 Jahren und von Menschen mit verminderten körperlichen, sensorischen oder geistigen Fähigkeiten oder mangelnden Erfahrungen/ Kenntnissen benutzt werden, insofern sie durch eine für ihre Sicherheit verantwortliche Person in die sichere Benutzung des Geräts eingewiesen wurden und die betreffenden Gefahren verstehen oder von einer solchen...
  • Page 34 Türdichtungs ächen zu prüfen, und falls ein solcher Schaden aufgetreten ist, darf das Gerät nicht betrieben werden, bevor es vom Panasonic-Kundendienst repariert worden ist. WARNUNG! Führen Sie weder eine Manipulation oder Reparatur an der Tür, an den Kontrolleinrich-tungen oder Sicherheitsvorrichtungen noch an irgendeinem anderen Teil des Gerätes durch.
  • Page 35 Gerätes ohne Aufsicht nur erlaubt werden, wenn eine ausreichende Einweisung gegeben wurde, die das Kind in die Lage versetzt, das Gerät in sicherer Weise bedienen und die Gefahr einer falschen Bedienung verstehen zu können. Verwendung als Tischgerät: Sicherheitsrichtlinien empfehlen die Einhaltung eines Mindestabstands von 15 cm über dem Gerät, 10 cm zur Rückwand sowie 5 cm zur einen und 40 cm zur anderen Seite.
  • Page 36 Beim Erhitzen von Flüssigkeiten im Mikrowellengerät kann durch kurzfristiges Aufkochen (Siedeverzug) die Flüssigkeit im Gerät oder bei der Entnahme schlagartig verdampfen und explosionsartig aus dem Gefäß geschleudert werden. Dies kann zu Verbrennungen führen. Sie vermeiden einen Siedeverzug, in dem Sie beim Erhitzen von Flüssigkeiten in Gläsern oder Tassen immer ein hitzebeständiges Glasstäbchen mit hineinstellen oder größere Gefäße mit einem Deckel bzw.
  • Page 37 und den Türrahmen sauber. Entfernen Sie Spritzer von Speisen und Flüssigkeiten, die an den Garraumwänden und der Tür haften, mit einem feuchten Tuch und ggf. mildem Reinigungsmittel. Scharfe Reinigungs- und Scheuermittel sind nicht empfehlenswert VERWENDEN SIE IN KEINEM FALL BACKOFENREINIGUNGSMITTEL. Während des GRILL- und KOMBINATIONSBETRIEBS können Spritzer von Speisen und Getränken an den...
  • Page 38 die Gehäuseober ächen sehr heiß werden können. Das Gerät ist ausschließlich als Tischgerä geeignet, nicht als Einbaugerät oder für die erwendung in Schränken. Ein Dampfreiniger darf nicht zur Reinigung verwendet werden. Verw enden Sie zur Reinigung der gläsernen Mikrowellentür keine Scheuermittel oder scharfe Metallschaber, da dies eine Beschädigung der Ober äche zur Folge haben und zum Zerspringen des Glases führen könnte.
  • Page 39 Mehrstufiges Kochen ....................21 Verwendung der Speicherfunktion ................22 Gewichtsautomatik zum Auftauen ................23 Auto-Sensor-Programme..................24-26 Gewichtsautomatik zum Erwärmen/Garen ..............27 Panacrunch ........................28 Fragen und Antworten ....................29 Pflege des Mikrowellengerätes ...................30 Technische Daten ......................31 Vielen Dank dafür, dass Sie sich für ein Panasonic Mikrowellengerät entschieden haben.
  • Page 40: Aufstellen Und Anschließen

    Aufstellen und Anschließen Überprüfung Ihres Ist die Steckdose nicht geerdet, muß Mikrowellengerätes der Kunde die Steckdose durch eine ordnungsgemäße Schutzkontaktsteckdose Das Gerät auspacken, Verpackungsmaterial ersetzen lassen. entfernen und auf Beschädigungen wie z.B. Stoßstellen, gebrochene Türverriegelungen Betriebsspannung oder Risse in der Tür überprüfen. Sofort Die Netzspannung muß...
  • Page 41: Wichtige Sicherheitshinweise

    Schaden aufgetreten Nahrungsmittel in versiegelten ist, darf das Gerät nicht betrieben Behältern (z.B. Konserven) erhitzen, werden, bevor es vom Panasonic- da diese platzen können. Kundendienst repariert worden ist. Zur eigenen Sicherheit bitte keinen Führen Sie weder eine Druck von oben auf die geöffnete Tür...
  • Page 42 Wichtige Sicherheitshinweise Gebrauch und Ausstattung des Gebrauch des GRILL- ODER Gerätes KOMBINATIONSBETRIEBS sind diese Ober ächen sehr heiß, ebenso Das Mikrowellengerät nur zur das benutzte Zubehör und Geschirr. Nahrungsmittelzubereitung benutzen. Achten Sie auch darauf, daß Sie Dieses Gerät ist speziell zum das Heizelement im Garraum nicht Auftauen, Erwärmen und Garen berühren.
  • Page 43 Wichtige Sicherheitshinweise Rollenring Wichtige! Der Rollenring und die Vertiefung Wird die empfohlene Kochzeit über- im Garraumboden müssen regelmäßig schritten, kann das Lebensmittel leicht gereinigt werden, um zu verhindern, verbrennen und ggf. einen Brand daß Geräusche entstehen und sich auslösen und somit den Garraum Nahrungsmittelreste ansammeln.
  • Page 44 Wichtige Sicherheitshinweise Flüssigkeiten Hilfsmittel und Folien Beim Erhitzen von Flüssigkeiten im Erhitzen Sie keine geschlossenen Mikrowellengerät kann durch Flaschen oder Konserven im kurzfristiges Aufkochen (Siedeverzug) Mikrowellengerät, da diese durch den die Flüssigkeit im Gerät oder bei der Druck explodieren können. Entnahme schlagartig verdampfen und explosionsartig aus dem Gefäß...
  • Page 45: Schematische Ansicht

    Schematische Ansicht Türöffnungstaste Bedienfeld Drücken Sie diese Taste, um die Stromkabel Tür zu öffnen. Durch Öffnen der Tür Gerätestecker während des Garvorgangs wird der Kennzeichnungsaufkleber Betrieb unterbrochen, das Programm Glasdrehteller bleibt erhalten. Der Garvorgang läuft Rollenring weiter ab, wenn die Tür geschlossen Grillstäbe und die Starttaste gedrückt wird.
  • Page 46: Bedienfeld Nn-Gd452W/Nn-Gd462M

    Bedienfeld NN-GD452W/NN-GD462M * Digitalanzeige Mikrowellen-Leistungswahltaste Grillbetriebstaste Auto-Kochprogramme Turbo-Auftauprogramme Auto-Sensor-Programmtaste Gemüse/ Fisch garen Auto-Sensor-Programmtaste Reis/Pasta kochen Gewichtsautomatik zum Erwärmen/ Garen Taste mehr/weniger Drehregler für die Zeit oder Gewichtseingabe Speicher-Taste Zeitschaltertaste Zeit-Taste Stopp-/Löschtaste: Eine Betätigung der Stopp-/Löschtaste vor dem Betrieb löscht alle eingegebe nen Daten.
  • Page 47: Digitale Laufschrift

    Digitale Laufschrift Digitale Laufschrift “88:88” Starttaste "FRANCAIS" In Französisch drücken Starttaste "ITALIANO" In Italienisch drücken Starttaste "DEUTSCH" In Deutsch drücken Starttaste "NEDERLANDS" In Holländisch drücken Starttaste "ESPANOL" In Spanisch drücken Starttaste "POLSKI" In Polnisch drücken Starttaste "CESKY" In Czek drücken Starttaste "ENGLISH"...
  • Page 48: Einstellen Der Uhr

    Einstellen der Uhr Beim ersten Anschließen des Gerätes erscheint “88:88” in der Digitalanzeige. Drücken Sie einmal auf Stellen Sie durch Drehen Drücken Sie auf das Zeit- Taste. Der Doppelpunkt das Zeit-Taste. des Drehreglers für die Zeit-/ Der Doppelpunkt blinkt. Gewichtseingabe die korrekte hört auf zu blinken und die Uhrzeit/Tageszeit ein.
  • Page 49: Mikrowellenbetrieb Zum Garen Und Auftauen

    Mikrowellenbetrieb zum Garen und Auftauen Vor Gebrauch des Gerätes vergewissern, daß der Glasdrehteller richtig eingesetzt ist. Drücken Sie die Mikrowellen- Stellen Sie mit dem Drehregler Drücken Sie die für die Zeit-/ Gewichtseingabe Starttaste. Das Leistungswahltaste. die gewünschte Zeit ein (1000 W: Wählen Sie die gewünschte Garprogramm beginnt maximal 30 Minuten, alle anderen...
  • Page 50: Grillbetrieb

    Grillbetrieb Vor Gebrauch des Gerätes vergewissern, daß der Glasdrehteller richtig eingesetzt ist. Stellen Sie mit dem Drehregler für die Drücken Sie die Drücken Sie die Grillbetriebstaste um die Zeit/Gewichtseingabe die gewünschte Starttaste. Die Zeit in gewünschte Grillstufe zu Zeit ein (maximal 90 Minuten). der Digitalanzeige wird wählen zurückgezählt.
  • Page 51: Grillkombinationsbetrieb

    Grillkombinationsbetrieb Stellen Sie mit dem Drücken Sie die Wählen Sie die gewünschte Leistungsstufe Drehregler für die Zeit-/ Starttaste. Die Zeit mal drücken (stark) mal drücken Mittel Grill 1 1000 W 600 W Gewichtseingabe die in der Digitalanzeige mal drücken (mittel) mal drücken niedrig Grill 2 800 W 440 W...
  • Page 52: Gebrauch Des Gerätes Mit Zeitvorwahl

    Gebrauch des Gerätes mit Zeitvorwahl Verwendung des Zeitschalters Durch Benutzung der Zeitschaffer-Taste kann der Beginn des Kochvorgangs verzögert werden. Beispiel: Drücken Sie den Stellen Sie die Verzögerungszeit Stellen Sie das gewünschte Drücken Sie Zeitschalter ein, indem Sie den Zeit/Gewicht- Kochprogramm und die das Starttaste.
  • Page 53: Mehrstufiges Kochen

    Mehrstufiges Kochen 2- oder -stu ges Kochen Beispiel: Drücken Sie die Drücken Sie die Drücken Sie die Stellen Sie mit Stellen Sie mit Starttaste. Das Mikrowellen- dem Drehregler Mikrowellen- dem Drehregler Garprogramm für die Zeit-/ für die Zeit-/ Leistungswahltaste. Leistungswahltaste. Gewichtseingabe Gewichtseingabe beginnt und...
  • Page 54: Verwendung Der Speicherfunktion

    Verwendung der Speicherfunktion Diese Funktion gestattet es, das Gerät für das normale Aufwärmen oder Garen vorzuprogrammieren (zum Beispiel für das manuelle Vorwärmen der Panacrunch-Pfanne). Sie können Ihr Gerät für eine bestimmte Leistungsstufe und Uhrzeit vorprogrammieren. Für dieses Gerät kann nur eine Speicherfunktion vorprogrammiert werden. Einstellen eines Speicherprogramms oder Programmieren Sie...
  • Page 55: Gewichtsautomatik Zum Auftauen

    Gewichtsautomatik zum Auftauen Mit dieser Ausstattung können Sie Lebensmittel nach dem Gewicht auftauen. Wählen Sie das gewünschte Geben Sie mit dem Drehregler für Drücken Sie die Gewichtsautomatikprogramm zum die Zeitund Gewichtseingabe das Starttaste. Vergessen Auftauen. Gewicht des Lebensmittels ein. Sie nicht, das 1 mal drücken für kleine Teile Langsames Drehen des Drehreglers Lebensmittel während...
  • Page 56: Auto-Sensor-Programme

    Auto-Sensor-Programme Viele Nahrungsmittel können gegart werden, ohne dass man die Garzeit, das Gewicht oder die Leistungsstufe eingeben muss. z.B. Das gewünschte Auto-Sensor-Programm Start-Taste drücken. auswählen.. Plus/Minus-Steuerung: Die Länge der Garzeit ist vom Geschmack abhängig. Es ist möglich, dass Sie nach mehrmaliger Benutzung der Auto-Sensor-Programme einen anderen Garungsgrad wünschen.
  • Page 57 Auto-Sensor-Programme Programm Gewicht Zubehör Hinweise/Tips 4. SUPPE Zum Aufwärmen gekühlter und zimmer- warmer Suppe. Die Suppe in einen geeigne- ten Behälter geben. Die Nahrungsmittel sollten möglichst Kühlschranktemperatur (ca. +5 °C) oder Raumtemperatur haben. Mit Frischhalte- 150 g - 1000 g folie abdecken.
  • Page 58 Auto sensor programs Programm Gewicht Zubehör Hinweise/Tips 8. GEFRO- Zum Garen von tiefgekühltem Gemüse. Das Gemüse in einen geeigneten Behälter RENES geben. 1-3 EL Wasser darüber gießen. Zum GEMUESE Garen von Gemüse mit hohem Wassergehalt (z.B. Spinat oder Tomaten) wird kein Wasser hinzugegeben.
  • Page 59: Gewichtsautomatik Zum Erwärmen/Garen

    Gewichtsautomatik zum Erwärmen/Garen Wählen Sie das Drücken Sie die Ist das Vorheizen Drücken Sie die gewünschte Starttaste, um den beendet, ertönt ein Starttaste. Programm und Panacrunch Signal. Legen Sie stellen Sie den vorzuheizen. anschließend das Panacrunch Lebensmittel in direkt auf den den Panacrunch Glasdrehteller.
  • Page 60: Panacrunch

    Backofen zu vergleichen: Der Teig ist Speicherfunktion gespeichert werden meistens weicher und der Boden nicht so (siehe Seite 22 DE). knusprig. Mit dem Panasonic Panacrunch 2. Platzieren Sie den Panacrunch als Zubehör ist das kein Problem mehr. in der Mitte des Glasdrehtellers.
  • Page 61: Fragen Und Antworten

    Kombinationsgarens brummende und Mikrowellengerät defekt. Wenden Sie klickende Geräusche zu hören? sich in diesem Fall unbedingt an einen Diese Geräusche sind bedingt Panasonic- Kundendienst. durch das automatische Umschalten von MIKROWELLENLEISTUNG Das Mikrowellengerät verursacht Fernsehstörungen. Ist das normal? auf GRILLEISTUNG während des Kombinationsbetriebes.
  • Page 62: Pflege Des Mikrowellengerätes

    Geräteinnere gelangt, da das Gerät sonst Schaden nehmen könnte. Das Mikrowellengerät darf ausschließlich vom quali zierten Ist das Bedienungsfeld verschmutzt, Panasonic-Kundendienst geprüft oder säubern Sie dieses mit einem repariert werden. trockenen, weichen Tuch. Verwenden Sie in keinem Fall scharfe Reinigungs- Ein Dampfreiniger darf nicht zur bzw.
  • Page 63: Technische Daten

    Gemäß der Richtlinie 2004/108/EC, Artikel 9(2) elektrischen und Artikel 9(2) elektronischen Geräten Panasonic Testing Centre Panasonic Testing Centre (private Haushalte) Panasonic Marketing Europe GmbH Panasonic Marketing Europe GmbH Winsbergring 15,22525 Hamburg, Winsbergring 15,22525 Hamburg, Deutschland Deutschland Entsprechend der grundlegenden Hergestellt von Panasonic Appliances Firmengrundsätzen der Panasonic-Gruppe...
  • Page 64 BELANGRIJKE VEILIGHEIDSINSTRUCTIES. Lees ze a.u.b. zorgvuldig door en bewaar ze zodat u ze opnieuw kunt raadplegen wanneer nodig. Dit apparaat mag gebruikt worden door kinderen in de leeftijd van 8 jaar en ouder en mensen met verminderde fysieke, zintuiglijke en mentale vermogens of gebrek aan ervaring en kennis mits zij onder toezicht staan of instructies hebben gekregen van iemand die verantwoordelijk...
  • Page 65 Indien het apparaat niet goed functioneert, beschadigd of gevallen is, mogen in verband met de veiligheid reparaties uitsluitend door een door de fabrikant erkende onderhouds- technicus worden uitgevoerd. WAARSCHUWING! De deurafdichtingen en de plaatsen hieromheen moeten worden schoongemaakt met een vochtige doek. Het apparaat moet gecontroleerd worden op beschadigingen aan de deurafdichtingen en de plaatsen rondom deze afdichtingen;...
  • Page 66 onderhoudstechnicus worden uitgevoerd. Ontplof ngsgevaar bestaat indien voedsel of dranken in een gesloten blik of es worden verwarmd. WAARSCHUWING! Plaats de magnetronoven niet vlak naast andere elektrische apparatuur of een gasfornuis. WAARSCHUWING! Kinderen mogen de magnetronoven uitsluitend onder toezicht gebruiken wanneer ze goed zijn ingelicht zodat ze de oven op veilige wijze kunnen bedienen en zich bewust zijn van de gevaren van onjuist gebruik.
  • Page 67 ontstaat, druk dan op de knop Stop/Cancel en laat de deur dicht om eventuele vlammen te smoren. Verwijder de netkabel of schakel de stroom uit met de stroomschakelaar of door de zekering te verwijderen. Indien vloeistoffen, zoals soep, sauzen en dranken opgewarmd worden in uw magnetronoven, kunnen deze zonder te gaan borrelen heter worden dan het kookpunt.
  • Page 68 op de ovenwanden, deurafdichtingen en de plaatsen hieromheen, moeten deze worden schoongemaakt met een vochtige doek. Als zij zeer vuil zijn geworden mag gebruik gemaakt worden van een mild reinigingsmiddel. Het gebruik van agressieve reinigings-middelen of schuursponsjes wordt niet aanbevolen. GEBRUIK GEEN COMMERCIËLE OVENREINIGERS.
  • Page 69 Deze oven is uitsluitend bestemd voor gebruik op een werkblad. Hij is niet bedoeld als inbouwoven of voor gebruik in een kast. Gebruik geen stoomreiniger voor het reinigen. Gebruik geen ruwe, schurende reinigingsmiddelen of scherpe metalen schrapers om de ruit van de ovendeur te reinigen, aangezien deze het oppervlak kunnen krassen en het glas kunnen doen barsten.
  • Page 70 Voorbereiding in meerdere stappen ................21 Het geheugen gebruiken ....................22 Turbo-ontdooiing ......................23 Automatische programma’s ................... 24-26 Auto-gewicht - verwarmen/koken ................27 Panacrunch pan ......................28 Vragen en antwoorden ....................29 Verzorging van uw magnetronoven ................30 Technische specificaties ....................31 Hartelijk dank dat u voor een Panasonic magnetronoven heeft gekozen.
  • Page 71: Installatie En Aansluiting

    Installatie en aansluiting Uw magnetronoven controleren Aarding BELANGRIJK Pak uw magnetron uit, verwijder al het verpakkingsmateriaal en controleer de DIT APPARAAT DIENT VOOR UW magnetron op schade zoals deuken, PERSOONLIJKE VEILIGHEID JUIST beschadigde deurvergrendelingen of GEAARD TE WORDEN AANGESLOTEN barsten in de deur. Waarschuw uw Indien uw stopcontact niet is geaard, is het dealer onmiddellijk als u beschadigingen de persoonlijke verantwoordelijkheid van de...
  • Page 72: Belangrijke Veiligheidsinstructies

    Belangrijke veiligheidsinstructies WAARSCHUWING! wanneer ze goed zijn ingelicht zodat ze de oven op veilige wijze Belangrijke veiligheidsinstructies kunnen bedienen en zich bewust zijn van de gevaren van onjuist gebruik. De deurafdichtingen en de plaatsen hieromheen moeten worden Ontplof ngsgevaar bestaat indien schoongemaakt met een voedsel of dranken in een gesloten vochtige doek.
  • Page 73 Belangrijke veiligheidsinstructies Gebruik van uw magnetronoven de oven. Na gebruik van de COMBINATIE- en GRILL-functies Gebruik de oven uitsluitend voor wordt dit oppervlak zeer heet. Let erop het bereiden van voedsel. Deze dat u het verwarmingselement in de magnetronoven is speciaal ontworpen oven niet aanraakt.
  • Page 74 Belangrijke veiligheidsinstructies Draairing OPMERKING De draairing en de ovenbodem Als u het voedsel langer kookt moeten regelmatig worden gereinigd dan de aanbevolen kooktijden, om ongewenste geluiden en het kan het bederven, en in extreme ophopen van voedselresten te gevallen zelfs vlam vatten en de voorkomen.
  • Page 75 Belangrijke veiligheidsinstructies Vloeistoffen Keukengerei/folie Indien vloeistoffen, zoals soep, Verwarm nooit gesloten potjes of sauzen en dranken opgewarmd essen omdat deze kunnen worden in uw magnetronoven, kunnen exploderen. deze zonder te gaan borrelen heter worden dan het kookpunt. Gebruik geen metalen bakjes of Hierdoor kan de hete vloeistof schotels met metalen randen tijdens plotseling gaan overkoken.
  • Page 76: De Magnetron-Oven

    De magnetron-oven Deur-ontgrendelknop Stroomkabel Indrukken om de deur te openen. Stekker Indien u de deur tijdens het koken Identi catie plaat opent, wordt het kookproces tijdelijk (achterkant van oven) onderbroken, zonder dat de eerder Glazen draaiplateau ingevoerde instellingen verdwijnen. Draairing Het kookproces zal direct hervat Grill-elementen worden, zodra u de deur weer...
  • Page 77: Bedieningspanelen Nn-Gd452W/Nn-Gd462M

    Bedieningspanelen NN-GD452W/NN-GD462M * Utileesvenster Magnetronvermogen Grilltoets Turbo ontdooiprogramma’s Automatische kookprogramma’s Knop voor automatische kookprogramma’s voor groenten / vis Knop voor automatische kookprogramma’s voor rijst / pasta Auto-gewicht - verwarmen/koken Knop meer / minder Tijd-/gewichtselector Geheugentoets Timer toets Kloktoets Stop / wistoets Voor het koken: Met één druk op de toets wordt het...
  • Page 78: Stap Voor Stap Display

    Stap voor stap displa Stap voor stap displa Stap voor stap Steek de stekker “88:88” display in het stopcontact Druk op "FRANCAIS" In Frans Druk op "ITALIANO" In Italiaans Druk op "DEUTSCH" In Duits Druk op "NEDERLANDS" In Nederlands Druk op "ESPANOL"...
  • Page 79: Instellen Van De Klok

    Instellen van de klok Wanneer de magnetronoven voor het eerst wordt ingeschakeld, verschijnt “88:88” in het uitleesvenster. Druk één keer op de Voer de tijd in door de Tijd-/ Druk op de kloktoets. kloktoets. De dubbele punt gewichtschakelaar te draaien. De De dubbele punt houdt op gaat knipperen.
  • Page 80: Koken En Ontdooien Met De Magnetronoven

    Koken en ontdooien met de magnetronoven Het glazen draaiplateau dient tijdens het gebruik van de magnetronoven, altijd op de juiste positie geplaatst te zijn. Druk de toets voor Stel de bereidingstijd Druk de starttoets in. Het in met de Tijd-/ magnetronvermogen in Bepaal kookproces zal starten en gewichtschakelaar...
  • Page 81: Grillen

    Grillen Het glazen draaiplateau dient tijdens het gebruik van de magnetronoven, altijd op de juiste positie geplaatst te zijn. Druk op de Grilltoets om de Stel de bereidingstijd in met de Tijd-/ Druk de Starttoets in. De grillinstelling te kiezen. gewichtschakelaar (tot 90 minuten).
  • Page 82: Combinatiekoken

    Combinatiekoken Kies het gewenste vermogen Stel de bereidingstijd Druk de starttoets in. in met de Tijd-/ drukken hoog drukken Grill 1 1100 W ( Gemiddeld 600 Watts gewichtschakelaar (tot drukken drukken Grill 2 800 W (gemiddeld) Laag 440 Watts 90 minuten). drukken drukken Grill 3 600 W (laag)
  • Page 83: De Timer Gebruiken

    De timer gebruiken Koken met startvertraging Met de Timer toets kunt u instellen wanneer de oven het programma gaat starten. b.v. Druk op Timer Stel de vertragingstijd in Stel het gewenste Druk op de startknop. door aan de Tijd/Gewicht kookprogramma en de kooktijd knop te draaien (tot 9 uur).
  • Page 84: Voorbereiding In Meerdere Stappen

    Voorbereiding in meerdere stappen voorbereiding in 2 of 3 stappen Voorbeeld: Druk de toets Druk de toets Stel de Stel de Druk de starttoets voor magnetron- voor magnetron- bereidingstijd in bereidingstijd in in. Het kookproces vermogen in. vermogen in. met de met de zal starten en de tijd Bepaal het...
  • Page 85: Het Geheugen Gebruiken

    Het geheugen gebruiken Met deze functie kunt u de oven voorprogrammeren voor standaardopwarm (bijvoorbeeld het handmatig voorverwarmen van de Panacrunch-pan). U kunt de oven voorprogrammeren voor een speci ek vermogen en een speci eke tijd. Met deze oven kunt u slechts één taak voorprogrammeren.
  • Page 86: Turbo-Ontdooiing

    Turbo-ontdooiing Met deze functie kunt u bevroren voedsel, op basis van het gewicht, ontdooien. Selecteer het gewenste Stel het gewicht van het Druk de starttoets programma voor turbo-ontdooiing bevroren voedsel in met de Tijd-/ in. Vergeet niet om 1 Druk op Kleine stukjes gewichtschakelaar.
  • Page 87: Automatische Programma's

    Automatische programma’s Een verscheidenheid aan voedsel kan gekookt worden zonder de kooktijd, het gewicht of het vermogen in te voeren. e.g. Kies het gewenste Druk op de knop Automatische Start programma. Plus/min-regeling: Voorkeuren voor mate van doorkoken zijn per persoon verschillend. Na de Automatische programma’s een paar keer te hebben gebruikt, kunt u besluiten dat u uw voedsel liever meer of minder wil laten doorkoken.
  • Page 88 Automatische programma’s Aanbevolen Programma Accessoires Instructies gewicht 4. SOEP Voor het opwarmen van gekoelde en ongekoelde soep. Doe de soep in een bak die groot genoeg is. Het voedsel moet op koelkasttemperatuur van ongeveer +5 °C of op kamertemperatuur zijn. Dek af met plastic folie.
  • Page 89 Automatische programma’s Aanbevolen Programma Accessoires Instructies gewicht 8. DIEPGEV- Bevroren groenten bereiden. Doe de groenten in een bak die groot genoeg is. ROREN Besprenkel met 1-3 eetlepels water. Als GROENTEN u groenten kookt die veel water bevatten, zoals spinazie of tomaten, voegt u geen water toe.
  • Page 90: Auto-Gewicht - Verwarmen/Koken

    Auto-gewicht - verwarmen/koken Kies het gewenste Druk op de Bij het einde van de Druk op de programma en plaats Starttoets om voorverwarmingstijd Starttoets de Panacrunch Pan de Panacrunch weerklinkt een direct op het glazen Pan voor te pieptoon. Doe het draaiplateau.
  • Page 91: Panacrunch Pan

    Zet de pan altijd in het midden een conventionele oven. van het glazen draaiplateau en Uw Panasonic Panacrunch Pan functioneert zorg ervoor dat hij de wanden van op drie manieren: opwarmen van de pan de oven niet raakt. Bij aanraking...
  • Page 92: Vragen En Antwoorden

    Vragen en antwoorden Waarom kan de oven niet Ik kan geen Automatisch programma instellen en op het beeldscherm verschijnt worden ingeschakeld? ‘WARM’. Waarom? Controleer het volgende wanneer de oven niet kan worden ingeschakeld: Als de oven net gebruikt is en te heet is voor gebruik bij een Automatisch Is de stekker goed aangesloten? Neem de stekker uit het...
  • Page 93: Verzorging Van Uw Magnetronoven

    Verzorging van uw magnetronoven Zet de oven uit alvorens hem te Van tijd tot tijd moet het glazen reinigen. draaiplateau verwijderd worden om het schoon te maken. Reinig het draaiplateau in warm water Houd de deurafdichtingen en de met een afwasmiddel of in een plaatsen hieromheen schoon.
  • Page 94: Technische Specificaties

    Informatie over het artikel 9(2) artikel 9(2) weggooien van elektrische Panasonic testcentrum Panasonic testcentrum en elektronische Panasonic Marketing Europe GmbH Panasonic Marketing Europe GmbH apparatuur (particulieren) Winsbergring 15,22525 Hamburg, F.R. Winsbergring 15,22525 Hamburg, F.R. Duitsland. Dit symbool betekent in Europa Duitsland.
  • Page 95 INSTRUCTIONS DE SÛRETÉ IMPORTANTES. Avant d’utiliser le four à micro-ondes, lisez attentivement les recommandations d’utilisation et conservez- les soigneusement. Cet appareil peut être utilisé par les enfants à partir de 8 ans et par les personnes présentant des handicaps moteurs, sensoriels et mentaux ou ayant un manque d’expérience ou de connaissances lorsqu’elles sont supervisées ou instruites par une personne responsable de leur...
  • Page 96 éri ez si l’appareil ne présente pas de défaut au niveau des joints d’étanchéité. Si c’est le cas, ne l’utilisez plus avant que ceux-ci aient été réparés par un technicien agréé par le fabricant. Ne tentez jamais de modi er, d’ajuster ou de réparer la porte, le boîtier du panneau de commandes, les commutateurs de verrouillage de sécurité...
  • Page 97 Utilisation sur un plan de travail : Laissez un espace de 15 cm en haut du four, de 10 cm à l’arrière, de 5 cm d’un côté du four et d’au moins 40 cm de l’autre côté. Si vous réchauffez des aliments dans des barquettes en plastique ou en papier, surveillez régulièrement la cuisson, car ces matériaux ont tendance à...
  • Page 98 proposer à l’enfant a n d’éviter qu’il se brûle. Ne cherchez pas à cuire des œufs coques ou des œufs durs dans votre four à micro- ondes. Ils risquent d’exploser sous l’effet de la pression, que ce soit pendant ou même après la cuisson.
  • Page 99 four a n d’éviter qu’il dégage de la fumée en cours d’utilisation. Il est indispensable de maintenir propre l’intérieur du four. Le non respect de cette consigne peut entraîner une détérioration notable des revêtements susceptible de réduire la durée de vie de votre appareil et pourrait même présenter un danger.
  • Page 100 Les parois extérieures du four, les ouvertures d’aération et la porte du four s’échauffent lorsque vous utilisez les modes COMBINE et GRIL.Prenez garde de ne pas vous brûler en ouvrant et en refermant la porte ou en manipulant les aliments et les accessoires.
  • Page 101 Installation et raccordement ..................8 Emplacement du four .....................8 Consignes de sécurité importantes ............... 9-12 Schéma descriptif ......................13 Le panneau de commande NN-GD452W/NN-GD462M * .........14 Mode d’emploi défilant ....................15 Affichage de l’heure .....................16 Verrouillage de sécurité enfant ..................16 Cuisson et décongélation en micro-ondes ..............17 Le mode gril ........................18...
  • Page 102: Installation Et Raccordement

    Installation et raccordement ri e l’ tat du four micro-ondes Instructions our la mise la terre Important Déballez le four et débarrassez-le de l’ensemble du matériel d’emballage. POUR VOTRE SÉCURITÉ, IL EST E aminez soigneusement l’appareil a n de TRES IMPORTANT QUE CET APPAREIL détecter toute déformation, défectuosité...
  • Page 103: Consignes De Sécurité Importantes

    Consignes de sécurité importantes Attention! Si le cordon d’alimentation est endommagé, il doit impérativement Consignes de sécurité importantes être remplacé par le fabricant ou un technicien formé par le fabricant. Nettoyez les joints d’étanchéité de la porte à l’aide d’un linge humide. Il ne faut laisser les enfants utiliser le Véri ez si l’appareil ne présente four qu’à...
  • Page 104 Consignes de sécurité importantes Utilisation du four brûlante. Prenez garde de ne pas toucher cette résistance. Utilisez le four exclusivement à des ns culinaires. Ce four est spécialement conçu pour chauffer Attention! Surfaces brûlantes ou cuire des aliments. Ne l’utilisez Lors de l’utilisation de ces modes, les pas pour réchauffer des produits accessoires du four seront également...
  • Page 105 Consignes de sécurité importantes Anneau roulettes Remarque: Nettoyez régulièrement l’anneau à Il vaut mieux éviter la surcuisson. Les roulettes et la sole du four a n de aliments n’attachent pas mais réduire les nuisances dues aux bruits peuvent brûler, se dessécher et même ainsi que l’accumulation de particules dans des cas extrêmes, prendre feu et de nourriture.
  • Page 106 Consignes de sécurité importantes Liquides Ustensiles/Papier aluminium Si on chauffe un liquide épais qui Ne réchauffez pas des canettes n’a pas été remué, il risque de ou des bouteilles fermées, car celles- déborder et d’occasionner des ci pourraient exploser. projections brûlantes pendant et Evitez d’utiliser des récipients en après le réchauffage.
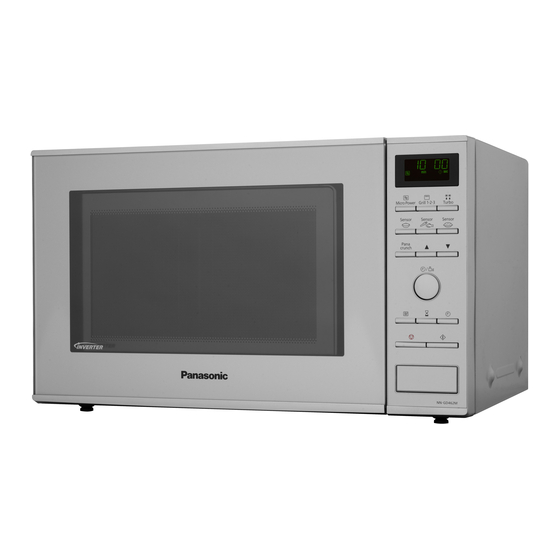
  • Page 107: Schéma Descriptif

    Schéma descriptif Touche d’ouverture de la porte: Panneau de commandes Presser pour ouvrir le four. Si on ouvre Câble d’alimentation électrique la porte du four pendant qu’il est en Prise électrique marche, il s’arrête de fonctionner tiquette d’identi cation sans toutefois que les instructions de Plateau tournant en verre programmation ne soient annulées.
  • Page 108: Le Panneau De Commande Nn-Gd452W/Nn-Gd462M

    Le panneau de commande NN-GD452W/ NN-GD462M * Fenêtre d’af chage Touche de puissance micro-ondes Touche du gril Touche des décongélations Turbo selon le poids Touche des réchauffages Auto selon le poids Bouton de cuisson automatique des légumes / du poisson Bouton de cuisson automatique du riz / des pâtes...
  • Page 109: Mode D'emploi Défilant

    Mode d’emploi défilant Mode d’emploi dé lant: Mode d’emploi dé lant Branchement “88:88” Appuyez sur "FRANCAIS" En français la touche Appuyez sur "ITALIANO" En Italien la touche Appuyez sur "DEUTSCH" En allemand la touche Appuyez sur "NEDERLANDS" En néerlandais la touche Appuyez sur "ESPANOL"...
  • Page 110: Affichage De L'heure

    Affichage de l’heure Lorsque vous branchez le four, 88:88 appara t dans le fenêtre d’af chage. Pressez une fois la touche Af chez l’heure en tournant le Pressez la touche Horloge. sélecteur Durée/Poids. L’heure Horloge. Le deux-points Le deux-points apparaît sur l’af chage tandis que le (:) cesse de clignoter et (:) commence à...
  • Page 111: Cuisson Et Décongélation En Micro-Ondes

    Cuisson et décongélation en micro-ondes Le plateau tournant doit être en place avant toute utilisation du four. Choisir la durée de cuisson à Pressez la touche de Pressez Marche. La puissance micro-ondes l’aide du sélecteur de durée cuisson démarre et le jusqu’à...
  • Page 112: Le Mode Gril

    Le mode gril Le plateau tournant doit être en place avant toute utilisation du four. Pressez la touche du gril a n de Réglez la durée de Pressez Marche. La choisir la puissance du gril. cuisson à l’aide du durée commence à sélecteur Durée/Poids décroître dans 1 pression...
  • Page 113: Le Mode Combiné

    Le mode combiné Choisissez la puissance souhaitée Réglez la durée de Pressez Marche. cuisson à l’aide du Le décompte de la 1 Pression Grill 1 1100 W (Fort) 1 Pressions Moyen 600 W sélecteur Durée/Poids durée s’af che dans 2 Pressions Grill 2 800 W (Moyen) 2 Pressions Faible 440 W (90 minutes maximum).
  • Page 114: Fonction Minuteur

    Fonction Minuteur La touche de Minuteur vous permet d’utiliser la fonction Mise en marche différée. exemple: Pressez la touche A l’aide du sélecteur de durée Programmer la cuisson Presser Minuteu choisir la durée du retardement désirée et sa durée. Marche. (jusqu’á...
  • Page 115: Cuisson En Plusieurs Étapes

    Cuisson en plusieurs étapes Cuisson en 2 ou 3 étapes Exemple: Presser une Presser une Choisir la durée Choisir la durée Presser Marche. La touche de touche de à l’aide du à l’aide du cuisson commence puissance puissance sélecteur de sélecteur de et le décompte pour af cher...
  • Page 116: Touche Mémoire

    Touche mémoire Cette fonction vous permet de mémoriser dans votre four un mode de cuisson et sa durée dont vous avez un usage fréquent. (par exemple, le préchauffage du plat Panacrunch en mode manuel). Vous ne pouvez mettre en mémoire qu’un seul programme. Pour mettre une cuisson en mémoire.
  • Page 117: La Décongélation Turbo Selon Le Poids

    La décongélation Turbo selon le poids Cette fonction vous permet de décongeler vos aliments surgelés en af chant simplement leur poids. Choisir le programme désiré en Af chez le poids de l’aliment à Pressez la touche pressant décongeler à l’aide du sélecteur Marche.
  • Page 118: Programmes De Cuisson Automatique

    Programmes de cuisson automatique Vous pouvez faire cuire différents aliments sans avoir à saisir la durée de cuisson, le poids ou le niveau de puissance. Par ex. Sélectionnez le programme Appuyez sur la touche de cuisson automatique Marche. souhaité. Commande plus/moins: Chaque utilisateur peut avoir des préférences en matière de degré...
  • Page 119 Programmes de cuisson automatique Poids Catégorie Accessories Utilisation recommandé 4. SOUPE Pour réchauffer la soupe réfrigérée et à température ambiante. Placer la soupe dans un plat/récipient de taille appropriée. Les aliments doivent être à la température du réfrigérateur, environ +5 °C, ou à température ambiante.
  • Page 120 Programmes de cuisson automatique Poids Catégorie Accessorie Utilisation recommandé 8. LEGUMES Cuisson des légumes surgelés. Placer les légumes dans un plat/récipient de taille SURGELE appropriée. Arroser avec 1-3 cuil. à soupe d’eau. Pour les légumes contenant beaucoup d’eau, comme les épinards ou les tomates, ne pas ajouter d’eau.
  • Page 121: Les Cuissons/Réchauffages En Panacrunch Selon Le Poids

    Les cuissons/réchauffages en Panacrunch selon le poids Sélectionnez le Pressez sur Une fois le préchauffage Pressez sur la programme désiré la touche terminé, le bip sonore touche Marche. et placez le plat Marche pour retentit. Posez les Panacrunch dans le préchauffer le plat aliments sur le plat, four, directement sur le...
  • Page 122: Le Plat Panacrunch

    Le Plat Panacrunch A quoi sert un plat Panacrunch de Remarques: Panasonic? 1. Ne préchauffez pas le plat Panacrunch pendant plus de 5 Certains aliments tels que les pizzas, les minutes. (vior page 22 FR) tartes ou les quiches ne se réchauffent pas aussi bien dans un four micro-ondes que 2.
  • Page 123: Questions Et Réponses

    Questions et réponses Pourquoi mon four ne fonctionne-t-il pas? est trop chaud pour fonctionner avec un programme de cuisson Si le four ne fonctionne pas, véri ez automatique, le message ‘CHAUD’ les points suivants: s’af chera à l’écran. Quand ce Le four est-il correctement branché...
  • Page 124: Entretien De L'appareil

    Entretien de l’appareil Débranchez l’appareil avant de le Nettoyez régulièrement l’anneau à nettoyer. roulettes et la sole du four pour éviter la production de bruit. A cette n, il Veillez à ce que l’intérieur du four suf t de laver la sole du four avec et les joints de la porte soient toujours de l’eau chaude savonneuse, puis propres.
  • Page 125: Fiche Technique

    électriques et directive 2004/108/CE directive 2004/108/CE électroniques (appareils Panasonic Testing Centre Panasonic Testing Centre electroménagers) Panasonic Marketing Europe GmbH, Panasonic Marketing Europe GmbH, Winsbergring 15, 22525 Hambourg, Winsbergring 15, 22525 Hambourg, Lorsque ce symbole gure sur les produits Allemagne Allemagne et/ou les documents qui les accompagnent, Fabriqué...
  • Page 126 ISTRUZIONI IMPORTANTI PER LA SICUREZZA. Leggere attentamente queste istruzioni e conservarle per consultazioni future. Questo apparecchio può essere utilizzato da bambini di età superiore agli 8 anni e da persone con capacità siche sensoriali o mentali ridotte oppure inesperte solo nel caso in cui ricevano supervisione o istruzioni da parte di una persona responsabile della loro sicurezza per quanto riguarda l’uso...
  • Page 127 Panasonic. AVVERTENZE! Le guarnizioni del portello e le zone circostanti devono essere pulite con un panno umido. Nel caso in cui esse vengano danneggiate non bisogna mettere in funzione il forno no a quando un tecnico autorizzato non le abbia riparate.
  • Page 128 supervisione di un adulto! Fatelo SOLO nel caso in cui al bambino siano state date adeguate istruzioni e che quindi sia in grado di usare il forno in modo sicuro e di capire il pericolo che può derivare da un uso improprio.
  • Page 129 Quando si riscaldano dei liquidi (come ad es. zuppe salse o bevande nel forno a microonde può capitare che arrivino al punto di ebollizione senza che in super cie si evidenzi la formazione di bolle: questa situazione può manifestarsi anche all’improvviso con la formazione di grumi o la fuoriuscita del liquido dal recipiente.
  • Page 130 versati che aderiscono alle pareti del forno passando un panno umido sulle giunture della porta e sulle super ci vicine. possibile utilizzare un detergente neutro nel caso in cui le giunture fossero molto sporche. Non è raccomandato l’uso di detergenti concentrati o abrasivi.
  • Page 131 durante l’utilizzo della funzione Grill e combinazione. Tenere i bambini lontano dal forno. Il forno è progettato esclusivamente per l’uso su ripiano e non come apparecchio da incasso o all’interno di una credenza. Non utilizzare pulitori a vapore. Non utilizzare detergenti abrasivi o raschietti di metallo appuntiti per pulire il vetro del forno in quanto possono graf are la super cie e di conseguenza danneggiare il vetro.
  • Page 132 Scongelamento automatico in base al peso ..............23 Programmi con sensore automatico ..............24-26 Programmi Panacrunch ....................27 Istruzioni per l’uso del Piatto Panacrunch ..............28 Domande e risposte ......................29 Cura del forno a microonde ..................30 Caratteristiche tecniche ....................31 Grazie per aver acquistato un Forno a microonde Panasonic.
  • Page 133: Installazione Ed Allacciamento Del Forno Alla Rete Elettrica

    Installazione ed allacciamento del forno alla rete elettrica Esaminate il vostro forno Se una presa di corrente non ha la messa a terra, è responsabilità e obbligo Togliere il forno dall’imballaggio, rimuovendo dell’acquirente sostituirla con una che ne sia ogni parte dell’imballo, ed esaminarlo per fornita.
  • Page 134: Informazioni Importanti

    I bambini devono essere sorvegliati dell’assistenza appositamente istruito per assicurarsi che non giochino con dal produttore. l’apparecchio. Se viene danneggiato il cavo dell’ apparecchio, deve essere sostituito da un cavo speciale fornito dal fabbricante e installato da un centro di assistenza autorizzato Panasonic.
  • Page 135 Se si dovessero sviluppare fumo o amme all’interno della cavità Non adoperare un vassoio di vetro del forno, premere il pulsante di diverso da quello originale Panasonic, EST / ANNU AMENT o che è stato studiato appositamente ruotare la MAN P A nella posizione per questo forno.
  • Page 136 Informazioni importanti Anello rotante Nota ’anello rotante e la parte inferiore del Se i tempi di cottura consigliati dovessero forno devono essere puliti risultare eccessivi, il cibo si rovinerà e, in frequentemente per evitare il prodursi casi estremi, potrebbe addirittura prendere di un’eccessiva rumorosità...
  • Page 137 Informazioni importanti Liquidi Utensili/pellicole Quando si riscaldano dei liquidi Non riscaldare lattine o bottiglie chiuse (come ad es. zuppe, salse o bevande) perché potrebbero esplodere nel forno a microonde, può capitare che arrivino al punto di ebollizione Non utilizzare contenitori in metallo senza che in super cie si evidenzi la o stoviglie con inserti in metallo (es.
  • Page 138: Il Vostro Forno

    Il vostro forno Pulsante di apertura della porta Prese esterne di ventilazione del Per aprire la porta, premere il forno pulsante. ’apertura della porta Pannello di controllo durante la cottura provoca Cavo di alimentazione un’interruzione momentanea Spina della cottura stessa, ma non la Etichetta di identi cazione cancellazione delle impostazioni Vassoio di vetro...
  • Page 139: Pannelli Di Controllo Nn-Gd452W/Nn-Gd462M

    Pannelli di controllo NN-GD452W/NN-GD462M * Finestrella del display Livelli di potenza microonde Pulsante del grill Pulsante di scongelamento automatico in base al peso Pulsante programmi di riscaldamento automatico con sensore Pulsante programmi di cottura con sensore automatico per verdura / pesce...
  • Page 140: Visualizzazione Della Lingua

    Visualizzazione della lingua Indicazione in lingua Indicazione in lingua Collegare “88:88” Premere In Francese "FRANCAIS" Premere "ITALIANO" In Italiano Premere "DEUTSCH" In Tedesco Premere In Olandese "NEDERLANDS" Premere "ESPANOL" In Spanish Premere "POLSKI" In Polish Premere "CESKY" In Czek Premere "ENGLISH"...
  • Page 141: Impostazione Dell'orologio

    Impostazione dell’orologio Quando si collega per la prima volta il forno alla presa, sul display viene visualizzata la scritta “88:88”. Premere una volta il Inserire l’ora mediante la Premere il pulsante pulsante dell’orologio. manopola Ora/Peso. ’ora viene dell’orologio. I due punti I due punti cominciano a visualizzata nel display e i due punti smettono di lampeggiare e...
  • Page 142: Cottura E Scongelamento A Microonde

    Cottura e scongelamento a microonde Il vassoio di vetro deve essere sempre collocato nel forno durante l’utilizzo. Premere il pulsante Selezionare il livello di potenza Premere il pulsante dei livelli di potenza. richiesto per il forno a microonde. avvio. Viene avviato il Selezionare il livello di Il forno può...
  • Page 143: Cottura Con Il Grill

    Cottura con il grill Il vassoio di vetro deve essere sempre collocato nel forno durante l’utilizzo. Premere il pulsante del grill, per Impostare il tempo Premere il pulsante selezionare i seguenti livelli di di cottura usando la avvio. Sul display viene potenza: manopola Ora/Peso ( no visualizzato il tempo di...
  • Page 144: Cottura Combinata

    Cottura combinata Impostare il livello di potenza desiderato Impostare il tempo Premere il pulsante avvio. di cottura usando la 1 Pressione Grill 1 1100 W (alta) 1 Pressioni Media 600 W manopola Ora/Peso 2 Pressioni Grill 2 800 W (media) 2 Pressioni Bassa 440 W ( no a 90 minuti).
  • Page 145: Utilizzo Del Timer

    Utilizzo del timer una cottura con avvio ritardato Utilizzando il Timer, è possibile programmare una cottura con avvio ritardato. Premere Timer Impostare l’intervallo di avvio Impostare il programma e il Premere il ritardato ruotando la manopola tempo di cottura richiesti. pulsante di dell’ora/del peso (per un avvio.
  • Page 146: Cottura Con Programmazione Multifase

    Cottura con programmazione multifase Cottura a 2 o 3 fasi Esempio: Premere il Premere il Selezionare Selezionare Premere il pulsante pulsante dei pulsante dei il livello di il livello di avvio. Viene avviato il livelli di potenza. livelli di potenza. programma di cottura potenza richiesto potenza richiesto...
  • Page 147: Utilizzo Della Funzione Di Memoria

    Utilizzo della funzione di memoria Questa funzionalità consente di pre-programmare il forno per un attività di riscaldamento o cottura regolari (ad esempio il preriscaldamento manuale della teglia Panacrunch). È possibile pre-programmare il forno ad uno speci co livello di potenza e tempo conveniente per voi. Con questo forno è...
  • Page 148: Scongelamento Automatico In Base Al Peso

    Scongelamento automatico in base al peso Con questa funzione è possibile scongelare i cibi surgelati in base al loro peso. Selezionare il programma di Impostare il peso del cibo Premere il pulsante scongelamento automatico congelato usando la manopola avvio. Ricordarsi di desiderato.
  • Page 149: Programmi Con Sensore Automatico

    Programmi con sensore automatico È possibile cucinare una gamma di pietanze senza dover impostare il tempo di cottura, il peso o il livello di potenza. Ad es. Impostare il programma Premere il pulsante Avvio. con sensore automatico desiderato. Pulsante più/meno Ognuno ha le proprie preferenze riguardo il grado di cottura delle pietanze.
  • Page 150 Programmi con sensore automatico Peso min./ Programma Accessori Suggerimenti max. Riscaldamento di zuppe refrigerate e a temperatura ambiente. Posizionare la zuppa 4. ZUPPA in un contenitore di dimensioni adeguate. Gli alimenti devono essere a una temperatura frigorifero di circa +5 °C o a temperatura ambiente.
  • Page 151 Programmi con sensore automatico Peso min./ Programma Accessori Suggerimenti max. 8. VERDURE Cottura di verdure congelate. Mettere le verdure in un contenitore di dimensioni SURGELATE adeguate. Aggiungere 1-3 cucchiai di acqua. Se si cucinano verdure con un alto contenuto d’acqua, come spinaci o pomodori, non aggiungere acqua.
  • Page 152: Programmi Panacrunch

    Programmi Panacrunch Selezionare Premere il tasto Quando la fase di Premere il tasto il programma di avvio per preriscaldamento è di Avvio. desiderato e porre preriscaldare il ultimata viene emesso il piatto grigliante piatto grigliante. il segnale acustico. direttamente sul Porre il cibo nel piatto vassoio di vetro nel grigliante, impostare...
  • Page 153: Istruzioni Per L'uso Del Piatto Panacrunch

    (vedere pagina 22 IT). cotti in un forno tradizionale. Porre sempre il Piatto Panacrunch Il Piatto Panacrunch Panasonic lavora in al centro del vassoio di vetro e 3 modi diversi: riscaldando il piatto (che assicurarsi che non tocchi le pareti assorbe le microonde), riscaldando il interne del forno in quanto ciò...
  • Page 154: Domande E Risposte

    Domande e risposte Perché il forno non si accende? visualizzato il messaggio “CA DO”. Quando “CA DO” sparisce, si possono Quando il forno non si accende, usare i programmi con sensore veri care i punti seguenti: automatico. Se si è di fretta, cuocere il Il forno è...
  • Page 155: Cura Del Forno A Microonde

    Panasonic. Quando si pulisce il pannello di controllo lasciare la porta aperta Non utilizzare pulitori a vapore.
  • Page 156: Caratteristiche Tecniche

    (per i nuclei familiari privati) articolo 9(2) articolo 9(2) Panasonic Testing Centre Panasonic Testing Centre Panasonic Marketing Europe GmbH Questo simbolo sui prodotti e/o sulla Panasonic Marketing Europe GmbH Winsbergring 15, 22525 Amburgo, documentazione di accompagnamento Winsbergring 15, 22525 Amburgo,...
  • Page 157 Instrucciones sobre seguridad importantes. Léalas detenidamente y guárdelas para futura referencia. Este aparato puede ser utilizado por niños de 8 años o más, personas con capacidades físicas, sensoriales o mentales reducidas, o sin experiencia o conocimientos, sólo si hay una persona responsable de su seguridad que les supervise o les haya dado instrucciones acerca del uso seguro del aparato y sobre los peligros que pueden...
  • Page 158 de cerrado de la puerta deben limpiarse con un paño húmedo. El aparato debe inspeccionarse para ver si tiene daños en los cierres de la puerta y en las áreas de cierre de la misma y si estas áreas están dañadas, no debe hacer funcionar el aparato hasta que haya sido reparado por un técnico formado por el fabricante.
  • Page 159 del horno sin supervisión, solamente lo podrán usar cuando se les haya dado las instrucciones adecuadas para que sean capaces de usar el horno de forma segura y una vez entendidos los riesgos que pueden derivarse de un uso inapropiado. Para uso en encimeras: Hay que dejar 15 cm de espacio libre por encima del horno, 10 cm por detrás y...
  • Page 160 sobrecalentamiento del líquido por encima de su punto de ebullición sin que se aprecie borboteo. Esto puede resultar en una repentina ebullición del líquido. El contenido de los biberones y potitos tiene que removerse o agitarse. La temperatura tiene que veri carse antes de su consumo, para evitar quemarse.
  • Page 161 Cuando use el modo GRILL o COMBINADO, algunos alimentos pueden salpicar de grasa inevitablemente las paredes del horno. Si el horno no se limpia regularmente, puede comenzar a producir humo durante su utilización. Debe mantener el horno limpio, puesto que, de no hacerlo, las super cies podrian deteriorarse, lo cual podría afectar la vida del electrodoméstico y probablemente resultaría en una situación de riesgo.
  • Page 162 No debe utilizarse una limpiadora a vapor para limpiar el aparato. No utilice productos de limpieza agresivos ni abrasivos o rascadores metálicos para limpiar la puerta de cristal del horno, ya que puede rayar la super cie y ésto puede provocar la rotura del cristal.
  • Page 163 Instalación y conexión ....................8 Colocación del horno .....................8 Instrucciones de seguridad importantes ............... 9-12 Esquema descriptivo ....................13 Cuadros de mandos NN-GD452W/NN-GD462M * ............14 Información en pantalla ....................15 Ajuste del reloj ......................16 Bloqueo de seguridad para niños ................16 Cocción y descongelación ..................17 Grill ..........................18...
  • Page 164: Instalación Y Conexión

    Instalación y conexión Examine su horno microondas Si su salida de CA no tiene toma en tierra, es responsabilidad personal del Desembale el horno, saque todo el material cliente reemplazarla por un enchufe de del embalaje y examine que el horno no pared apropiado conectado a tierra.
  • Page 165: Instrucciones De Seguridad Importantes

    Instrucciones de seguridad importantes ¡AVISO! No permita a los niños el uso del horno sin supervisión, solamente lo Instrucciones de seguridad importantes podrán usar cuando se les haya dado las instrucciones adecuadas para que Los cierres de la puerta y las áreas sean capaces de usar el horno de de cerrado de la puerta deben forma segura y una vez entendidos los...
  • Page 166 Instrucciones de seguridad importantes Utilización de su horno de no tocar el elemento calentador situado dentro del horno. No use el horno para ninguna otra razón que no sea la preparación de Atención Super cies calientes comida. Este horno está diseñado Después de cocinar mediante estas especí...
  • Page 167 Instrucciones de seguridad importantes Aro Giratorio Nota El aro giratorio y la parte inferior del Si se sobrepasan los tiempos de horno deben limpiarse cocción recomendados, la comida frecuentemente. puede estropearse y en circunstancias El aro giratorio debe usarse siempre extremas podría incendiarse y dañar, para cocinar, junto con la bandeja de posiblemente, el interior del horno.
  • Page 168 Instrucciones de seguridad importantes Líquidos Utensilios/papel de aluminio Cuando se calienten líquidos, como No calentar latas ni botellas cerradas por ejemplo sopas, salsas y bebidas porque pueden explotar. en su horno microondas, puede darse un sobrecalentamiento del líquido por Los recipientes metálicos o los platos encima de su punto de ebullición sin con ribetes metálicos no deben usarse que se aprecie borboteo.
  • Page 169: Esquema Descriptivo

    Esquema descriptivo Botón de apertura de la puerta Panel de control Púlselo para abrir la puerta. Cuando Cable de alimentación abra la puerta del horno durante Conexión la cocción, éste se detendrá Tar eta de identi cación temporalmente sin borrar el ajuste Bandeja de cristal que se haya hecho con anterioridad.
  • Page 170: Cuadros De Mandos Nn-Gd452W/Nn-Gd462M

    Cuadros de mandos NN-GD452W/NN-GD462M * Pantalla de isuali ción Ni eles de potencia del microondas Botón del grill Programas de descongelación turbo Programas de recalentado automáticos Botón de programas de cocción de erduras pescado con sensor automático Botón de programas de cocción de arro pasta con sensor automático...
  • Page 171: Información En Pantalla

    Información en pantalla Información en pantalla Información en pantalla Conexión “88:88” Pulse "FRANCAIS" En Francés Pulse "ITALIANO" En Italiano Pulse "DEUTSCH" En Alemán Pulse En Holandés "NEDERLANDS" Pulse "ESPANOL" En Español Pulse "POLSKI" En Polaco Pulse "CESKY" En Checo Pulse "ENGLISH"...
  • Page 172: Ajuste Del Reloj

    Ajuste del reloj Cuando el horno se conecta por primera e , aparece 88 88 en la pantalla de isuali ación. Pulse el botón del reloj Ponga la hora girando el Pulse el botón del reloj. Los dos puntos paran de una e .
  • Page 173: Cocción Y Descongelación

    Cocción y descongelación La bandeja de cristal debe estar siempre colocada cuando se utili a el horno. Pulse el botón de potencia Ajustar el tiempo de cocción Pulse el botón de inicio. usando el Dial Tiempo Peso. El del microondas. Seleccione El programa de cocción se horno puede programarse para 90 el nivel de potencia que...
  • Page 174: Grill

    Grill La bandeja de cristal debe estar siempre colocada cuando se utili a el horno. Ajustar el tiempo de Pulse el botón inicio. El Pulse el botón del grill. cocción usando el Dial tiempo de la pantalla Seleccionar el nivel pulsando una de Tiempo/Peso comenzará...
  • Page 175: Cocción En El Modo Combinado

    Cocción en el modo combinado Ajustar el tiempo de Seleccione el ni el de potencia deseado Pulse el botón inicio. cocción usando el Dial 1 pulsación Grill 1 1100 W (alto) 1 pulsaciones Media 600 W Tiempo/Peso (hasta 90 2 pulsaciones Grill 2 800 W (media) 2 pulsaciones Bajo 440 W min.).
  • Page 176: Uso Del Temporizador

    Uso del temporizador Retraso al empezar a cocinar Puede programar la cocción con retraso de inicio utili ando el botón de tempori ador. Ejemplo Pulse el Ajuste el tiempo de retraso Ajuste el programa de Pulse el tempori ador girando el dial Tiempo Peso cocción y el tiempo de botón de (hasta 9 horas).
  • Page 177: Cocción Multifase

    Cocción multifase 2 o 3 fases de cocción Ejemplo Pulse el botón Pulse el botón Pulse el botón Ajuste el tiempo Ajuste el tiempo de potencia del de potencia del de cocción de cocción inicio. El programa microondas. microondas. usando el Dial usando el Dial de cocción se Seleccione el...
  • Page 178: Uso De La Función De Memoria

    Uso de la función de memoria Esta función le permite programar el horno para operaciones simples de cocción o recalentamiento (por ejemplo, el precalentamiento manual del recipiente Panacrunch). Puede programar el horno al tiempo y ni el de potencia especí cos que desee. Con este horno sólo puede programar una operación de memoria.
  • Page 179: Descongelación Automática Por Peso

    Descongelación automática por peso Con esta prestación podrá descongelar alimentos congelados según su peso. Pulse el botón de Seleccione el programa de Fije el peso del alimento descongelación que desee congelado usando el dial inicio. No olvide Tiempo Peso. Girando lentamente remover o dar 1 pulsación para pie as pequeñas 2 pulsaciones para pie as grandes...
  • Page 180: Programas De Sensor Automático

    Programas de sensor automático Pueden cocinarse una serie de alimentos sin necesidad de introducir el tiempo de cocción, el peso o el ni el de potencia. Seleccione el programa de Pulse el botón de sensor automático que desee. inicio. Control Más/Menos Las preferencias del grado de cocción varían según cada persona.
  • Page 181 Programas de sensor automático Peso (Mín. Programa Accesorios Alimentos Máx.) 4. SOPA Para recalentar sopa refrigerada y a temperatura ambiente. Coloque la sopa en un recipiente de tamaño adecuado. Los alimentos deben estar a temperatura del refrigerador, aprox. +5 ºC, o a temperatura ambiente.
  • Page 182 Programas de sensor automático Peso (Mín. Programa Accesorios Alimentos Máx.) Para cocinar erdura congelada. Coloque la 8. VERDURA verdura en un recipiente de tamaño adecuado. CONGELADA Rocíela con 1-3 cucharadas soperas de agua. Si cocina verduras con un elevado contenido de agua, tales como espinacas o tomates, no añada agua.
  • Page 183: Recalentado/Cocción Automática Por Peso

    Recalentado/cocción automática por peso Seleccionar el Pulsar el botón de Tras el precalentamiento Pulsar el botón programa deseado inicio para suenan pitidos. Colocar de inicio. y colocar la bandeja precalentar el alimento en la bandeja, para Panacrunch en la bandeja para jar el peso.
  • Page 184: Bandeja Panacrunch

    Bandeja Panacrunch El “concepto” Notas Algunos alimentos cocinados con 1. No precalentar la bandeja más de microondas pueden quedar poco crujientes. 8 minutos. Es posible memorizar el Su accesorio Panacrunch dorará y hará precalentamiento del recipiente con crujientes las pizzas, quiches, tartas, la función de memoria (consulte la productos de bollería, igual que lo haría página 22 ES).
  • Page 185: Preguntas Y Respuestas

    Libro de cocina El horno no acepta mi programa. de Panasonic. Por qué? El horno deja de funcionar en El horno está diseñado para rechazar microondas y en la pantalla aparece “H97”...
  • Page 186: Cuidado De Su Horno

    Cuidado de su Horno Desconecte el horno antes de Deben limpiarse regularmente el aro limpiarlo. giratorio y la base interior del horno para evitar un ruido excesivo. Mantenga limpios el interior del horno, Simplemente, limpie la super cie cierres y áreas de cierre de la puerta. inferior del horno con un detergente Si se le adhieren restos de alimentos suave en agua caliente, y después...
  • Page 187: Especificaciones Técnicas

    Según la directiva 2004/108/CE, electrónicos usados artículo 9(2) artículo 9(2) (particulares) Centro de Ensayos de Panasonic Centro de Ensayos de Panasonic La aparición de este símbolo en un Panasonic Marketing Europe GmbH Panasonic Marketing Europe GmbH producto y/o en la documentación adjunta...
  • Page 194 ............8 ......................8 ..............9-12 .......................13 ............1 ........................1 ................1 ..............1 ................17 ......................18 .....................19 ......................20 ..................21 ..................22 ..................23 ............... 2 -2 ....................27 ......................28 ..................29 ................30 ......................31...
  • Page 195 15 cm 5 cm 10 cm...
  • Page 197 so i...
  • Page 198 li i s o o o s ko...
  • Page 200 ko k ik o l...
  • Page 201 Po io ik o lo o o o isk i isk s o k so isk s...
  • Page 202 88 88 "FRANCAIS" W języku francuskim "ITALIANO" W języku włoskim "DEUTSCH" W języku niemieckim "NEDERLANDS" W języku holenderskim "ESPANOL" W języku hiszpańskim W języku polskim "POLSKI" W języku czeskim "CESKY" "ENGLISH" W języku angielskim...
  • Page 203 o si i si 88 88 1 00 2 00. k o i isk s k o i isk s o k so...
  • Page 204 ki s kl o o o s oi s o o ik o lo i 1000 1000 Watts 270 Watts 00 Watts 0 Watts 300 Watts 100 Watts 1000...
  • Page 205 o o o isk o sta t. a o io 1 1100 W 2 800 W 00 W a ta a a t t a t a a. a a. t a a W t a a s a a a a s - st t s .
  • Page 206 o io sta t. s o o 00 W 1 1100 W o 90 2 800 W 300 W 00 W 100 W 1000 W 270 W a sta a st . W a a t s s a a a a 200 g a sta a a a s...
  • Page 207 so i o li s o o a Wa a ta a 1000 W 10 300 W 20 as t a a 1 ta . ta t so i s o s as Wa a ta a 1000 W 1000 W 2 t a t as a a ta s...
  • Page 208 o io o io ik o l ik o l t a a i o o 1000 ik o l ik o l 1000 i o o illo ik o l o io illo a a t sta t. a a a ta t a a a a a at...
  • Page 209 o li i k si o li o li si i lo a a s a a sa t 1- ta a a. 3- ta a a a a a. a sa a sa a as a a...
  • Page 210 o li i i s oso sta t. a 1 a s 10 g. a a a 100 g. t t s 100 g g . a a a a 200 g - 1200 g - 30 a a a a a a a a a 00 g - 2 00 g...
  • Page 211 a a. s a t a a s t a a a a. st s sta t. a a t a a a a a a t a a. at a a a s t a s a a t at a a st sta a a...
  • Page 212 so i oko o 1 0 g - 1000 g s sta t. a s a a sta a a. a 200 g - 1000 g a ast s sta t. s a . a s a a a a. a a s a a t a ast...
  • Page 213 so i a 1-3 a a t 200 g - 1000 g s a t a a a s st at. . 30 200 g - 800 g a a a s st at. 200 g - 800 g a a a s st at.
  • Page 214 isk s i si s i ko s kl so i PIZZA a a a a 1 0 g - 00 g PIZZA a a a a 1 0 g - 00 g 200 g - 00 g a st a a s a a a a s tt...
  • Page 215 a ta a sa sta a a s t a a a as a a a t a ta a a a a a a a a s . ast a a s a t a a a. s a a a a .
  • Page 216 . W a a ast s a 10 a sta stas a a a a a ta ta t a a t sta a s a a. st t t ta s s a st ta a a a s st a a s s st st a...
  • Page 217 st t st s W sta st a a sta ta a at a sta a s a t s a ast a a a a sta a s a a a st t . a a s t a . t a t st s .
  • Page 218 Zgodnie z dyrektywÐ 2004/108/WE, Zgodnie z dyrektywĐ 2004/108/WE, artykuÐ 9 ust. (2) artykuĐ 9 ust. (2) Centrum Testowania Panasonic Centrum Testowania Panasonic Panasonic Marketing Europe GmbH Panasonic Marketing Europe GmbH Winsbergring 15, 22525 Hamburg, Winsbergring 15, 22525 Hamburg, Niemcy Niemcy...
  • Page 219 DŮLEŽITÉ POKYNY K BEZPEČNOSTI. Pečlivě si je prosím přečtěte a uložte pro případné použití. Toto zařízení mohou používat děti od 8 let věku a osoby se sníženými duševními, sensorickými a mentálními schopnostmi či nedostatečnými zkušenostmi a znalostmi, pokud jsou pod dozorem osoby zodpovědné za jejich bezpečnost nebo jí byly poučeny o bezpečném použití...
  • Page 220 tomu tak je, trouba nesmí být používána, dokud závadu neodstraní servisní technik z autorizované opravny. VAROVÁNÍ Nemanipulujte s dvířky, tělesem ovládacího panelu, koncovými vypínači ani s jinými částmi trouby nedovoleným způsobem a ani tyto díly neseřizujte a neopravujte. Nedemontujte vnější kryt trouby, který zajišťuje ochranu proti působení...
  • Page 221 prostor 15 cm, 10 cm za ní a 5 cm na jedné straně a více než 40 cm na druhé straně. Při ohřevu pokrmů v plastovém nebo papírovém obalu často kontrolujte průběh přípravy, protože tyto druhy nádob se mohou vznítit, pokud se přehřejí. Pokud se z trouby kouří...
  • Page 222 Vajíčka ve skořápce ani vajíčka natvrdo nepřipravujte v režimu MIKROVLNNÝ ohřev. Ve vajíčkách může vzniknout přetlak, který je může roztrhnout i po ukončení mikrovlnného ohřevu. Udržujte v čistotě vnitřek trouby, těsnění dvířek a těsnicí plochy. Pokud se odstříknuté pokrmy nebo vylité tekutiny připečou na stěny trouby, těsnění...
  • Page 223 spotřebiče a případně představovat bezpečnostní riziko. VAROVÁNÍ Přístupné části mikrovlnné trouby se mohou v režimu COMBINATION a GRILL silně zahřát. Vzhledem ke gene ro- va nému teplu by malé děti k troubě vůbec neměly mít přístup. Děti by měly troubu používat pouze pod dohledem dospělých.
  • Page 224 Toto zařízení nelze ovládat externím časovačem ani samostatným systémem dálkového ovládání. Používejte jen nádobí vhodné pro použití v mikrovlnných troubách.
  • Page 225 í ní islosti na otnosti p a a ......27 Panac nc p ne .......................28 a o po i ......................29 e o t o ........................30 ec nic speci i ace ....................31 Děkujeme vám, že jste zakoupili mikrovlnnou troubu Panasonic.
  • Page 226 Instalace a zapojení Prohlédněte mikrovlnnou troubu a není ze n na sí azní zajistit ze n n alte o st a te e e o alo ate i l a pe li ji p o l n te z a není po ozen z a na ní...
  • Page 227 Instalace a zapojení VAROVÁNÍ! estli e sí o a je po ozen sí p o o ce se isní st e is o ne o jin ali o an o o ní ne o lo sn ní í e a t snicí ploc o o ení...
  • Page 228 Instalace a zapojení Používání trouby í ejte p íp a Pozor! Horké povrchy . ato t o a je ena po ze ne o p íp a neo í ejte c e i lie ani nejso po í ní. P íst pn i o lnn t o P e po ití...
  • Page 229 Instalace a zapojení Kruhová podložka Malé porce po lo a a no t o alé po ce pot a in s níz ají asto istit a se za nilo o sa e od se o o sp lit p o oz a ní...
  • Page 230 Instalace a zapojení Nádoby na vaření/folie Tekutiny eo í ejte za ené onze P i o e tin nap . polé e p oto e o o e plodo at. e a n poj i o lnné t o e dojít jejic p e tí...
  • Page 231 Popis tis n tí ote ete d í a. Po ote ete d í a p íp a o e se do asn p e í ani dojde az ní z olené o nasta ení. e se zno sp stí ile za ete d í...
  • Page 232 Ovládací panely NN-GD452W/NN-GD462M * ední stis n tí a ete nasta ení. ední stis n tí íte p o a . al í stis n tí íte ec na nasta ení a na displeji se o je í a t lní...
  • Page 233 Slovní nápověda ad ní 88 88 tis n te "FRANCAIS" ve francouzštině tis n te "ITALIANO" v italštině tis n te "DEUTSCH" v němčině tis n te "NEDERLANDS" v holanctině tis n te "ESPANOL" ve španělštině tis n te "POLSKI" v polštině...
  • Page 234 Nastavení hodin u trouby 88 88 a ne ojte a p estane li at d ojte a. a displeji se zo azí li at displej zo az je as p i e de li at lní as. d ojte a. Poznámka cete-li n lo at den opa jte...
  • Page 235 Režimy Mikrovlny a Rozmrazování Při používání trouby musí být skleněný talíř vždy na svém místě. í je sp t n p o a olte p íp a a na displeji se po ado an st pe 1000 do 30 in t za ne odpo ít at as.
  • Page 236 Grilování tis n tí tla ít a ní z olte Po ocí oli e as tis n te ta t st pe . otnosti nasta te - na displeji je dél p íp a odpo ít n as 1 stis n tí ní...
  • Page 237 Kombinovaný ohřev tis n te tla ít o 1 stis n tí ilo ní 1 1100 1 stis n tí t ední on 00 ta t 2 stis n tí ilo ní 2 800 st ední 2 stis n tí níz 3 stis n tí...
  • Page 238 Použití časovače Oddálení spuštění přípravy pokrmu např. tis n te aso a oli e otnosti asta te po ado an p o a tis n te nasta te do odd lení a do p íp a tla ít o a 9 od . t ní.
  • Page 239 Vícefázové vaření vaření o dvou nebo třech fázích Po ocí oli e Po ocí oli e otnosti otnosti í je sp p o a p íp a nasta te dél nasta te dél p íp a p íp a na displeji se za ne odpo ít at as.
  • Page 240 Používání paměťové funkce Nastavení programu Memory Použití programu Memory Poznámka to atic é p o a nelze do pa ti nap o a o at. ti lze lo it po ze jedno zo é a ení. ení o né lo it d o ne o t í zo é a ení.
  • Page 241 Rychlé rozmrazování 1 stis n tí p o alé o s Po al ení 2 stis n tí p o el nasta íte otnost s p esností 3 stis n tí p o c lé 10 g. ení oli e nasta íte otnost s p esností...
  • Page 242 Programy s automatickými čidly Ovládání pomocí šipek nahoru / dolů (+/): p i p íp a jiné p e e ence. Poté co p t po ijete p o a a to atic i idl so díte e ste c t li ít jídlo p ip a ené...
  • Page 243 Programy s automatickými čidly alijte polé n do odné eli osti. Po ít teplot tí z c ladni ne o po ojo o teplot . a jte n do p ilna o lií. lii p opíc n te ost 1 0 g - 1000 g no e jedno p ost ed a t i...
  • Page 244 Programy s automatickými čidly íst te zelenin do n do odné eli osti. Po opte ji 13 polé o i l íce i od . d p ip a jete zelenin s o sa e od nap í lad pen t ne o aj ata od nep id ejte.
  • Page 245 Automatické opětovné ohřívání v závislosti na hmotnosti/úprava dst a te ec n o al a íst te pizz do p ede té p n e Panac nc . tis n te jedno panac nc . Po a ení íst te pizz na 1 0 g - 00 g c ladicí...
  • Page 246 Panac nc P ne Panasonic . edod ení to oto po ada je t e i zp so tj.
  • Page 247 Otázky a odpovědi Otázka: Proč není možné zapnout troubu? je p íli o á na to a ste ji o li dpov ení-li o né t o zapno t ít v p o a s a to atic post p jte násled jící zp so e idle na displeji se zo azí...
  • Page 248 Péče o troubu P ed i t ní v pn te t o ová podlo a a dno vnit ní o p osto ají p avideln istit a se za ánilo nad né jte v istot vnit e t o nosti.
  • Page 249 Podle naĐízení 2004/108/EC, Đlánku 9(2) Panasonic Testing Centre Panasonic Testing Centre odpadního elektrického Panasonic Marketing Europe GmbH Panasonic Marketing Europe GmbH a elektronického zařízení Winsbergring 15, 22525 Hamburg, SRN Winsbergring 15, 22525 Hamburg, SRN VÐrobce: Panasonic Appliances (domácnosti)
  • Page 250 FONTOS BIZTONSÁGI ELŐÍRÁSOK: Mielőtt beüzemelné a mikrohullámú sütőt, kérjük, olvassa el figyelmesen az utasításokat és tartsa be ezeket a jövőben A készüléket 8 év feletti gyermekek illetve csökkent fizikai, érzékszervi, vagy szellemi képességű, vagy tapasztalattal és gyakorlattal nem rendelkező személyek csak olyan, a biztonságukért felelős személy felügyelete és irányítása alatt használhatják, aki ismerik annak veszélyeit és biztonságos...
  • Page 251 FIGYELEM! Az ajtó tömítését és környékét nedves ruhával kell tisztítani. A készüléket ellenőrizni kell, hogy nem sérült-e az ajtótömítés és környéke. Ha igen, akkor addig nem szabad hasz nálni a készüléket, amíg egy, a gyártó által képzett szakember meg nem javítja! FIGYELEM! Tilos átalakítani vagy javítani a készülék ajtaját, a kezelőpult házát, a biztonsági kapcsolókat, vagy a...
  • Page 252 megfelelő utasításokkal, hogy képes legyen biztonságosan használni azt, és ismeri a nem megfelelő használattal kapcsola tos veszélyeket! Pulton történő használata: Hagyjon 15 cm helyet a mikrohullámú sütő felett, 10 cm-t mögötte, 5 cm-t az egyik oldalon; a másik oldalon legalább 40 cm legyen szabadon.
  • Page 253 forró folya dék hirtelen kifuthat. A cumisüveg vagy a bébiételes üveg tartal mát fel kell rázni, vagy össze kell keverni! Fogyasztás előtt ellenőrizni kell a hőmérsékletet, nehogy megégesse a gyermek száját! Tilos nyers tojást és kemény tojást főzni MIKROHULLÁMÚ üzemmódban! A tojásban nyomás keletkezik, és szétrobbanhat, még a melegítés befejezése után is.
  • Page 254 sütő fala. Ha nem tisztítják meg időnként a készüléket, lehetséges, hogy használat közben „füstölni” kezd. Ha a mikrohullámú sütőt nem tartják tiszta állapotban, a felületek állapota sérülhet, ami károsan befolyá solhatja a készülék élettartamát, és esetleg veszélyes helyzetet teremthet. FIGYELEM! A hozzáférhető részek is felforrósodhat nak a kombinációs használat során.
  • Page 255 A mikrohullámú sütő külső felülete, beleértve a szekrény szellőzőnyílásait és az ajtót is, felforrósodik KOMBINÁLT és GRILL üzemmódban; erre ügyelni kell az ajtó nyitásakorzárásakor és az étel vagy a tartozékok berakásakor- kiszedésekor. A készülék nem arra készült, hogy külső időzítővel, vagy különálló távirányító rendszerrel működtessék.
  • Page 256 Turbó kiolvasztás ........................23 Automatikus érzékel rogramok ..................2 -2 Automatikus súlyérzékel T rogramok ............27 Panacrunch tál ........................28 Kérdések és válaszok ......................29 A mikrosüt karbantartása ....................30 in ségtanúsítás m szaki adatok ..................31 Köszönjük, hogy Panasonic mikrohullámú sütőt vásárolt.
  • Page 257: Üzembe Helyezés És Csatlakoztatás

    Üzembe helyezés és csatlakoztatás Ellenőrizze a mikrohullámú sütőt! Amennyiben hálózati csatlakozóal zat nincs földelve a vev feladata kicseréltetni somagol a ki távolítsa el az összes azt megfelel en földelt hálózati csomago lóanyagot és vizsgál a meg a csatlakozóal zatra. mikrohullámú süt t hogy nincs-e ra ta valamilyen sérülés l.
  • Page 258: Fontos Balesetvédelmi Utasítások

    Fontos balesetvédelmi utasítások a a hálózati kábel sérült akkor a FIGYELEM! gyártónak hivatalos szervizének vagy Fontos balesetvédelmi utasítások hasonló ké zettség szakembernek kell kicserélnie az életveszély Az a tó tömítését és környékét nedves megszüntetése végett! ruhával kell tisztítani. A készüléket ellen rizni kell hogy nem sérült-e az sak olyankor szabad gyermeknek a tótömítés és környéke.
  • Page 259 Fontos balesetvédelmi utasítások A mikrohullámú sütő használata használata után ezek a felületek nagyon felforrósod nak. igyázzon A mikrohullámú süt t étel készítésén nehogy megérintse a mikrohullámú kívül más célra használni tilos! z süt f t elemeit! a mikrohullámú süt ki fe ezetten étel melegítésére vagy f zésére szolgál.
  • Page 260 Fontos balesetvédelmi utasítások Görgőgyűrű Megjegyzés A görg gy r t és a mikrohullámú süt t A a ánlott ési id tartamának belse ét rendszeresen tisztítani t llé ésekor a étel t nk re megy kell a za valamint az ételmaradék s éls séges esetben meg is lerakódásának a megel zése végett.
  • Page 261 Fontos balesetvédelmi utasítások Folyadékok Edény/fólia Folyadék l. leves szósz és ital Tilos zárt kannát vagy alackot melegí té se kor lehetséges hogy melegíteni mert felrobbanhat! a folyadék túllé i a forrás ont át anélkül hogy ezt a buborék ké z dés Fém tartóedényt vagy fémfestékkel el re elezné.
  • Page 262 A mikrohullámú sütő ábrája A t nyit gomb Ke el zt megnyomva kinyílik az a tó. a Tá kábel f zés közben kinyit a az a tót a satlako tatás f zés átmenetileg leáll a korábbi Figyelme tet ímke beállítások azonban változatlanok Forg tányér maradnak.
  • Page 263 Kezelőpultok NN-GD452W/NN-GD462M * Ki el ablak Mikro ullám energias intek GR LLE ÉS gomb Turbo kiolvas t rogramok Automatikus ramelegít rogramok Automatikus ldség rogramgomb Automatikus ri s tés ta rogramgomb Automatikus s lyér ékel K MB LT rogramok Több / kevesebb gomb d /s lyválas t tár sa...
  • Page 264: Szöveges Utasítás

    Szöveges utasítás Szöveges utasítás Szöveges utasítás Csatlakoztatás 88:88 yom a "FRANCAIS" Franciául pl. yom a "ITALIANO" Olaszul pl. yom a "DEUTSCH" Németül pl. yom a Hollandul pl. "NEDERLANDS" yom a "ESPANOL" Spanyolul pl. yom a "POLSKI" Lengyelül pl. yom a "CESKY"...
  • Page 265: Az Óra Beállítása

    Az óra beállítása Amikor el s ör satlako tatja a mikro ullám s t satlako ódugóját 88 88 jelenik meg a kijel ablakban yomja meg egys er a llítsa be a id t a yomja meg egys er a ÓRA ÓRA gombot S L tár sával A ki elz n gombot...
  • Page 266: Ikrohullám S Tés És Kiolvasztás

    Mikrohullámú sütés és kiolvasztás A s t as nálatakor a vegtál ának mindig a elyén kell lennie yomja meg a M KR A s tési id beállítása a id / yomja meg a START s lybeállító tár sával MAGAS TEL E S T MÉ gombot gombot energias int 1000...
  • Page 267: Rillezés

    Grillezés A mikro ullám s t as nálatakor a orgótányérnak mindig a elyén kell lennie A teljesítménys int kiválas tá sá o yomja meg a START llítsa be a ési id t a nyomja meg a GR LL gombot gombot kkor megkezd dik /S L tár sával leg eljebb 90 er re...
  • Page 268 Kombinált főzés A kívánt energiaszint kiválasztása llítsa be a ési yomja meg a id t a /S L START gombot A 1 Press rill 1 1100 magas 1 gombnyomás köze es orgatógombbal ki elz n megkezd dik 2 Presses rill 2 800 köze es 2 gombnyomás alacsony leg eljebb 90 er...
  • Page 269 Az időzítő használata Az id zít asználatával késleltetett indítás s tést le et be rogramozni pl.: yom a meg az llítsa be a késlelte tési id t llítsa be a kívánt f zési yom a meg d zít gombot. SÚ tárcsával rogramot és f zési id t.
  • Page 270: Többfokozatú Sütés

    Többfokozatú sütés 2 vagy 3 fokozatú sütés élda A kívánt A kívánt yomja meg a Start A s tési id A s tési id mikro ullám mikro ullám beállítása az beállítása az gombot A s tési energiaszint energiaszint id /s lybeállító id /s lybeállító...
  • Page 271: A Memória Funkció Használata

    A memória funkció használata Ez a unk ió a s t rendszeres melegítési vagy s tési eladatinak el zetes be rogramozását teszi le et vé ( éldául a ana run edény kézi el melegítését A s t be rogramoz ató nnek meg elel teljesítményszintre és id re Ennél a s t nél sak egy memória eladat el zetes rogramozása végez et el Memóriaprogram beállításához:...
  • Page 272: Turbó Kiolvasztás

    Turbó kiolvasztás Ezzel a szolgáltatással kiolvaszt atja a agyasztott ételt s ly szerint Válassza ki a kívánt llítsa be a agyasztott yomja meg a A T MAT K S K LVAS T S étel s lyát az /S L START gombot rogramot orgatógombbal Kiolvasztáskor...
  • Page 273: Automatikus Érzékel Rogramok

    Automatikus érzékelő programok Sok éle étel elkészít et az id a s ly és a teljesítményszint megadása nélk l Válassza ki a kívánt yomja meg a Start Automatikus érzékel gombot rogramot Több/Kevesebb beállítás: A sütés megfelel nek ítélt mértéke egyénenként eltér lehet. Az Automatikus érzékel rogram néhány használata után n ké...
  • Page 274 Automatikus érzékelő programok er /Max rogram kiegészít k ótaná sok s ly tött és ki lt levesek jramelegítésé ez Tegye a levest egy LEVES megfelel méret edénybe. Az ételeknek a h t szekrénynek megfelel kb. -osnak vagy szobah mérséklet eknek kell lenniük. 1 0 g - 1000 g Fed e le egy ól záródó...
  • Page 275 Automatikus érzékelő programok er /Max rogram kiegészít k ótaná sok s ly 8 FAGYASZ Fagyasztott zöldségek zése elyezze a zöldségeket egy megfelel méret TOTT ZÖLD edénybe. Fröcsköl ön rá uk 1-3 ev kanál SÉGEK vizet. a nagy víztartalmú zöldségeket mint éldául s enótot vagy aradicsomot 200 g - 1000 g f z ne ad on hozzá...
  • Page 276: Automatikus Súlyérzékel

    Automatikus súlyérzékelő KOMBINÁLT programok Válassza ki a yomja meg a Az el melegítés yomja meg a kívánt rogramot START gombot után angjelzés Start gombot és elyezze a a ana run tál szólal meg ana run tálat el melegítésé ez elyezze az ételt a közvetlenül az üveg tálba és állítsa be a tál ára...
  • Page 277: Panacrunch Tál

    úgy mint egy hagyományos süt ben. A tárolható lásd a –22. oldalon). Panasonic Panacrunch tál három módon indig az üveg tálca köze ére m ködik: a tál felmelegedik a mikrohullám helyezze a tálat hogy az ne ér en elnyelése következtében az ételt...
  • Page 278: Kérdések És Válaszok

    Kérdések és válaszok Kérdés: Miért nem kap csolódik be a Kérdés: Nem tudom az automatikus mikrohullámú sütőm? programot beállítani, a kijelzőn pedig a Válasz: Amikor a mikrohullámú süt “HOT” szó látható. Miért? nem ka csolódik be ellen rizze a Válasz: Amennyiben a süt t nemrég következ ket: használták és az még túl meleg egy...
  • Page 279: A Mikrosüt Karbantartása

    A mikrosütő karbantartása Tisztítás el tt ka csol a ki a A forgótányért id nként ki kell venni mikrohullámú süt t! és meg kell tisztítani. ossa el meleg sza anos víz zel vagy endszeres id közönként tisztítsa mosogatógé ben. meg a mikrohullámú süt bels terét az a tótömítést és kör nyé...
  • Page 280: In Ségtanúsítás M Szaki Adatok

    Panasonic Testing Centre Panasonic Testing Centre dokumentációban szere l szimbólum arra Panasonic Marketing Europe GmbH Panasonic Marketing Europe GmbH Winsbergring 15, 22525 Hamburg, F. R. utal hogy az elhasználódott elekt romos Winsbergring 15, 22525 Hamburg, F. R.
  • Page 281 INSTRUCŢIUNI DE SIGURANŢĂ IMPORTANTE: Înainte de utilizarea a acestui cuptor, vă rugăm să citiţi cu atenţie aceste instrucţiuni şi să le păstraţi pentru referinţe ulterioare. Acest aparat poate fi utilizat de copiii cu vârsta peste 8 ani şi, de asemenea, de persoanele cu capacităţi fizice, senzoriale şi mentale reduse sau de cele fără...
  • Page 282 persoană calificată similar, pentru a evita pericolul electrocutării. ATENŢIE! Elementele şi zonele de etanşare a uşii trebuie curăţite cu o cârpă umedă. Aparatul trebuie verificat să nu prezinte defecţiuni ale elemente-lor şi zonelor de etanşare a uşii, şi dacă acestea sunt deteriorate atunci aparatul nu trebuie pus în funcţiune până...
  • Page 283 ATENŢIE! Permiteţi copiiilor să utilizeze fără supraveghere cuptorul numai după ce au primit instrucţiuni adecvate, astfel încât să fie capabili să-l utilizeze în siguranţă şi să înţeleagă primejdiile unei utilizări incorecte. Pentru utilizare pe suprafeţe plane: Asiguraţi un spaţiu de 15 cm deasupra cuptorului, 10 cm în spate, 5 cm în una din laterale şi cel puţin 40 cm în cealaltă...
  • Page 284 de temperatura lor de fierbere poate surveni fără a observa că fierb. Aceasta poate conduce la o revărsare subită a lichidului din recipientul care-l conţine. Conţinutul acestor biberoane sau recipiente cu alimente pentru copii trebuie amestecat sau agitat. Înainte de a fi consumate trebuie verificat ce temperatură...
  • Page 285 NU FOLOSIŢI SUBSTANŢE COMERCIALE DE CURĂŢIRE. Părţile accesibile pot deveni fierbinţi ca urmare a utilizării în mod combinat. Copiii trebuie să evite atingerea cuptorului şi să-l utilizeze numai sub supravegherea unei persoane adulte, datorită temperaturii înalte generate. Când utilizați modul GRIL sau COMBINAT, unele alimente vor stropi, inevitabil, cu grăsime pe pereţii cuptorului.
  • Page 286 Nu folosiţi detergenţi puternici, substanţe abrazive de curăţat sau bureţi din metal la curăţirea uşii cuptorului, deoarece îi pot zgâria suprafaţa, iar acest lucru poate conduce la spargerea sticlei. Suprafeţele exterioare ale cuptorului, inclusiv orificiile de ventilare ale carcasei şi uşa cuptorului devin fierbinți în timpul utilizării COMBINATE şi GRIL, aveţi grijă...
  • Page 287 Cuprins .....................8 ....................8 ..............9-12 ......................13 ............1 .........................1 ......................1 ................1 ................17 ....................18 ......................19 ....................20 ....................21 ..................22 .......................23 ................2 -2 ....27 ......................28 ....................29 .......................30 ......................31 Vă mulţumim că aţi cumpărat un cuptor cu microunde Panasonic.
  • Page 288 Instalare şi conectare Examinaţi cuptorul cu microunde Tensiunea de lucru Instrucţiuni privind împământarea Important! Amplasarea cuptorului Utilizarea pe balatul mobilierului de bucătărie: 15cm 10cm...
  • Page 289 Instrucţiuni importante de siguranţă ATENŢIE! n m o...
  • Page 290 Instrucţiuni importante de siguranţă Utilizarea cuptorului Atenţie! Suprafeţe fierbinţi Lampa cuptorului Accesorii Platoul din sticlă Încălzirea datorată funcţionării...
  • Page 291 Instrucţiuni importante de siguranţă Inel cu role Important! om n mân om om Cantităţi mici de alimente Grătar din sârmă Ouă Tava Panacrunch Timpii de gătit Înţeparea cojii Termometru pentru carne...
  • Page 292 Instrucţiuni importante de siguranţă Lichide Ustensile/folii Biberoane/alimente pentru copii Hârtie/plastic Funcţionarea motorului ventilatorului...
  • Page 293 Desen schematic on o n â m ân Note.
  • Page 294 Panoul de control NN-GD452W/NN-GD462M * on o on m mo Vă rugăm să reţineţi Semnal sonor Notă...
  • Page 295 Afişaj cuvinte Afişaj cuvinte: Afişaj cuvinte 88 88 "FRANCAIS" în franceză "ITALIANO" în italiană "DEUTSCH" în germană "NEDERLANDS" în daneză "ESPANOL" în spaniolă "POLSKI" în poloneză "CESKY" În limba Cehă "ENGLISH" în engleză...
  • Page 296 Reglarea ceasului ân 88 88 Observaţii 1 00 2 00. Blocarea de siguranţă pentru copii ân Notă...
  • Page 297 Gătitul şi decongelatul cu microunde ân 1000 1000 ATENŢIE! 1000 Observaţii...
  • Page 298 Utilizarea funcţiei Gril 1100 Observaţii ATENŢIE!
  • Page 299 Gătitul combinat 1 1100 2 800 1000 Observaţii 200 g ATENŢIE!
  • Page 300 Utilizarea temporizării Pornirea întârziată a gătitului m o o n n â exemplu n â Observaţii n â exemplu 1000 Timp de aşteptare ân onom exemplu n â Observaţii exemplu 1000 1000...
  • Page 301 Gătitul în etape multiple Gătitul în 2 sau 3 etape ân ân 2 m n 1000 3 m n 2 m n 1000 4 m n 5 m n 4 m n Observaţii...
  • Page 302 Utilizarea funcţiei de memorie m mo Reglarea unui program cu memorie m mo Utilizarea unui program cu memorie m mo m mo Observaţii...
  • Page 303 Decongelare rapidă ân 10 g. 100 g. om n 100 g 00 g . 200 g - 1200 g 00 g - 2 00 g 100 g - 800 g Important! n 16 R...
  • Page 304 Programe cu senzor automat Butonul de control plus/minus: Observaţii...
  • Page 305 Programe cu senzor automat om n 1 0 g -1000 g 200 g - 1000 g o mân 200 g - 1000 g PROASPETE 200 g - 1000 g...
  • Page 306 Programe cu senzor automat om n A m n E ATE 200 g - 1000 g preparare. 9 PE TE PROASP T e a a re p e re p e ap . e ar . 200 g - 800 g e ar e pa r e re r...
  • Page 307 Programe automate pentru tava Panacrunch, în funcţie de greutate om n A m n 13 P E AT ân 1 0 g - 00 g a a r pe r p ar e r a e a ar e 14 P RE R ERAT ân...
  • Page 308 Tava Panacrunch “Concept” Observaţii: e e a e pr a ea e. pera ea e pre a a r a a e p a e a e p e e pr r are a e e ea pa a 22 e pa p r ra a .
  • Page 309 Întrebări şi răspunsuri a a er r Î: De ce nu porneşte cuptorul? p r e e e e prea er e pe r a are e a er a ap rea erea ra e a a . a ep a 10 e ap .
  • Page 310 Îngrijirea cuptorului e e a- er r ar re e re pe r a e a ar a e er r er e pra a a er ar a e e e e er e are a e pe e e e ra .
  • Page 311 Conform Directivei 2004/108/CE, articolul particulare) 9 alineatul (2) 9 alineatul (2) e a a e pe pr Centrul de TestÐri Panasonic Centrul de TestĐri Panasonic e e e are a e Panasonic Marketing Europe GmbH Panasonic Marketing Europe GmbH a e e pr Winsbergring 15, 22525 Hamburg, R.F.
  • Page 312 IMPORTANT SAFETY INSTRUCTIONS. Before operating this oven, please read these instructions carefully and keep for future reference. WICHTIGE SICHERHEITSANWEISUNGEN. Vor Gebrauch des Mikrowellengerätes bitte diese Bedienungsanleitung sorgfältig durchlesen und aufbewahren. BELANGRIJKE VEILIGHEIDSINSTRUCTIES. Alvorens u deze microgolfoven gebruikt, raden wij u ten zeerste aan deze gebruiksaanwijzing door te lezen en bij te houden voor eventueel toekomstig gebruik.
  • Page 313 Panasonic Corporation Website:http://panasonic.com.net © Panasonic Corporation 2012 F00039X70EP F00039X70EP IP0412-10512 IP0512-0 Printed in P.R.C. Printed in P.R.C.

Ce manuel est également adapté pour:

Nn-gd462m

Table des Matières