Télécharger Imprimer la page
Hama High-End Mode D'emploi
Masquer les pouces Voir aussi pour High-End:

Publicité

Les langues disponibles
  • FR

Les langues disponibles

  • FRANÇAIS, page 28

Liens rapides

D I G I T A L
P H O T O
Digitaler Bilderrahmen 8.0
»High-End«
Digital Photo Frame
00090916

Publicité

loading

Sommaire des Matières pour Hama High-End

  • Page 1 D I G I T A L P H O T O Digitaler Bilderrahmen 8.0 »High-End« Digital Photo Frame 00090916...
  • Page 2 Stand der Dokumentation 11/2009 Vielen Dank, dass Sie sich für einen digitalen Bilderrah- Sicherheitshinweise: men aus dem Hause Hama entschieden haben. Bitte • Setzen Sie das Gerät keinen starken Erschütterungen lesen Sie vor der ersten Inbetriebnahme und Benutzung aus und vermeiden Sie Stoß oder Fall.
  • Page 3 • Bitte beachten Sie die im Anhang technischen Daten Funktionsüberblick: • hochauflösendes 8.0 (= 20,32cm) TFT-LC-Display im im Bezug auf die Multimedia-Kompatibilität beim 4:3 Format Anschluss von USB-Geräten, bzw. bei der Wiedergabe von Fotos, Musik, Videos oder Filmen (je • inkl. Bluetooth-Funktion (zur kabellosen Datenübertragung) nach Spezifikation des Gerätes).
  • Page 4 Aufbau des digitalen Bilderrahmens und der Fernbedienung: Um das Einlegen bzw. Funktionen der Fernbedienung: Links die Entnahme von „MS Enter Rechts Lautstärke Setup Menu Oben Duo/MS PRO Duo“- Reglung Ein/Aus Unten Zoom Stummschaltung Karten zu erleichtern wird ein „ Adapter“ benötigt.
  • Page 5 Menüfunktionen: MENÜ Untermenüs & Funktionsbeschreibungen Funktionsauswahlmenü PHOTO Photo Diashow MUSIK MP3, WMA COMBO Musik + Photo Diashow MOVIE Video SPIELLISTE Liste aller Dateien mit Dateimanagement sowie Lösch- & Kopierfunktion EINSTELLUNGEN Systemeinstellungen (variiert je nach Spezifikation des Gerätes) (Setting/Setup) KALENDER Kalender-, Uhr- und Alarmeinstellungen Kartenauswahlmenü...
  • Page 6 Original: Originalgröße (4:3 Format) In der Einstellung „Normal“ behält das Bild sein Originalformat bei Smart: Originalgröße (4:3 Format) In der Einstellung „Smart“ wird das Bild auf die Displaygröße angepasst...
  • Page 7 3. Dateiliste Starten des digitalen Bilderrahmens Sind der USB-Stick bzw. die Speicherkarten korrekt in den Stecken Sie zuerst den Adapterstecker in den digitalen digitalen Bilderrahmen eingesteckt, wird eine Liste der Bilderrahmen und danach das Netzkabel in eine Datenträgeretiketten angezeigt. (Abb. 2) Steckdose.
  • Page 8 Kopieren von Dateien: a) Wählen Sie den Menüpunkt „Wiedergabe“ aus. b) Wählen Sie mit Hilfe der Pfeiltasten die Datei aus, welche Sie kopieren möchten. c) Ihre Auswahl bestätigen Sie mit der Pfeiltaste neben dem Dateinamen erscheint nun ein Zeichen d) Mit Hilfe der Pfeiltaste gelangen Sie zurück in das Abb.
  • Page 9 5. Verwendung als Card Reader: Angezeigte Informationen: • Monatsanzeige Sie können Ihren digit. Bilderrahmen per USB mit Ihrem • Bildanzeige Computer verbinden, um auf Dateien der eingelegten • Zeitanzeige Speicherkarte zuzugreifen, bzw. Daten über die USB- Schnittstelle austauschen/kopieren/löschen. Bevor Sie 7.
  • Page 10 Der beiliegende Bluetooth-Dongle ist separat unter der danach wird das gesamte Verzeichnis jeweils Hama-Art.-Nr.: 49227: “Nano-Bluetooth-Dongle“ wiederholt). erhältlich. Hierzu kann über die Hama Internetseite (www.hama.de / www.hama.com) ein aktueller Treiber Achtung: heruntergeladen werden der es Ihnen erlaubt den Diese Funktion wird nur ab Firmware Version beiliegenden Nano-Bluetooth-Dongle auch an anderen HA07V1.5-102 unterstützt!
  • Page 11 10.) Sobald die Übertragung erfolgreich abgeschlossen wurde erscheint unten aufgeführtes Fenster. Zeitgleich werden die übertragenen Daten auf dem Bilderrahmen angezeigt/abgespielt 7.) Ihr PC/Laptop wird nun versuchen eine Verbindung zum digit. Bilderrahmen herzustellen Bitte beachten Sie folgende Punkte: • Die oben beschriebenen Übertragungsarten stellen Beispiele dar.
  • Page 12 Montagelöcher, mit denen der Bilderrahmen mithilfe Reinigung des Gerätes ein weiches, fusselfreies Tuch passender Schrauben an der Wand befestigt werden (z.B. Hama Art.-Nr. 51076/51077 u.ä.). Bei stärkeren kann. Verschmutzungen feuchten Sie das Tuch sehr leicht an. Verwenden Sie jedoch keinesfalls starke Lösungsmit- Bildbetrachtung: tel, wie z.B.
  • Page 13 FEHLERSUCHE: Beim Anschluss von USB-Endgeräten werden diese nicht angezeigt. Der Bilderrahmen lässt sich nicht einschalten: Ursache: inkompatibles USB-Protokoll Nicht alle Geräte unterstützen die USB-Kommunikation Ursache: Problem in der Stromversorgung des in gleicher Weise. Im Zweifelsfall testen Sie ein anderes Bilderrahmens. Gerät am digit.
  • Page 14 Betriebes nicht auf weiche Oberflächen, Bitte wenden Sie sich bei Produktreklamationen an Teppiche oder andere Materialien, die die Ihren Händler oder an die Hama Produktberatung. Luftzirkulation behindern könnten. • Die Steckdose muss leicht zugänglich sein, so dass Internet/World Wide Web der Netzadapter notfalls leicht abgezogen werden Produktunterstützung, neue Treiber oder Produktinfor-...
  • Page 15 Operating instructions Operating instructions Issue of documentation: November 2009 Thank you for choosing a Hama digital picture frame. Safety Notes: Please read the complete operating instructions • Do not expose the player to heavy vibrations and do carefully before using the device for the first time.
  • Page 16 Function overview: • Please note that that files that are displayed or played on the digital picture frame may be subject to • High-resolution 8.0 (=20.32cm) TFT LC display in 4:3 format copyright laws from third parties. All liability claims •...
  • Page 17 Structure of the digital picture frame and the remote control: An „Adapter“ is Left required to facilitate Enter Right Remote Control Functions: Volume Menu the insertion and control ON/Off Down Setup removal of „MS Duo/ Zoom Mute MS PRO Duo“ cards. Exit Audio Volume Plus Rotate...
  • Page 18 Menu functions: MENU Submenus & function descriptions Function selection menu PHOTO Photo slide show MUSIC MP3, WMA COMBO Music + photo slide show MOVIE Video PLAY LIST List of all files with file management as well as delete & copy functions SETTINGS System settings (varies according to the device specification) (Setting/Setup)
  • Page 19 Original: Original size (4:3 format) With the „Normal“ setting, the image keeps its original format Smart: Original size (4:3 format) With the „Smart“ setting, the image is adjusted to fit the size of the display...
  • Page 20 Starting the digital photo frame 3. File List Screen Insert the adaptor DC plug into the DPF player first, and With USB device/Memory cards rightly inserted into the plug the power cord to a standard wall outlet, then turn on Digital Picture Frame: volume label list screen displays.
  • Page 21 Copying files: a) Select the “Play” menu item. b) Using the arrow buttons , select the file that you wish to copy. c) Confirm your selection with the arrow button A symbol appears next to the file name. Exhibit 5b: Deleting a file d) Press the arrow button to go back to the menu.
  • Page 22 5. Use as a card reader: 7. Setup Menu You can connect your digital picture frame to your Press MENU to return to function select menu. computer via USB to access files on the inserted memory Then open the Setup menu. You can also use the SETUP card or exchange/copy/delete data via the USB interface.
  • Page 23 • Repeat folder (all videos in the directory are repeated The enclosed Bluetooth dongle is available separately one after the other, and the whole directory is then under Hama item no.: - 49227: “Nano Bluetooth repeated afterwards). dongle”. The current driver for the dongle can be downloaded from the Hama Internet site (www.hama.de/...
  • Page 24 9.) Enter the PIN “0000” (four zeros) and press OK. 10.) As soon as transfer has been completed successfully, the following window appears. The transferred files are displayed/played back on the picture frame simultaneously. 7.) Your PC/laptop now attempts to connect to the digital picture frame.
  • Page 25 Occasional care and cleaning of the device ensure a There are installation holes on the rear of the digital long service life. Use a soft, lint-free cloth (e.g. Hama picture frame to attach it to the wall using suitable item no. 51076/51077 etc.) to clean the device. Slightly screws.
  • Page 26 TROUBLESHOOTING: Data on a memory card can not be accessed. Cause: incompatible memory card or incorrect data The picture frame can not be switched on: media format Cause: Problem with the electrical supply of the picture There are some types of memory cards/media that are screen.
  • Page 27 If the product is defective: • The socket must be easily accessible so that it is easy Contact your retailer or Hama Product Consulting if you to disconnect the power supply adapter in case of an have any product claims.
  • Page 28 Nous vous remercions d’avoir choisi un cadre photo Consignes de sécurité : • Protégez l’appareil des secousses violentes et évitez numérique de Hama. Veuillez lire attentivement le présent mode d‘emploi avant sa première utilisation et tout choc ou toute chute.
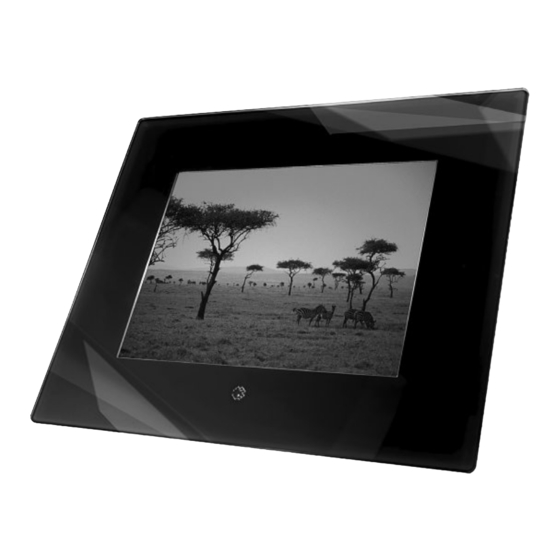
  • Page 29 • En cas de défaut constaté sur votre cadre photo Aperçu des fonctions : • écran haute résolution TFT-LCD de 8.0 (= 20,32 cm) numérique, veuillez vous adresser à votre revendeur spécialisé. au format 4:3 • Veuillez noter les caractéristiques techniques en •...
  • Page 30 Structure du cadre photo numérique et de la télécommande : Un « Adaptateur » Gauche Sous/ Fonctionnement de la télécommande : est nécessaire afin de Droite Enter hors Réglage Menu Haut vous faciliter l’insertion Configuration tension du volume et l’extraction de cartes Zoom Mise en sourdine «...
  • Page 31 Fonctions du menu : MENÜ Sous-menus & description des fonctions Menu de sélection de fonctions PHOTO Diaporama MUSIQUE MP3, WMA COMBO Musique + diaporama MOVIE Vidéo LISTE DE JEUX Liste aller Dateien mit Dateimanagement sowie Lösch- & Kopierfunktion PARAMETRES Liste de tous les fichiers à gestion de fichier ainsi (réglage / setup) que fonction de suppression et de copie CALENDRIER...
  • Page 32 Original: Format d’origine (format 4:3) En réglage « Normal », l’image conserve son format d’origine Smart: Format d’origine (format 4:3) En réglage « Smart », l’image est adaptée à la taille de l’écran...
  • Page 33 Démarrage du cadre photo numérique 3. Ecran liste des fichiers Commencez par insérer la fiche de l’adaptateur CC dans Lorsqu’un appareil USB / une carte mémoire est correcte- le cadre photo numérique, insérez le câble d’alimentation ment inséré(e) dans le cadre photo numérique : l’écran dans une prise de courant, puis mettez l’appareil sous affiche une liste des volumes.
  • Page 34 Copie de fichiers : a) Sélectionnez l’option de menu „lecture“. b) Sélectionnez le fichier que vous désirez copier à l‘aide des touches fléchées c) Confirmez votre sélection à l‘aide de la touche fléchée ; un symbole apparaît à côté du nom du fichier. d) Vous pouvez retourner au menu à...
  • Page 35 5. Utilisation en mode lecture de carte (CardReader) : 7. Menu de configuration Vous pouvez connecter votre cadre photo numérique Appuyez sur MENU afin de retourner au menu de sélec- à votre ordinateur via USB afin d’ouvrir les fichiers tion de la fonction. Ouvrez le menu de configuration. stockés sur la carte mémoire ou remplacer/copier/ effacer les données grâce à...
  • Page 36 Cette fonction est prise en charge uniquement à partir charge (ordinateur portable ou non, etc.) sur le site de la version de microprogramme HA07V1.5-102. Hama (www.hama.de / www.hama.com). 9. Bluetooth : Réglage de la connexion Bluetooth sur un ordinateur Réglage de la fonction Bluetooth du (portable ou non) cadre photo numérique...
  • Page 37 10.) La fenêtre représentée c-dessous apparaît dès que le transfert s’est déroulé correctement. Simultanément, les données transférées sont affichées/lues sur le cadre photo numérique. 7.) Votre ordinateur (portable ou non) va tenter d’établir une connexion vers le cadre photo numérique. Veuillez tenir compte des points suivants : •...
  • Page 38 Vous n’arrivez pas à mettre le cadre photo numérique chiffon non textile doux pour nettoyer l’appareil (par sous tension exemple l’article de Hama réf. 51076/51077). Cause : problème d’alimentation du cadre photo. En cas de saletés tenaces, humidifiez légèrement le Vérifiez que la fiche de l’appareil d’alimentation est bien...
  • Page 39 Tous les appareils ne prennent pas le système de vous adresser à votre revendeur ou au département communication USB en charge de la même manière. En conseil produits de Hama. cas de doute, testez un autre appareil sur votre cadre photo numérique.
  • Page 40 Le agradecemos que se haya decidido por la compra Indicaciones de seguridad: de este marco digital de la casa Hama. Antes de utilizar • No someta el aparato a fuertes sacudidas y evite que por primera vez el marco, léase detenidamente estas sufra golpes o caídas.
  • Page 41 • Observe los datos técnicos que se indican en el Sinopsis del funcionamiento: • Pantalla TFT-LCD de 8.0 (= 20,32cm) de alta resolución anexo en cuanto a la compatibilidad de multimedia en formato 4:3 cuando se conectan dispositivos USB, o en cuanto a la reproducción de fotos, música, vídeos o películas •...
  • Page 42 Estructura del marco digital y del mando a distancia: A la izquierda Para facilitar la inser- A la derecha ción y la retirada de Enter Funciones del mando a distancia: Regulación Menú Arriba tarjetas „MS Duo/MS ON/Off de volumen Abajo Setup PRO Duo“...
  • Page 43 Funciones de menú: MENU Submenús y descripciones de funcionamiento Menú de selección de funciones PHOTO Sesión de diapositivas MUSICA MP3, WMA COMBO Música + Sesión de diapositivas MOVIE Vídeo LISTA DE REPRODUCCIÓN Lista de todos los archivos con administración de archivos y función de copia y borrado AJUSTES (Setting/Setup) Ajustes del sistema (varía en función de la especificación del aparato) CALENDARIO...
  • Page 44 Original: Tamaño original (formato 4:3) En el ajuste „Normal“, la imagen conserva su formato original Smart: Tamaño original (formato 4:3) En el ajuste „Smart“, la imagen se ajusta al tamaño de la pantalla...
  • Page 45 Iniciar el marco digital 3. Lista de archivos Si la memoria USB o las tarjetas de memoria están correc- Enchufe primero el conector adaptador en el marco digital tamente insertadas en el marco digital, se visualiza una y después el cable de red a una toma de corriente. Encien- lista de las etiquetas de los medios de datos.
  • Page 46 Copiar archivos: a) Seleccione el punto de menú “Reproducción”. b) Con ayuda de las teclas de flecha , seleccione el archivo que desee copiar. c) Confirme su selección con la tecla de flecha , junto al nombre del archivo, ahora aparece un signo d) Con ayuda de la tecla de flecha puede volver al Fig.
  • Page 47 5. Utilización como lector de tarjetas: 6. Menú de ajustes Pulse MENU para volver al menú de selección de fun- El marco digital se puede conectar a su ordenador ciones. A continuación, llame el menú de configuración. vía USB para acceder a los archivos de la tarjeta de memoria colocada en el marco, o bien para intercambiar/copiar/borrar datos a través del puerto USB.
  • Page 48 • Repetir un vídeo (el vídeo actual se repite sin fin) Hama: - 49227: “Mochila Nano-Bluetooth“. Para este • Repetir carpeta (se reproducen todos los vídeos del fin podrá descargarse de la página web de Hama directorio consecutivamente, después, se repite todo (www.hama.de / www.hama.com) un controlador el directorio).
  • Page 49 10.) Tan pronto como se termina exitosamente la transmisión, aparece la ventana que se muestra abajo. Al mismo tiempo se visualizan/reproducen los datos transmitidos en el marco digital. 7.) Su PC/portátil tratará de establecer una conexión al marco digital. Tenga en cuenta los puntos siguientes: •...
  • Page 50 (p. ej., art. n° Causa: Problema en la alimentación de corriente del de Hama: 51076/51077 o similar). Si la suciedad es fuerte, marco digital. humedezca el paño sólo muy levemente. Nunca utilice Compruebe si el enchufe de la fuente de alimentación...
  • Page 51 Existen algunos tipos de tarjetas/medios de memoria productos Hama. que son incompatibles con el marco digital. En estos casos, la tarjeta no se reconoce y no se puede utilizar Internet/World Wide Web para la reproducción de contenidos.
  • Page 52 Stand van de documentatie 11/2009 Hartelijk dank dat u voor de aanschaf van een Veiligheidsinstructies: digitale fotolijst van Hama heeft gekozen. Lees de • Stel het toestel niet bloot aan zware schokken en gebruiksaanwijzing volledig en goed door voordat u voorkom stoten of vallen.
  • Page 53 • Houd rekening met de technische gegevens in de Functieoverzicht • 8.0-TFT-LC-display (20,32 cm) met hoge resolutie in appendix over de compatibiliteit met multimedia bij de 4:3 formaat aansluiting van USB-apparatuur, resp. bij de weergave van foto´s, muziek, video´s of films •...
  • Page 54 Opbouw van de digitale fotolijst en de afstandsbediening: Voor het makkelijker Links plaatsen en Functies van de afstandsbediening: Enter Rechts Volumere- Menu Boven Setup verwijderen van Aan/uit Onder geling Zoom Mute-functie „MS Duo/MS PRO Duo“-kaarten, heeft u een Beëindigen „Adapter“ nodig Volume + Draaien Volume control...
  • Page 55 Menufuncties: MENÜ Submenu´s & beschrijving van de functies Functiemenu FOTO Foto-diashow MUZIEK MP3, WMA COMBO Muziek + foto-diashow MOVIE Video SPEELLIJST Lijst van alle bestanden met bestandsmanagement en wis- en kopieerfunctie INSTELLINGEN Systeeminstellingen (varieert afhankelijk van de specificaties van het toestel) (setting/setup) KALENDER Kalender-, klok- en alarminstellingen...
  • Page 56 Origineel: Originele afmeting (4:3 formaat) Onder de instelling „Normal“ blijft het origi- nele formaat van de foto behouden Smart: Originele afmeting (4:3 formaat) Onder de instelling „Smart“ wordt de foto aan de grootte van het scherm aangepast...
  • Page 57 Starten van de digitale fotolijst 3. Bestandslijst Steek eerst de adaptersteker in de digitale fotolijst en Als de USB-stick resp. de geheugenkaarten correct in de daarna de voedingskabel in een contactdoos. Zet dan het digitale fotolijst gestoken is, wordt er een lijst met etiketten apparaat aan.
  • Page 58 Kopiëren van bestanden: a) Selecteer de menuoptie “Weergave”. b) Selecteer met behulp van de pijltoetsen het te kopiëren bestand. c) Bevestig met de pijltoets het geselecteerde bestand; naast de bestandsnaam verschijnt nu een teken d) Met behulp van de pijltoets keert u terug in het Afb.
  • Page 59 5. Gebruik als Card Reader: 7. Instelmenu U kunt uw digit. fotolijst per USB op uw computer Druk op MENU om terug te keren naar het functiemenu. aansluiten voor toegang tot bestanden op de Vervolgens het setup-menu oproepen. U kunt ook gebruik geheugenkaart in de fotolijst.
  • Page 60 één voor één afgespeeld en daarna wordt de Hama-art.-nr.: - 49227: “Nano-Bluetooth-Dongle“ hele directory herhaald). verkrijgbaar. Hiervoor kunt u vanaf de internetsite van Hama (www.hama.de / www.hama.com) een Attentie: actuele driver downloaden, waarmee u de inbegrepen Deze functie wordt pas ondersteund vanaf firmware- Nano-bluetooth-dongle ook op andere toestellen met versie HA07V1.5-102!
  • Page 61 10.) Zodra de overdracht succesvol is afgesloten, verschijnt het venster dat hierna is afgebeeld. Tegelijkertijd worden de overgedragen gegevens op de fotolijst weergegeven/afgespeeld 7.) Uw pc/laptop probeert nu een verbinding met de digitale fotolijst tot stand te brengen. Let op het volgende: •...
  • Page 62 Oorzaak: probleem in de stroomvoorziening van de reiniging van het toestel een zachte, pluisvrije doek fotolijst. (bijv. Hama art.-nr. 51076/51077 o.i.d.). Bij hardnekkiger Controleer of de stekker van de voedingsadapter vuil maakt u de doek iets vochtig. Maar gebruik goed en helemaal op het stopcontact is aangesloten.
  • Page 63 Bij defecte producten: Neem bij klachten over het product contact op met uw formaat van de gegevensdrager verkoper of met de afdeling Productadvies van Hama. Er zijn een paar soorten geheugenkaarten/-media die niet compatibel zijn met de digit. fotolijst. In dat geval...
  • Page 64 Istruzioni per l‘uso Istruzioni per l’uso Stato della documentazione 11/2009 Grazie per avere acquistato la cornice digitale di Hama. Indicazioni di sicurezza: Prima dell’utilizzo, leggete attentamente le istruzioni per • Non sottoporre l‘apparecchio a scossoni ed evitare l’uso! Conservate queste istruzioni. Vi saranno di grande colpi o cadute.
  • Page 65 • Osservate attentamente i dati tecnici allegati in Schema delle funzioni: • display LCD TFT da 8.0 (20,32 cm) ad alta risoluzione merito alla compatibilità multimediale per l‘attacco in formato 4:3 di apparecchi USB ovvero per la riproduzione di foto, musica, video o film (secondo le specifiche •...
  • Page 66 Struttura della cornice digitale e del telecomando: Per facilitare Sinistra l‘inserimento e Enter Destra Funzioni del telecomando Regolazione Menu In alto l‘estrazione di carte Set up del volume ON/OFF In basso „MS Duo/MS PRO Zoom Mute Duo“ è necessario un‘apposito adattatore Esci Volume + Ruota...
  • Page 67 Funzioni del menu: MENU Sottomenu e descrizioni delle funzioni Menu scelta della funzione FOTO Slideshow immagini MUSICA MP3, WMA COMBO Musica + Slideshow immagini MOVIE Video PLAYLIST Elenco di tutti i file e loro gestione e le funzioni cancella e copia IMPOSTAZIONI Impostazioni di sistema (variano secondo le specifiche dell’apparecchio) (Regolazione/setup)
  • Page 68 Originale: Dimensione originale (Formato 4:3) Nella impostazione „Normale“ l‘immagine mantiene il suo formato originale Intelligente: Dimensione originale (Formato 4:3) Nella impostazione intelligente l‘immagine viene adattata alla dimensione del display...
  • Page 69 Avvio della cornice digitale 3. Elenco file Se la chiavetta USB e/o le schede di memoria sono state Inserire prima la spina dell’adattatore nella cornice correttamente inserite nella cornice digitale, apparirà la digitale e poi il cavo in una lista delle etichette dei media. (Fig.2) presa di corrente.
  • Page 70 Copia di file a) Selezionare la voce di menu “Riproduzione”. b) Servendosi dei tasti freccia , selezionare il file che si desidera copiare. c) Confermare la selezione con il tasto freccia accanto al nome del file viene visualizzato un segno d) Mediante il tasto freccia si torna al menu dove si Fig.5b: Cancellazione dei file...
  • Page 71 5. Utilizzo come card reader: 6. Menu impostazioni Premere MENU per ritornare al menu scelta funzione. La cornice digitale può essere collegata via USB al Richiamare il menu di set up. computer per accedere ai file della memory card inserita oppure per scambiare/copiare/cancellare dati attraverso l’interfaccia USB.
  • Page 72 • Standard (nessuna ripetizione) La chiavetta Bluetooth in dotazione è disponibile • Ripetizione singola (il video corrente viene ripetuto separatamente con il n° articolo Hama: - 49227: all‘infinito) “Nano-Bluetooth-Dongle”. Inoltre dal sito Internet di • Ripetizione cartella (tutti i video nella directory Hama (www.hama.de / www.hama.com) si può...
  • Page 73 10.) Al termine del trasferimento, appare la maschera raffigurata qui sotto. I dati trasferiti vengono visualizzati/riprodotti sulla cornice digitale. 7.) Il PC/laptop cerca di stabilire la connessione con la cornice digitale. Osservare i seguenti punti: • I tipi di trasmissione descritti sopra sono soltanto esempi.
  • Page 74 La cornice digitale non si accende: prolungano la durata. Utilizzate un panno in microfibra Causa: problema all’alimentazione elettrica della morbido e senza pelucchi (ad es. Hama articolo cornice digitale. 51076/51077). In caso di sporco persistente, inumidite Verificate che la spina dell’alimentatore sia inserita leggermente il panno.
  • Page 75 Per reclami in merito ai prodotti, rivolgetevi al vostro Alcuni tipi di memory card o supporti non sono rivenditore o alla Consulenza prodotto Hama. compatibili con la cornice digitale. In questo caso la scheda non viene riconosciuta e non può essere Internet/World Wide Web utilizzata per la riproduzione dei contenuti.
  • Page 76 d Hinweis zum Umweltschutz: Ab dem Zeitpunkt der Umsetzung der europäischen Richtlinien 2002/96/EG und 2006/66/EG in nationales Recht gilt folgendes: Elektrische und elektronische Geräte sowie Batterien dürfen nicht mit dem Hausmüll entsorgt werden. Der Verbraucher ist gesetzlich verpflichtet, elektrische und elektronische Geräte sowie Batterien am Ende ihrer Lebensdauer an den dafür eingerichteten, öffentlichen Sammelstellen oder an die Verkaufsstelle zurückzugeben.
  • Page 77 Wskazówki dotyczące ochrony środowiska: Od czasu wprowadzenia europejskiej dyrektywy 2002/96/EU i 2006/66/EU do prawa narodowego obowiązują następujące ustalenia: Urządzeń elektrycznych, elektronicznych oraz baterii jednorazowych nie należy wyrzucać razem z codziennymi odpadami domowymi! Użytkownik zobowiązany prawnie do odniesienia zepsutych, zniszczonych lub niepotrzebnych urządzeń elektrycznych i elektronicznych do punktu zbiórki lub do sprzedawcy.
  • Page 78 Specyfikacja informacyjno techniczna – urządzenie klasy A Informationstechnische Einrichtung Class A UWAGA! Urządzenie klasy A. Urządzenie może powodować zakłócenia w obrębie Warnung! Dies ist eine Einrichtung der Klasse A. Diese Einrichtung kann im Wohnbereich Funkstörungen verursachen. In diesem Fall kann vom Betreiber mieszkania.
  • Page 79 Français La société Hama GmbH & Co. KG certifie que cet appareil est conforme aux exigences de base et aux dispositions de la directive 1999/5/ en vigueur. Vous trouverez la déclaration de conformité à la directive R&TTE 99/5/CE sur www.hama.de.
  • Page 80 Hama GmbH & Co KG D-86651 Monheim/Germany www.hama.com All listed brands are trademarks of the corresponding companies. Errors and omissions excepted, and subject to technical changes. Our general terms of delivery and payment are applied.

Ce manuel est également adapté pour:

00090916