Table des Matières

Publicité

Les langues disponibles
  • FR

Les langues disponibles

  • FRANÇAIS, page 46

Liens rapides

d i g i t a l
p h o t o
Bedienungsanleitung
D
Operating Instructions
GB
Mode d'emploi
F
Instrucciones de uso
E
Istruzioni per l'uso
I
Gebruiksaanwijzing
NL
Instrukcja obsługi
PL
Návod k použití
CZ
Digitaler Bilderrahmen 12.1 »New Basic«
Digital Photo Frame
00095220

Publicité

Table des Matières
loading

Sommaire des Matières pour Hama New Basic

  • Page 1 Bedienungsanleitung Operating Instructions Mode d‘emploi Instrucciones de uso Istruzioni per l‘uso Gebruiksaanwijzing Instrukcja obsługi Návod k použití Digitaler Bilderrahmen 12.1 »New Basic« Digital Photo Frame 00095220...
  • Page 2: Table Des Matières

    Bedienungsanleitung Inhaltsverzeichnis Einführung ....3 Bedienung und Betrieb ..12 Vorwort ....3 Die Menüführung .
  • Page 3: Einführung

    Sehr geehrte Kundin, sehr geehrter Kunde, mit dem Kauf dieses digitalen Bilderrahmens haben Sie sich für ein Qualitätsprodukt von Hama entschieden, welches hinsichtlich Technik und Funktionalität dem modernsten Entwicklungsstandard entspricht. Lesen Sie die hier enthaltenen Informationen, damit Sie mit Ihrem Ge- rät schnell vertraut werden und seine Funktionen in vollem Umfang...
  • Page 4: Warnhinweise

    Warnhinweise In der vorliegenden Bedienungsanleitung werden folgende Warnhin- weise verwendet: GEFAHr Ein Warnhinweis dieser Gefahrenstufe kennzeichnet eine dro- hende gefährliche Situation. Falls die gefährliche Situation nicht vermieden wird, kann dies zum Tod oder zu schweren Verletzungen führen. ► Die Anweisungen in diesem Warnhinweis befolgen, um die Gefahr des Todes oder schwerer Verletzungen von Personen zu vermeiden.
  • Page 5: Bestimmungsgemäße Verwendung

    Bestimmungsgemäße Verwendung Dieses Gerät ist nur zum Gebrauch in geschlossenen Räumen zum Anzeigen von Fotos bestimmt. Eine andere oder darüber hinausgehende Benutzung gilt als nicht be- stimmungsgemäß. WArNUNG Gefahr durch nicht bestimmungsgemäße Verwendung! Von dem Gerät können bei nicht bestimmungsgemäßer Verwen- dung und/oder andersartiger Nutzung Gefahren ausgehen.
  • Page 6: Sicherheit

    Sicherheit In diesem Kapitel erhalten Sie wichtige Sicherheitshinweise im Um- gang mit dem Gerät. Dieses Gerät entspricht den vorgeschriebenen Sicherheits-bestim- mungen. Ein unsachgemäßer Gebrauch kann jedoch zu Personen- und Sachschäden führen. Grundlegende Sicherheitshinweise Beachten Sie für einen sicheren Umgang mit dem Gerät die folgenden Sicherheitshinweise: ■...
  • Page 7: Aufbau Und Funktion

    Aufbau und Funktion Digitaler Bilderrahmen (rückansicht) Auf / Ab / Links / Exit / Zurück ON/OFF Rechts / Enter (OK) Befestigung zur Wandmontage Standfußaufnahme Besfestigungsmöglichkeit für VESA 75 x 75 Digitaler Bilderrahmen (Seitenansicht)
  • Page 8: Aufbau Und Funktion

    Aufbau und Funktion Fernbedienung Ein / Aus Menü Enter Rechts Links Exit / Zurück Systemeinstellungen Fernbedienung Batterie einlegen Zum Einlegen der Batterie bzw. für einen Batteriewechsel gehen Sie wie folgt vor: ‹ Ziehen Sie das Batteriefach aus der Fernbedienung, indem Sie die Verriegelung eindrücken und gleichzeitig das Batteriefach herausziehen.
  • Page 9: Inbetriebnahme

    Inbetriebnahme Sicherheitshinweise WArNUNG Bei der Inbetriebnahme des Gerätes können Personen- und Sachschäden auftreten! Beachten Sie die folgenden Sicherheitshinweise um die Gefahren zu vermeiden. ► Verpackungsmaterialien dürfen nicht zum Spielen verwendet werden. Es besteht Erstickungsgefahr. ► Beachten Sie die Hinweise zu den Anforderungen an den Aufstellort sowie zum elektrischen Anschluss des Gerätes um Personen- und Sachschäden zu vermeiden.
  • Page 10: Auspacken

    Auspacken Beim Auspacken des Gerätes gehen Sie wie folgt vor: ‹ Entnehmen Sie das Gerät aus dem Karton und entfernen Sie das Verpackungsmaterial. ‹ Entfernen Sie das Verpackungsmaterial des Zubehörs. ‹ Entfernen Sie die Schutzfolie am LCD-Farbbildschirm des Gerä- tes. Entsorgung der Verpackung Die Verpackung schützt das Gerät vor Transportschäden.
  • Page 11: Elektrischer Anschluss

    Elektrischer Anschluss Für einen sicheren und fehlerfreien Betrieb des Gerätes sind beim elektrischen Anschluss folgende Hinweise zu beachten: ■ Vergleichen Sie vor dem Anschließen des Gerätes die Anschluss- daten des Netzadapters (Spannung und Frequenz) auf dem Typenschild mit denen Ihres Elektronetzes. Diese Daten müssen übereinstimmen, damit keine Schäden am Gerät auftreten.
  • Page 12: Bedienung Und Betrieb

    Bedienung und Betrieb Die Menüführung Das Gerät ist mit einer benutzerfreundlichen Menüführung ausgestat- tet. Die Menüführung wird am Bildschirm eingeblendet. ‹ Schließen Sie ein entsprechendes Speichermedium an das Ge- rät an. Folgende Speichermedien können gelesen werden: ● SD/SDHC - Karten ●...
  • Page 13: Ändern Der Bediensprache

    Ändern der Bediensprache Die Bediensprache ist werkseitig auf Deutsch eingestellt. Zum Ändern dieser Einstellung gehen Sie wie folgt vor: ‹ Drücken Sie die Taste „Setup“ auf der Fernbedienung. ‹ Wählen Sie „Sprache“ und anschließend die gewünschte Bedien- sprache und bestätigen Sie mit der „Enter“-Taste. ‹...
  • Page 14: Funktionen

    Funktionen Kopieren und Löschen von Dateien: a) Wählen Sie den USB – Stick bzw. die Speicherkarte aus, den Sie bearbeiten möchten. b) Wählen sie mit Hilfe der Pfeiltasten ◄/► der Fernbedienung die Playlist aus und drücken Sie „Enter“. c) Nun werden alle Daten angezeigt, betätigen Sie nun ihre Auswahl mit der Pfeiltaste ►...
  • Page 15: Leiste

    f) Wenn Sie Daten löschen möchten bestätigen Sie Delete mit der „Enter“-Taste, danach mit der Pfeiltaste ◄ auf ok. Betätigen Sie nun die „Enter“-Taste und die Daten werden unwiderruflich ge- löscht. g) Mit der „Exit“-Taste können Sie immer wieder ins Menü zurückkehren! Aufbau und Funktion der Info-Leiste: Drücken Sie während der Wiedergabe „Menü“...
  • Page 16: Zusatzfunktionen

    A-Stecker auf Mini-B-Stecker (B5Pin)) HINWEIS ► Ein USB - Kabel ist nicht im Lieferumfang enthalten ! Wir empfehlen das Hama USB - Adapterkabel 44430 ● Verbinden Sie den digit. Bilderrahmen mit Ihrem Computer ● Legen Sie eine Speicherkarte in den Slot des Bilderrahmen ●...
  • Page 17: Slideshow - Varianten

    Slideshow - Varianten Einzelmodus Slideshow Bildrotation Das Gerät ist mit einer automatischen Bildrotation ausgestattet. Stellen Sie das Gerät quer oder hochkant auf, das angezeigte Photo wird sich nun automatisch in die richtige Darstellung drehen. Original: Originalgröße (4:3 Format) In der Einstellung „Normal“ behält das Bild sein Originalformat bei Smart: Originalgröße (4:3 Format)
  • Page 18: Reinigung Und Pflege

    Reinigung und Pflege In diesem Kapitel erhalten Sie wichtige Hinweise zur Reinigung und Pflege des Gerätes. Sicherheitshinweise ACHTUNG Beschädigung des Gerätes durch Feuchtigkeit! ► Stellen Sie sicher, dass bei der Reinigung keine Feuchtigkeit in das Gerät eindringt, um eine irreparable Beschädigung des Gerätes zu vermeiden.
  • Page 19: Fehlerbehebung

    Fehlerbehebung In diesem Kapitel erhalten Sie wichtige Hinweise zur Störungslokali- sierung und Störungsbehebung. Beachten Sie die Hinweise um Ge- fahren und Beschädigungen zu vermeiden. Sicherheitshinweise WArNUNG Beachten Sie die folgenden Sicherheitshinweise um Gefahren und Sachschäden zu vermeiden: ► Reparaturen an Elektrogeräten dürfen nur von Fachleuten durchgeführt werden, die vom Hersteller geschult sind.
  • Page 20: Lagerung

    Fehler Mögliche Ursache Behebung Kein Speichermedium Stecken Sie ein Spei- Kein Bild eingesteckt chermedium ein. wird ange- Speichermedium ent- Überprüfen Sie Ihr Spei- zeigt hält keine Daten chermedium. Manche Nehmen Sie Bilder mit Bilder Bei hochauflösenden geringerer Auflösung. laden sich Bildern ist die Lade- Das Gerät unterstützt schneller...
  • Page 21: Anhang

    Anhang Technische Daten Allgemein 100-240 V AC / 50/60 Hz / 0,6 A Stromversorgung Eingang Stromversorgung Ausgang 12 V DC / 1,5 A Leistungsaufnahme < 13W 315 x 30 x 245 mm Abmessungen (L x B x H) (ohne Standfuß) Gewicht ca.
  • Page 22: Menüstruktur Des Dpf

    Supportinformationen Bei defekten Produkten wenden Sie sich bitte an Ihren Händler oder der Hama Produktberatung: Support Hotline – Hama Produktberatung (Deutsch / Englisch): Tel. +49 (0) 9091 / 502 – 115 Fax. +49 (0) 9091 / 502 – 272 e-mail: produktberatung@hama.de Weiter Produktinformationen finden Sie im Internet unter www.hama.com...
  • Page 24 Operating Instructions Contents Introduction ... . .25 Functions....36 Preface....25 Copying and deleting data .
  • Page 25: Introduction

    Introduction Preface Dear customer, By purchasing this Hama digital picture frame, you have chosen a quality product which conforms to state-of-the art development stan- dards in technology and functionality. Read the following information carefully in order to familiarise yourself with the device and its full range of functions.
  • Page 26: Warnings

    Warnings The following warnings are used in these operating instructions: DANGEr A warning of this type indicates the immediate threat of a dan- gerous situation. Death or serious injuries can result if this situation is not avoided. ► Follow the information in this warning to prevent death or serious personal injury.
  • Page 27: Intended Use

    Intended use This device is only intended for indoor use to display photos. Other uses or uses that go beyond this use are considered uninten- ded. WArNING Danger caused by unintended use Danger may result from unintended or other use of the device. ►...
  • Page 28: Safety

    Safety This chapter contains important safety instructions for handling the device. This device complies with the applicable safety regulations. However, improper use can lead to personal injury or material damage. Basic safety instructions Observe the following safety instructions to ensure safe handling of the device: ■...
  • Page 29: Design And Functionality

    Design and functionality Digital picture frame (rear view) arriba / abajo / a la izquierda / a la derecha / OK EXIT / Atrás ON/OFF Dispositivo para el montaje en la pared Alojamiento del pie Estándar VESA 75 x 75 mm como posibilidad de fijación alternativa Digital photo frame (side view)
  • Page 30: Estructura Y Funcionamiento

    Estructura y funcionamiento Mando a distancia On / off Menú Enter Arriba A la derecha A la izquierda Abajo Exit / Retroceso Ajustes del sistema Mando a distancia Colocación de la pila Para colocar la pila o para cambiarla, proceda del siguiente modo: ‹...
  • Page 31: Getting Started

    Getting started Safety instructions WArNING Personal injury and material damage may occur when using the device for the first time. Observe the following safety instructions to avoid these dangers. ► Packaging materials may not be used as toys. There is a risk of suffocation.
  • Page 32: Materials

    Unpacking When unpacking the device, proceed as follows: ‹ Take the device out of the box and remove the packaging mate- rial. ‹ Remove the packaging material for the accessories. ‹ Remove the protection foil on the LCD colour screen of the device.
  • Page 33: Electrical Connection

    Electrical connection The electrical connections must be made according to the following instructions in order to ensure safe and error-free operation: ■ Before you connect the device, compare the connection data for the power supply adapter (voltage and frequency) on the type pla- te with that of your mains power supply.
  • Page 34: Operation

    Operation Using the menu The device is equipped with a user-friendly menu. The menu appears on the screen. ‹ Connect a suitable storage medium to the device. The following types of storage media can be read: ● SD/SDHC cards ● MMC cards ●...
  • Page 35: Changing The Operating

    Changing the operating language The operating language is set to German („Deutsch“) at the factory. To change this setting, proceed as follows: ‹ Press the SETUP button on the remote control. ‹ Select “Language” and then the desired operating language, and confirm your selection by pressing the ENTER button.
  • Page 36: Functions

    Functions Copying and deleting files: a) Select the USB stick or memory card you want to edit. b) Select the playlist using the ◄/► buttons and press ENTER. c) All data is now displayed. Confirm your selection with the arrow button ►.
  • Page 37: Structure And Function Of The

    f) If you want to delete files, select DELETE and press ENTER, then press OK with arrow button ◄. Press ENTER to delete the files permanently. g) Return to the menu at any time by pressing EXIT. Structure and function of the info bar During Playback, press MENU and info bar displays on the screen.
  • Page 38: Additional Functions

    NOTE ► A USB - cable is not included! We recommend the Hama USB - Adapter - Cable 44430. ● Connect the digital picture frame to your computer ● Insert a memory card in the slot of the picture frame ●...
  • Page 39: Slideshow

    Slideshow types Individual mode Slideshow Image rotation The device can rotate images automatically. Turn the device so that it is upright or on its side and the displayed photo will rotate to the correct orientation automatically. Original: Original size (4:3 format) With the „Normal“...
  • Page 40: Cleaning And Care

    Cleaning and care This chapter contains important information for the cleaning and care of the device. Safety instructions CAUTION Moisture can damage the device. ► To prevent irreparable damage, make sure that no moisture gets into the device when you clean it. Cleaning The display on your device is located behind protective glass.
  • Page 41: Troubleshooting

    Troubleshooting This chapter contains important information for localising and rectify- ing errors. Observe the information to avoid dangers and material da- mage. Safety instructions WArNING Observe the following safety instructions to avoid safety risks and material damage: ► Repairs to electrical devices may only be carried out by spe- cialists who have been trained by the manufacturer.
  • Page 42: Storage

    Error Possible cause Solution No storage medium is Insert a storage inserted medium. No image appears The storage medium Check your storage does not contain data medium. Use a lower resolu- Some images load The loading time is lon- tion for your images. up quicker than ger for high resolution The device supports...
  • Page 43: Appendix

    Appendix Technical specifications General information Power supply input 100-240 V AC / 50/60 Hz / 0,6 A Max Power supply output 12 V DC / 1,5 A Power consumption <13 W Dimensions (L x W x H) 315 x 30 x 245 mm (without the base) Weight 1200 g Recommended ambient...
  • Page 44: Menu Structure For The Dpf

    Contrast Colour saturation Split screen function Default Support information Contact your dealer or Hama Product Consulting if you have a faulty product: Support hotline – Hama Product Consulting (German/ English): Phone: +49 (0) 9091/502-115 Fax: +49 (0) 9091 / 502 – 272 Email: mailto:produktberatung@hama.de...
  • Page 46 Mode d´emploi Sommaire Introduction ... . .47 Commande et utilisation . . .56 Préface....47 Gestion du menu .
  • Page 47: Introduction

    Chère cliente, cher client, Avec l´achat de ce cadre photo numérique vous avez choisi un produit de qualité de Hama, qui correspond à la norme de développement la plus récente, en ce qui concerne la technologie et la fonctionnalité. Veuillez lire les informations con tenues dans cette notice afin que vous puissiez vous familiariser rapidement avec cet appareil et utiliser toutes ses fonctions.
  • Page 48: Mises En Garde

    Mises en garde Dans cette notice d´utilisation, les avertissements suivants sont utili- sés : DANGEr Une mise en garde de ce niveau de danger caractérise une situation dangereuse et menaçante. Au cas où cette situation dangereuse n´est pas évitée, cela peut conduire à...
  • Page 49: L´application

    Utilisation conforme à l´application Cet appareil est destiné exclusivement à une utilisation à l‘intérieur pour présenter des photos. Toute autre utilisation est considérée comme non conforme. AVErTISSEMENT Danger en cas d’utilisation non conforme ! L’appareil est susceptible de provoquer des situations dangereu- ses en cas d’utilisation non conforme et/ou divergente.
  • Page 50: Sécurité

    Sécurité Ce chapitre contient des consignes de sécurité importantes relatives à l’utilisation de l’appareil. Cet appareil est conforme aux consignes de sécurité prescrites. L’utilisation non conforme peut cependant entraîner des dommages matériels et corporels. Mesures de sécurité fondamentales Pour une manipulation sûre de l´appareil, veuillez observer les mesu- res de sécurité...
  • Page 51: Structure Et Fonctionnement51

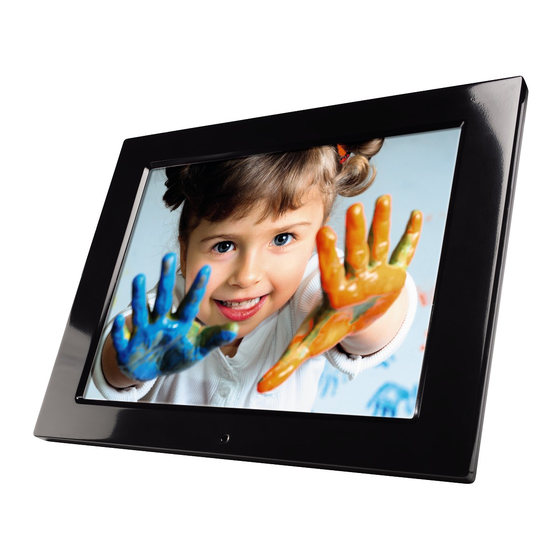
    Structure et fonctionnement Cadre photo numérique (vue avant) Montée / descente / Quitter / retour marche / arrêt gauche / droite / OK Dispositif pour le montage mural Prise de vue sur pied Fixation standard VESA 75 x 75 mm comme possibilité...
  • Page 52: Structure Et Fonctionnement

    Structure et fonctionnement Télécommande Marche / arrêt Menu Entrée Montée Droite Gauche Descente Exit / retour Paramètres du système Télécommande Insertion de la pile Procédez comme suit afin d‘insérer / remplacer la pile : ‹ Ouvrez le compartiment de la pile de la télécommande en appu- yant sur le verrouillage et en extrayant le compartiment.
  • Page 53: Mise En Marche

    Mise en marche Mesures de sécurité AVErTISSEMENT risque de dommages corporels et matériels lors de la mise en service de l’appareil ! Veuillez tenir compte des consignes de sécurité suivantes pour éviter les dangers. ► Les matériaux d’emballage ne doivent pas être utilisés pour jouer.
  • Page 54: Déballage

    Déballage Procédez comme suit lors du déballage : ‹ Sortez l‘appareil du carton et retirez l‘emballage. ‹ Retirez l‘emballage des accessoires. ‹ Retirez le film de protection de l‘écran LCD. Elimination de l’emballage L’emballage protège l’appareil des dommages de transport. Les ma- tériaux d’emballage ont été...
  • Page 55: Branchement Électrique

    Branchement électrique Respectez les conditions suivantes lors du branchement électrique de l‘appareil afin de garantir un fonctionnement en toute sécurité et sans défaut de l‘appareil : ■ Avant le branchement, comparez les caractéristiques de votre réseau électrique à celles de la plaque signalétique de l‘adaptateur secteur (tension et fréquence).
  • Page 56: Commande Et Utilisation

    Commande et utilisation Gestion du menu L‘appareil est équipé d’une gestion de menu conviviale. La gestion du menu apparaît à l‘écran. ‹ Insérez un support d‘enregistrement approprié dans l‘appareil. L‘appareil est capable de lire les supports d‘enregistrement suivants: ● cartes SD/SDHC ●...
  • Page 57: Changement De La Langue D'utilisation

    Changement de la langue d‘utilisation La langue par défaut est l‘allemand. Procédez comme suit afin de mo- difier ce paramètre : ‹ Appuyez sur la touche « Setup » de la télécommande. ‹ Sélectionnez « Langue » votre langue d‘utilisation, puis confir- mez votre sélection à...
  • Page 58: Fonctions

    Fonctions Copie et suppression de fichiers : a) Sélectionnez la clé USB (la carte mémoire) dont vous désirez éditer les fichiers. b) Sélectionnez la liste de lecture à l‘aide des touches fléchées ◄/►, puis appuyez sur la touche ENTER. c) Toutes les données apparaissent à l‘écran ; sélectionnez le fichier à...
  • Page 59: Aperçu De La Barre D'informations Et Fonctions

    f) Pour effacer des fichiers, sélectionnez DELETE à l‘aide de la tou- che ENTER, puis sélectionnez OK à l‘aide de la touche fléchée ◄. Appuyez sur la touche ENTER ; les fichiers seront alors irrémédia- blement effacés. g) Vous avez à tout moment la possibilité de retourner au menu à l‘aide de la touche EXIT.
  • Page 60: Utilisation Comme Lecteur De

    ► Vous aurez besoin d‘un cordon USB type A – type B pour con- necter l‘appareil à votre ordinateur (nous vous recommandons l‘article Hama réf. 44430) ● Branchez le cadre photo numérique à votre ordinateur ● Insérez une carte mémoire dans l‘emplacement du cadre photo ●...
  • Page 61: Variantes Diaporama

    Variantes diaporama Mode individuel Diaporama rotation de l’image L‘appareil est équipé d’une fonction automatique de rotation de photos. Installez l‘appareil en hauteur ou en largeur, la photo affi- chée pivotera automatiquement dans le bon sens. Original: Format d’origine (format 4:3) En réglage «...
  • Page 62: Nettoyage Et Entretien

    Nettoyage et entretien Dans ce chapitre, vous trouverez les remarques importantes con- cernant le nettoyage et l´entretien de l´appareil. Mesures de sécurité ATTTENTION Endommagement de l´appareil dû à l´humidité! ► Vérifiez que lors du nettoyage aucune humidité ne pénètre dans l´appareil afin d´éviter un endommagement irréparable de l´appareil.
  • Page 63: Consignes De Sécurité

    Consignes de sécurité AVErTISSEMENT Veuillez tenir compte des consignes de sécurité suivantes afin d‘écarter tout danger et éviter tout dommage matériel : ► Faites réaliser les réparations sur les appareils électriques exclusivement par des spécialistes formés par le fabricant. Des réparations effectuées de manière non conforme sont susceptib- le d‘être à...
  • Page 64: Entreposage

    REMARQUE ► Veuillez contacter le service après-vente dans le cas où les mesu- res mentionnées ci-dessus ne vous permettent pas de résoudre le problème. Entreposage Dans le cas où vous ne comptez pas utiliser votre appareil pendant un certain temps, mettez-le hors tension, séparez-le de l‘alimentation électrique et entreposez-le dans un endroit propre et sec, et protégez- le des rayons directs du soleil.
  • Page 65: Annexe

    Annexe Spécificités techniques Généralités Entrée secteur 100-240 V AC / 50/60 Hz / 0,6 A Max Sortie secteur 12 V DC / 1,5 A Consommation de courant <13 W Dimensions (L x l x H) 389 x 30 x 245 mm (sans pied) Poids env.
  • Page 66: Structure Du Menu Du Dpf (Cadre Photo Numérique)

    Réglages d’usine Support technique En cas de produit défectueux, veuillez vous adresser à votre reven- deur ou au département de conseil produits de Hama : Assistance technique – Conseil produits Hama (allemand/anglais) : Tél. +49 (0) 9091 / 502 – 115 Fax +49 (0) 9091 / 502 –...
  • Page 68 Instrucciones de uso Índice Introducción ... . .69 Manejo y funcionamiento . .78 Prefacio ....69 La guía de menús .
  • Page 69: Introducción

    Prefacio Estimados clientes: Con la compra de este marco digital se han decidido por un producto de calidad de Hama con el más moderno standard de desarrollo téc- nico y funcional. Léanse estas informaciones para familiarizarse rápidamente con el aparato y poder utilizar sus funciones al completo.
  • Page 70: Avisos

    Avisos En estas instrucciones de uso se utilizan los siguientes avisos:: PELIGrO Un aviso con este nivel de peligro caracteriza una situación peligrosa presente. Si no se evita esta situación peligrosa, la muerte o graves lesiones pueden ser la consecuencia. ►...
  • Page 71: Uso Adecuado

    Uso adecuado Este aparato está destinado únicamente para el uso en espacios cer- rados para la visualización de fotografías. Cualquier uso distinto o adicional será considerado como no adecu- ado. ADVErTENCIA Peligro si no se hace un uso adecuado del aparato. Si el aparato no se utiliza de forma adecuada o si se utiliza para fines distintos al previsto, pueden surgir peligros de él.
  • Page 72: Seguridad

    Seguridad Este capítulo contiene importantes informaciones de seguridad sobre el manejo del aparato. El aparato cumple las disposiciones de seguridad prescritas. Sin em- bargo, un manejo incorrecto del aparato puede causar daños perso- nales y materiales. Instrucciones básicas de seguridad Para un manejo seguro del aparato, observe las siguientes instruccio- nes de seguridad: ■...
  • Page 73: Estructura Y Funcionamiento

    Estructura y funcionamiento Marco digital (vista posterior) arriba / abajo / a la izquierda / a la derecha / OK EXIT / Atrás ON/OFF Dispositivo para el montaje en la pared Alojamiento del pie Estándar VESA 75 x 75 mm como posibilidad de fijación alternativa Marco digital (vista lateral)
  • Page 74: Estructura Y Funcionamiento

    Estructura y funcionamiento Mando a distancia On / off Menú Enter Arriba A la derecha A la izquierda Abajo Exit / Retroceso Ajustes del sistema Mando a distancia Colocación de la pila Para colocar la pila o para cambiarla, proceda del siguiente modo: ‹...
  • Page 75: Puesta En Funcionamiento

    Puesta en funcionamiento Instrucciones de seguridad ADVErTENCIA Durante la puesta en funcionamiento del aparato, pueden producirse daños personales y materiales. Para evitar peligros, observe las siguientes instrucciones de segu- ridad. ► Los materiales del embalaje no deben utilizarse para jugar. Existe peligro de asfixia.
  • Page 76: Desembalar

    Desembalar Proceda del siguiente modo para desembalar el aparato: ‹ Saque el aparato de la caja de cartón y retire el material de embalaje. ‹ Retire el material de embalaje de los accesorios. ‹ Retire la lámina protectora de la pantalla LCD a color del aparato. Desechar el embalaje El embalaje protege el aparato frente a daños de transporte.
  • Page 77: Conexión Eléctrica

    Conexión eléctrica Para que el aparato funcione de forma segura y sin fallos, se deben observar las siguientes instrucciones durante la conexión eléctrica: ■ Antes de enchufar el aparato, compare los datos de conexión del adaptador de red (tensión y frecuencia) que se encuentran en la placa de características con los de su red eléctrica.
  • Page 78: Manejo Y Funcionamiento

    Manejo y funcionamiento La guía de menús El aparato está equipado con una guía de menús de fácil uso. La guía de menús se visualiza en la pantalla. ‹ Conecte un medio de memoria al aparato. Se pueden leer los siguientes medios de memoria: ●...
  • Page 79: Cambiar El Idioma De Manejo

    Cambiar el idioma de manejo El idioma de manejo viene ajustado de fábrica a alemán. Para cambiar este ajuste, proceda del siguiente modo: ‹ Pulse la tecla „Setup“ del mando a distancia. ‹ Seleccione „Idioma“ y seguidamente el idioma de manejo que desee y confirme con la tecla ENTER.
  • Page 80: Funciones

    Funciones Copiar y borrar archivos: a) Seleccione la memoria USB o la tarjeta de memoria que desee editar. b) Con ayuda de las teclas de flecha ◄/►, seleccione la lista de re- producción y pulse la tecla ENTER. c) Ahora se visualizan todos los archivos, haga su selección con la tecla de flecha ►.
  • Page 81: Estructura Y Funciones De La Barra De Información

    f) Si desea borrar datos, confirme Delete con la tecla ENTER, segui- damente pulse ok con la tecla ◄. Pulse ahora la tecla ENTER y los datos se borran de forma definitiva. g) Con la tecla EXIT puede volver siempre al menú. Estructura y funciones de la barra de información: Durante la reproducción, pulse MENU y se visualiza la barra de infor- mación.
  • Page 82: Uso Como Lector De Tarjetas

    NOTA ► Para conectar su aparato a un PC necesita un cable USB tipo A – tipo B, recomendamos el art. n° de Hama: 44430 ● Conecte el marco digital con su ordenador ● Introduzca la tarjeta de memoria en la ranura del marco digital ●...
  • Page 83: Variantes De Diapositivas

    Variantes de diapositivas Modo individual Sesión de diapositivas rotación de imagen El aparato está equipado con una rotación de imagen automática. Colocando el aparato en posición transversal o vertical, la foto- grafía se girará automáticamente hasta la posición correcta. Original: Tamaño original (formato 4:3) En el ajuste „Normal“, la imagen conserva su formato original...
  • Page 84: Impieza Y Cuidadod

    impieza y cuidadod Este capítulo contiene importantes informaciones para la limpieza y el cuidado del aparato. Instrucciones de seguridad ATENCIÓN Destrucción del aparato por la humedad! ► Asegúrese de que durante la limpieza no pueda penetrar ningún tipo de humedad en el aparato para evitar un deterioro irrepara- ble de éste.
  • Page 85: Solución De Fallos

    Solución de fallos Este capítulo contiene importantes informaciones para la localización de fallos y su solución. Para evitar peligros y deterioros, observe las siguientes indicaciones. Instrucciones de seguridad ADVErTENCIA Para evitar peligros y daños materiales, observe las siguientes instrucciones de seguridad: ►...
  • Page 86: Almacenamiento

    Fallo Posible causa Solución No hay ningún medio de Conecte un medio de memoria conectado memoria. No se visualiza ninguna imagen El medio de memoria no Compruebe el medio contiene ningún dato de memoria. Seleccione imágenes El tiempo de carga de de menor resolución.
  • Page 87: Anexo

    Anexo Datos técnicos General Entrada de alimentación de 100-240 V AC / 50/60 Hz / 0,6 A Máx corriente Salida de alimentación de 12 V DC / 1,5 A corriente Consumo de potencia <13 W 315 x 30 x 245 mm Dimensiones (L x B x H) (sin soporte) Peso...
  • Page 88: Estructura De Menú Del Dpf

    Config. original Información de ayuda Si tiene que hacer alguna reclamación sobre un producto defectuoso, diríjase a su proveedor o a su distribuidor de productos Hama: Línea directa de soporte – Asesoramiento sobre productos Hama (alemán / inglés): Tel. +49 (0) 9091 / 502 – 115 Fax.
  • Page 90 Istruzioni per l‘uso Indice del contenuto Introduzione ... . .92 Impiego e funzionamento .101 Premessa ....92 La guida a menu .
  • Page 91: Introduzione

    Gentile cliente, con l‘acquisto di questa cornice digitale vi siete decisi per un prodotto di qualità Hama, il quale, per quello che riguarda la tecnica e la funzio- nalità corrisponde allo standard di sviluppo più moderno. Leggere le informazioni qui contenute, in maniera tale da familiarizza- re con l‘apparecchio e poter sfruttare pienamente tutte le sue funzioni.
  • Page 92: Avvertimento

    Avvertimento Nelle presenti Istruzioni per l‘uso vengono usate le seguenti avver- tenze: PErICOLO Un avvertimento di questo livello contrassegna una incomben- te situazione di pericolo. Se la situazione di pericolo non viene evitata, questa può causare la morte oppure gravi lesioni. ►...
  • Page 93: Impiego Conforme Alle Prescrizioni

    Impiego conforme alle prescrizioni Questo apparecchio è concepito per l‘impiego in ambienti chiusi, per la visualizzazione di fotografie. Un impiego diverso da quello per il quale è previsto viene considerato come non conforme alle prescrizioni. AVVISO Pericolo a causa di un impiego non conforme alle prescrizio- Se l‘apparecchio non viene utilizzato conformemente alle prescri- zioni e/o se viene utilizzato per un altro scopo da quello previsto possono avere luogo dei pericoli.
  • Page 94: Sicurezza

    Sicurezza Questo capitolo fornisce delle importanti indicazioni di sicurezza per l‘impiego dell‘apparecchio. Questo apparecchio corrisponde alle norme di sicurezza prescritte. Tuttavia, un impiego inadeguato può causare dei danni alle persone e materiali. Indicazioni di sicurezza basilari Per un impiego sicuro dell‘apparecchio osservare le seguenti indica- zioni di sicurezza: ■...
  • Page 95: Struttura E Funzionamento

    Struttura e funzionamento Cornice per foto digitale (vista lato posteriore) su /giù / sinistra / EXIT / Indietro ON/OFF destra / OK Preparazione al montag- gio a parete Altoparlante Alloggiamento piede Standard VESA 75 x 75 mm come possibilità di fissaggio alternativa Cornice per foto digitale (vista laterale)
  • Page 96: Struttura E Funzionamentoe

    Struttura e funzionamentoe Telecomando On/Off Menü Enter Destra Sinistra Giù Exit / Indietro Impostazioni di sistema Telecomando Inserimento delle batterie Per inserire le batterie oppure per la loro sostituzione, procedere nel seguente modo: ‹ Estrarre il vano batterie dal telecomando, premendo sulla chiusu- ra e estraendo contemporaneamente il vano batterie.
  • Page 97: Messa In Funzione

    Messa in funzione Indicazioni di sicurezza AVVISO Con la messa in funzione dell‘apparecchio possono insorgere dei danni per le persone oppure materiali! Per evitare dei pericoli, osservare le seguenti indicazioni di sicurezza: ► I materiali di imballaggio non devono essere utilizzati per gio- care.
  • Page 98: Disimballaggio

    Disimballaggio Per il disimballaggio dell‘apparecchio procedere nel seguente modo: ‹ Togliere l‘apparecchio dal cartone e rimuovere il materiale di imballaggio. ‹ Rimuovere il materiale di imballaggio degli accessori. ‹ Rimuovere la pellicola di protezione nello schermo LCD dell‘apparecchio.. Smaltimento dell‘imballaggio L‘imballaggio protegge l‘apparecchio da eventuali danni dovuti al tras- porto.
  • Page 99: Collegamento Elettrico

    Collegamento elettrico Per un funzionamento sicuro e senza problemi dell‘apparecchio, per il collegamento elettrico si devono osservare le seguenti indicazioni: ■ Prima del collegamento dell‘apparecchio confrontare i dati di colle- gamento dell‘adattatore di rete (tensione e frequenza), sulla targhet- ta di modello, con quelli della propria rete elettrica. Questi dati de- vono coincidere, altrimenti si rischia di danneggiare l‘apparecchio.
  • Page 100: Impiego E Funzionamento

    Impiego e funzionamento La guida a menu L‘apparecchio è dotato di una guida a menu di facile uso. La guida a menu viene visualizzata sullo schermo. ‹ Collegare un corrispondente supporto di memoria all’apparecchio. Possono essere letti i seguenti supporti di me- moria: ●...
  • Page 101: Modifica Della Lingua Dell'interfaccia

    Modifica della lingua dell‘interfaccia La lingua dell‘interfaccia è impostata di fabbrica su Tedesco. Per modi- ficare questa impostazione procedere nel seguente modo: ‹ Premere il pulsante „Setup“ nel telecomando. ‹ Selezionare „Lingua“ e dopo la lingua dell‘interfaccia desiderata, infine confermare con il pulsante ENTER. ‹...
  • Page 102: Funzioni

    Funzioni Copia e cancellazione di file: a) Selezionare la chiavetta USB o la scheda di memoria su cui si desidera lavorare. b) Servendosi dei tasti freccia ◄/►, selezionare la playlist e premere ENTER. c) Vengono visualizzati tutti i dati. Effettuare la selezione mediante il tasto freccia ►.
  • Page 103: Struttura E Funzioni Della Barra Delle Informazioni

    f) Se si desidera cancellare i dati, confermare DELETE mediante il tasto ENTER, quindi andare su OK con il tasto freccia ◄. Premere il tasto ENTER, i dati vengono definitivamente cancellati. g) Con il tasto EXIT è sempre possibile tornare al menu! Struttura e funzioni della barra delle informazioni: Preme MENU durante la riproduzione per visualizzare la barra delle informazioni.
  • Page 104: Funzioni Supplementari

    (non compreso nella confezione) INDICAZIONE ► Per il collegamento al PC, è necessario un cavo USB tipo A – tipo B; consigliamo Hama Art. nr.: 44430 ● Collegate la cornice digitale al computer ● Inserite la memory card nello slot della cornice digitale ●...
  • Page 105: Varianti - Slideshow

    Varianti - Slideshow Single Mode Slideshow rotazione immagine L‘apparecchio è provvisto della funzione di rotazione automatica dell‘immagine. Disporre l‘apparecchio in orizzontale o verticale, la foto visualizzata ruoterà automaticamente nella posizione corretta. Originale: Dimensione originale (Formato Nella impostazione „Normale“ 4:3) l‘immagine mantiene il suo formato originale Smart: Dimensione originale (Formato...
  • Page 106: Pulizia E Cura

    Pulizia e cura Questo capitolo fornisce delle importanti indicazioni per la pulizia e la cura dell‘apparecchio. Indicazioni di sicurezza ATTENZIONE Danneggiamenti dell‘apparecchio a causa dell‘umidità! ► Assicurarsi, che durante la pulizia non penetri alcuna umidità nell‘apparecchio, onde evitare un danneggiamento irreparabile dell‘apparecchio.
  • Page 107: Rimozione Degli Errori

    rimozione degli errori Questo capitolo fornisce delle importanti indicazioni per la localizza- zione e la rimozione dei disturbi. Per evitare dei pericoli e dei dann- eggiamenti, osservare le indicazioni. Indicazioni di sicurezza AVVISO Per evitare dei pericoli e dei danni materiali, osservare le seguenti indicazioni di sicurezza: ►...
  • Page 108: Immagazzinamento

    Errore Possibile causa rimozione Non è inserito alcun Inserire un supporto di Non viene visu- supporto di memoria memoria. alizzata alcuna Il supporto di memoria non Controllare il supporto immagine contiene alcun dato di memoria. Prendere foto con una Alcune foto si Per le foto ad alta risoluzione più...
  • Page 109: Appendice

    Appendice Dati tecnici Informazioni generali Alimentazione di corrente 100-240 V AC / 50/60 Hz / 0,6 A Max ingresso Alimentazione di corrente 12 V DC / 1,5 A uscita Potenza assorbita <13 W 315 x 30 x 245 mm Dimensioni (L x B x H) (senza piedino di sostegno) Peso 1200 g...
  • Page 110: Struttura Del Menu Del Dpf

    Impostazioni di default Informazioni per l’assistenza In caso di prodotti difettosi, si prega di rivolgersi al proprio rivenditore o al Servizio di consulenza prodotti Hama: Servizio di supporto in linea (hotline) – Consulenza prodotti Hama (tedesco / inglese): Tel. +49 (0) 9091 / 502 – 115 Fax: +49 (0) 9091 / 502 –...
  • Page 112 Gebruiksaanwijzing Inhoudsopgave Inleiding ....114 Bediening en gebruik..123 Voorwoord ....114 Menu .
  • Page 113: Inleiding

    Geachte klant, Met de aanschaf van deze digitale fotolijst heeft u gekozen voor een kwaliteitsproduct van Hama dat op het gebied van techniek en functio- naliteit aan de modernste standaard voldoet. Lees de informatie in deze gebruiksaanwijzing zodat u uw toestel snel leert kennen en volledig gebruik kunt maken van de functies.
  • Page 114: Waarschuwingen

    Waarschuwingen In deze gebruiksaanwijzing worden de volgende waarschuwingen ge- bruikt: GEVAAr Een waarschuwing van dit gevarenniveau geeft een zeer ge- vaarlijke situatie aan. Als de gevaarlijke situatie niet vermeden wordt, ontstaat levensge- vaar of kan ernstig letsel het gevolg zijn. ►...
  • Page 115: Gebruik Volgens De Bestemming

    Gebruik volgens de bestemming Dit toestel is alleen bestemd voor gebruik in gesloten ruimtes voor het weergeven van foto´s. Een andere toepassing of gebruik geldt als niet volgens de bestem- ming. WAArSCHUWING Gevaar door gebruik dat niet volgens de bestemming is! Het toestel kan bij gebruik dat niet volgens de bestemming is en/of bij andersoortig gebruik risico´s opleveren.
  • Page 116: Veiligheid

    Veiligheid In dit hoofdstuk vindt u belangrijke veiligheidsinstructies over de om- gang met het toestel. Dit toestel voldoet aan de voorgeschreven veiligheidsbepalingen. On- deskundig gebruik kan echter tot letsel en materiële schade leiden. Belangrijkste veiligheidsinstructies Houd u voor een veilige omgang met het toestel aan de volgende veiligheidsinstructies: ■...
  • Page 117: Opbouw En Functie

    Opbouw en functie Digitale fotolijst (achteraanzicht) Omhoog/omlaag/ EXIT / terug ON/OFF links/rechts/OK Systeem voor wandmontage Houder voor voet VESA – standaard 75 x 75 mm als alternatieve montagemogelijkheid Digitale fotolijst (zijaanzicht)
  • Page 118: Opbouw En Functie

    Opbouw en functie Afstandsbediening Aan/uit Menü Enter Omhoog Rechts Links Omlaag Exit/terug Systeeminstellingen Afstandsbediening Batterijen plaatsen Ga als volgt te werk voor het plaatsen of vervangen van de batterij: ‹ Trek het batterijvak uit de afstandsbediening door de vergrende- ling in te drukken en tegelijkertijd het batterijvak eruit te trekken. ‹...
  • Page 119: Inbedrijfname

    Inbedrijfname Veiligheidsinstructies WAArSCHUWING Bij de ingebruikname van het toestel kunnen er letsel en mate- riële schade ontstaan! Houd u, om de risico´s te vermijden, aan de volgende veiligheids- instructies. ► Verpakkingsmateriaal mag niet gebruikt worden om mee te spelen. Er bestaat gevaar van stikken. ►...
  • Page 120: Uitpakken

    Uitpakken Ga bij het uitpakken van het toestel als volgt te werk: ‹ Neem het toestel uit de doos en verwijder het verpakkingsmate- riaal. ‹ Verwijder het verpakkingsmateriaal van het toebehoren. ‹ Verwijder de beschermende folie op het kleuren-LCD van het toestel.
  • Page 121: Elektrische Aansluiting

    Elektrische aansluiting Voor een veilig en storingsvrij gebruik van het toestel moet er bij de elektrische aansluiting op het volgende gelet worden: ■ Vergelijk voor het aansluiten van het toestel de aansluitgegevens van de voedingsadapter (spanning en frequentie) op het type- plaatje met de gegevens van uw elektrische voedingsnet.
  • Page 122: Bediening En Gebruik

    Bediening en gebruik Menu Het toestel is uitgerust met een gebruiksvriendelijk menu. Het menu verschijnt op het beeldscherm. ‹ Sluit een opslagmedium op het toestel aan. De volgende opslag- media kunnen gelezen worden: ● SD-/SDHC-kaarten ● MMC-kaarten ● Memory-sticks ● USB-opslagmedia ‹...
  • Page 123: Wijzigen Van De Taal

    Wijzigen van de taal De taal is in de fabriek ingesteld op Duits. Om de taal te wijzigen gaat u als volgt te werk: ‹ Druk op de knop “Setup” op de afstandsbediening. ‹ Selecteer „Taal“ en vervolgens de gewenste taal en bevestig uw keuze met de ENTER-knop.
  • Page 124: Functies

    Functies Kopiëren en wissen van bestanden: a) Selecteer de USB-stick of geheugenkaart die u wilt bewerken. b) Selecteer met behulp van de pijltoetsen ◄/► de playlist en druk op ENTER. c) Nu worden alle gegevens weergegeven. Bevestig uw selectie met de pijltoets ►.
  • Page 125: Opbouw En Functies Van De Informatielijst

    f) Als u gegevens wilt wissen, bevestigt u Delete met de ENTER- toets. Vervolgens gaat u met de pijltoets ◄ naar ok. Druk nu op de ENTER-toets en de gegevens worden onherroepelijk gewist. g) Met de EXIT-toets kunt u op elk willekeurig moment naar het menu terugkeren! Opbouw en functies van de informatielijst: Druk tijdens de weergave op MENU en de informatielijst wordt weer-...
  • Page 126: Extra Functies

    (niet inbegrepen) AANWIJZING ► Voor een pc-verbinding met uw toestel heeft u een USB-kabel, type A – Mini-B-Stecker (B5Pin) nodig. Wij adviseren Hama art.- nr.: 39664 ● Sluit de digit. fotolijst aan op uw computer ● Plaats een geheugenkaart in de sleuf van de fotolijst ●...
  • Page 127: Diashow-Varianten

    Diashow-varianten Enkele modus Diashow Beeldrotatie Het toestel is voorzien van een automatische beeldrotatie-functie. Zet het toestel overdwars of rechtop, de weergegeven foto draait zich vervolgens automatisch in de juiste weergave. Origineel: Originele afmeting (4:3 formaat) Onder de instelling „Normal“ blijft het originele formaat van de foto behouden.
  • Page 128: Reiniging En Onderhoud

    reiniging en onderhoud In dit hoofdstuk vindt u belangrijke informatie over de reiniging en het onderhoud van het toestel. Veiligheidsinstructies ATTENTIE Beschadiging van het toestel door vochtigheid! ► Zorg ervoor dat er bij de reiniging geen vochtigheid in het toestel dringt om onherstelbare beschadiging van het toestel te voorko- men.
  • Page 129: Verhelpen Van Storingen

    Verhelpen van storingen In dit hoofdstuk vindt u belangrijke informatie over het opsporen en verhelpen van storingen. Neem de aanwijzingen in acht om risico´s en beschadigingen te vermijden. Veiligheidsinstructies WAArSCHUWING Houd u, om materiële schade te vermijden, aan de volgende veilig- heidsinstructies.
  • Page 130: Bewaren

    Storing Mogelijke oorzaak Oplossing Geen opslagmedium Plaats een opslag- geplaatst medium. Er wordt niets weergegeven Opslagmedium bevat Controleer het ops- geen gegevens lagmedium. Neem foto´s met een lagere resolutie. Het Sommige foto´s Bij foto´s met een hoge toestel ondersteunt worden sneller ge- resolutie duurt het een maximale reso- laden dan andere...
  • Page 131: Bijlage

    Bijlage Technische gegevens Algemeen Stroomtoevoer ingang 100-240 V AC / 50/60 Hz / 0,6 A max Stroomtoevoer uitgang 12 V DC / 1,5 A Vermogensopname <13 W Afmetingen (L x B x H) 315 x 30 x 245 mm (zonder voet) Gewicht ca.
  • Page 132: Menustructuur Van De Dpf

    Neem bij defecte producten contact op met uw verkoper of met de afdeling Productadvies van Hama: Support hotline - Hama productadvies (Duits/Engels): Tel. +49 (0) 9091 / 502 – 115 Fax: +49 (0) 9091 / 502 – 272 E-mail: mailto:produktberatung@hama.de Meer productinformatie vindt u op internet onder www.hama.com...
  • Page 134: Instrukcja Obsługi

    Instrukcja obsługi Spis treści Wprowadzenie ..136 Obsługa....145 Wstęp ....136 Struktura menu.
  • Page 135: Wprowadzenie

    Wstęp Szanowni Klienci, kupując elektroniczną ramkę do zdjęć, zdecydowali się Państwo na wysokiej jakości produkt firmy Hama, odpowiadający pod względem technicznym i funkcjonalnym najnowszym standardom rozwoju. Prosimy o przeczytanie zawartych tutaj informacji w celu szybkiego zapoznania się z urządzeniem i jego funkcjami.
  • Page 136: Ostrzeżenia

    Ostrzeżenia W niniejszej instrukcji obsługi zastosowano następujące ostrzeżenia: NIEBEZPIECZEńSTWO Ostrzeżenie tego stopnia oznacza grożącą niebezpieczną sytuację. Jeżeli nie zapobiegnie się niebezpiecznej sytuacji, istnieje ryzyko utraty życia lub ciężkich obrażeń ciała. ► Przestrzegać zaleceń w tym ostrzeżeniu, aby uniknąć ryzyka utraty życia lub ciężkich obrażeń ciała. OSTRZEŻENIE Ostrzeżenie tego stopnia oznacza potencjalnie niebezpieczną...
  • Page 137: Użytkowanie Zgodne Z Przeznaczeniem Użytkowanie Zgodne Z Przeznaczeniem

    Użytkowanie zgodne z przeznaczeniem Użytkowanie zgodne z przeznaczeniem Urządzenie to przeznaczone jest wyłącznie do stosowania w zamkniętych pomieszczeniach, wyświetlania zdjęć. Inne lub wykraczające poza wyznaczony zakres użytkowanie uważane jest za niezgodne z przeznaczeniem. OSTRZEŻENIE Niebezpieczeństwo w wyniku użytkowania niezgodnego z przeznaczeniem! W przypadku stosowania urządzenia niezgodnie z przeznacze- niem i/lub innego użytkowania może dojść...
  • Page 138: Bezpieczeństwo

    Bezpieczeństwo W rozdziale tym zawarte są ważne wskazówki dotyczące bezpiecznej obsługi urządzenia. Urządzenie to odpowiada wymaganym przepisom bezpieczeństwa. Nieprawidłowe stosowanie może jednakże prowadzić do obrażeń ciała i szkód rzeczowych. Podstawowe wskazówki bezpieczeństwa Aby bezpiecznie korzystać z urządzenia, należy przestrzegać poniższych wskazówek bezpieczeństwa: ■...
  • Page 139: Budowa I Działanie

    Budowa i działanie Elektroniczna ramka do zdjęć (widok z tyłu) Do góry /w dół/ Wyłącznik Wyjście / powrót zasilania lewo / prawo / OK Mocowanie do montażu na ścianie Mocowanie podpórki Możliwości mocowania VESA 75 x 75 Elektroniczna ramka do zdjęć (widok z boku)
  • Page 140: Budowa I Działanie

    Budowa i działanie Pilot zdalnego sterowania Zał./wył. Menü Enter Do góry W prawo W lewo W dół Wyjście/wstecz Ustawienia systemowe Pilot zdalnego sterowania Wkładanie baterii Sposób postępowania podczas wkładania bądź wymiany baterii: ‹ Zdjąć z pilota schowek na baterię, jednocześnie naciskając blokadę...
  • Page 141: Uruchamianie

    Uruchamianie Wskazówki bezpieczeństwa OSTRZEŻENIE Podczas uruchamiania urządzenia może dość do obrażeń ciała i szkód rzeczowych! W celu uniknięcia zagrożeń należy przestrzegać poniższych wska- zówek bezpieczeństwa: ► Nie używać materiałów opakowaniowych do zabawy. Istnieje niebezpieczeństwo uduszenia. ► Przestrzegać informacji dotyczących wymagań wobec miejsca ustawienia i podłączania elektrycznego urządzenia, aby uniknąć...
  • Page 142: Usuwanie Opakowania

    Sposób postępowania podczas rozpakowywania: ‹ Wyjąć urządzenie z kartonu i usunąć materiał opakowaniowy. ‹ Usunąć materiał opakowaniowy akcesoriów. ‹ Ściągnąć folię ochronną z kolorowego ekranu LCD urządzenia. Usuwanie opakowania Opakowanie chroni urządzenie przed szkodami powstałymi podczas transportu. Materiały opakowanie są dobrane z uwzględnieniem as- pektów ekologicznych i utylizacyjnych, i dlatego nadają...
  • Page 143: Podłączanie Elektryczne

    Podłączanie elektryczne Aby zapewnić bezpieczną i bezawaryjną pracę urządzenia, podczas podłączania elektrycznego należy uwzględnić poniższe wskazówki: ■ Przed podłączeniem urządzenia porównać parametry przyłączeniowe zasilacza sieciowego (napięcie i częstotliwość) na tabliczce znamionowej z parametrami sieci elektrycznej. Parame- try te muszą się zgadzać, aby uniknąć uszkodzenia urządzenia. ■...
  • Page 144: Obsługa

    Obsługa Struktura menu Urządzenie posiada przyjazne dla użytkownika menu. Informacje menu wyświetlane są na ekranie. ‹ Podłączyć do urządzenia odpowiedni nośnik danych. Zastosować można następujące nośniki danych: ● karty SD/SDHC ● karty pamięci MMC ● przenośne dyski ● nośniki danych USB ‹...
  • Page 145: Zmiana Języka Menu

    Zmiana języka menu Język menu jest ustawiony fabrycznie na język niemiecki. Aby zmienić język, należy wykonać następujące czynności: ‹ Nacisnąć przycisk „Setup“ na pilocie zdalnego sterowania. ‹ Wybrać „Język menu“ - „OSD“, a następnie żądany język, po czym potwierdzić przyciskiem „Enter“. ‹...
  • Page 146: Funkcje

    Ustawienia fa- Menu funkcyjne do przywracania ustawień bryczne fabrycznych Funkcje Kopiowania i usuwania danych: a) Wybrać pendrive USB lub kartę pamięci do edytowania danych. b) Wybrać przyciskami strzałek ◄/► listę odtwarzania i nacisnąć przycisk „ENTER”. c) Wyświetlane są teraz wszystkie dane; dokonać wyboru przycis- kiem strzałki ►, obok nazwy pliku pojawia się...
  • Page 147: Budowa I Funkcja Paska Informacyjnego

    Aby usunąć dane, potwierdzić opcję Delete przyciskiem „Enter“, a następnie najechać przyciskiem ◄ na ok. Nacisnąć przycisk „En- ter“ – dane zostaną nieodwracalnie usunięte. g) Przyciskiem „Exit“ można zawsze powrócić do menu! Budowa i funkcja paska informacyjnego: nacisnąć podczas odtwarzania przycisk „Menu“, aby wyświetlić pasek informacyjny.
  • Page 148: Funkcje Dodatkowe

    ● Połączyć kabel USB z ramką (kabel USB: wtyk A na wtyk Mini-B (B5Pin)) WSKAZÓWKA ► Kabel USB nie należy do zakresu dostawy! Zalecamy użycie kabla USB Hama 44430. ● Połączyć elektroniczną ramkę do zdjęć z komputerem. ● Włożyć kartę pamięci w slot ramki. ● Włączyć ramkę głównym wyłącznikiem zasilania „ON“.
  • Page 149: Warianty Pokazu Slajdów

    Warianty pokazu slajdów Tryb pojedynczy Pokaz slajdów rotacja obrazów Urządzenie jest wyposażone w funkcję automatycznej rotacji ob- razów. Ustawić urządzenie na boku lub na sztorc – zdjęcie obróci się automatycznie na odpowiedni format. Original: Oryginalna wielkość (format 4:3) W ustawieniu „Normal“ obraz za- chowuje swój oryginalny format.
  • Page 150: Czyszczenie I Pielęgnacja

    Czyszczenie i pielęgnacja W rozdziale tym zawarte są ważne wskazówki dotyczące czyszczenia urządzenia. Wskazówki bezpieczeństwa UWAGA Uszkodzenie urządzenia wskutek działania wilgoci! ► Podczas czyszczenia do wnętrza urządzenia nie może wniknąć wilgoć, aby uniknąć nieodwracalnych szkód. Czyszczenie Ekran urządzenia jest zabezpieczony szkłem ochronnym. ■...
  • Page 151: Usuwanie Usterek

    Usuwanie usterek W rozdziale tym zawarte są ważne wskazówki dotyczące lokalizacji i usuwania usterek. Aby zapobiec niebezpieczeństwu i uszkodzeniu urządzenia, należy przestrzegać wskazówek: Wskazówki bezpieczeństwa OSTRZEŻENIE W celu uniknięcia zagrożeń i szkód rzeczowych należy przestrzegać poniższych wskazówek bezpieczeństwa: ► Naprawy urządzeń elektronicznych mogą być przeprowadza- ne tylko przez wykwalifikowany personel przeszkolony przez producenta.
  • Page 152 Usterka Możliwa przyczyna Usuwanie Jeżeli urządzenie Wskutek normal- nie będzie nych wyładowań reagować na elektrostatycznych naciskanie przycis- występujących w ków bądź nastąpi Urządzenie otoczeniu (wykładziny zanik obrazu, wyłącza się dywanowe, wełniane nacisnąć przycisk nagle swetry) może POWER na pilocie się zdarzyć, że zdalnego stero- urządzenie przełączy wania lub z tyłu...
  • Page 153: Przechowywanie

    Przechowywanie Jeżeli urządzenie nie będzie używane przez dłuższy czas, wyłączyć urządzenie, odłączyć je od sieci zasilania elektrycznego i przechowywać w czystym, suchym miejscu zabezpieczonym przed bezpośrednim promieniowaniem słonecznym. Utylizacja Utylizacja urządzenia W żadnym wypadku nie wyrzucać urządzenia do zwykłych od- padów domowych.
  • Page 154: Załącznik

    Załącznik Dane techniczne Ogólne parametry 100-240 V AC / 50/60 Hz / 0,6 A Zasilanie na wejściu maks. Zasilanie na wyjściu 12 V DC / 1,5 A Pobór mocy <13 W Wymiary (dł. x szer. x wys.) 315 x 30 x 245 cm (bez stopki) Waga ok.
  • Page 155: Struktura Menu Dpf

    Pomoc techniczna W przypadku uszkodzonych produktów prosimy zwrócić się do sk- lepu bądź infolinii firmy Hama. Pomoc techniczna - infolinia Hama (w jęz. niemieckim / an- gielskim): Tel. +49 (0) 9091 / 502 – 115 Fax. +49 (0) 9091 / 502 – 272 e-mail: mailto:produktberatung@hama.de...
  • Page 156 Návod k použití Obsah Úvod ....158 Obsluha a provoz ..167 Úvodní slovo ... . 158 Vedení...
  • Page 157: Úvod

    Úvodní slovo Vážená zákaznice, vážený zákazníku, zakoupením tohoto digitálního fotorámečku jste se rozhodli ve prospěch kvalitního výrobku firmy Hama, který po technické stránce a svou funkčností odpovídá nejmodernějšímu standardu. Přečtěte si zde obsažené informace, abyste se co nejdříve seznámili s Vaším přístrojem a mohli tak plně využít jeho funkcí.
  • Page 158: Výstražná Upozornění

    Výstražná upozornění V tomto návodu k používání se používají tato výstražná upozornění: NEBEZPEČí Výstražné upozornění tohoto stupně nebezpečí označuje hro- zící nebezpečnou situaci. Pokud se nebezpečné situaci nezabrání, může dojít k usmrcení nebo těžkým poraněním. ► Respektujte pokyny uvedené v tomto výstražném upozornění, aby nedošlo k nebezpečí...
  • Page 159: Použití Dle Stanoveného Účelu

    Použití dle stanoveného účelu Tento přístroj je určen pouze k promítání fotografií v uzavřených pros- torách. Jiné nebo tento rámec překračující použití se považuje jako použití v rozporu se stanoveným účelem. VÝSTrAHA Nebezpečí v důsledku použití v rozporu se stanoveným účelem! V případě...
  • Page 160: Bezpečnost

    Bezpečnost V této kapitole jsou uvedena důležitá bezpečnostní upozornění týka- jící se zacházení s přístrojem. Tento přístroj odpovídá předepsaným bezpečnostním ustanovením. V důsledku neodborného použití ale může dojít k ublížení na zdraví a k věcným škodám. Základní bezpečnostní pokyny V zájmu bezpečného zacházení s přístrojem dbejte těchto bezpečnostních upozornění: ■...
  • Page 161: Montáž A Funkce

    Montáž a funkce Digitální fotorámeček (pohled zezadu) ahoru / dolů / exit / zpět zap./vyp doleva / doprava Upevnění pvro nástěnnou montáž Uchycení stavěcí nožky Možnosti upevnění pro VESA 75 x 75 Digitální fotorámeček (pohled ze strany)
  • Page 162: Montáž A Funkce

    Montáž a funkce Dálkové ovládání zap. / vyp. menu enter nahoru doprava doleva dolů exit / zpět systémová nastavení Dálkové ovládání Vložení baterie Baterii vkládejte resp. provádějte její výměnu následujícím způsobem: ‹ Z dálkového ovládání sejměte bateriovou přihrádku zatlačením na uzávěr a současně vytáhněte bateriovou přihrádku. ‹...
  • Page 163: Uvedení Do Provozu

    Uvedení do provozu Bezpečnostní pokyny VÝSTrAHA Při uvádění přístroje do provozu může dojít k ublížení na zdra- ví a k věcným škodám! Abyste se vyvarovali nebezpečí, dbejte těchto bezpečnostních upozornění. ► Obalový materiál se nesmí používat ke hraní. Hrozí nebezpečí udušení.
  • Page 164: Vybalení

    Vybalení Přístroj vybalte následujícím způsobem: ‹ Vyjměte přístroj z kartonu a odstraňte obalový materiál. ‹ Sejměte obalový materiál příslušenství. ‹ U LCD-barevné obrazovky přístroje sejměte ochrannou fólii. Likvidace obalu Obal chrání přístroj před poškozením během transportu. Obalové ma- teriály jsou vybrány podle ekologických hledisek a s přihlédnutím k je- jich likvidaci a jsou proto recyklovatelné.
  • Page 165: Elektrické Připojení

    Elektrické připojení Pro zajištění bezpečného a správného provozu přístroje respektujte při elektrickém připojení tyto pokyny: ■ Před připojením přístroje srovnejte připojovací údaje síťového ad- aptéru (napětí a frekvence) na typovém štítku s údaji Vaší elekt- rické sítě. Pro zabránění poškození přístroje se musí tyto údaje shodovat.
  • Page 166: Obsluha A Provoz

    Obsluha a provoz Vedení menu Přístroj je vybaven jednoduchým vedením menu. Menu se zobrazuje na obrazovce. ‹ Připojte k přístroji odpovídající paměťové médium. Je možné načítat tato paměťová média: ● SD/SDHC - karty ● MMC-karty ● Memory Stick ● paměťové médium USB ‹...
  • Page 167: Změna Jazyka Obsluhy

    Změna jazyka obsluhy Ze závodu je jazyk obsluhy nastaven na Deutsch(německy). Pro změnu jazyka postupujte tímto způsobem: ‹ Na dálkovém ovládání stiskněte tlačítko „Setup“. ‹ Zvolte „Menü Sprache“ (Menu jazyk) - „OSD“ a poté požadovaný jazyk obsluhy a volbu potvrďte tlačítkem „Enter“. ‹...
  • Page 168: Funkce

    Funkce Kopírování a mazání souborů: a) Zvolte USB – stick resp. paměťovou kartu, kterou chcete upravit. b) Pomocí šipkových tlačítek ◄/► zvolte seznam playlist a stiskněte „Enter“. c) Nyní se zobrazí všechna data, pomocí šipkového tlačítka ► proveďte volbu, vedle názvu souboru se nyní zobrazí značka. d) Po provedení...
  • Page 169: Struktura A Funkce Informační Lišty

    Pokud chcete data vymazat, pak potvrďte Delete tlačítkem „Enter“, poté šipkovým tlačítkem ◄ na ok. Nyní stiskněte tlačítko „Enter“ a data se nenávratně vymažou. g) Tlačítkem „Exit“ se můžete kdykoliv navrátit do menu! Struktura a funkce informační lišty: Během reprodukce stiskněte „Menü“ a informační lišta se zobrazí. Pomocí...
  • Page 170: Přídavné Funkce

    Spojte USB-kabel s fotorámečkem (USB - připojovací kabel: A- konektor na mini-B-konektor (B5Pin)) UPOZORNĚNÍ ► USB - kabel není součástí dodávky! Doporučujeme Hama USB - adaptérový kabel 44430 Spojte digitální fotorámeček s Vaším počítačem. Do slotu rámečku vložte paměťovou kartu. Hlavním spínačem „ON“ zapněte fotorámeček.
  • Page 171: Varianty Promítání Obrázků

    Varianty promítání obrázků jednotlivý režim slideshow Otáčení snímku Přístroj je vybaven funkcí automatického otáčení snímků. Postavte přístroj na šířku nebo na výšku, zobrazovaná fotografie se automati- cky otočí do správné polohy zobrazení. Originál: Originální velikost (formát 4:3) V nastavení „Normálně“ si snímek zachová...
  • Page 172: Čištění A Údržba

    ► Pro šetrné čištění a údržbu displeje Vám doporučujeme čisticí hadřík z mikrovlákna. Tento je k zakoupení jednotlivě nebo v sadě s čisticím gelem u firmy Hama (výr. č.: 51076/51077). ■ bývající části přístroje čistěte suchým hadříkem. Při silném znečištění...
  • Page 173: Odstranění Závad

    Odstranění závad V této kapitole obdržíte důležité informace týkající se lokalizace a odstranění závad. Aby se zabránilo nebezpečí a poškození respek- tujte tyto pokyny. Bezpečnostní pokyny VÝSTrAHA Abyste zabránili nebezpečí a věcným škodám, respektujte tato bezpečnostních upozornění. ► Opravy na elektrických přístrojích smí provádět pouze odborní- ci zaškolení...
  • Page 174 Porucha Možná příčina Odstranění Pokud by přístroj dále nereagoval, V důsledku statických nebo nezobrazo- vybíjení, které se val žádný obraz, vyskytují v normálním Přístroj se stiskněte tlačítko každodenním použití neočekávaně POWER na dál- (koberce, vlněné vypne kovém ovládání svetry), se může stát, nebo na zadní...
  • Page 175: Uschování

    Uschování Sollten Sie das Gerät längere Zeit nicht benutzen, schalten Sie das Gerät aus, trennen Sie es von der Stromversorgung und lagern Sie es an einem sauberen, trockenen Ort ohne direkte Sonneneinstrahlung. Likvidace Likvidace přístroje Přístroj v žádném případě nevhazujte do normálního domovního odpadu.
  • Page 176: Dodatek

    Dodatek Technické údaje Obecně Napájení vstup 100-240 V AC / 50/60 Hz / 0,6 A Max Napájení výstup 12 V DC / 1,5 A Příkon <13 W 315 x 30 x 245 mm Rozměry (D x Š x V) (bez nožky) Hmotnost ca.
  • Page 177: Podpůrné Informace

    Splitscreen Funkce Nastavení ze závodu Podpůrné informace V případě vadných výrobků se obraťte na svého prodejce nebo na poradenské oddělení Hama: Podpůrná zákaznická linka – poradenská služba Hama (německy / anglicky): Tel. +49 (0) 9091 / 502 – 115 Fax. +49 (0) 9091 / 502 – 272 e-mail: mailto:produktberatung@hama.de...
  • Page 178 Hama GmbH & Co KG D-86652 Monheim www.hama.com © 2009 by Hama GmbH & Co KG Technische Änderungen, Irrtümer bzw. Druckfehler vorbehalten. We reserve the right to make technical changes, we are not liable for any errors or printing errors.

Ce manuel est également adapté pour:

00095220

Table des Matières