Hama 00095252 Mode D'emploi
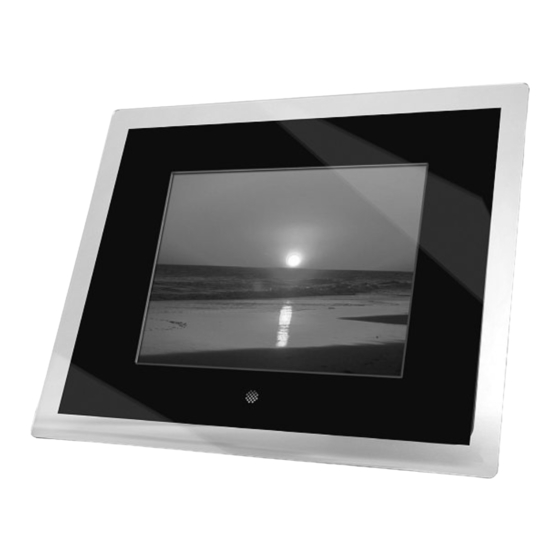
Cadre photo numérique
Table des Matières
Les langues disponibles
Les langues disponibles
Informationstechnische Einrichtung Class A
Warnung! Dies ist eine Einrichtung der Klasse A. Diese Einrichtung kann
im Wohnbereich Funkstörungen verursachen. In diesem Fall kann vom
Betreiber verlangt werden, angemessene Maßnahmen durchzuführen.
Class A information technology equipment
Warning! This device is categorized as class A
equipment. This equipment can cause radio interference in living spaces.
If this is the case, you can request the operator to undertake appropriate
measures to prevent such interference.
Dispositif d'informations techniques classe A
Avertissement ! Ce dispositif appartient à la classe A. Ce dispositif est
susceptible de provoquer des perturbations radioélectriques dans une
zone habitable. Il peut être exigé de l'utilisateur de prendre des mesures
appropriées.
Equipo de tecnología de información clase A
Aviso: Éste es un aparato de la clase A. Este aparato puede provocar
interferencias en el ámbito doméstico. En este caso, el usuario puede
estar obligado a tomar medidas adecuadas.
Informatietechnische inrichting Class A
Waarschuwing! Dit is een klasse-A-inrichting. Deze inrichting kan in
woonomgevingen storingen veroorzaken. In dat geval dient de gebruiker
passende maatregelen te nemen.
Dispositivo per tecnologie dell'informazione classe A
Attenzione! Questo è un dispositivo della classe A che può causare distur-
bi radio nella zona abitativa. In questo caso l'esercente può richiedere di
prendere particolari
provvedimenti.
Τεχνική διάταξη ενημέρωσης κατηγορίας A
Προειδοποίηση! Αυτή είναι μία διάταξη κατηγορίας A. Αυτή η διάταξη μπορεί
να προκαλέσει ηλεκτρομαγνητικές παρεμβολές σε χώρους διαμονής. Σε αυτή
την περίπτωση μπορεί να ζητηθεί από τον ιδιοκτήτη να λάβει τα κατάλληλα
μέτρα.
Informationsteknisk enhet klass A
Varning! Detta är en enhet enligt klass A. Dessa enheter kan förorsaka
radiostörningar i bostäder. I detta fall kan
driftsansvarig åläggas att vidtaga passande åtgärder.
Luokan A tietotekniikkalaite
Varoitus: Tämä on A-luokan laite. Tämä laite voi aiheuttaa
radiohäiriöitä asunnossa käytettäessä. Siinä tapauksessa
käyttäjältä voidaan edellyttää kohtuullisia korjaustoimia.
All listed brands are trademarks of the corresponding companies. Errors and omissions excepted,
and subject to technical changes. Our general terms of delivery and payment are applied.
Specyfikacja informacyjno techniczna – urządzenie klasy A
d
UWAGA! Urządzenie klasy A. Urządzenie może powodować zakłócenia
w obrębie mieszkania. W takim wypadku użytkownik musi przedsięwziąć
odpowiednie kroki zapobiegawcze.
Információtechnikai berendezés, A-osztály
g
Figyelem! Ez az eszköz A-osztályú berendezés.
Ez az eszköz lakásban üzemeltetve rádiófrekvenciás zavart kelthet.
Ha hosszabb időn át üzemeltetve, a közelben lévő készülékeket zavarja,
célszerű áthelyezni más környezetbe.
Technicko informační zařízení třídy A
f
Varování! Tohle je zařízení třídy A. Může způsobit rádiové rušení v obytné
zóně. V takovém případě může být požadováno od provozovatele, aby
provedl příslušná opatření.
Technicko-informačné zariadenie triedy A
e
POZOR! Toto je zariadenie triedy A. Môže spôsobiť rádiové rušenie v
obytnej zóne. V takomto prípade môže byť požadované od
prevádzkovateľa, aby urobil príslušné opatrenia.
Aparelho de tecnologia da informação Class A
o
Aviso! Este é um aparelho de Classe A. Este aparelho pode provocar
interferências em áreas residenciais. Neste caso, pode-se exigir ao
utilizador que tome as medidas adequadas.
Информационное техническое устройство класса А
i
Предупреждение! Устройство относится к приборам класса А.
Устройство может создавать радиопомехи в жилых помещениях.
В этом случае эксплуатационник, возможно, будет обязан принять
соответствующие меры по их устранению.
A sınıfı bilgi tekniği tertibatı
k
Uyarı! Bu A sınıfı bir donanımdır. Bu tertibat oturma alanlarında parazitlere
sebep olabilir. Bu durumda işleticisinin uygun önlemleri alması gerekebilir.
Informaţii tehnice pentru instalaţii Clasa A
Avertizare! Aceasta este o instalaţie cuprinsă în Clasa A. Instalaţie poate
produce în locuinţă perturbări în recepţia radio.
s
În acest caz utilizatorul poate pretinde să fie luate măsuri în consecinţă.
m
Hama GmbH & Co KG
D-86651 Monheim/Germany
www.hama.com
q
h
c
v
p
u
t
r
Table des Matières

Manuels Connexes pour Hama 00095252


Sommaire des Matières pour Hama 00095252
- Page 1 Varoitus: Tämä on A-luokan laite. Tämä laite voi aiheuttaa radiohäiriöitä asunnossa käytettäessä. Siinä tapauksessa käyttäjältä voidaan edellyttää kohtuullisia korjaustoimia. Hama GmbH & Co KG D-86651 Monheim/Germany www.hama.com All listed brands are trademarks of the corresponding companies. Errors and omissions excepted,...
- Page 23 Nous vous remercions d’avoir choisi un cadre photo Consignes de sécurité : • Protégez l’appareil des secousses violentes et évitez numérique de Hama. Veuillez lire attentivement le présent mode d‘emploi avant sa première utilisation et tout choc ou toute chute.
- Page 24 • En cas de défaut constaté sur votre cadre photo Aperçu des fonctions : • écran haute résolution TFT-LCD de 10.4 (= 26,4 cm) numérique, veuillez vous adresser à votre revendeur spécialisé. au format 4:3 • Veuillez noter les caractéristiques techniques en •...
- Page 25 Structure du cadre photo numérique et de la télécommande : Fonctionnement de la télécommande : Mise en sourdine Configuration Fente carte SD / MMC / MS Zoom Quitter Fente carte Compact Flash Connexion mini USB Connexion USB Rotation Augmentation Connexion pour bloc mise sous / du volume audio secteur...
- Page 26 Fonctions du menu : MENÜ Sous-menus & description des fonctions Menu de sélection de fonctions PHOTO Diaporama MUSIQUE COMBO Musique + diaporama MOVIE Vidéo LISTE DE JEUX Liste aller Dateien mit Dateimanagement sowie Lösch- & Kopierfunktion PARAMETRES Liste de tous les fichiers à gestion de fichier ainsi (réglage / setup) que fonction de suppression et de copie CALENDRIER...
- Page 27 Original: Format d’origine (format 4:3) En réglage « Normal », l’image conserve son format d’origine Smart: Format d’origine (format 4:3) En réglage « Allonger », l’image est adap- tée à la taille de l’écran Mode split-screen : Avec la fonction split-screen, plusieurs images peuvent être affichées simultanément à l’écran. Dans le mode présentation des images, vous pressez sur «...
- Page 28 Démarrage du cadre photo numérique 3. Copie et suppression de fichiers : Insérez premièrement la fiche adaptateur dans le cadre a) Sélectionnez la clé USB (la carte mémoire) dont vous photo numérique, puis branchez le câble secteur dans une désirez éditer les fichiers. prise de courant.
-
Page 29: Aperçu De La Barre D'informations Et Fonctions
4. Ecran de lecture ATTENTION : la connexion USB ne peut pas être établie pendant un diaporama automatique ou pendant la Actions : lecture d’images individuelles. Il n’est pas non plus Pendant la lecture, appuyez sur MENU, une barre possible de démarrer un diaporama ou de visualiser d’informations sera affichée à... - Page 30 • Saturation des couleurs chiffon non textile doux pour nettoyer l’appareil (par • Paramètres horaires (ON) : heure de mise sous exemple l’article de Hama réf. 51076/51077). tension du cadre photo numérique En cas de saletés tenaces, humidifiez légèrement le •...
-
Page 31: Recherche Des Pannes
RECHERCHE DES PANNES : Vous n’arrivez pas à mettre le cadre photo numérique Les appareils USB ne sont pas affichés après avoir été sous tension connectés : Cause : problème d’alimentation du cadre photo. Cause : protocole USB incompatible Vérifiez que la fiche de l’appareil d’alimentation est bien Tous les appareils ne prennent pas le système de insérée. - Page 32 En cas d’appareils défectueux : En cas de réclamation concernant le produit, veuillez vous adresser à votre revendeur ou au département conseil produits de Hama. Internet / World Wide Web Notre support technique, les nouveaux pilotes et les informations produits sont disponibles sous : www.hama.com...
- Page 63 d Hinweis zum Umweltschutz: Ab dem Zeitpunkt der Umsetzung der europäischen Richtlinien 2002/96/EG und 2006/66/EG in nationales Recht gilt folgendes: Elektrische und elektronische Geräte sowie Batterien dürfen nicht mit dem Hausmüll entsorgt werden. Der Verbraucher ist gesetzlich verpflichtet, elektrische und elektronische Geräte sowie Batterien am Ende ihrer Lebensdauer an den dafür eingerichteten, öffentlichen Sammelstellen oder an die Verkaufsstelle zurückzugeben.