Ribimex Ribitech PRKG110P Manuel D'instructions Et D'utilisation
Pompe à main à piles
Masquer les pouces
Voir aussi pour Ribitech PRKG110P:
- Manuel d'instructions et d'utilisation (17 pages)
Table des Matières
Les langues disponibles
Les langues disponibles
AVERTISSEMENT: Lire et assimiler ce manuel avant d'utiliser ce produit.
Une utilisation incorrecte de ce produit pourrait causer des dommages aux biens et aux personnes.
Conserver ce manuel pour pouvoir le consulter ultérieurement.
WARNING: Carefully read this instruction manual before operating this appliance. Incorrect operation
may cause injury and/or damages.
Please keep this manual for future reference.
AVVERTENZA:
Leggere attentamente questo manuale di istruzioni prima di utilizzare l'attrezzo.
Il funzionamento non corretto può causare lesioni e/o danni.
Conservare il presente manuale per futuri consulti.
Imp. par / by : Ribimex
.
. – 56 Route de Paris –RN4– FR-77340 Pontault-Combault
S
A
Imp da: Ribimex Italia s.r.l. – Via Igna, 18 – IT-36010 Carrè (Vi)
[v_2016-04-13]
FR
POMPE À MAIN À PILES
Manuel d'instructions et d'utilisation
EN
B
ATTERY
User and maintenance manual
IT
POMPA A MANO A PILE
MANUALE DI ISTRUZIONI E DI MANUTENZIONE
Réf : PRKG110P / 580072
O
P
PERATED
UMP
1
Table des Matières

Manuels Connexes pour Ribimex Ribitech PRKG110P


Sommaire des Matières pour Ribimex Ribitech PRKG110P
- Page 1 Il funzionamento non corretto può causare lesioni e/o danni. Conservare il presente manuale per futuri consulti. Imp. par / by : Ribimex . – 56 Route de Paris –RN4– FR-77340 Pontault-Combault Imp da: Ribimex Italia s.r.l. – Via Igna, 18 – IT-36010 Carrè (Vi) [v_2016-04-13]...
-
Page 2: Caracteristiques
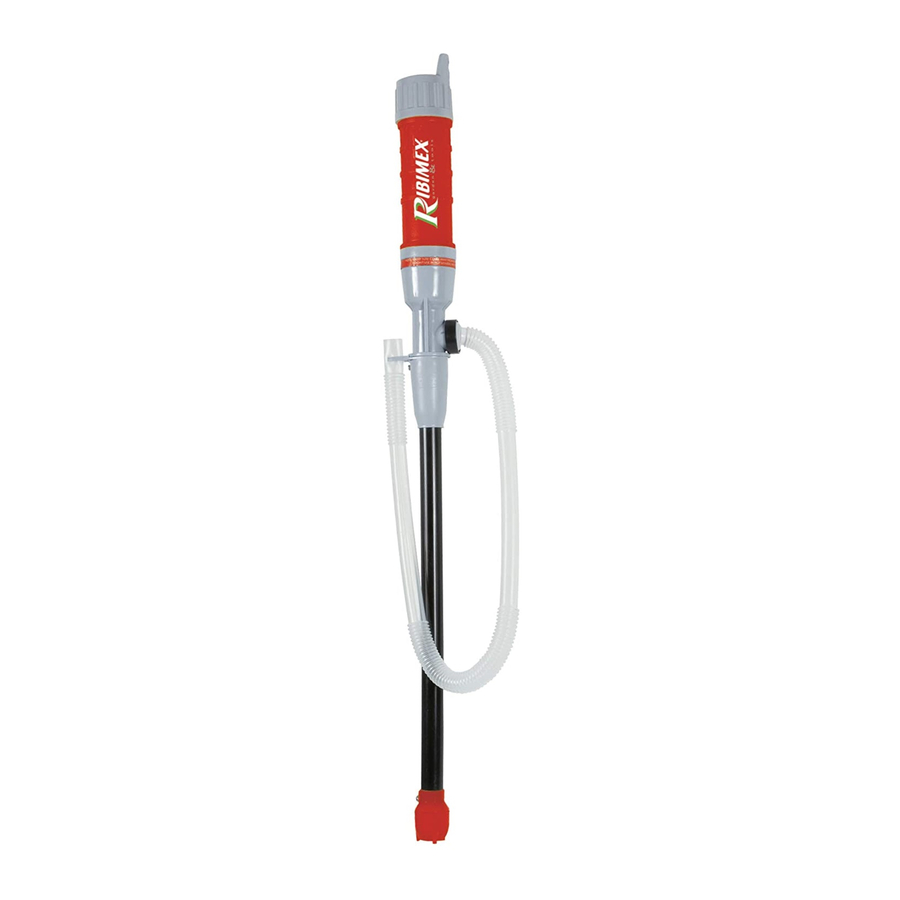
I. Nomenclature II. Caractéristiques techniques III. Consignes de sécurité IV. Utilisation V. Entretien et Entreposage I. NOMENCLATURE PRODUIT Fig. A 1- Interrupteur 2- Porte compartiment à piles 3- Compartiment à piles 4- Sortie d’évacuation Fig. A II. CARACTERISTIQUES Référence PRKG110P / 580072 Alimentation (2 x 1,5V type D / LR20) Température... -
Page 3: Mise En Route
IV. MISE EN ROUTE 4.1- Déballage - Retirez le produit de son emballage. - Vérifiez que le produit ne présente de dégâts. 4.2- Mise en place et remplacement des piles : (voir Fig. B) Note : piles non fournies 1- Dévisser le couvercle du compartiment à pile. 2- Insérer 2 piles type LR20 (D) en respectant la polarité. -
Page 4: Entretien Et Entreposage
5.3- Utilisation : (voir Fig. C) 1- Insérer le plongeur (1) dans le récipient contenant le liquide à transvaser. Note : Insérer le plongeur jusqu’au niveau indiqué sur celui-ci. 2- Insérer le tuyau de décharge (2) dans un récipient ou réservoir (3). 3- Appuyer sur l’interrupteur Marche/Arrêt pour commencer ou arrêter le transfert du liquide.