
Manuels Connexes pour Philips SmartSleep Snoring Relief Band


Sommaire des Matières pour Philips SmartSleep Snoring Relief Band
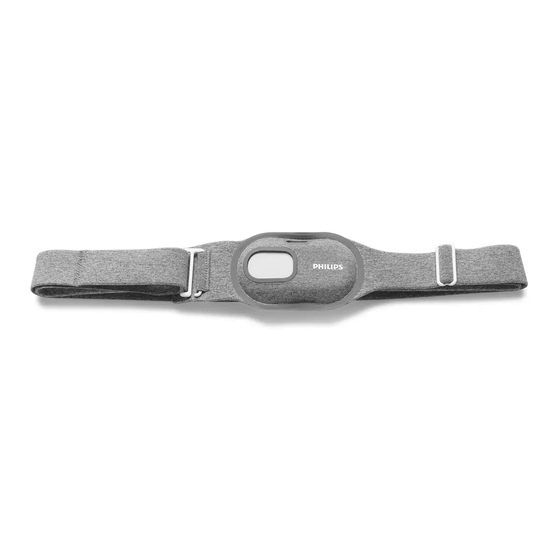
- Page 1 SmartSleep Snoring Relief Band Schnarch-Linderungsband Ceinture anti-ronflement Fascia antirussamento Snurkverminderingsband...
- Page 4 empty page before TOC...
-
Page 5: Table Des Matières
English 6 Deutsch 31 Français 60 Italiano 88 Nederlands 115... -
Page 6: English
English Introduction Congratulations on your purchase and welcome to Philips! To fully benefit from the support that Philips offers, register your product at www.philips.com/welcome. The first Philips solution designed to alert you before your snoring starts. Using clinically-proven technology the positional monitor detects when you’re moving onto your back and delivers... - Page 7 English Important safety information Read this important information carefully before you use the product and save it for future reference. Danger - The Snoring Relief Band is for indoor use only. - Keep the adapter and the sensor dry and away from liquids and moisture (running tap, bathroom etc.).
- Page 8 - If the adapter and/or USB cord is damaged or defective, always seek a replacement from Philips in order to avoid a hazard. - The sensor contains a non-replaceable Lithium battery. - Do not open the sensor, there are no serviceable parts inside.
- Page 9 English - Do not dispose of batteries in fire or extreme heat. Batteries may explode or leak. Caution - The sensor is not washable. Never immerse the sensor in water or rinse it under the tap. - Never use compressed air, scouring pads, abrasive cleaning agents or aggressive liquids such as petrol or acetone to clean the Snoring Relief Band.
- Page 10 ‘recycling’ to preserve our environment. Intended use The Philips SmartSleep Snoring Relief Band is intended to reduce snoring disruptions, leading to an improved sleep experience. This product is not a medical device and is not intended for use in the...
- Page 11 - Do not use the Snoring Relief Band in case of existing allergies to Polyester, Nylon or Spandex. Electromagnetic fields (EMF) This Philips product complies with all applicable standards and regulations regarding exposure to electromagnetic fields.
- Page 12 English Preparing for use The Snoring Relief Band consists of a sensor and a strap. Wear the Snoring Relief Band when you sleep to reduce snoring caused by sleeping on your back. The sensor will gently vibrate to encourage you to turn from your back to your side.
- Page 13 English Note: During charging, the battery indicator blinks slowly white. Battery fully charged When the battery is fully charged, the battery indicator lights up white continuously and switches off automatically after 30 minutes. Quick charge When the battery is low or empty, you can quickly charge the sensor for 1 hour.
- Page 14 English 3 The display and the activation button of the sensor should be visible through the pouch windows. Wearing the Snoring Relief Band during the night 1 Center the pouch with the sensor in front of your torso, just below the chest. 2 Do not wear the strap too high or too low.
- Page 15 English 4 Adjust the length of the strap with the strap adjuster. The strap should feel snug but comfortable below your chest. The Snoring Relief Band should stay in the same position during the night. The strap is tight enough if you are able to feel the vibrations.
- Page 16 English - The sensor allows you to fall asleep in any position. This means that during the first 30 minutes of a sleep session the sensor will not vibrate. Once the 30 minutes have passed, the sensor encourages you to turn from your back to your side.
- Page 17 English sensor is placed on a horizontal surface. Not stopping a session also influences the sensor data. After the sleep session has ended, the sensor will vibrate briefly and show the data of your last sleep session. 2 sec. Sensor data The display shows three types of sensor data.
- Page 18 English 2 The sensor switches on and quickly shows an animation of the sensor data and battery indicator. 3 Sensor data point 1: Response rate. 1 sec. The response rate indicates how many times (in percentage) you turned from your back to your side after the sensor vibrates.
- Page 19 English indicates a session of less than one hour. Sessions shorter than one hour are not saved as a sleep session. The sensor will not show any data for response rate and the hours on your back. indicates a session of more than twelve hours. After twelve hours, the sensor automatically stops the sleep session and switches off.
- Page 20 English The sensor shows a small dot on the left side of the display to indicate that the adaptation phase is active. Vibration level The sensor has a self-learning algorithm. The sensor optimizes the vibration level based on your reaction time. Vibration patterns Every five days, the vibration pattern changes to make sure that you do not get used to the...
- Page 21 Ordering accessories To buy accessories or spare parts, visit www.philips.com/parts-and-accessories or go to your Philips dealer. You can also contact the Philips Consumer Care Center in your country (see the international warranty leaflet for contact details). You can order the following items:...
- Page 22 (2006/66/EC). Please take your product to an official collection point or a Philips service center to have a professional remove the rechargeable battery. - Follow your country’s rules for the separate collection of electrical and electronic products and rechargeable batteries.
- Page 23 This chapter summarizes the most common problems you could encounter with the product. If you are unable to solve the problem with the information below, visit www.philips.com/support for a list of frequently asked questions or contact the Consumer Care Center in your country.
- Page 24 English Problem Possible cause / solution The Snoring You do not only snore when you are sleeping on Relief Band your back, but also when you sleep on your side doesn't work and/or stomach. The sensor is most effective for for me.
- Page 25 English Problem Possible cause / solution I don't feel the The Snoring Relief band is wrongly positioned (e.g. vibrations on your back or too low/high on your chest) (see 'Wearing the Snoring Relief Band during the night'). Center the pouch with the sensor in front of your torso, just below the chest.
- Page 26 - IEC 60335: Household and similar electrical appliances IEC 62368: Audio/video, information and communication technology equipment - IEC 62133: Batteries - IEC 61558: Adapters Specifications Adapter Philips WAA1001 Safety classification Class II power supply (double insulation) Mode of operation Continuous Ingress Protection marking...
- Page 27 English Output characteristics 5.0 Vdc, 2.5 W, 0.5 A Weight (EU / UK) 39 gr (1.38 oz.) / 48 gr (1.69 oz.) Length of detachable USB 60 cm (23.6 in.) cord Sensor Safety classification Class III device (sensor battery is charged by a Class II adapter) Dimensions Sensor (height x Approx.
- Page 28 English Long term (>1 month) storage +15 °C to +25 °C (+59 °F to +77 °F) temperature ≤85 % (no condensation) Relative humidity Atmospheric pressure 86 - 106 kPa Explanation of symbols Symbol Explanation Manufacturer logo. European Declaration of Conformity. For indoor use only. Do not dispose of the product with normal household waste.
- Page 29 English Serial number. Detachable supply unit. Stand-by. Maximum ambient temperature. Efficiency class. SMPS (Switch Mode Power Supply). SMPS incorporating a short-circuit-proof safety isolating transformer. Class II construction (double insulated). Ingress protection against water splashes from any direction. Safety mark. Machine wash in water not exceeding 30 °C / 86 °F, at delicate/gentle setting.
- Page 30 English Do not tumble dry. Do not iron. Do not dry clean.
-
Page 31: Deutsch
Philips! Um die Unterstützung von Philips optimal nutzen zu können, sollten Sie Ihr Produkt unter www.philips.com/welcome registrieren. Die erste Philips Lösung, die reagiert, bevor Sie mit dem Schnarchen beginnen. Die Lageüberwachung erkennt mithilfe klinisch erprobter Technologie, wann Sie sich zurück auf den Rücken drehen und sendet Vibrationen aus, die Sie dazu veranlassen, sich wieder auf die Seite zu drehen –... - Page 32 Deutsch 10 Clip 14 Schlitz zum 11 Öffnung für das Einsetzen des Display Sensors 12 Öffnung für die 15 Gurt Aktivierungstaste 16 Gurtversteller 13 Tasche für Sensor 17 Adapter 18 USB-Kabel Wichtige Sicherheitsinformationen Lesen Sie diese wichtigen Informationen vor dem Gebrauch des Produkts aufmerksam durch, und bewahren Sie sie für eine spätere Verwendung auf.
- Page 33 Deutsch - Dieses Produkt ist für Benutzer (einschl. Kinder) mit eingeschränkten physischen, sensorischen oder psychischen Fähigkeiten bzw. ohne jegliche Erfahrung oder Vorwissen nur dann geeignet, wenn eine angemessene Aufsicht oder ausführliche Anleitung zur Benutzung des Produkts durch eine verantwortliche Person sichergestellt ist.
- Page 34 Die Verwendung eines anderen Netzteils kann die Systemsicherheit gefährden. - Wenn der Adapter oder das USB-Kabel beschädigt oder defekt ist, wenden Sie sich für Ersatzteile immer an Philips, um Gefährdungen zu vermeiden. - Der Sensor enthält einen nicht austauschbaren Lithium-Akku.
- Page 35 Deutsch Achtung - Der Sensor ist nicht abwaschbar. Tauchen Sie den Sensor niemals in Wasser. Spülen Sie ihn auch nicht unter fließendem Wasser - Benutzen Sie zum Reinigen des Schnarch- Linderungsbands keine Druckluft, Scheuerschwämme und -mittel oder aggressive Flüssigkeiten wie Benzin oder Aceton.
- Page 36 Deutsch - Verwenden und lagern Sie das Produkt nur unter den, in dieser Bedienungsanleitung angegebenen, Umgebungsbedingungen (siehe 'Technische Daten '). Ein Betrieb außerhalb der angegebenen Grenzwerte kann zu Leistungseinbußen und einer verkürzten Lebensdauer des Produkts führen. - Der Gurt sollte eng, aber bequem unter der Brust anliegen.
- Page 37 Produktlebensdauer den Sensorakku aus Umweltschutzgründen wie im Kapitel "Recycling" beschrieben. Vorgesehener Verwendungszweck Das Philips SmartSleep Schnarch-Linderungsband dient zum Verhindern von Schlafunterbrechungen durch Schnarchen und sorgt so für ein besseres Schlaferlebnis. Dieses Produkt ist kein medizinisches Gerät und eignet sich nicht für die Verwendung zur Linderung und Behandlung von Krankheiten einschließlich POSA...
- Page 38 Einschränkungen nicht in der Lage sind, Ihre Schlafposition selbstständig zu wechseln. - Verwenden Sie das Schnarch-Linderungsband nicht bei vorhandenen Allergien auf Polyester, Nylon oder Elastan. Elektromagnetische Felder (EMF) Dieses Philips Produkt erfüllt sämtliche Normen und Vorschriften bezüglich der Gefährdung durch elektromagnetische Felder.
- Page 39 Deutsch Für den Gebrauch vorbereiten Das Schnarch-Linderungsband besteht aus einem Sensor und einem Gurt. Tragen Sie das Schnarch-Linderungsband, um das durch das Schlafen in Rückenlage entstehende Schnarchen zu mindern. Der Sensor vibriert sanft, um Sie zum Wechsel in die Seitenlage zu bewegen. Aufladen Laden Sie den Sensor vor dem ersten Gebrauch auf, bis die Akkustandsanzeige orange blinkt.
- Page 40 Deutsch Hinweis: Die USB-Buchse am Sensor kann nur zum Aufladen verwendet werden. Hinweis: Während des Aufladens blinkt die Akkuanzeige langsam weiß. Akku voll aufgeladen Wenn der Akku vollständig aufgeladen ist, leuchtet die Akkuanzeige dauerhaft weiß. Nach 30 Minuten schaltet sie automatisch ab. Schnellaufladung Wenn der Akku fast leer oder leer ist, können Sie den Sensor zum schnellen Aufladen eine Stunde...
- Page 41 Deutsch 2 Stecken Sie den Sensor in die Tasche. Hinweis: Achten Sie darauf, dass der Sensor vollständig in die Tasche eingesteckt ist. 3 Das Display und die Aktivierungstaste des Sensors sollten durch die Sichtfenster der Tasche sichtbar sein. Tragen des Schnarch-Linderungsbands in der Nacht 1 Positionieren Sie die Tasche mit dem Sensor vorn am Oberkörper knapp unterhalb der Brust.
- Page 42 Deutsch Hinweis: Achten Sie darauf, dass die Aktivierungstaste nach oben (zum Kinn) weist und das Display durch das Taschenfenster sichtbar ist. Hinweis: Beste Ergebnisse erzielen Sie, wenn Sie das Schnarch-Linderungsband direkt auf der Haut tragen. Achten Sie bei der Verwendung von Körperlotionen darauf, dass diese von der Haut aufgenommen sind, bevor Sie den Gurt anlegen.
- Page 43 Deutsch - Der Sensor vibriert kurz und zeigt blinkende Striche „- -“ an, wenn die Schlafsitzung gestartet wurde. Während der Schlafsitzung werden die Striche ebenfalls auf dem Display angezeigt. 2 sec. Hinweise: - Starten Sie eine Schlafsitzung nur dann, wenn Sie die Absicht haben, einzuschlafen (nicht, wenn Sie zunächst noch fernsehen möchten).
- Page 44 Deutsch bringt der Sensor Sie dazu, sich vom Rücken auf die Seite zu drehen. Vibrationen vorübergehend unterbrechen Wenn eine Schlafsitzung aktiv ist und Sie wach sind und auf dem Rücken liegen, aber nicht möchten, dass der Sensor vibriert, dann kippen Sie den Sensor in eine vertikale Position und wieder zurück, um den automatischen Pausenmodus zu starten.
- Page 45 Deutsch Sensordaten Das Display zeigt drei Arten von Sensordaten an. Reaktionsrate: Anzahl der Drehungen (in Prozent) vom Rücken auf die Seite nach Sensorvibrationen Dauer der Schlafsitzung: Anzahl der Stunden im Bett Stunden auf dem Rücken: Anzahl der Stunden auf dem Rücken Display 1 Drücken Sie kurz die Aktivierungstaste, um den 1 sec.
- Page 46 Deutsch 4 Sensor-Datenpunkt 2: Dauer der 1 sec. Schlafsitzung. Der Sensor zeigt an, wie viele Stunden Sie im Bett verbracht haben. Drücken Sie erneut kurz die Aktivierungstaste, um die in Rückenlage verbrachten Stunden abzurufen. 5 Sensor-Datenpunkt 3: Stunden auf dem Rücken.
- Page 47 Deutsch zeigt eine Sitzung von mehr als 12 Stunden an. Nach zwölf Stunden stoppt der Sensor die Schlafsitzung automatisch und schaltet sich aus. Der Sensor zeigt keine Daten zur Reaktionsrate und den Stunden auf dem Rücken an. Weitere Informationen zu Ihrem Schnarch- Linderungsband Eingewöhnungsphase Es kann einige Zeit dauern, bis Sie sich an das...
- Page 48 Deutsch Vibrationsintensität Der Sensor verfügt ist lernfähig. Der Sensor passt die Vibrationsintensität ausgehend von Ihrer Reaktionszeit (Reaktionsrate) an. Vibrationsmuster Alle fünf Tage wird das Vibrationsmuster geändert, damit Sie sich nicht an die Vibrationen gewöhnen und weiterhin darauf reagieren. Pflege Reinigen des Sensors Warnhinweis: Tauchen Sie den Sensor niemals in Wasser.
- Page 49 Um Zubehör oder Ersatzteile zu kaufen, besuchen Sie www.philips.com/parts-and-accessories, oder suchen Sie Ihren Philips Händler auf. Sie können sich auch an das Philips Consumer Care Center in Ihrem Land wenden. Die Kontaktdaten finden Sie in der internationalen Garantieschrift. Sie können die folgenden Produkte bestellen:...
- Page 50 - Dieses Symbol bedeutet, dass das Produkt einen Akku enthält, der nicht mit dem normalen Hausmüll entsorgt werden darf (2006/66/EG). Bitte geben Sie das Produkt bei einer offiziellen Sammelstelle oder einem Philips Service- Center ab, um den Akku fachgerecht ausbauen zu lassen. 1 Altgeräte/Altakkus/Batterien können kostenlos an geeigneten Rücknahmestellen abgegeben...
- Page 51 Deutsch 4 Hinweise für Verbraucher in Deutschland: Die in Punkt 1 genannte Rückgabe ist gesetzlich vorgeschrieben. Altgeräte mit Altbatterien und/oder Altakkus, die nicht vom Altgerät umschlossen sind, sind vor der Abgabe an einer Rücknahmestelle von diesen zu trennen. Dies gilt nicht, falls die Altgeräte für eine Wiederverwendung noch geeignet (d.h.
- Page 52 Gebrauch des Produkts auftreten können. Sollten Sie ein Problem mithilfe der nachstehenden Informationen nicht beheben können, besuchen Sie unsere Website unter: www.philips.com/support, und ziehen Sie die Liste „Häufig gestellte Fragen“ hinzu, oder wenden Sie sich an den Philips Kundendienst in Ihrem Land.
- Page 53 Deutsch Problem Mögliche Ursache / Lösung Der Schnarch- Sie schnarchen nicht nur, wenn Sie auf dem Rücken schlafen, sondern auch, wenn Sie auf der Seite Linderungs und/oder dem Bauch schlafen. band funktioniert Der Sensor ist am effektivsten für Personen, die bei mir nicht.
- Page 54 Deutsch Problem Mögliche Ursache / Lösung Der Sensor Der Sensor nimmt nicht Ihr Schnarchen auf, vibriert, wenn sondern ermittelt Ihre Position. Dies dient dazu, das ich auf den Schlafen auf dem Rücken zu verhindern, das zu Rücken wach Schnarchen führen kann. liege, aber Versuchen Sie, auf der Seite einzuschlafen, sodass nicht...
- Page 55 Deutsch Problem Mögliche Ursache / Lösung Within two hours of stopping a sleep session, you angezeigten started another sleep session. Sensordaten If you start another sleep session within two hours sind nicht after switching off the previous session, the sensor korrekt.
- Page 56 Deutsch Technische Daten Netzteil Philips WAA1001 Sicherheitsklassifizierung Stromversorgung der Klasse II (doppelte Isolierung) Betriebsmodus Kontinuierlich Kennzeichnung für IPX4 (Schutz vor Spritzwasser) Eindringschutz Eingangseigenschaften 100–240 Vac, 50/60 Hz, 3,5 W Leerlauf-Stromverbrauch 0,03 W Ausgangseigenschaften 5,0 VDC, 2,5 W, 0,5 A Gewicht (EU/UK) 39 g (1,38 oz.) / 48 g (1,69 oz.) Länge des abnehmbaren 60 cm (23,6 in.)
- Page 57 Deutsch Länge (min. – max.) Ca. (72 cm – 130 cm) / (28 in. – 51 in.) Gewicht Ca. 33 g (1,16 oz.) Betrieb Temperatur +5 °C bis 40 °C Relative Luftfeuchtigkeit 15 % bis 95 % (nicht kondensierend) Atmosphärischer Druck 86 bis 106 kPa Aufbewahrung Kurzzeitige Lagerung -20 °C bis +60 °C (<1 Monat) bei Langfristige Lagerung +15 °C bis +25 °C (>1 Monat) bei...
- Page 58 Deutsch KEMA-Zulassungslogo. Gegen Staub und fallende Wassertropfen geschützt. Bezieht sich auf die Bedienungsanleitung. Lesen Sie vor dem Gebrauch des Produkts die Bedienungsanleitung durch. Gleichstromversorgung. SN3710 Modellnummer. Seriennummer. Abnehmbares Netzteil. Stand-by. Maximale Umgebungstemperatur. Effizienzklasse. SMPS (Schaltnetzteil). SMPS mit kurzschlussfestem Sicherheitstrafo. Bau der Klasse II (doppelt isoliert).
- Page 59 Deutsch Schutz gegen allseitiges Spritzwasser. Sicherheitszeichen. Waschen in der Waschmaschine mit höchstens 30 °C in der Einstellung für empfindliche/sanfte Wäsche. Kein Bleichmittel verwenden. Nicht im Trockner trocknen. Nicht bügeln. Nicht chemisch reinigen.
-
Page 60: Français
Testée cliniquement. La conception de la ceinture anti-ronflement Philips est le fruit de recherches cliniques. Cinq études cliniques ont montré une réduction du temps de sommeil sur le dos chez les participants de l’étude qui utilisent une solution de... - Page 61 Français 12 Fenêtre pour touche 15 Sangle d’activation 16 Dispositif de réglage 13 Pochette pour de la sangle capteur 17 Adaptateur 14 Fente d’insertion 18 Câble USB pour capteur Informations de sécurité importantes Lisez attentivement ces informations importantes avant d'utiliser le produit et conservez-les pour un usage ultérieur.
- Page 62 Français - Ce produit ne doit pas être utilisé par des personnes (incluant des enfants) ayant des capacités physiques, sensorielles ou mentales réduites ou n'ayant pas l'expérience et les connaissances nécessaires, à moins qu'elles ne soient sous la surveillance d'une personne responsable de leur sécurité...
- Page 63 - Si l'adaptateur et/ou le câble USB est endommagé ou défectueux, veillez à toujours obtenir un remplacement auprès de Philips afin d'éviter tout risque. - Le capteur contient une batterie au lithium non remplaçable. - N'ouvrez pas le capteur car il ne contient aucune pièce réparable.
- Page 64 Français Attention - Le capteur n'est pas lavable à l'eau. N'immergez jamais le capteur dans l'eau et ne le rincez pas sous le robinet. - N'utilisez jamais d'air comprimé, de tampons à récurer, de produits abrasifs ou de détergents agressifs tels que de l'essence ou de l'acétone pour nettoyer le Snoring Relief Band.
- Page 65 Français - Réinitialisez le capteur si vous comptez changer d'utilisateur : en effet, le capteur a un algorithme d'auto-apprentissage optimisé en fonction de votre comportement pendant le sommeil. Informations d'ordre général - Pour des raisons d'hygiène, la sangle peut être lavée et séchée à l'air. Le sèche-linge ou un lavage excessif risquent de détériorer l'aspect esthétique de la sangle.
- Page 66 Français Quand ne pas l’utiliser - La ceinture anti-ronflement ne peut être utilisée si votre respiration s’interrompt et repart pendant que vous dormez en ronflant. En effet, il se peut que vous souffriez alors d’apnée obstructive du sommeil, un trouble du sommeil potentiellement grave.
- Page 67 Français Champs électromagnétiques (CEM) Ce produit Philips est conforme à toutes les normes et à tous les règlements applicables relatifs à l’exposition aux champs électromagnétiques. Avant utilisation La ceinture anti-ronflement se compose d’un capteur et d’une sangle. Portez-la lorsque vous dormez pour réduire le ronflement causé...
- Page 68 Français 1 Insérez la petite fiche du câble USB dans la prise à l’arrière du capteur. 2 Insérez la grosse prise du câble USB dans la fiche de l’adaptateur. 3 Branchez l’adaptateur sur la prise secteur. Remarque : Il est impossible d’utiliser le capteur pendant la charge.
- Page 69 Français Insertion du capteur dans la pochette 1 Ouvrez la fente à l’arrière de la pochette. 2 Insérez le capteur dans la pochette. Remarque : assurez-vous que le capteur est complètement inséré dans la pochette. 3 L’afficheur et le bouton d’activation du capteur doivent être visibles à...
- Page 70 Français 3 Poussez le clip entièrement dans la boucle pour fixer correctement la sangle. Remarque : assurez-vous que la touche d’activation est orientée vers votre menton et que la fenêtre d’affichage est visible à travers la fenêtre de la pochette. Remarque : pour des résultats optimaux, portez la ceinture anti-ronflement sur la peau.
- Page 71 Français Démarrage manuel d’une session de sommeil. Démarrez une session de sommeil lorsque vous êtes dans l’un des écrans de données ou lorsque le capteur est éteint. Maintenez la touche d’activation enfoncée pendant deux secondes. - Le capteur vibre brièvement et affiche « - - » par alternance pour indiquer que la session de sommeil a démarré.
- Page 72 Français Mode pause automatique Une session de sommeil est automatiquement mise en pause lorsque le capteur détecte que vous êtes assis ou éveillé (position verticale). Lorsque vous vous recouchez, le capteur ne vibre pas pendant les 30 premières minutes pour vous permettre de vous endormir.
- Page 73 Français 2 sec. Données du capteur L’afficheur indique trois types de données du capteur. Taux de réponse : Nombre de fois (en pourcentage) que vous êtes passé d’une position sur le dos à une position sur le côté après que le capteur a vibré. Durée de la session de sommeil : Nombre d’heures passées au lit.
- Page 74 Français 2 Le capteur s’allume et affiche rapidement une animation des données du capteur et du voyant de batterie. 3 Point 1 des données du capteur : taux de 1 sec. réponse. Le taux de réponse indique combien de fois (en pourcentage) vous êtes passé...
- Page 75 Français automatiquement au bout de 8 secondes d’inactivité. Code d’erreur Le capteur peut indiquer A1 ou A2 sur l’afficheur. Vous n’avez rien à faire. Le code vous indique la raison pour laquelle le capteur n’affiche pas de données. indique une session de moins d’une heure. Les sessions inférieures à...
- Page 76 Français 100% Le capteur présente un petit point sur le côté gauche de l’afficheur pour indiquer que la phase d’adaptation est active. Niveau de vibration Le capteur possède un algorithme d’auto- apprentissage. Il optimise le niveau de vibration en fonction de votre temps de réaction. Séquences de vibration Tous les cinq jours, la séquence de vibration change pour que vous ne vous habituiez pas aux...
- Page 77 Web www.philips.com/parts-and-accessories ou rendez-vous chez votre revendeur Philips. Vous pouvez également contacter le Service Consommateurs Philips de votre pays (consultez le dépliant de garantie internationale pour obtenir les coordonnées). Vous pouvez commander les articles suivants : Sangle : CP0943...
- Page 78 être mise au rebut avec les déchets ménagers (2006/66/CE). Veuillez déposer votre produit dans un point de collecte agréé ou un centre de service après-vente Philips pour faire retirer la batterie rechargeable par un professionnel. - Respectez les réglementations de votre pays concernant la collecte séparée des appareils...
- Page 79 Français Respectez toutes les mesures de sécurité nécessaires lorsque vous utilisez des outils pour ouvrir le produit et lorsque vous jetez la pile rechargeable. 1 Insérez un petit tournevis plat dans la petite fente du capteur. 2 Faites tourner le tournevis jusqu’à ce que le capteur s’ouvre.
- Page 80 Français problème à l’aide des informations ci-dessous, rendez-vous sur le site www.philips.com/support et consultez la liste de questions fréquemment posées ou contactez le Service Consommateurs Philips de votre pays. Problème Cause possible / solution La ceinture Vous ne ronflez pas seulement lorsque vous...
- Page 81 Français Problème Cause possible / solution Le capteur Le capteur n’enregistre pas votre ronflement, il vibre lorsque mesure uniquement votre position. Il vous je suis allongé empêche ainsi de dormir sur le dos, ce qui pourrait sur le dos et causer le ronflement.
- Page 82 Français Problème Cause possible / solution Les données La batterie était presque vide lorsque vous avez du capteur commencé la session de sommeil. Si la batterie se figurant sur décharge entièrement pendant une session de l’afficheur ne sommeil, le capteur s’éteint et cesse de recueillir sont pas des données.
- Page 83 - Les appareils électriques ménagers et similaires de la norme IEC 60335 CEI 62368 : les équipements des technologies audio/vidéo, d’informations et de communication. - CEI 62133 : piles - CEI 61558 : adaptateurs Caractéristiques Adaptateur Philips WAA1001 Classification de sécurité Alimentation de classe II (double isolation)
- Page 84 Français Mode de fonctionnement Continu Marquage de protection IPX4 (protection contre les contre la pénétration d’eau éclaboussures d’eau) Caractéristiques d’entrée 100-240 V CA, 50/60 Hz, 3,5 W Consommation hors charge 0.03 W Caractéristiques de sortie 5 Vcc, 2,5 W, 0,5 A Poids (UE / R-U) 39 gr (1,38 oz) / 48 gr (1,69 oz.) Longueur du cordon USB 60 cm (23,6 po) amovible...
- Page 85 Français Conditions de fonctionnement Température de +5 °C à +40 °C (de 41 °F à 104 °F) Humidité relative de 15 % à 95 % (sans condensation) Pression atmosphérique 86 - 106 kPa Conditions de stockage Température de stockage de de -20 °C à +60 °C (de -4 °F à courte durée (<1 mois) +140 °F) Température de stockage de...
- Page 86 Français Protégé contre la poussière et les gouttes d’eau qui tombent. Veuillez vous reporter au mode d’emploi. Lisez le mode d’emploi de l’appareil avant d’utiliser le produit. Alimentation CC. SN3710 Référence du modèle. Numéro de série. Bloc d’alimentation amovible. Mode veille. Température ambiante maximale.
- Page 87 Français Label de sécurité. Lavage en machine à une température maximale de 30 °C/86 °F, sur programme délicat. Ne pas utiliser d’eau de Javel. Ne pas sécher dans le sèche-linge. Ne pas repasser. Ne pas nettoyer à sec.
-
Page 88: Italiano
Italiano Introduzione Congratulazioni per l'acquisto e benvenuti in Philips! Per trarre il massimo vantaggio dall'assistenza fornita da Philips, registrate il vostro prodotto sul sito www.philips.com/welcome. La prima soluzione Philips ideata per avvisarvi prima che iniziate a russare. Grazie alla sua... - Page 89 Italiano 14 Fessura per 16 Dispositivo di l'inserimento del regolazione della sensore fascia 15 Fascia 17 Adattatore 18 Cavo USB Informazioni di sicurezza importanti Prima di utilizzare il prodotto, leggete attentamente queste importanti informazioni e conservatele per eventuali riferimenti futuri. Pericolo - La Snoring Relief Band è...
- Page 90 Italiano - Questo prodotto non è adatto all'uso da parte di persone (inclusi i bambini) con capacità mentali, fisiche o sensoriali ridotte, prive di esperienza o conoscenze adeguate, fatti salvi i casi in cui tali persone abbiano ricevuto assistenza o formazione per l'uso del prodotto da una persona responsabile della loro sicurezza.
- Page 91 L'utilizzo di un altro adattatore può compromettere la sicurezza del sistema. - Se l'adattatore e/o il cavo USB è danneggiato o difettoso, chiedete a Philips di effettuare una sostituzione per evitare un pericolo. - Il sensore contiene una batteria al litio non sostituibile.
- Page 92 Italiano - Non usate aria compressa, prodotti o sostanze abrasive o detergenti aggressivi, come benzina o acetone, per pulire la Snoring Relief Band. - Prima di collegare l'adattatore, verificate che la tensione riportata su di esso corrisponda alla tensione disponibile. - Per evitare danni irreparabili, non usate l'adattatore in o vicino a prese a muro che contengono o hanno contenuto un...
- Page 93 Utilizzo previsto Lo scopo della Philips SmartSleep Snoring Relief Band è quello di ridurre le interruzioni del sonno causate dal vostro stesso russare, consentendovi di dormire meglio. Questo prodotto non è un dispositivo medico e non è...
- Page 94 Italiano Quando non utilizzare il prodotto - La Snoring Relief Band non deve essere utilizzata se la vostra respirazione si interrompe ripetutamente e poi riprende quando dormite russando. Potreste soffrire di un'apnea ostruttiva del sonno che è un disturbo potenzialmente grave. Consultate un medico per una diagnosi.
- Page 95 Italiano Campi elettromagnetici (EMF) Questo prodotto Philips è conforme a tutti gli standard e alle norme applicabili relativi all'esposizione a campi elettromagnetici. Predisposizione del dispositivo La Snoring Relief Band è costituita da un sensore e una fascia. Indossate la Snoring Relief Band quando dormite per ridurre il russare causato dalla vostra posizione supina.
- Page 96 Italiano 1 Inserite la spina piccola del cavo USB nella presa sul retro del sensore. 2 Inserite la spina grande del cavo USB nella presa dell'adattatore. 3 Inserite l'adattatore nella presa a muro. Nota: non è possibile utilizzare il sensore durante la ricarica.
- Page 97 Italiano Inserimento del sensore nella tasca 1 Premete per aprire la fessura sul retro della tasca. 2 Inserite il sensore nella tasca. Nota: assicuratevi che il sensore sia completamente inserito nella tasca. 3 Il display e il pulsante di attivazione del sensore devono essere visibili attraverso le aperture della tasca.
- Page 98 Italiano 3 Spingete completamente la fibbia nel gancio per assicurare saldamente la fascia. Nota: assicuratevi che il pulsante di attivazione sia rivolto verso il mento e che il display sia visibile attraverso l'apertura della tasca. Nota: per ottenere i migliori risultati, indossate la Snoring Relief Band sulla pelle nuda.
- Page 99 Italiano È necessario avviare manualmente una sessione di sonno. Avviate una sessione di sonno quando è visualizzata una delle schermate di dati o quando il sensore è spento. Tenete premuto il pulsante di attivazione per due secondi. - Il sensore vibrerà per breve tempo e mostrerà dei trattini alternati ("- -") per indicare che la sessione di sonno è...
- Page 100 Italiano Modalità di pausa automatica Una sessione di sonno viene automaticamente messa in pausa quando il sensore rileva che vi siete seduti o alzati dal letto (in posizione verticale). Dopo esservi nuovamente sdraiati, il sensore non vibrerà per i primi 30 minuti per consentirvi di addormentarvi.
- Page 101 Italiano 2 sec. Dati del sensore Il display visualizza tre tipi di dati del sensore. Tasso di risposta: quante volte (in percentuale) vi siete girati sul fianco dalla posizione supina dopo la vibrazione del sensore. Durata della sessione di sonno: quante ore avete trascorso a letto.
- Page 102 Italiano 3 Dati del sensore punto 1: Tasso di risposta. 1 sec. Il tasso di risposta indica quante volte (in percentuale) vi siete girati sul fianco dalla posizione supina dopo la vibrazione del sensore. Premete di nuovo brevemente il pulsante di attivazione per visualizzare la durata della sessione di sonno.
- Page 103 Italiano indica una sessione di meno di un'ora. Le sessioni di durata inferiore a un'ora non vengono salvate come sessione di sonno. Il sensore non mostrerà alcun dato per il tasso di risposta e le ore sulla schiena. indica una sessione di più di dodici ore. Dopo dodici ore, il sensore interrompe automaticamente la sessione di sonno e si spegne.
- Page 104 Italiano Il sensore visualizza un puntino sul lato sinistro del display per indicare che è attiva la fase di adattamento. Livello di vibrazione Il sensore ha un algoritmo di auto-apprendimento. Inoltre, ottimizza il livello di vibrazione in base al vostro tempo di reazione. Tipi di vibrazione Il tipo di vibrazione cambia ogni 5 giorni, per far sì...
- Page 105 Per acquistare accessori o parti di ricambio, visitate il sito Web www.philips.com/parts-and- accessories o recatevi presso il vostro rivenditore Philips. Potete inoltre contattare il Centro Assistenza Clienti Philips del vostro paese. Per i dettagli, fate riferimento all'opuscolo della garanzia internazionale. Potete ordine i seguenti articoli:...
- Page 106 (2006/66/CE). Vi invitiamo a recarvi presso un punto di smaltimento ufficiale o un centro di assistenza Philips per far rimuovere la batteria ricaricabile da un professionista. - Ci sono due situazioni in cui potete restituire...
- Page 107 Italiano prodotto sia scollegato dalla presa di corrente e che la batteria sia completamente scarica. Adottate tutte le misure di sicurezza necessarie quando utilizzate utensili per aprire il prodotto e quando smaltite la batteria ricaricabile. 1 Inserite un piccolo cacciavite a testa piatta nella piccola fessura del sensore.
- Page 108 Questo capitolo riassume i problemi più comuni che potreste riscontrare con il prodotto. Se non riuscite a risolvere il problema con le informazioni riportate sotto, visitate il sito www.philips.com/support per un elenco di domande frequenti o contattate il Centro assistenza clienti del vostro paese. Problema...
- Page 109 Italiano Problema Possible causa / soluzione Il sensore vibra Il sensore non registra il tuo russare, ma misura la quando sono tua posizione. Ciò serve ad evitare che vi sveglio in addormentiate sulla schiena, una posizione che posizione potrebbe farvi russare. supina ma non Provate ad addormentarvi sul fianco, in modo che il sto russando.
- Page 110 Italiano Problema Possible causa / soluzione I dati del Avete iniziato un'altra sessione di sonno entro due sensore ore dall'interruzione della sessione precedente. visualizzati sul Se avviate una nuova sessione di sonno entro due display non ore dallo spegnimento della precedente, il sensore sono corretti.
- Page 111 Italiano - IEC 62133: Batterie - IEC 61558: Adattatori Specifiche Adattatore Philips WAA1001 Classificazione di sicurezza Alimentatore di Classe II (doppio isolamento) Modalità di funzionamento Continua Marcatura di Protezione IPX4 (protezione contro gli spruzzi Ingresso d'acqua) Caratteristiche in ingresso 100-240 V CA, 50/60 Hz, 3,5 W Consumo di energia senza 0.03 W...
- Page 112 Italiano Fascia Materiale della fascia 42 % poliestere, 40 % nylon, 18 % elastan Materiale del Acciaio rivestito gancio/dispositivo di regolazione Lunghezza (min - max) Circa (72 cm - 130 cm) / (28 pollici - 51 pollici) Peso Circa 33 g (1,16 once) Condizioni operative Temperatura Da +5 °C a +40 °C (da 41 °F a 104 °F) Umidità...
- Page 113 Italiano Dichiarazione europea di conformità. Solo per l'uso in ambienti interni. Non smaltire il prodotto insieme ai normali rifiuti domestici. Logo di approvazione KEMA. Protetto contro la polvere e da caduta di gocce d'acqua. Fare riferimento al manuale per l'utente. Leggere il manuale dell'utente prima di utilizzare il prodotto.
- Page 114 Italiano SMPS (Switch Mode Power Supply). SMPS che incorpora un trasformatore di isolamento di sicurezza a prova di cortocircuito. Costruzione di Classe II (doppio isolamento). Protezione dell'ingresso da schizzi d'acqua da qualsiasi direzione. Marchio di sicurezza. Lavare in lavatrice a una temperatura non superiore a 30 °C/86 °F, ciclo delicato.
-
Page 115: Nederlands
Gefeliciteerd met uw aankoop en welkom bij Philips. Registreer uw product op www.philips.com/welcome om optimaal gebruik te kunnen maken van de door Philips geboden ondersteuning. De eerste Philips-oplossing die is ontworpen om u te waarschuwen voordat u begint te snurken. Uw slaaphouding wordt met klinisch bewezen technologie bewaakt. - Page 116 Nederlands 10 Klem 14 Opening voor 11 Venster voor display sensor 12 Venster voor 15 Band activeringsknop 16 Schuifgesp 13 Etui voor sensor 17 Adapter 18 USB-kabel Belangrijke veiligheidsinformatie Lees deze belangrijke informatie zorgvuldig door voordat u het product gaat gebruiken en bewaar de informatie om de aanwijzingen later opnieuw te kunnen raadplegen.
- Page 117 Nederlands - Dit product is niet bedoeld voor gebruik door personen (waaronder kinderen) met verminderde lichamelijke, zintuiglijke of geestelijke vermogens, of die gebrek aan ervaring of kennis hebben, tenzij iemand die verantwoordelijk is voor hun veiligheid, toezicht op hen houdt of hun heeft uitgelegd hoe het product dient te worden gebruikt.
- Page 118 - Als de adapter en/of USB-kabel beschadigd of defect is, moet u bij Philips een nieuwe bestellen om gevaar te voorkomen. - De sensor bevat een lithium-ion-accu die niet vervangbaar is.
- Page 119 Nederlands - Gebruik nooit perslucht, schuursponzen, schurende schoonmaakmiddelen of agressieve vloeistoffen, zoals benzine of aceton, om de Snurkverminderingsband schoon te maken. - Controleer of het voltage dat wordt aangegeven op de adapter overeenkomt met de plaatselijke netspanning voordat u de adapter aansluit. - Gebruik de adapter niet in of in de buurt van stopcontacten waar een elektrische luchtverfrisser in zit of in heeft gezeten.
- Page 120 ‘Recycling’. Beoogd gebruik De Philips SmartSleep Snurkverminderingsband is bedoeld om het snurken te verminderen waardoor de slaapkwaliteit verbetert. Dit product is geen medisch hulpmiddel en is niet bedoeld ziekten of...
- Page 121 - Gebruik de Snurkverminderingsband niet in het geval van een bestaande allergie voor polyester, nylon of spandex. Elektromagnetische velden (EMV) Dit Philips product voldoet aan alle toepasselijke richtlijnen en voorschriften met betrekking tot blootstelling aan elektromagnetische velden.
- Page 122 Nederlands Klaarmaken voor gebruik De Snoring Relief Band bestaat uit een sensor en een band. Draag de Snoring Relief Band tijdens het slapen om het snurken veroorzaakt door rugligging te beperken. De trillingen van de sensor stimuleren u om van rugligging naar zijligging te draaien. Opladen Laad de sensor op voordat u deze voor het eerst gebruikt en wanneer het oranje oplaadlampje...
- Page 123 Nederlands Opmerking: De USB-aansluitopening op de sensor kan alleen worden gebruikt voor het opladen. Opmerking: Het witte lampje voor acculading knippert langzaam tijdens het opladen. Batterij volledig opgeladen Wanneer de accu volledig is opgeladen, brandt het witte oplaadlampje continu en gaat na circa 30 minuten automatisch uit.
- Page 124 Nederlands 2 Schuif de sensor in het etui. Opmerking: Controleer of de sensor helemaal in het etui steekt. 3 Het display en de activeringskop van de sensor blijven zichtbaar in de etuivensters. De Snoring Relief Band bevestigen voor het slapen 1 Plaats het etui met de sensor aan de voorkant van uw torso, net onder de borst.
- Page 125 Nederlands Opmerking: Zorg dat de activeringskop in de richting van uw kin wijst en het display zichtbaar is door het venster van het etui. Opmerking: Draag voor het beste resultaat de Snoring Relief Band op uw naakte huid. Als u bodylotion gebruikt, moet deze geheel door de huid zijn opgenomen voordat u de band bevestigt.
- Page 126 Nederlands 2 sec. Opmerkingen: - Begin alleen maar met een slaapsessie als u van plan bent om te gaan slapen (begin geen sessie als u eerst nog televisie wilt kijken). - U kunt met de sensor in elke houding in slaap vallen.
- Page 127 Nederlands Als de slaapsessie actief is en u wakker bent en op uw rug ligt, maar u niet wilt dat de sensor op dat moment trilt, kantelt u de sensor in een verticale stand en weer terug om de automatische pauzemodus te starten.
- Page 128 Nederlands Responsgraad: Het aantal keren (in procenten) dat u van rugligging naar zijligging bent gedraaid nadat de sensor een trilling gaf. Lengte van slaapsessie: Het aantal uren dat u in bed hebt gelegen. Uren in rugligging: Het aantal uren dat u op de rug hebt geslapen. Display 1 Druk kort op de activeringskop om de sensor in 1 sec.
- Page 129 Nederlands 4 Sensorgegevenspunt 2: Lengte van 1 sec. slaapsessie. De sensor geeft het aantal uren aan dat u in bed hebt gelegen. Druk nogmaals kort op de activeringskop om het aantal uren te zien dat u op uw rug hebt gelegen.
- Page 130 Nederlands Meer informatie over uw Snoring Relief Band Aanpassingsfase Het kan even duren voordat u gewend bent aan de snurkverminderingsband. Om u te helpen aan de trillingen te wennen, begint de sensor met een aanpassingsfase die bestaat uit zeven slaapsessies. Tijdens deze fase trilt de Snoring Relief Band niet elke keer dat u op uw rug ligt.
- Page 131 Nederlands Reinigen De sensor schoonmaken Waarschuwing: Dompel de sensor niet onder in water en spoel deze ook niet af onder de kraan. Waarschuwing: Reinig de sensor nooit met schurende reinigingsmiddelen of (agressieve) vloeistoffen. Reinig de sensor na gebruik met een droge doek, indien nodig.
- Page 132 Accessoires bestellen Ga voor accessoires of reserveonderdelen naar www.philips.com/parts-and-accessories of uw Philips-dealer. U kunt ook contact opnemen met het Philips Consumer Care Centrum in uw land (zie de meegeleverde internationale garantieverklaring voor contactgegevens). De volgende onderdelen kunt u bestellen: Band: CP0943...
- Page 133 Nederlands - Volg de in uw land geldende regels voor de gescheiden inzameling van elektrische en elektronische producten en batterijen. Als u oude producten correct verwijdert, voorkomt u negatieve gevolgen voor het milieu en de volksgezondheid. De oplaadbare batterij verwijderen Verwijder de batterij alleen wanneer u het product weggooit.
- Page 134 Als u het probleem niet kunt oplossen met behulp van de onderstaande informatie, gaat u naar www.philips.com/support voor een lijst met veelgestelde vragen of neemt u contact op met het Consumer Care Center in uw land.
- Page 135 Nederlands Probleem Mogelijke oorzaak / oplossing Ik lig op mijn De sensor is in de gewenningsfase (sessie 1-7). De rug, maar de sensor bouwt het aantal trillingen elke nacht sensor trilt langzaam op. Tijdens deze fase zal de sensor niet niet.
- Page 136 Nederlands Probleem Mogelijke oorzaak / oplossing Ik voel de De Snoring Relief Band is verkeerd geplaatst trillingen niet. (bijvoorbeeld op uw rug of te hoog om uw borstkas) (zie 'De Snoring Relief Band bevestigen voor het slapen'). Plaats het etui met de sensor aan de voorkant van uw torso, net onder de borst.
- Page 137 Nederlands Probleem Mogelijke oorzaak / oplossing Binnen twee uur na het stoppen van een sensorgege slaapsessie, hebt u een andere slaapsessie gestart. vens op het Als u binnen twee uur na het stoppen van een display slaapsessie een volgende slaapsessie start, kloppen niet.
- Page 138 Nederlands Specificaties Adapter Philips WAA1001 Veiligheidsnorm Klasse II voeding (dubbel geïsoleerd) Werkingsmodus Continu IP-beschermingsklasse IPX4 (beschermd tegen opspattend water) Inputkarakteristieken 100-240 Vac, 50/60 Hz, 3,5 W Stroomverbruik bij nullast 0.03 W Outputkarakteristieken 5,0 Vdc, 2,5 W, 0,5 A Gewicht (EU / VK) 39 gr (1,38 oz.) / 48 gr (1,69 oz.) Lengte loskoppelbare USB- 60 cm (23,6 in.)
- Page 139 Nederlands Lengte (min - max) Circa (72 cm - 130 cm) / (28 inch - 51 inch) Gewicht Circa 33 gr (1,16 oz.) Voorwaarden voor een goede werking Temperatuur +5 °C tot +40 °C (41 °F tot 104 °F) Relatieve vochtigheid 15 % tot 95 % (geen condensatie) Atmosferische druk 86 - 106 kPa Opbergomstandigheden Opslagtemperatuur korte -20 °C tot +60 °C (-4 °F tot +140 °F)
- Page 140 Nederlands Kema-keurmerk. Bestand tegen stof en vallende waterdruppels. Verwijst naar de gebruiksaanwijzing. Lees de gebruiksaanwijzing voordat u het product gebruikt. Gelijkstroom. SN3710 Modelnummer. Serienummer. Afneembare voedingsunit. Stand-by. Maximale omgevingstemperatuur. Efficiëntieklasse. SMPS (Switch Mode Power Supply, voeding met schakelmodus). SMPS met een kortsluitvaste veiligheidstransformator.
- Page 141 Nederlands Bescherming tegen waterspetters uit alle richtingen. Veiligheidsmarkering. Wassen in wasmachine op lage temperatuur (maximaal 30 °C), fijnwasprogramma. Niet bleken. Niet in de wasdroger drogen. Niet strijken. Niet chemisch reinigen.
- Page 145 Empty page before back cover...
- Page 146 SN3710_NERO_4222.002.7841.4_SDFU_BACK-COVER_EU_A6_sc.pdf 24-04-20 10:11 © 2020 Koninklijke Philips N.V. All rights reserved. Specifications are subject to change without notice. Trademarks are the property of www.philips.com Koninklijke Philips N.V. (Royal Philips) or their respective owners. 4222.002.7841.4...