Olympus DS-2500 Mode D'emploi
Enregistreur vocal numérique
Table des Matières
Les langues disponibles
Les langues disponibles
Liens rapides
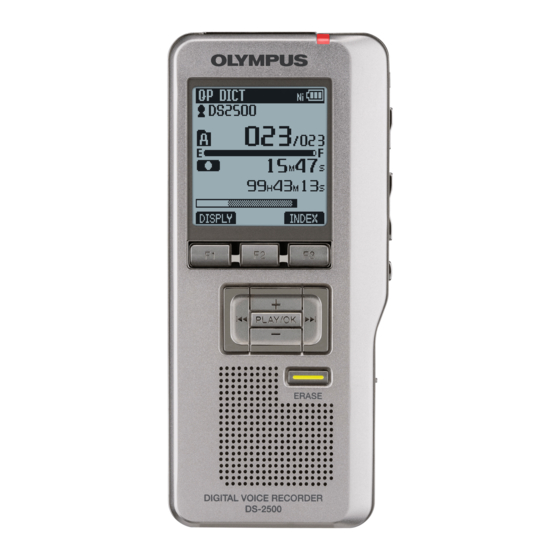
DIGITAL VOICE
RECORDER
DS-2500
DS-2500
INSTRUCTIONS
ENGLISH ........................................1
FRANÇAIS ..................................... 65
ESPAÑOL ..................................... 129
Thank you for purchasing an Olympus
Digital Voice Recorder.
Please read these instructions for information
about using the product correctly and safely.
Keep the instructions handy for future reference.
To ensure successful recordings, we recommend that
you test the record function and volume before use.
EN
Chapitres
Table des Matières
Dépannage

Manuels Connexes pour Olympus DS-2500


Sommaire des Matières pour Olympus DS-2500
- Page 65 ENREGISTREUR VOCAL NUMÉRIQUE DS-2500 DS-2500 MODE D’EMPLOI Merci d’avoir porté votre choix sur cet enregistreur vocal numérique. Lisez ce mode d’emploi pour les informations concernant l’emploi correct et sûr de l’appareil. Conservez-le à portée de la main pour toute référence ultérieure.
- Page 66 • Toute responsabilité pour dommages passifs ou dommages de quelque nature que ce soit survenus à cause d’une perte de données causée par un défaut du produit, réparation effectuée par un tiers autre que Olympus ou un service agréé par Olympus, ou toute autre raison est exclue de la responsabilité de Olympus.
- Page 67 INDEX Table des matières P.68 Pour un emploi sûr et correct P.69 Préparatifs P.72 Opérations de base P.86 Opérations avancées P.100 Gestion des fichiers sur votre PC P.117 Autres méthodes d’utilisation pratique P.123 PLAY/OK Autres informations P.124...
- Page 68 Table des matières Introduction Opérations avancées Table des matières ...........68 Sélection de dossiers et de fichiers ....100 Pour un emploi sûr et correct ......69 Informations sur le fichier affiché [Informations] ... 101 Préparatifs Marques index ..........102 Liste de menus ..........103 Caractéristiques principales ......72 Apprentissage de l’utilisation des menus ..
-
Page 69: Pour Un Emploi Sûr Et Correct
Pour un emploi sûr et correct Avant d’utiliser votre nouvel enregistreur, lisez Précautions pour l’environnement d’utilisation attentivement ce manuel pour savoir comment l’utiliser de manière sûre et correcte. Conservez • Pour protéger la technologie de haute ce manuel à un endroit facilement accessible précision contenue dans ce produit, ne pour toute référence ultérieure. -
Page 70: Maniement De L'enregistreur
Ce qui pourrait causer une par un défaut du produit, réparation effectuées surchauffe, débouchant sur un incendie. par un tiers autre que Olympus ou un service • Manipulez l’enregistreur soigneusement afin agréé par Olympus, ou toute autre raison est d’éviter une brûlure à... - Page 71 La batterie rechargeable fournie est destinée en contact avec vos yeux, lavez-les avec de exclusivement à l’utilisation avec l’enregistreur l’eau propre et consultez immédiatement un vocal numérique Olympus DS-2500. médecin. • Il existe un risque d’explosion si la batterie est •...
-
Page 72: Préparatifs
Préparatifs Caractéristiques principales s Type de mémoire prise en charge : Carte SD ( ☞ P.73). s Trois touches intelligentes programmables: F1, F2 et F3 s Enregistrement et stockage de la voix au format Digital Speech Standard Pro (DS2 format). s Deux modes d’enregistrement, le mode QP (lecture de qualité) ou le mode SP (lecture standard) ( ☞... -
Page 73: Carte Mémoire
• Olympus ne peut être tenu pour responsable pour suppression accidentelle de ces dernières. la corruption ou la perte de données à cause d’un Lorsque la fonction de verrouillage est activée, [ ]... -
Page 74: Identification Des Éléments
Identification des éléments & 1 Fente pour carte SD $ Touche + (Volume) 2 Microphone intégré % Touche Avance Rapide (9) 3 Touche NEW ^ Touche PLAY/OK 4 Touche REC & Touche intelligente (F1,F2,F3) 5 Touche REW * Touche Recul Rapide (0) 6 Touche FF ( Touche –... -
Page 75: Affichage Des Indicateurs D'état (Panneau Acl)
Identification des éléments Affichage des indicateurs d’état (panneau ACL) QP DICT VCVA QP DICT DS2500 DS2500 / 030 / 030 INSERT VITESS INDEX VISU. INDEX Affichage en mode Affichage en mode lecture d’enregistremente 9 Nombre total de fichiers contenus dans 1 Indicateur de mode d’enregistrement 2 Dossier actuel le dossier... -
Page 76: Alimentation
Alimentation Insertion des piles Précautions concernant les piles Cet enregistreur peut être utilisé soit avec les f Avertissement: batteries rechargeables Ni-MH soit avec des piles alcalines AAA. • L’utilisation de piles dont une partie ou la totalité • Lors du chargement avec l’enregistreur, du revêtement externe veillez à... -
Page 77: Configuration Des Piles
• Lors du remplacement des piles, des piles alcalines AAA ou des batteries Ni-MH l’enregistreur (☞ P.76). rechargeables Olympus sont recommandées. Appuyez sur la touche + ou − pour • Vous devez arrêter l’enregistreur avant de remplacer la batterie. Le fait d’ôter la batterie modifier le réglage. -
Page 78: Rechargement Par Connexion À Un Ordinateur Via Un Port Usb
Alimentation Appuyez sur la touche PLAY/OK pour Rechargement par connexion à un démarrer la recharge. ordinateur via un port USB Touche OK pour Vous pouvez recharger les batteries en vous recharger connectant au port USB d’un PC. Lors du chargement, veillez à... -
Page 79: Branchez L'appareil À L'adaptateur Ac De Connexion Usb (Facultatif) Pour Le Charger
Alimentation Lorsque l’enregistreur est en mode stop Branchez l’appareil à l’adaptateur AC de ou désactivé, connectez le câble USB à connexion USB (facultatif) pour le charger la prise de raccordement sur le bas de l’enregistreur. Il peut être chargé en branchant l’adaptateur AC de connexion USB (A514) (options). - Page 80 Alimentation Température d’utilisation: Remarques • Introduisez la batterie rechargeable fournie et réglez Les batteries rechargeables contiennent des produits [Pile] sur [Ni-MH]. Si [Pile] est réglé sur [Alkaline], chimiques. L’efficacité des batteries rechargeables vous ne pouvez pas recharger l’appareil (☞ P.77). peut varier même lorsqu’elles sont utilisées dans la •...
-
Page 81: Allumer/Couper L'alimentation
Alimentation Allumer/couper l’alimentation Mode économie d’énergie (Eco Energie) Lorsque vous n’utilisez pas l’enregistreur, éteignez-le Lorsque l’enregistreur est en marche mais sans être pour réduire la consommation des piles au minimum. utilisé pendant 10 minutes, par défaut, il passera Même si l’alimentation est coupée, les données, automatiquement en mode d’économie d’énergie. -
Page 82: Verrouillage Clavier
Verrouillage clavier Si vous mettez le commutateur POWER/HOLD en position HOLD, les conditions actuelles seront sauvegardées et toutes les touches et commutateurs seront désactivés. Cette caractéristique est pratique lorsque vous devez transporter l’enregistreur dans un sac ou dans votre poche. Réglez le mode HOLD de l’enregistreur Glissez le commutateur POWER/HOLD en position HOLD. -
Page 83: Insertion Et Éjection Des Cartes Sd
Insertion et éjection des cartes SD Remarques IInsertion d’une SD carte • La carte s’arrête avec un déclic lorsqu’elle est Insérez la carte SD dans le lecteur de carte dans complètement insérée. la direction montrée dans I’illustration jusqu’à ce • Si la carte est insérée à l’envers ou en biais, qu’elle se clique. -
Page 84: Réglage De L'heure Et De La Date [Heure Et Date]
Réglage de l’heure et de la date [Heure et Date] Appuyez sur la touche 9 ou 0 pour Il est très important de régler correctement l’heure et la date sur l’enregistreur car chaque fichier enregistré sélectionner l’élément à configurer. dessus verra l’heure et la date faire partie de l’en-tête •... -
Page 85: Modifier L'heure Et La Date
Réglage de l’heure et de la date [Heure et Date] • Vous pouvez choisir l’ordre de l’année, du Modifier l’heure et la date mois et du jour en appuyant sur la touche F2 ([M]/[D]/[Y] ou [D]/[M]/[Y] ou [Y]/[M]/[D])* Lorsque le commutateur POWER/HOLD de pendant que vous les réglez. -
Page 86: Enregistrement
Opérrattiions de base Enregistrement L’enregistreur possède cinq dossiers [ A ], [ B ], [C], Réglages relatifs à l’enregistrement [D], [E] par défaut, et vous pouvez les sélectionner en appuyant sur la touche F1 (DOSS.). Vous pouvez Les réglages relatifs à l’enregistrement utiliser ces cinq dossiers sélectivement pour peuvent être configurés afin d’assurer un différents types d’enregistrements;... -
Page 87: Nouvel Enregistrement
Enregistrement Nouvel enregistrement Créez un nouveau fichier pour l’enregistrement. Appuyez sur la touche NEW pour créer QP DICT un nouveau fichier. DS2500 a Identifiant Auteur sélectionné / 030 b Nouveau numéro de fichier Nouv. fichier c Temps d’enregistrement restant Valide DOSS. -
Page 88: Ecrasement D'enregistrement
Enregistrement Ecrasement d’enregistrement Vous pouvez écraser un fichier préalablement enregistré à partir de tout point du fichier. Notez que les informations écrasées seront effacées. Sélectionnez et lisez le fichier que vous souhaitez écraser. • Arrêtez la lecture au niveau du début de l’écrasement. -
Page 89: Enregistrement D'insertion
Enregistrement Enregistrement d’insertion Des informations complémentaires peuvent être insérées dans des fichiers précédemment enregistrés. PLAY/OK Sélectionnez et lisez le fichier dans lequel vous souhaitez insérer un enregistrement. Pendant la lecture du fichier, appuyez sur la QP DICT VCVA touche F1 (INSERT) si vous souhaitez insérer DS2500 PLAY/OK des informations complémentaires. -
Page 90: Modes D'enregistrements [Mode Enregist.]
Modes d’enregistrements [Mode Enregist.] Vous pouvez choisir le mode d’enregistrement parmi Appuyez sur la touche PLAY/OK pour [QP] (lecture de qualité) et [SP] (lecture standard). valider le réglage. • [Réglage figé] s’allume sur l’écran et vous revenez à l’écran [Menu enregist.]. •... -
Page 91: Sensibilité Du Microphone [Sens. Micro]
Sensibilité du microphone [Sens. micro] Vous pouvez choisir entre deux sensibilités Appuyez sur la touche + ou – pour de microphone correspondant à vos besoins sélectionner [Conférence] ou [Dictée]. d’enregistrement: [Dictée] pour la dictée orale ou [Conférence]: Convient pour enregistrer des [Conférence], plus adaptée aux situations telles que réunions et des séminaires où... -
Page 92: Utilisation Du Déclenchement À La Voix [Vcva]
Utilisation du déclenchement à la voix [VCVA] Quand le microphone perçoit que les sons ont QP DICT VCVA DS2500 atteint le niveau préréglé, le VCVA (Variable Control Voice Actuator) démarre automatiquement /134 l’enregistrement, et s’arrête quand le volume descend sous un certain seuil. Le VCVA économise Veille la mémoire en coupant automatiquement l’enregistrement, par exemple pendant les périodes... -
Page 93: Contrôle De L'enregistrement
Contrôle de l’enregistrement Il est possible de contrôler votre enregistrement en l’écoutant pendant qu’il est en cours. Introduisez la fiche de l’écouteur dans la prise pour écouter et utilisez le touche + ou – (Volume) pour régler le niveau sonore. −... -
Page 94: Lecture
Lecture Vous pouvez commencer à lire un fichier à partir de n’importe quel point. Sélectionnez le fichier puis appuyez QP DICT DS2500 sur la touche PLAY/OK pour lancer la PLAY/OK lecture. / 133 • Le [ ] (Indicateur de lecture) affiche à l’écran. - Page 95 Lecture Fonctions de lecture Opération Comment annuler Appuyez une fois sur la touche 9 ou FF pendant Avance rapide Appuyez sur la touche PLAY/OK ou STOP. (FF) l’arrêt. Appuyez une fois sur la touche 0 ou REW Rembobinage Appuyez sur la touche PLAY/OK ou STOP. (REW) pendant l’arrêt.
-
Page 96: Effacement
Effacement Effacement d’un fichier Il est très facile d’effacer ou de supprimer un fichier PLAY/OK depuis n’importe quel dossier de l’enregistreur. Sélectionnez le fichier que vous souhaitez effacer. QP DICT DS2500 Appuyez sur la touche ERASE. / 031 Supp dans doss. Fichier effacé... -
Page 97: Fr Effacement De Tous Les Fichiers D'un Dossier
Effacement Effacement de tous les fichiers d’un dossier Tous les fichiers d’un dossier peuvent être effacés PLAY/OK simultanément. Sélectionnez le dossier que vous souhaitez effacer. QP DICT DS2500 Appuyez sur la touche ERASE. / 030 Supp dans doss. PLAY/OK Fichier effacé Annuler EXIT Appuyez sur la touche + pour... -
Page 98: Effacement Partiel D'un Fichier
Effacement Effacement partiel d’un fichier Vous pouvez effacer partiellement un fichier sélectionné. Commencez la lecture du fichier que vous souhaitez effacer partiellement. QP DICT Appuyez sur la touche ERASE au point où DS2500 commencer l’effacement. PLAY/OK / 134 • Alors que la lecture continue, [Effacer] s’affiche à... - Page 99 Effacement Appuyez sur la touche ERASE pour QP DICT DS2500 confirmer l’effacement. / 134 • L’affichage passe à [Effacement partiel !] et l’effacement commence. Effacement partiel ! Quand [Fin effacement partiel.] s’affiche, QP DICT l’effacement partiel est terminé. DS2500 / 134 PLAY/OK Fin effacement partiel.
-
Page 100: Opérations Avancées
Opérations avancées Sélection de dossiers et de fichiers Modification d’un fichier Appuyez sur la touche 9 ou 0 Touche F1, F3 pendant l’enregistreur est à l’écran. • L’ordre des numéros des fichiers contenus dans le dossier est modifié et s’affiche. Touche PLAY/OK Touche +, −... -
Page 101: Informations Sur Le Fichier Affiché [Informations]
Informations sur le fichier affiché [Informations] L’enregistreur peut afficher plusieurs informations Les informations affichées liées au fichier actuel. Les informations suivantes s’affichent. [ Nom fichier ]: Nom du fichier. [ Temps enreg. ]: Heure et date d’enregistrement du fichier. Touche F2, F3 [ ID auteur ]: Affiche Identifiant Auteur du fichier. -
Page 102: Marques Index
Marques index Il est possible de placer des marques index dans Repérage d’une marque index un fichier pendant l’enregistrement ou la lecture. Les marques index permettent d’identifier Appuyez sur la touche 9 ou 0 et rapidement et facilement les parties importantes ou maintenez-la pendant la lecture d’un significatives d’un fichier. -
Page 103: Liste De Menus
Liste de menus sRéglages du menu (Tandis que l’enregistreur est arrêté, Appuyez sur la touche F3 (MENU)) Menu principal Page de Réf. Second niveau Réglage Vérouiller [Off], [On] P.106 Menu fichier Informations Les informations de fichier apparaissent. P.101 Mode Enregist. [QP], [SP] P.90 Menu... - Page 104 Liste de menus Menu principal Page de Réf. Second niveau Réglage Signal [On], [Off] P.111 [5 minutes], [10 minutes], [30 minutes], [1heure], Menu système Eco Energie P.81 [Off]. Dans l’ordre de l’heure, de la minute, de l’année, du Heure et Date P.84 mois, et du jour.
-
Page 105: Apprentissage De L'utilisation Des Menus
Apprentissage de l’utilisation des menus Appuyez sur la touche PLAY/OK ou 9. Pour naviguer parmi les différentes options dans le Menu, utilisez le tableau de la liste des menus (☞ • Allez au réglage des éléments de menu P.103, P.104) et les étapes suivantes pour modifier ou sélectionnés. -
Page 106: Verrouillage De Fichiers [Vérouiller]
Verrouillage de fichiers [Vérouiller] Appuyez sur la touche + ou – pour Lorsqu’un fichier est réglé sur [Vérouiller], [ ] sélectionner [On] ou [Off]. s’affiche à l’écran et cela vous permet de protéger les fichiers importants d’un effacement accidentel. [On]: Verrouille le fichier et évite son effacement. De plus, le fichier n’est pas effacé... -
Page 107: Rétro Éclairé [Rétro Éclairé]
Rétro éclairé [Rétro éclairé] Lorsque le rétro éclairage de l’écran est réglé sur Appuyez sur la touche + ou – pour [On], il s’allume pendant 10 secondes chaque fois sélectionner [On] ou [Off]. que l’on appuie sur une touche. [On]: Le rétro éclairage est activé. Cette fonction est utile car elle vous permet de [Off]: Le rétro éclairage est désactivé. -
Page 108: Réglage Du Contraste De L'écran Acl [Contraste]
Réglage du contraste de l’écran ACL [Contraste] Le contraste de l’écran se règle des niveaux [01] à Appuyez sur la touche + ou – pour [12]. régler le niveau du contraste. • Vous pouvez régler le niveau du contraste de l’écran ACL entre [01] et [12]. -
Page 109: Led [Led]
LED [LED] Vous pouvez régler l’appareil pour que le témoin Appuyez sur la touche + ou – pour d’enregistrement ne s’allume pas. sélectionner [On] ou [Off]. [On]: L’éclairage de la LED est réglé. [Off]: L’éclairage de la LED est annulé. LED (Voyant d’enregistrement) RETOUR... -
Page 110: Langage [Language]
Langage [Language] Vous pouvez choisir la langue d’affichage de cet Langage enregistreur. English La langue pouvant être sélectionnée varie selon le pays dans lequel le produit a été acheté. RETOUR EXIT Touche F1, F3 Appuyez sur la touche PLAY/OK pour valider le réglage. -
Page 111: Avertissements Sonores [Signal]
Avertissements sonores [Signal] Lorsqu’il est réglé sur [On], l’enregistreur émet des Appuyez sur la touche + ou – pour bips pour vous signaler les opérations de touche ou sélectionner [On] ou [Off]. pour vous avertir en cas d’erreur. [On]: Les avertissements sonores sont activés. [Off]: Les avertissements sonores sont désactivés. -
Page 112: Modification De La Classe Usb [Réglagesusb]
Modification de la classe USB [RéglagesUSB] Outre la configuration sur [PC] (Connecter un PC [Connecteur USB]: Paramètres pour la pour transférer des fichiers) ou [Adaptateur AC] connexion à un PC. (Connecter sur l’adaptateur AC pour recharger la [USB]: Paramètres pour la connexion à une classe batterie), vous pouvez commuter la classe USB en USB. - Page 113 Modification de la classe USB [RéglagesUSB] Quand [USB] est sélectionné: Appuyez sur la touche + ou − pour modifier le réglage. Composite Stockage RETOUR EXIT [Composite]: Paramètre utilisé lors de la connexion à l’ordinateur et utilisé comme un dispositif de mémoire externe, hautparleur ou microphone USB.
-
Page 114: Formatage De La Carte [Format]
Formatage de la carte [Format] Les cartes qui ont été utilisées sur des dispositifs Appuyez sur la touche + ou – pour non-Olympus ou qui ne peuvent être reconnues mettre en surbrillance l’option [Début]. par l’enregistreur doivent être formatées avant de pouvoir être utilisées avec l’enregistreur. - Page 115 Formatage de la carte [Format] Initialisation des réglages de menu de l’enregistreur [MAJ réglage] Pour rétablir l’état d’origine des réglages de menu de l’enregistreur tels qu’ils étaient lors de son achat (réglages initiaux), effectuez le réglage depuis [MAJ réglage] dans le [Menu système], ou faites de même à...
-
Page 116: Vérification Des Informations De Système [Info Système]
• [Nom du modèle] [Version] et [Série] s’affichent. • Veuillez consulter la P.105 en ce qui concerne les réglages de chaque élément de menu. Menu système Info Système Pile Nom du modèle RéglagesUSB DS-2500 MAJ réglage Version Format 1.00 Info carte Série Info Système 123456789... -
Page 117: Gestion Des Fichiers Sur Votre Pc
Espace disque dur: 2 Go ou plus • Pour en savoir plus sur la compatibilité des dernières Navigateur : mises à niveau de systèmes d’exploitation, consultez Microsoft Internet Explorer 6.0 ou version la page Web d’Olympus sur ultérieure http://www.olympus-global.com/en/global/ . -
Page 118: Installation Du Logiciel
Windows Macintosh A propos de la version de Windows, il existe une Insérez le logiciel Olympus DSS Player méthode d’installation individuelle et une autre pour dans le lecteur de CD-ROM. les administrateurs en cas d’installation sur plusieurs ordinateurs clients. Une explication de la méthode Double-cliquez sur l’icône CD. -
Page 119: Désinstaller Un Logiciel
Cliquez sur le bouton [démarrer] et Sélectionnez [Ajouter/Supprimer des sélectionnez [Tous les programmes], Programmes] à partir du [Panneau de puis [Olympus DSS Player Standard], puis configuration]. [Aide du Dictation Module]. • La liste des applications installées est affichée. Lorsque le DSS Player est en marche, Sélectionnez [Olympus DSS Player... -
Page 120: Connecter L'enregistreur À Votre Pc
Connecter l’enregistreur à votre PC Connexion à votre PC avec le câble USB Démarrez le PC. Reliez le câble USB au port USB du PC. Vérifiez que l’enregistreur est arrêté et reliez un câble USB au port de connexion situé sur l’appareil. •... -
Page 121: Déconnecter L'enregistreur De Votre Pc
Connecter l’enregistreur à votre PC Remarques Déconnecter l’enregistreur de votre PC • Ne retirez JAMAIS la carte et n’ôtez jamais le câble USB tant que l’indicateur d’enregistrement Windows clignote. Ceci entraînerait la destruction des données. Cliquez sur [ ] de la barre de tâches •... -
Page 122: Mise En Marche Du Logiciel Dss Player
Enregistrement des informations • Tout le menu du programme s’affichera. utilisateur. • L’écran d’enregistrement de l’utilisateur Sélectionnez [Olympus DSS Player s’affiche lors du premier démarrage. Veuillez Standard], puis cliquez sur le [Dictation saisir le numéro de série. Veuillez consulter Module]. -
Page 123: Autres Méthodes D'utilisation Pratique
Autres méthodes d’utilisation pratique Utilisation comme mémoire externe du PC En plus de ses utilisations comme enregistreur vocal et lecteur de musique, cet enregistreur peut également être utilisé comme mémoire externe pour PC en stockant des données à partir d’un PC et en les lisant. -
Page 124: Autres Informations
Ceci est une anomalie. Prenez contact avec le Une erreur système a été détectée dans magasin où vous avez acheté l’enregistreur ou [Erreur Système] l’enregistreur. avec un Centre de Service après-vente Olympus pour le faire réparer. [Insérer carte] Aucune carte n’est insérée. Insérez-en une carte (☞ P.83). -
Page 125: Dépannage
Dépannage Symptôme Cause probable Mesure Vérifiez les polarités ( ☞ P.76). Les piles sont mal insérées. Rien n’apparaît sur Rechargez les batterie ou remplacez-les par des Les piles sont épuisées. l’affichage piles neuves (☞ P.76, P.78, P.79). L’enregistreur est en marche-arrêt en position Réglez le sur ON ( ☞... -
Page 126: Dépannage/Assistance Technique Et Soutien
Player (☞ P.119). Assistance technique et soutien Les informations suivantes concernent seulement les questions techniques et le soutien pour l’enregistreur OLYMPUS et son logiciel. s Numéro de ligne directe aux Etats-Unis et au Canada 1-888-553-4448 s Adresse électronique de soutien aux Etats-Unis et au Canada distec@olympus.com... -
Page 127: Accessoires (Options)
Ni-MH (BR401). Ce chargeur peut précision de la retranscription lors de l’utilisation rapidement charger les batteries rechargeables d’un logiciel de reconnaissance vocale. Olympus AA ou AAA. s Microphone externe: ME15 s Batterie Ni-MH rechargeable: BR404 Un microcravate multidirectionnel qui se fixe sur Batteries rechargeables à... -
Page 128: Spécifications
EAR 8 Ω ou plus à modification sans préavis. 4 Puissance de travail max. (3 V c.c.): La durée de vie est estimée par Olympus. Elle 300 mW ou plus (haut-parleur 8 Ω) peut varier considérablement selon le type de 4 Puissance maxi de sortie casque: batteries et les conditions d’utilisation. - Page 193 Memo...
- Page 194 Memo...
- Page 195 Model Number : DS-2500 Trade Name : DIGITAL VOICE RECORDER Responsible Party : OLYMPUS IMAGING AMERICA INC. Address : 3500 Corporate Parkway, P.O. Box 610, Center Valley, PA 18034-0610, U.S.A. Telephone Number : 1-888-553-4448 This device Complies with Part 15 of the FCC Rules. Operation is subject to the following two conditions: (1) This device may not cause harmful interference, and (2) this device must accept any interference received, including interference that may cause undesired operation.