Astralpool 37159 Manuel D'installation Et D'entretien
Table des Matières
Les langues disponibles
Les langues disponibles
Liens rapides
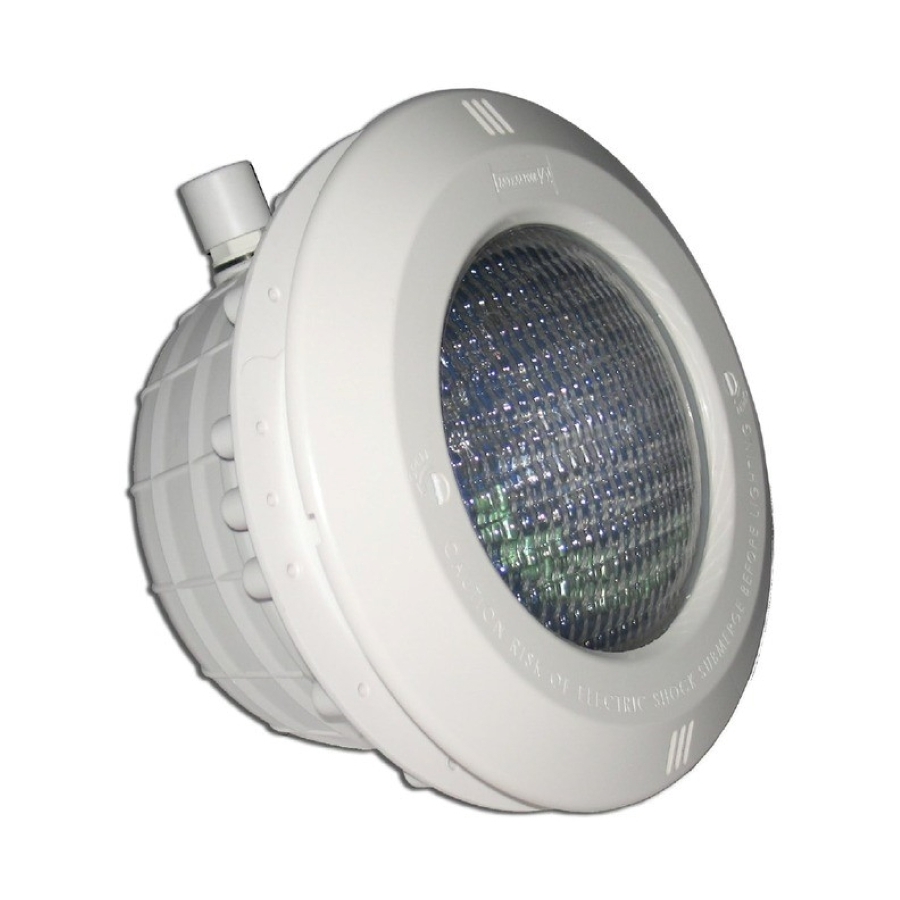
UNDERWATER PROJECTOR WITH RGB LED PAR56
PROJECTEUR IMMERGÉ PAR 56 À LEDS RVB
PROYECTOR SUBACUÁTICO CON PAR56 DE LEDS RGB
PROIETTORE SUBACQUEO CON PAR56 A LED RGB
UNTERWASSERSTRAHLER PAR 56 MIT LEDS RGB
PROJECTOR SUBAQUÁTICO COM PAR56 DE LEDS RGB
INSTALLATION AND MAINTENANCE MANUAL
MANUEL D'INSTALLATION ET D'ENTRETIEN
MANUAL DE INSTALACIÓN Y MANTENIMIENTO
MANUALE DI INSTALAZIONE E MANUTENZIONE
EINBAU-UND BETRIEBSANLEITUNG
MANUAL DE INSTRUÇÕES E MANUNTENÇÃO
1
Table des Matières

Manuels Connexes pour Astralpool 37159


Sommaire des Matières pour Astralpool 37159
- Page 1 UNDERWATER PROJECTOR WITH RGB LED PAR56 PROJECTEUR IMMERGÉ PAR 56 À LEDS RVB PROYECTOR SUBACUÁTICO CON PAR56 DE LEDS RGB PROIETTORE SUBACQUEO CON PAR56 A LED RGB UNTERWASSERSTRAHLER PAR 56 MIT LEDS RGB PROJECTOR SUBAQUÁTICO COM PAR56 DE LEDS RGB INSTALLATION AND MAINTENANCE MANUAL MANUEL D’INSTALLATION ET D’ENTRETIEN MANUAL DE INSTALACIÓN Y MANTENIMIENTO...
-
Page 6: Caractéristiques Générales
FRANÇAIS IMPORTANT: le manuel d’instructions que vous avez entre les mains contient des informations de première importance sur les mesures de sécurité à adopter au moment de l’installation et de la mise en service. Il est par conséquent indispensable que l’installateur et l’utilisateur lisent attentivement les instructions avant de commencer le montage et la mise en marche. -
Page 7: Diagramme Du Branchement Électrique
La lampe ne doit fonctionner que s’il est immergé et fixé aux parois verticales de la piscine. La lampe est pourvu d’une protection thermique qui, dans le cas d’un excès de température, réduit le niveau d’éclairage pour éviter des surchauffes. 5.1. -
Page 8: Types D'éclairage
Le transformateur doit être dimensionné pour fournir 60 VA sur chaque lampe à voyants qui est connecté. Par exemple, si nous voulons contrôler 5 lampes, nous devons les brancher en parallèle sur un transformateur d’au moins 300VA. Chaque Récepteur-Modulateur peut contrôler jusqu’à un maximum de 15 projecteurs à LEDS. Après avoir effectué... -
Page 9: Mise En Marche
Attention : Avant toute manipulation, s'assurer que le projecteur N'EST PAS sous tensión. La lampe neuve doit avoir Íes mêmes caractéristiques que celle fournie avec ie projecteur, lampe à leds PAR56 , 12 V. Pour que l'étanchéité soit parfalte, iI faut nettoyer 1'assiette du joint torique (num, 6) de la lampe ou le remplacer si l'on y a observé une entaille ou n’importe quelle déformation permanente. - Page 27 ENGLISH CODE DESCRIPTION 37159 37160 37161 37162 37163 37164 33975R0001 Decorative ring Stainless steel ring 07837R0100 33975R0003 Fixation screw 00347R0002 Floodlamp base fastening ring 7020106055 DIN 933 A4 M-6x55 screw Underwater led PAR56 12V lamp 35604R0500 7211100110 110x11 O-ring 33975R0002...
- Page 30 SACOPA, S.A.U. PRODUCTS: PRODUITS: 37159, 37160, 37161, PRODUCTOS: PRODOTTI: 37162, 37163, 37164 PRODUKTE: PRODUTOS: DÉCLARATION CE DE CONFORMITÉ DECLARATION CE OF CONFORMITY Les produits énumérés ci-dessus sont conformes à: The products listed above are in compliance with: La Directive de compatibilité électromagnétique Electromagnetic Compatibility Directive 89/336/EEC.
- Page 36 WASSER GETAUCHT ANZUMACHEN / NAO ACENDER NUNCA O PROECTOR SE NAO ESTIVER SUBMERGIDO NA AGUA Made in EC Sacopa, S.A.U. Pol. Ind. Pla de Poliger, s/n 17854 Sant Jaume de Llierca (Spain) ASTRALPOOL Avda. Francesc Macià, 38, planta 16 08208 Sabadell (Barcelona) Spain 37159E201-02 info@astralpool.com We reserve to change all or part of the articles or contents of this document, without prior notice.