Table des Matières

Manuels Connexes pour ITT G&L Serie


Sommaire des Matières pour ITT G&L Serie
- Page 1 IT T Commercial Water Goulds Pumps G&L SERIES MODEL SSV Installation, Operation and Maintenance Instructions Goulds Pumps is a brand of ITT Corporation. www.goulds.com Engineered for life...
- Page 2 SUBJECT PAGE SSV Product Line Numbering System ..........................3 Safety Instructions .................................5 Overview ..................................5 Product Description...............................5 Applications ..................................5 Pre-Installation Checks ..............................5 Transportation and Storage ............................6 Installation ..................................7 Start-Up ..................................9 Operation ..................................10 Maintenance................................10 Mechanical Seal Replacement (Sizes 1SV-4SV) ......................10 Mechanical Seal Replacement (Sizes 33SV-92SV) ......................11 Mechanical Seal Replacement (Sizes 33SV-92SV) Fitted with Cartridge Seals ..............13 Motor Replacement ..............................13 Troubleshooting ................................13...
- Page 3 SSV PRODUCT LINE NUMBERING SYSTEM The various versions of the SSV line are identifi ed by a product code number on the pump label. This number is also the catalog number for the pump. The meaning of each digit in the product code number is shown below. Note: Not all combinations are possible. Consult your G&L Pumps distributor. MODEL NOMENCLATURE (Sizes 1SV - 4SV) ➤...
- Page 4 SSV PRODUCT LINE NUMBERING SYSTEM MODEL NOMENCLATURE (Sizes 33SV - 92SV) The various versions of the SSV line are identifi ed by a product code number on the pump label. This number is also the catalog number for the pump. The meaning of each digit in the product code number is shown below.
-
Page 5: Safety Instructions
THOROUGHLY REVIEW ALL INSTRUCTIONS AND WARNINGS PRIOR TO PERFORMING ANY DO NOT OPERATE AT CLOSED DISCHARGE WORK ON THIS PUMP. MAINTAIN ALL SAFETY DECALS. Goulds Pumps, ITT Industries, Inc. UNIT NOT DESIGNED FOR USE WARNING WITH HAZARDOUS LIQUIDS OR FLAMMABLE GASES. THESE... - Page 6 2. MAXIMUM INLET PRESSURE 5. MINIMUM NOMINAL FLOW RATE The following table shows the maximum permissible To prevent overheating of the internal pump com- inlet pressure. However, the actual inlet pressure + ponents, make sure that a minimum water fl ow is pressure against a closed valve must always be lower always guaranteed when the pump is running.
-
Page 7: Handling The Product
Lift and handle the product carefully, using suitable lifting equipment. Observe all the accident prevention regulations. When you receive the pump, check the outside of the package for evident signs of damage. If the prod- uct bears visible signs of damage, notify our distribu- tor within 8 days from the delivery date. -
Page 8: Shaft Alignment - Motor To Pump
5. SHAFT ALIGNMENT – MOTOR TO PUMP 4. PIPING When the pump is purchased less motor, the pump Discharge and suction piping should be no smaller will be supplied with a motor assembly shim posi- than the respective pump opening and should be tioned between the motor adapter and the coupling. -
Page 9: Water Connection
For the 33 through 92SV sizes using a cartridge seal, Single Phase Motors – Connect the BLACK wire to after coupling bolts have been properly torqued, the BLACK motor wire. Connect the WHITE wire there are four set screws on the collar of the car- to the WHITE motor wire. -
Page 10: Motor Lubrication
NOTE: Place a loose rag over the open vent port to pre- Make sure that the drained liquid does not vent large amounts of liquid from being sprayed cause damage or injuries. on the pump and adjacent equipment. Care should be exercised if you After stabilizing the system at normal operating CAUTION are pumping hot water or chemi-... - Page 11 adequately sized crane, carefully remove the mo- 17. With an adequately sized crane, carefully lower tor. DO NOT rest the motor on the motor shaft. the motor onto the motor adapter, lining up the electrical conduit connection and the 4 motor 5.
- Page 12 lubricant compatible with the o-ring and install smooth with (fi ne grit) emery paper. See step 7 in the new seat by pressing it into the seal housing Figure 5. with your thumb. DO NOT USE EXCESSIVE 8. Lubricate the o-ring located in the ID of the rotary FORCE and, if possible, place a clean soft cloth unit of the mechanical seal with a lubricant com- over the seal face to protect the seal faces during...
-
Page 13: Motor Not Running
9. Install a new seal housing o-ring on the seal hous- 9. Rotate the shaft by hand to insure that the pump ing. A lubricant can be used to hold the o-ring on and motor rotate freely. Reinstall the coupling the diameter of the seal housing. -
Page 14: Torque Values
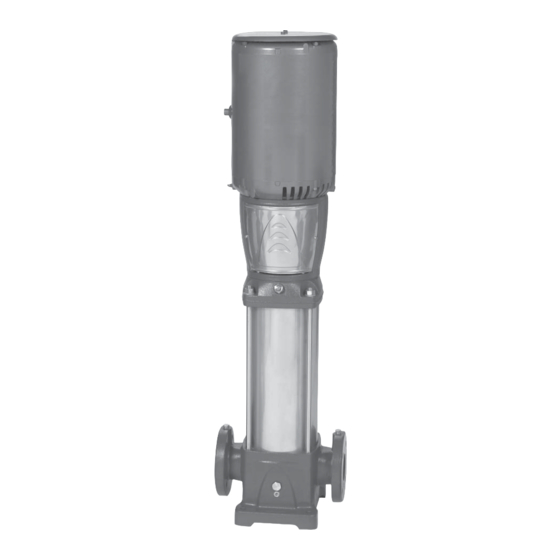
11. System head too high. 12. NPSH A too low – excessive suction lift or losses. 13. Discharge head too low – excessive fl ow rate. 14. Fluid viscosity, specifi c gravity too high. 15. Worn bearing. 16. Pump, motor or piping loose. TORQUE VALUES TORQUE VALUES Coupling... - Page 15 1 Standard NEMA vertical motor 2 Rigid coupling 3 Motor adapter 4 Coupling guard 5 Stainless steel seal housing 6 Mechanical seal 7 Stainless steel fi ll and drain plugs 8 Tie-rods 9 O-ring 10 Stainless steel pump casing 11 Stainless steel diffuser 12 Stainless steel impeller 13 Tungsten carbide shaft sleeve 14 Ceramic bushing...
- Page 16 1 O-Ring, Piston Seal 2 O-Ring, Mechanical Seal 3 O-Ring, Seal housing 4 O-Ring, Sleeve 5 Mechanical Seal 5A Cartridge Seal (not shown) 6 Screw, Guard 7 Screw, Piston Holding Disc 8 Screw, Coupling 9 Screw, MA and Seal Housing 10 Screw, Impeller 11 Washer, Coupling 12 Washer, Impeller...
- Page 17 FLOW DIRECTION AND MOTOR ROTATION CLOCKWISE Motor Flange Size Stage Operation Flow ROTATION COUNTER- Rotation Orientation CLOCKWISE DIRECTION CLOCKWISE ROTATION CLOCKWISE ROTATION 2-16 A,B,C,D Normal DIRECTION ROTATION DIRECTION 1SV 18-22 50 Hz, 1750 RPM A,B,C,D Normal DIRECTION 18-22 3500 RPM ONLY A,B,C,D Reverse 2-15...
- Page 18 THIS WARRANTY EXTENDS TO THE DEALER ONLY. Goulds Pumps, G&L and the ITT Engineered Blocks Symbol are registered trademarks and tradenames of ITT Corporation.
- Page 19 IT T Systèmes d’alimentation en eau commerciaux Goulds Pumps SÉRIE G&L MODÈLE SSV Directives d’installation, d’utilisation et d’entretien Goulds Pumps est une marque d'ITT Corporation. www.goulds.com Engineered for life...
- Page 20 SUJET PAGE Codifi cation des SSV ..............................21 Consignes de sécurité ..............................23 Aperçu..................................23 Description des SSV ..............................23 Usages ..................................23 Vérifi cations avant installation .............................23 Transport et entreposage .............................24 Installation ..................................25 Mise en service ................................27 Utilisation ..................................28 Entretien ..................................28 Remplacement de la garniture mécanique (1SV à 4SV) ....................29 Remplacement de la garniture mécanique (33SV à...
-
Page 21: Codification Des Ssv
CODIFICATION DES SSV Chaque version de la SSV est désignée par un code de produit, inscrit sur la plaque signalétique de la pompe. Ce code est le numéro d’article (catalogue) de la pompe. Les caractères du code sont défi nis ci-dessous. Nota : consulter le distributeur G&L Pumps, car certaines combinaisons de caractères sont impossibles. NOMENCLATURE DU NUMÉRO DE MODÈLE (1SV à... - Page 22 CODIFICATION DES SSV NOMENCLATURE DU NUMÉRO DE MODÈLE (33SV à 92SV) Chaque version de la SSV est désignée par un code de produit, inscrit sur la plaque signalétique de la pompe. Ce code est le numéro d’article (catalogue) de la pompe.
-
Page 23: Consignes De Sécurité
FEET AVERTISSEMENT AVANT D’EFFECTUER TOUT TRAVAIL SUR LA POMPE. DO NOT OPERATE AT CLOSED DISCHARGE N’ENLEVER AUCUN AUTOCOLLANT DE SÉCURITÉ. Goulds Pumps, ITT Industries, Inc. APPAREIL NON CONÇU POUR LES AVERTISSEMENT LIQUIDES DANGEREUX NI POUR LES GAZ INFLAMMABLES. CES FLUIDES POURRAIENT ÊTRE PRÉ- SENTS DANS LES INSTALLATIONS Numéro d’article de Goulds Pumps... -
Page 24: Débit Nominal Minimal
NOTA : ON DOIT CALCULER LA NPSHA POUR LE Si la température dépasse 104 °F et que l’installation SYSTÈME QUI SERA ÉQUIPÉ DE LA SSV . soit à une altitude supérieure à 3 000 pi par rapport au POUR TOUTE ASSISTANCE, S’ADRESSER AU niveau de la mer, on devra peut-être réduire la puis- DÉTAILLANT OU AU DISTRIBUTEUR. -
Page 25: Manutention Du Produit
Certaines caisses en carton dont la 1. CHOIX DU SITE AVERTISSEMENT base est en bois sont conçues pour S’assurer qu’aucun obstacle ne nuit à la circulation de être transportées et manutentionnées à la verticale, l’air de refroidissement produit par le ventilateur de et d’autres, y compris les caisses en bois, à... -
Page 26: Réglage De La Position De L'arbre De Pompe
h min. h min. Figure 1 Figure 2 AVIS : POSER LA TUYAUTERIE DE FAÇON À CE QU’ELLE N’APPLIQUE AUCUNE CONTRAINTE SUR LES RACCORDS D’ASPIRATION ET DE REFOULEMENT. (min.) 4. TUYAUTERIE Afi n de réduire la perte de charge (par frottement) h min. -
Page 27: Raccordement À La Tuyauterie
S’il s’agit d’un moteur à carcasse 213TC ou plus N’utiliser que du fi l de cuivre torsadé pour la mise à grosse, fi xer au moteur la bride pour adaptateur de la terre et l’alimentation du moteur. Le calibre du fi l moteur avec 4 vis à... -
Page 28: Utilisation
Enlever le bouchon de mise à l’air libre. AVIS : ON DOIT AMORCER LA POMPE CORRECTE- MENT AVANT SA MISE EN SERVICE. Pour les 1SV et 2SV , on doit dévisser complè- tement la cheville du bouchon de vidange (v. NE PAS FAIRE FONCTIONNER LA AVERTISSEMENT illustrations ci-dessous). -
Page 29: Code Et Choix De Garnitures Mécaniques
NE PAS mélanger les graisses de types différents (à va-et-vient brusque, dégager le corps d’étage base de lithium, de sodium, etc.). Enlever complè- inférieur (aspiration) de la tubulure de pompe. Sortir le jeu de corps d’étage hors de l’enveloppe tement l’ancienne graisse quand on utilise un autre extérieure. -
Page 30: Code Et Choix De Dispositifs D'étanchéité
Placer la plaque-logement entre l’arbre de mo- teur et l’arbre de pompe et enfi ler la plaque sur ce dernier. Procéder avec précaution pour ne pas CODE ET CHOIX DE DISPOSITIFS D'ÉTANCHÉITÉ endommager la surface d’étanchéité de l’élément fi xe de la garniture (v. fi g. 5, n Élément Dispositif Code... - Page 31 Figure 5...
-
Page 32: Débit De Refoulement Faible Ou Nul
Pour déposer le moteur, exécuter d’abord les VERROUILLER LA SOURCE DE tâches 1 à 4 de REMPLACEMENT DE LA AVERTISSEMENT COURANT EN POSITION HORS GARNITURE MÉCANIQUE. Tension CIRCUIT AVANT DE PROCÉDER dangereuse À L’ENTRETIEN DE LA POMPE. Dans le cas des moteurs à carcasse 213TC et plus OMETTRE CETTE PRÉCAU- grosse, enlever les 4 vis de fi... -
Page 33: Couple De Serrage
COUPLE DE SERRAGE COUPLE DE SERRAGE Carcasse Moteur- Accouplement Tirants Bouchons (vidange Moteur-bride Pompe de moteur adaptateur d’assemblage et mise à l’air libre) 1SV à 4SV 33SV à 92SV ¾ 27 N·m (20 lbf·pi) 20 N·m (15 lbf·pi) 30 N·m (22 lbf·pi) 20 N·m (15 lbf·pi) 27 N·m (20 lbf·pi) 20 N·m (15 lbf·pi) - Page 34 1 Moteur vertical standard NEMA 2 Accouplement rigide 3 Adaptateur de moteur 4 Carter d’accouplement 5 Plaque-logement de garniture mécanique en inox 6 Garniture mécanique 7 Bouchons de remplissage et de vidange en inox 8 Tirants d’assemblage 9 Joint torique 10 Enveloppe extérieure de pompe en inox 11 Diffuseur en inox...
- Page 35 1 Joint torique de dispositif d’étanchéité (piston d’équilibrage) 2 Joint torique de garniture mécanique 3 Joint torique de plaque-logement de dispositif d’étanchéité 4 Joint torique d'enveloppe extérieure 5 Garniture mécanique 5A Cartouche d’étanchéité (non montrée) 6 Vis de carter d’accouplement 7 Vis de disque de retenue de piston 8 Vis d’accouplement 9 Vis d’adaptateur de moteur et de plaque-...
-
Page 36: Sens De Rotation Et D'écoulement
SENS DE ROTATION ET D’ÉCOULEMENT Sens de Orientation Écoule- Étages Exécution Pompe rotation de Bride ment ROTATION EN SENS ROTATION 2 à 16 Toutes Horaire A,B,C,D Normal ROTATION HORAIRE EN SENS EN SENS 18 à 22 50 Hz, 1 750 r/min Horaire A,B,C,D Normal... -
Page 37: Systèmes D'alimentation En Eau Commerciaux
à responsabilité limitée, une association ou autre entité juridique se livrant à quelque activité que ce soit. LA PRÉSENTE GARANTIE SE RAPPORTE AU DÉTAILLANT SEULEMENT. Goulds Pumps, G&L et le logo à blocs siglés ITT sont des marques déposées et de commerce d’ITT Corporation. LES CARACTÉRISTIQUES PEUVENT ÊTRE CHANGÉES SANS PRÉAVIS. - Page 38 IT T Agua Industrial Goulds Pumps SERIE G&L MODELO SSV Instrucciones de instalación, funcionamiento y mantenimiento Goulds Pumps es una marca de fábrica de ITT Corporation. www.goulds.com Engineered for life...
- Page 39 TEMA PÁGINA Sistema de numeración de la línea de productos SSV ....................40 Instrucciones de seguridad ............................42 Perspectiva general ..............................42 Descripción del producto ............................42 Aplicaciones ................................42 Controles previos a la instalación ..........................42 Transporte y almacenamiento ............................43 Instalación ...................................44 Arranque ..................................46 Funcionamiento ................................47 Mantenimiento ................................47 Recambio de juntas herméticas mecánicas (tamaños 1SV-4SV) ..................48 Recambio de juntas herméticas mecánicas (tamaños 33SV-92SV) .................49...
-
Page 40: Ejemplo De Código De Producto
SISTEMA DE NUMERACIÓN DE LA LÍNEA DE PRODUCTOS SSV Las distintas versiones de la línea SSV se identifi can con un código de producto ubicado en la etiqueta de la bomba. Este número es también el número de catálogo de la bomba. A continuación se muestra el signifi cado de cada dígito del número de producto. Nota: No son posibles todas las combinaciones. Consulte con su distribuidor de G&L Pumps. - Page 41 SISTEMA DE NUMERACIÓN DE LA LÍNEA DE PRODUCTOS SSV NOMENCLATURA DE LOS MODELOS (Tamaños 33SV - 92SV) Las distintas versiones de la línea SSV se identifi can con un código de producto ubicado en la etiqueta de la bomba. Este número es también el número de catálogo de la bomba.
-
Page 42: Instrucciones De Seguridad
CONSERVE TODAS LAS CALCOMANÍAS. NO OPERAR CON DESCARGA CERRADA ESTA UNIDAD NO SE ENCUENTRA ADVERTENCIA DISEÑADA PARA SER USADA CON Goulds Pumps, ITT Industries, Inc. LÍQUIDOS O GASES INFLAMABLES. ESTOS FLUIDOS PUEDEN ESTAR PRESENTES EN ÁREAS CONTAMI- NADAS. Los fluidos peligrosos Número de catálogo Goulds... -
Page 43: Presión De Entrada Máxima
NOTA: EL NPSH DEBE CALCULARSE DE ACU- Para las temperaturas superiores a 104º F y para los ERDO AL SISTEMA ESPECÍFICO EN EL sitios de instalación elevados que excedan los 3000 pies sobre el nivel del mar puede ser necesario disminuir CUAL SE INSTALARÁ... -
Page 44: Desembalaje Del Producto
Algunas cajas de cartón (la base 1. SELECCIÓN DEL SITIO DE INSTALACIÓN ADVERTENCIA inferior es de madera) están dis- Asegúrese que no existan obstrucciones u obstáculos eñadas para ser transportadas y manipuladas en que impidan el fl ujo normal del aire de refrigeración posición vertical. - Page 45 3. ALINEACIÓN ANGULAR Instale una válvula de contención de descarga que sea adecuada para manejar el fl ujo y los líquidos con La alineación angular de las bridas de succión y el fi n de evitar el refl ujo. descarga puede lograrse de mejor manera utilizando Instale una válvula de compuerta del tamaño adecua- calibradores donde se ubiquen los pernos.
-
Page 46: Conexión De Agua
Para los tamaños de armazón de motor 213TC y Los motores equipados con protectores tér- más grandes, fi je la brida del adaptador de motor micos automáticos abren el circuito eléctrico utilizando 4 tornillos de cabeza hexagonal. Ajuste del motor cuando existe una sobrecarga. Esto hasta alcanzar los valores de torque detallados en la puede hacer que la bomba arranque inesperada- sección “DATOS DE INGENIERÍA”... - Page 47 3. CEBADO/VENTILACIÓN 4. FUNCIONAMIENTO Para instalaciones con el nivel de líquido por debajo NO OPERE LA UNIDAD SIN LOS ADVERTENCIA de la bomba: ELEMENTOS DE SEGURIDAD INSTALADOS. HACERLO PUEDE Cierre la válvula de descarga. CAUSAR SEVERAS LESIONES PER- Quite la boca de evacuación de agua. SONALES.
-
Page 48: Lubricación Del Motor
7. Para poder acceder a las juntas herméticas mecáni- LUBRICACIÓN DEL MOTOR cas, es necesario quitar la placa superior de acero Intervalos de lubricación recomendados para los cojinetes del motor inoxidable que es sostenida en posición por un Intervalo Entorno de Servicio aro tórico ubicado debajo de la corona de la placa. - Page 49 17. Con una grúa de tamaño adecuado, baje el motor pareja los tornillos. Eleve y saque la cubierta de la con cuidado sobre el adaptador de motor, alin- junta hermética entre la bomba y el eje del motor. Ponga cuidado cuando desplace la cubierta de la eando la conexión del conducto eléctrico y los 4 junta entre el eje para evitar dañar el emplaza- agujeros de perno del adaptador de motor, según...
- Page 50 14. La bomba y el sistema deben ventilarse antes de 2. Afl oje los 4 tornillos ubicados alrededor del ID del arrancar la bomba. Vea la Sección 3, página 8, eje de la bomba. para conocer los procedimientos de ventilación. 3.
-
Page 51: El Motor No Funciona
4. Controle que el eje de la bomba no tenga ninguna rebaba o suciedad. Cualquier rebaba debe ser ANTES DE REALIZAR CUALQUI- pulida con papel de esmeril (arenado fi no). ADVERTENCIA ER TAREA DE MANTENIMIEN- Voltaje 5. Instale un nuevo aro tórico sobre el montaje TO, DESCONECTE Y BLOQUEE peligroso torneado de la nueva junta de cartucho. - Page 52 VALORES DE TORQUE VALORES DE TORQUE Armazón Perno Brida del Acoplamiento Tamaño de Tuercas de Ventilación del motor del motor adaptador 1-4SV 33-92SV la bomba barra tensora y drenaje ¾ 20 lbs pies (27 N .m) – 15 lbs pies (20 N .m) 22 lbs pies (30 N .m) 15 lbs pies (20 N .m) 20 lbs pies (27 N .m)
- Page 53 COMPONENTES PRINCIPALES DE 1SV, 2SV, 3SV Y 4SV 1 Motor vertical NEMA estándar 2 Acoplamiento rígido 3 Adaptador de motor 4 Protección de acoplamiento 5 Cubierta de la junta hermética de acero inoxidable 6 Junta hermética mecánica 7 Tapones de carga y drenaje de acero inoxidable 8 Varillas tensoras 9 Aro tórico...
- Page 54 1 Aro tórico, obturador del pistón 2 Aro tórico, junta hermética mecánica 3 Aro tórico, cubierta de la junta hermética 4 Aro tórico, manga 5 Junta hermética mecánica 5A Junta hermética de cartucho (no se muestra) 6 Tornillo, protección 7 Tornillo, disco de soporte del pistón 8 Tornillo, acoplamiento 9 Tornillo, cubierta de MA y junta...
-
Page 55: Garantía Limitada De Goulds Pumps
DIRECCIÓN DE FLUJO Y ROTACIÓN DEL MOTOR Rotación Orientación Talla Etapa Operación Flujo del Motor Del Borde DIRECCIÓN DE DIRECCIÓN ROTACIÓN EN DIRECCIÓN 2-16 TODAS A,B,C,D Normal DE ROTACIÓN SENTIDO ANTI DE ROTACIÓN EN SENTIDO HORARIO DIRECCIÓN 18-22 50 Hz, 1750 RPM A,B,C,D Normal EN SENTIDO... -
Page 56: Declaration Of Conformity
Fred Clise Product Manager/ Encargado de producto/ Directeur des produits Goulds Pumps, G&L y el símbolo ITT Engineered Blocks son marcas registradas y marcas comerciales de ITT Corporation. LAS ESPECIFICACIONES ESTÁN SUJETAS A CAMBIO SIN PREVIO AVISO. IM018R08 Mayo, 2007 ©...