Publicité
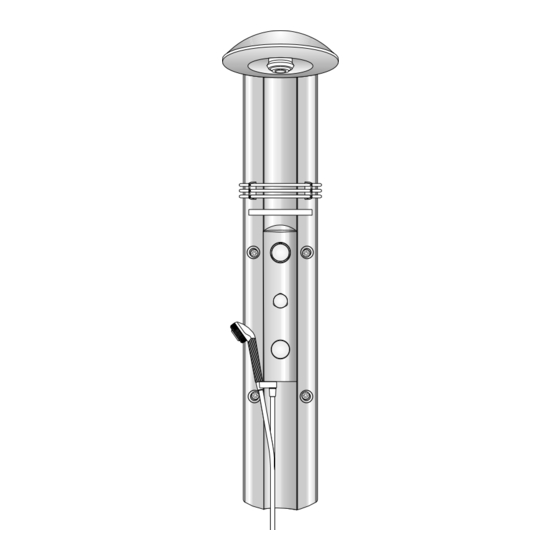
uschpaneel Wandversion manuell
D
Shower Panel version for wall installation
Duschpaneel version murale manuelle
Pannello doccia meccanico a parete
Panel de ducha para pared, versión manual
mechanisch douchepaneel wanduitvoering
266 / 267
Hans Grohe
D-77761 Schiltach / Schwarzwald
Tel.: (0 78 36) 51-0 · Telex: 7525614
Telefax: (0 78 36) 51 14 40
1
Publicité
Table des Matières

Manuels Connexes pour Hansgrohe PHARO 266


Sommaire des Matières pour Hansgrohe PHARO 266
- Page 1 uschpaneel Wandversion manuell Shower Panel version for wall installation Duschpaneel version murale manuelle Pannello doccia meccanico a parete Panel de ducha para pared, versión manual mechanisch douchepaneel wanduitvoering 266 / 267 Hans Grohe D-77761 Schiltach / Schwarzwald Tel.: (0 78 36) 51-0 · Telex: 7525614 Telefax: (0 78 36) 51 14 40...
-
Page 3: Acqua Calda
Leerrohr Ø 21 nur für Ausführung mit Beleuchtung Hollow pipe ( Ø 21) for shower panel with lightning Gaine à prévoir uniquement pour la version avec éclairage Foro Ø 21 mm. per il cavo solo per versione con illuminazione Tubo de Ø 21 mm solamente para la versión con iluminación Wanddoorvoer Ø... - Page 4 1. Wandprofil 1. Wall profile 1. Profilé mural 2. Duschpaneeldach 2. Shower panel roof 2. Coupole 3. Kopfbrause 3. Over Head Shower 3. Douche de tête 4. "Quattro" Umstellung 4. "Quattro" diverter 4. Inverseur "Quattro" 5. Absperrventil 5. On/Off control 5.
- Page 5 Duschpaneeldach mittels der Connect panel roof to wall Fixer la coupole du Dusch- 2 mitgelieferten Zylinder- profile with the M6x25 screws paneel au profilé à l'aide des schrauben mit Innensechskant amd M6 nuts. Use drill holes 2 vis à têtes creuses M6x25 M6x25 (Schlüssel SW 5) und A and B.
- Page 6 Mit den zwei mittleren Schrau- Connect the holding bracket A l'aide des deux vis centrales, ben wird der Haltewinkel A A by screwing 2 screws monter l'équerre de fixation befestigt, indem die zwei through the wall profile C into A et la contreplaque B sur le Schrauben durch das Wand- the mounting plate B.
- Page 7 DN15 (1/2") Dichtung einle- Insert 1/2" seal. Connect over Placer le joint 1/2", raccorder gen, Kopfbrauseanschluß- head hose A to over head le flexible A à la pomme de schlauch A mit Kopfbrause- connection B. tête B. anschluß B DN15 (1/2") verbinden.
- Page 8 Dichtprofile A auf Paneel- Attach seals A to edge of Monter le joint d'étanchéité kanten aufdrücken. Panel. A sur le profilé du Dusch- paneel. Inserire il profilo in gomma A Colocar a presión la junta A Dichtingsprofielen A op de en el canto del panel.
- Page 9 Wandhalterung A entspre- Position wall bracket A in Positioner le support de chend Maßzeichnung waa- accordance with montage mural gerecht an die Wand halten, measurements on the wall an horizontalement comme anzeichnen und Bohrlöcher drill 6mm holes. Use the 4x35 indiqué...
- Page 10 Anschlußbogen für Warm- A Hot water connection A and Poser coudes und Kaltwasser B so ein- cold water connection B raccordements eau froide B dichten, daß die Schlauchan- should be positioned in such et eau chaude A de telle schlußgewinde (innen- a way that the flexible hose manière que la partie filetée...
- Page 11 Die untere Befestigungs- Position the bottom support. Marquer l'emplacement de bohrung für die Halteleiste Drill 8mm holes and connect percage profilé festlegen. Befestigungsloch (Ø support loosely. d´accrochage. 8 mm) bohren. Stockschraube Percer le trou diamétre 8mm. eindrehen.Halteleiste A mit Monter le profilé à l'aide de Flügelmutter lose montieren.
- Page 12 Das Duschpaneel mit dem Hang shower panel with the Accrocher l'équerre A du Haltewinkel A in die Wand- support angle A in bracket B. Duschpaneel dans le support halterung B einhängen. mural B. For panels Bei Paneelen Pour le Duschpaneel with lighting: mit Beleuchtung: avec éclairage:...
- Page 13 Das Duschpaneel im unteren Be- Gently pull forward the panel at Incliner le bas du Duschpaneel reich leicht nach vorne schwen- the buttom and connect flexible légèrement vers l'avant et ken und Anschlußschläuche mit supply hoses (hot on the left, red brancher flexibles Anschlußbogen (warm links, rote...
- Page 14 Brauseschlauch und Hand- Connect shower hose and Brancher le flexible et brause montieren und in die hand shower. positionner la douchette main vorgesehene Halterung stek- Do not forget the washer! dans son support. ken. Insert hand shower into the Attention: ne pas oublier le joint! Dichtung nicht vergessen! shower holder.Both the hand...
- Page 15 Funktionsprüfung durchfüh- Check all funktions. Procéder aux tests de ren. fonctionnement. Effettuare la prova di Comprobación de la función. Test op werking. funzionamento.
- Page 16 Der 1/2" Thermostat befindet The 1/2" thermostat is situated Le mitigeur thermostatique sich hinter der Mittelab- under the centre cover and is 1/2" trouve derrière le cache deckung und wird durch den served by the thermostat hand- central et se commande par Thermostatgriff bedient.
-
Page 17: Important
Thermostat einjustieren : Thermostat adjustment: Etalonnage du thermostat: Eine Korrektur ist erforderlich, An adjustment may be necessary Un étalonnage est nécessaire wenn die an der Entnahmestelle if the water at the outlet does not lorsque la température puisée gemessene Temperatur von der différe sensiblement de celle match the temperature on the am Thermostat eingestellten Tem-... - Page 18 Regolazione del Ajustar mezclador Thermostaat instellen: termostatico: termostático: Een korrektie is noodzakelijk als regolazione diventa Cuando la temperatura de salida de op tapplaats gemeten del agua no coincide con la necessaria quando si ha una temperatuur van de bij de temperatura del termostato hay thermostaat ingestelde...
-
Page 19: Entretien Des Douches Latérales
Seitenbrausen warten : Body shower servicing: Entretien des douches Die Seitenbrausen A sollten From time to time body latérales: von Zeit zu Zeit bewegt und showers A should be moved Il est conseillé de manipuler mit Armaturenfett oder einer and re-greased on the de temps en temps les douches wasserfesten Handcreme im uppermost swiverl joint with... - Page 20 Durchlauferhitzer: Combi-boilers: Chauffe-eau instantanés: PHARO Duschpaneele manuell PHARO manual 1/2" L´installation du Duschpaneel en mit DN25 (1/2") Thermostaten thermostatic shower panels can version manuelle est déconseillée können in Verbindung mit hy- be used on hydraulically or avec un chauffe eau instantané draulisch und thermisch gesteu- thermostatically driven combi- (sans réserve d'eau chaude).
- Page 21 Das PHARO Duschpaneel Wandversion manuell kann auch mit Beleuchtung geliefert werden. Die Beleuchtung besteht aus 6 x 12V Halogenstiften G4 mit jeweils 5Watt, und befindet sich unter einer transparenten Ab- deckung rund um die Kopfbrause. Die Beleuchtung wird in dem Augenblick automatisch eingeschaltet, wenn das Ab- sperrventil geöffnet wird.
- Page 22 The shower panel version for wall installation is also available with lighting. The lighting comprises 6 x 12V halogen bulbs G4, 5Watt each. It is arranged around the overhead shower with a circular transparent light cover. The lighting is activated when the shut- off valve is turned on and it remains on for appx.
-
Page 23: Remplacement Des Ampoules Halogénes
Le Duschpaneel frontal version manuelle peut être également livrée avec éclairage. l´ éclairage comprend 6 lampes halogènes, type G4 / 12V / 5 Watts et sont disposés circulairement autour dela pomme de douche sous un cache trans- parent. L´éclairage s´allume automatquement lors de l´ouverture du robinet d´arrêt. - Page 24 Il Pannello doccia meccanico di PHARO è disponibile anche con l’illuminazione incorporata. L’illuminazione comprende lampade alogene 6x12V, G4 5/Watt ed è posizionata sul tetto del Pannello doccia. L’illuminazione viene automaticamente messa in funzione al momento in cui si apre il rubinetto d’arresto per farsi la doccia.
- Page 25 El panel de ducha PHARO para la pared en versión manual, se puede suministrar también con iluminación. La iluminatión, compuesta por 6 lámparas halógenas G4 de 12V y 5 Watios cada una, está ubicada tras una pantalla translúcida,alrededor de la ducha fija.
- Page 26 Het PHARO mechanische douchepaneel wanduitvoering kan ook met verlichting geleverd worden. Deze verlichting bestaat uit 6 halogeenlampjes (5W / 12V) en zit gemonteerd onder een transparente kap rond de hoofddouche. Wanneer de stopkraan geopend wordt, schakelt de verlichting automatisch in. Na het sluiten van de kraan brandt de verlichting nog 2 minuten.
-
Page 27: Serviceteile
Technische Daten : Serviceteile: Mindestfließdruck: 1,5 bar Clubmaster Kopfbrause: Betriebsdruck: max.10 bar Service Set 92027 Empfohlener Betriebsdruck: 2 - 5 bar Prüfdruck: 10 bar Heißwassertemperatur: max. 70° C Quattro Umstellung: Empfohlene Heißwassertemperatur: 60° C Einsatz kpl. 13937 Temperaturskala 20°-60°C Sicherheitssperre 38°C Prüfzeichen: P-IX-8242/IB... - Page 28 Données techniques: Piéces d'échange: Pression minimum nécessaire: 1,5 bar Pomme de tête Clubmaster: Pression de service autorisée: max.10 bar Sachet service 92027 Pression de service conseillée: 2 - 5 bar Pression testée: 10 bar Température eau chaude: max. 70° C Inverseur Quattro: Température recommandée: 60°...
- Page 29 Datos técnicos : Piezas de recambio: Pressión minima en servicio: 1,5 bar Clubmaster, ducha fija: Pressión en servicio: max.10 bar Set de servicio 92027 Pressión recomendada en servicio: 2 - 5 bar Pressión de prueba: 10 bar Temperatura de agua caliente: max.
- Page 30 Garantia: Ud. ha adquirido un producto de calidad de la empresa Hansgrohe. Todas las piezas que en el plazo de 6 meses después de su instalación resulten defectuosas, serán substituidas o reparadas gratuitamente por nosotros según nuestro criterio. Varios intentos de reparación ó substitución serán admisibles. Las piezas substituidas serán de nuestra propiedad.
- Page 31 Conseils d'entretien: · Nettoyer les surfaces avec un produit d'entretien ménager ou un savon liquide. · Eliminer les dépôts calcaires avec le détartrant Hansgrohe Réf. 90905, rincer à l'eau claire et polir avec un chiffon doux. · Ne pas utiliser un produit d'entretien à base d'acide ou de poudre à récurer.
- Page 32 G r o h e S . à . r . l . Hans Grohe Handelsges. m. b. H Hansgrohe · Juhani Niemi Oy 180 Avenue Daumesnil · 75012 Paris Postfach 85 · 2355 Wr. Neudorf Mäntytie 11 · 00270 Helsinki Téléphone:...