Publicité

Les langues disponibles
  • FR

Les langues disponibles

  • FRANÇAIS, page 30

Liens rapides

MONITOR iLOFT BUS2
BUS2 iLOFT MONITOR
MONITEUR iLOFT BUS2
BUS2 iLOFT MONITOR
MONITOR iLOFT BUS2
MONITOR iLOFT BUS2
MANUAL DE INSTALADOR Y USUARIO
USER& INSTALLER'S MANUAL
MANUEL D´INSTALLATION ET UTILISATION
INSTALLATIONS-und BENUTZERHANDBUCH
MANUAL DO INSTALADOR E USUÁRIO
MANUALE DELL'INSTALLATORE E UTENTE
E S PA Ñ O L
E N G L I S H
F R A N Ç A I S
D E U T S C H
P O R T U G Û E S
I TA L I A N O

Publicité

Table des Matières
loading

Sommaire des Matières pour Fermax iLOFT BUS2

  • Page 1 MONITOR iLOFT BUS2 BUS2 iLOFT MONITOR MONITEUR iLOFT BUS2 BUS2 iLOFT MONITOR MONITOR iLOFT BUS2 MONITOR iLOFT BUS2 MANUAL DE INSTALADOR Y USUARIO E S PA Ñ O L USER& INSTALLER’S MANUAL E N G L I S H MANUEL D´INSTALLATION ET UTILISATION F R A N Ç...
  • Page 2: Iloft Monitor

    Fermax electrónica desarrolla y fabrica equipos de prestigio que cumplen los más altos estándares de diseño y tecnología. Su monitor de videoportero FERMAX le permitirá comunicarse con la placa de calle, ver la persona que le está llamando y abrirle la puerta de entrada si así lo desea.
  • Page 3: Table Des Matières

    iLOFT Monitor iLOFT Monitor INDICE - INDEX SOMMAIRE - INHALT - INDICE MONITOR iLOFT ......................6 Instalación Monitor ..................6 Conexiones ...................... 8 Características Técnicas ................8 Esquemas ......................9 Programación del monitor ................10 Funcionamiento ....................13 Ajustes del monitor ..................16 Mantenimiento (limpieza) ................
  • Page 4 iLOFT Monitor iLOFT Monitor INDICE MONITOR iLOFT ......................65 Installazione Monitor ....................66 Collegamenti ....................68 Specifiche tecniche ..................68 Schemi ......................69 Programmazione del monitor ................. 70 Funzionamento ....................73 Regolazione del monitor ................. 76 Manutenzione (pulizia) ..................78 Pag 4...
  • Page 5: Emonitor Iloft

    iLOFT Monitor iLOFT Monitor Monitor iLOFT iLOFT Monitor Moniteur iLOFT iLOFT Monitor Monitor iLOFT Monitor iLOFT Pag 5...
  • Page 6: Instalación Monitor

    - Prof * : la profundidad del Monitor se ha considerado con 131mm 14mm caja Fermax (*) Quitar la etiqueta electrostática de protección. Instalación con CAJA FERMAX (*) Quitar la etiqueta electrostática de protección. Instalación con CAJA UNIVERSAL ESPAÑOL Pag 6...
  • Page 7 iLOFT Monitor iLOFT Monitor INSTALACIÓN MONITOR SUPERFICIE Dimensiones monitor (Alto x Ancho x Prof .) 197 x 131 x 34,3 mm / 7,7” x 5,1” x 1,3” Dimensiones monitor modelo Pure (Alto x Ancho x Prof .) 197 x 131 x 33,3 mm / 7,7” x 5,1” x 1,3” 197mm MENU 131mm...
  • Page 8: Conexiones

    iLOFT Monitor iLOFT Monitor CONEXIONES JP1=DATA TERM No Term NO TERM Bout Bin - F1 F2 JP2=VIDEO TERM NO TERM JP2 JP1 Bout - F1 F2 T Ct A SEC - Term JP2 JP1 Empotrar Superficie - Bus de comunicaciones audio+video (sin polaridad) - Conexión monitor/teléfono adicional Bout Conexión siguiente monitor/teléfono en cascada...
  • Page 9: Esquemas

    iLOFT Monitor iLOFT Monitor ESQUEMAS En distribución En cascada No Term No Term Bout Bin - F1 F2 Bout Bin - F1 F2 MADE IN SPAIN REF. 3240 BUS-2 OUTPUT PROX/NEXT DISTRIB DISTRIBUIDOR BUS-2 Term BUS-2 DISTRIBUTOR Term JP2 JP1 JP2 JP1 DERIVACION DERIVACION...
  • Page 10: Programación Del Monitor

    iLOFT Monitor iLOFT Monitor PROGRAMACIÓN DEL MONITOR iLOFT 1º. Entrar en progamación Opción 1 0 0 0 (5 seg.) (3 seg.) Con el monitor conectado: - Pulsar el botón «MENU» durante 5 segundos. Se escucha la melodía programada para la placa principal. - Pulsar los botones «F1»...
  • Page 11 iLOFT Monitor iLOFT Monitor 2º. Programar la dirección del monitor Opción 1: Desde placa de calle Pulsar el botón de llamada a vivienda (placas de pulsa- dores) o código de llamada (placas de teclado). Se pro- duce confirmación con tono de llamada y se visualiza en H IG H IG E S O...
  • Page 12 iLOFT Monitor iLOFT Monitor PROGRAMACIÓN DEL MONITOR iLOFT como SECUNDARIO 1º. Entrar en progamación 0 0 0 (5 seg.) (3 seg.) Con el monitor conectado: - Pulsar el botón «MENU» durante 5 segundos. Se escucha la melodía programada para la placa principal. - Pulsar los botones «F1»...
  • Page 13 iLOFT Monitor iLOFT Monitor FUNCIONAMIENTO MONITOR iLOFT CON Bucle inductivo Botones CON Bucle inductivo. Vienen identificados con este símbolo. · Incluye un bucle que interactúa con los dispositivos de audición de personas con discapacidad auditiva. · Nota: en dispositivos de audición con selección manual de modo, debe estar configurado el Modo Digital.
  • Page 14 iLOFT Monitor iLOFT Monitor Funcionamiento Atender una llamada Al presionar el pulsador de llamada, en la Placa de Calle se produce un tono de llamada tanto en la placa de calle como en el monitor, encendiéndose la pantalla. Pulsar el botón para hablar con el visitante Se abre el canal de audio en sentido calle y vivienda, el funcionamiento es en modo manos libres.
  • Page 15 iLOFT Monitor iLOFT Monitor Funcionamiento Cancelar tono de llamada Con el monitor en reposo, pulsar 3 veces seguidas el botón en un tiempo inferior a 2 segundos apoximadamente. El led rojo parpadea 1 vez cada 2 segundos. Para desactivar la cancelación de tono de llamada, pulsar nueva- mente 3 veces seguidas el botón en un tiempo inferior a 2 segundos.
  • Page 16 iLOFT Monitor iLOFT Monitor AJUSTES MONITOR iLOFT Ajustes de Volumen y Selección de Melodías : Ajuste de volumen. (5 seg.) : Selección de Melodía Placa principal. 90 seg. : Selección de Melodía Placa secundaria. : Salir de ajustes. - Acceso a modo «ajuste de volumen»: pulsar el botón « »...
  • Page 17 iLOFT Monitor iLOFT Monitor Ajustes de Imagen (contraste, brillo, color) Realizar autoencendido (visualizar imagen en el monitor) (1seg.) : Ajuste de contraste (cn). (5 seg.) c n 3 : Ajuste de brillo (br). 30 seg. : Ajuste de color (cl). : Salir de ajustes.
  • Page 18 - Depth *: the Monitor depth stated here takes into account 131mm 14mm the Fermax box (*) Remove the electrostatic protective tag Installation with a FERMAX BOX (*) Remove the electrostatic protective tag Installation with a UNIVERSAL BOX ENGLISH Page 18...
  • Page 19 iLOFT Monitor iLOFT Monitor SURFACE MONITOR INSTALLATION Monitor Dimensions (Height x Width x Depth.) 197 x 131 x 34,3 mm / 7,7” x 5,1” x 1,3” Pure Monitor Dimensions (Height x Width x Depth.) 197 x 131 x 33,3 mm / 7,7” x 5,1” x 1,3” 197mm MENU 131mm...
  • Page 20: Connections

    iLOFT Monitor iLOFT Monitor iLOFT Monitor iLOFT Monitor CONNECTIONS JP1=DATA TERM No Term NO TERM Bout Bin - F1 F2 JP2=VIDEO TERM NO TERM JP2 JP1 Bout - F1 F2 T Ct A SEC - Term JP2 JP1 Flush Surface - Audio + Video Communication Bus (polarity free) - Monitor/Additional Telephone Connection Bout...
  • Page 21 iLOFT Monitor iLOFT Monitor DIAGRAMS: Distribution Cascade No Term No Term Bout Bin - F1 F2 Bout Bin - F1 F2 MADE IN SPAIN REF. 3240 BUS-2 OUTPUT PROX/NEXT DISTRIB DISTRIBUIDOR BUS-2 Term BUS-2 DISTRIBUTOR Term JP2 JP1 JP2 JP1 DERIVACION DERIVACION SPLIT...
  • Page 22: Programming The Monitor

    iLOFT Monitor iLOFT Monitor iLOFT Monitor iLOFT Monitor PROGRAMMING THE iLOFT MONITOR 1. Select programming mode: Option 1: (5 sec.) (3 sec.) With the monitor connected: - Press and hold the «MENU» button for 5 seconds. The tone pre-programmed on the main panel will sound.
  • Page 23 iLOFT Monitor iLOFT Monitor 2. Programme the monitor’s address Option 1: From the entry panel Press the residence’s call button (button panel) or call code (keypad panel). A ring tone will sound as confirmation and you will see the number programmed H IG H IG E S O...
  • Page 24 iLOFT Monitor iLOFT Monitor iLOFT Monitor iLOFT Monitor PROGRAMMING OF THE iLOFT MONITOR as a SECONDARY 1. Select programming mode: (5 sec.) (3 sec.) With the monitor connected: - Press and hold the «MENU» button for 5 seconds. The tone pre-programmed on the main panel will sound.
  • Page 25 iLOFT Monitor iLOFT Monitor iLOFT MONITOR OPERATION WITH Induction Loop Buttons Including induction loop. Identified by the following symbol. · Includes an induction loop which interacts with audio devices used by the hearing impaired. · Note: In manual audio devices Digital Mode should be configured. Buttons Audio Activation, Call Hang-Up and Configuration Settings Button (menu).
  • Page 26: Operation

    iLOFT Monitor iLOFT Monitor iLOFT Monitor iLOFT Monitor Operation Answering a call. When the call button on the Entry Panel is pressed a ring tone is emitted both from the panel and on the monitor, causing the screen to start up. Press the button to speak with the visitor.
  • Page 27 iLOFT Monitor iLOFT Monitor Operation Canceling the Ring Tone With the monitor on standby, press the button 3 times consecutively in less than 2 seconds. The red led flashes once every 2 seconds. To deactivate the ring tone cancellation option, press the button 3 times consecutively once again, in less than 2 seconds.
  • Page 28 iLOFT Monitor iLOFT Monitor iLOFT Monitor iLOFT Monitor iLOFT MONITOR SETTINGS Volume Settings and Tone Selection : Volume Settings (5 sec.) : Main Panel Tone Selection 90 sec. : Secondary Panel Tone Selection : Exit Settings - Accessing «Volume Settings» Mode: Press and hold the « »...
  • Page 29 iLOFT Monitor iLOFT Monitor Image Settings (contrast, shine, colour) Auto-Start (See image on the monitor) (1sec.) : Contrast Settings (cn) (5 sec.) : Shine Settings (br) 30 sec. : Colour Settings (cl) : Exit Settings The ILOFT monitor has 5 pre-defined levels for contrast, shine and colour settings. - Accessing «Contrast Settings»...
  • Page 30: Installation Moniteur

    - Ce moniteur peut être installé dans un boîtier universel. MENU - Prof * : la profondeur du moniteur est prise en compte 131mm 14mm avec le boîtier Fermax. (*) Retirer l’étiquette électrostatique de protection. Installation avec BOÎTIER FERMAX (*) Retirer l’étiquette électrostatique de protection. Installation avec BOÎTIER UNIVERSEL FRANÇAIS...
  • Page 31: Installation Moniteur Surface

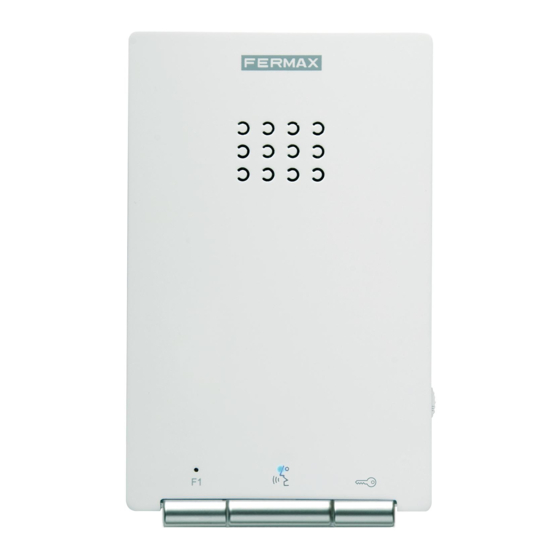
    iLOFT Monitor iLOFT Monitor INSTALLATION MONITEUR SURFACE Dimensions moniteur (hauteur x largeur x prof.) 197 x 131 x 34,3 mm / 7,7” x 5,1” x 1,3” Dimensions moniteur Pure (hauteur x largeur x prof.) 197 x 131 x 33,3 mm / 7,7” x 5,1” x 1,3” 197mm MENU 131mm...
  • Page 32: Connexions

    iLOFT Monitor iLOFT Monitor CONNEXIONS JP1=DATA TERM No Term NO TERM Bout Bin - F1 F2 JP2=VIDEO TERM NO TERM JP2 JP1 Bout - F1 F2 T Ct A SEC - Term JP2 JP1 Encastrable Surface - Bus de communication audio+vidéo (sans polarité). - Connexion moniteur/poste supplémentaire.
  • Page 33 iLOFT Monitor iLOFT Monitor SCHÉMAS En distribution En cascade No Term No Term Bout Bin - F1 F2 Bout Bin - F1 F2 MADE IN SPAIN REF. 3240 BUS-2 OUTPUT PROX/NEXT DISTRIB DISTRIBUIDOR BUS-2 Term BUS-2 DISTRIBUTOR Term JP2 JP1 JP2 JP1 DERIVACION DERIVACION...
  • Page 34: Programmation Du Moniteur

    iLOFT Monitor iLOFT Monitor PROGRAMMATION DU MONITEUR iLOFT 1º. Entrer en mode programmation Option 1 (5 s.) (3 s.) Si le moniteur est connecté : - Appuyez sur le bouton « MENU » pendant 5 secondes. La mélodie programmée pour la platine principale est émise. - Appuyez sur les boutons «...
  • Page 35 iLOFT Monitor iLOFT Monitor 2º. Programmer l’adresse du moniteur Option 1 : depuis la platine de rue Appuyez sur le bouton d’appel à destination du logement (platines à boutons-poussoirs) ou composez le code d’appel (platines à clavier). La confirmation se H IG H IG E S O...
  • Page 36 iLOFT Monitor iLOFT Monitor PROGRAMMATION DU MONITEUR iLOFT en tant que moniteur SECONDAIRE 1º. Entrer en mode programmation (5 s.) (3 s.) Si le moniteur est connecté : - Appuyez sur le bouton « MENU » pendant 5 secondes. La mélodie programmée pour la platine principale est émise.
  • Page 37: Fonctionnement Moniteur Iloft

    iLOFT Monitor iLOFT Monitor FONCTIONNEMENT MONITEUR iLOFT AVEC Boucle à induction Boutons AVEC boucle à induction. Sont identifiés à l’aide de ce symbole. · Comprend une boucle à induction qui interagit avec les appareils auditifs des personnes malentendantes. · Remarque : pour les appareils auditifs avec sélection manuelle du mode, il faut configurer le mode numérique.
  • Page 38: Fonctionnement

    iLOFT Monitor iLOFT Monitor Fonctionnement Prendre un appel En appuyant sur le bouton-poussoir d’appel sur la platine de rue, il se produit une tonalité d’appel aussi bien au niveau de la platine de rue que du moniteur ; l’écran s’allume. Appuyez sur la touche afin de pouvoir parler avec le visiteur.
  • Page 39 iLOFT Monitor iLOFT Monitor Fonctionnement Annuler tonalité d’appel Lorsque le moniteur est en veille, appuyez 3 fois de suite sur le bouton en moins de 2 secondes à peu près. La DEL rouge clignote 1 fois toutes les 2 secondes. Pour désactiver l’annulation de la tonalité...
  • Page 40: Réglages Du Moniteur

    iLOFT Monitor iLOFT Monitor RÉGLAGES MONITEUR iLOFT Réglages du volume et sélection des mélodies : réglage du volume (5 s.) : sélection de la mélodie platine principale 90 s. : sélection de la mélodie platine secondaire : quitter mode réglages - Accès au mode «...
  • Page 41 iLOFT Monitor iLOFT Monitor Réglages de l’image (contraste, luminosité, couleur) Utilisez l’allumage automatique (pour voir l’image sur le (1s.) moniteur) : réglage du contraste (cn) (5 s.) : réglage de la luminosité (br) 30 s. : réglage de la couleur (cl) : quitter mode réglages.
  • Page 42 Hinweise: XXmm - Dieser Monitor kann in einem Universalkasten installiert MENU werden. 131mm 14mm - Tiefe*: Die Tiefe des Monitors ist auf den Fermax-Kasten abgestimmt. (*) Elektromagnetischen Schutzaufkleber entfernen. Installation mit FERMAX-KASTEN (*) Elektromagnetischen Schutzaufkleber entfernen. Installation mit UNIVERSALKASTEN DEUTSCH...
  • Page 43: Iloft Monitor

    iLOFT Monitor iLOFT Monitor MONITORINSTALLATION AUFPUTZKASTEN Abmessungen des Monitors (Höhe x Breite x Tiefe) 197 x 131 x 34,3 mm / 7,7” x 5,1” x 1,3” Abmessungen des Pure Monitors (Höhe x Breite x Tiefe) 197 x 131 x 33,3 mm / 7,7” x 5,1” x 1,3” 197mm MENU 131mm...
  • Page 44: Technische Eigenschaften

    iLOFT Monitor iLOFT Monitor ANSCHLÜSSE JP1=DATA TERM No Term NO TERM Bout Bin - F1 F2 JP2=VIDEO TERM NO TERM JP2 JP1 Bout - F1 F2 T Ct A SEC - Term JP2 JP1 Unterputz Aufputz - Audio und Video-Kommunikationsbus (ohne Polarität) - Zusätzlicher Monitor- und Telefonanschluss Bout Anschluss an den nachfolgenden Monitor/Telefon bei Kaskadenanordnung...
  • Page 45 iLOFT Monitor iLOFT Monitor SCHEMATA mit Verzweigungen Kaskadenanordnung No Term No Term Bout Bin - F1 F2 Bout Bin - F1 F2 MADE IN SPAIN REF. 3240 BUS-2 OUTPUT PROX/NEXT DISTRIB DISTRIBUIDOR BUS-2 Term BUS-2 DISTRIBUTOR Term JP2 JP1 JP2 JP1 DERIVACION DERIVACION SPLIT...
  • Page 46 iLOFT Monitor iLOFT Monitor iLOFT MONITORPROGRAMMIERUNG 1. Zugang in den Programmiermodus Option 1 (5 Sekunden) (3 Sekunden) Bei eingeschaltetem Monitor: - Den Schalter "MENU" 5 Sekunden lang drücken. Nun ertönt die einprogrammierte Melodie der Haupttürstation. - Drücken Sie drei Sekunden lang die Tasten "F1" und "F2". Es ertönt ein Signalton und der Monitor aktiviert sich und zeigt auf dem Feld die aktuelle Adresse des Monitors an.
  • Page 47 iLOFT Monitor iLOFT Monitor 2. Programmierung der Monitoradresse. Option 1: Über die Türstation Drücken Sie die Ruftaste der Wohnung (Türstation mit Infomodul) oder geben Sie den Rufkode ein (Türstationen mit Tastatur). Es ertönt ein Rufton und auf H IG H IG E S O E S O L U T...
  • Page 48 iLOFT Monitor iLOFT Monitor iLOFT MONITORPROGRAMMIERUNG als ZUSATZMONITOR 1. Zugang in den Programmiermodus (5 Sekunden) (3 Sekunden) Bei eingeschaltetem Monitor: - Den Schalter "MENU" 5 Sekunden lang drücken. Nun ertönt die einprogrammierte Melodie der Haupttürstation. - Drücken Sie drei Sekunden lang die Tasten "F1" und "F2". Es ertönt ein Signalton und der Monitor aktiviert sich und zeigt auf dem Feld die aktuelle Adresse des Monitors an.
  • Page 49: Funktionsweise

    iLOFT Monitor iLOFT Monitor FUNKTIONSWEISE MONITOR iLOFT MIT induktiver Schleife Tasten MIT induktiver Schleife. Sie werden mit diesem Symbol gekennzeichnet. · Enthält eine induktive Schleife, die sicherstellt, dass Personen mit eingeschränktem Hörvermögen die Mitteilungen hören können. · Hinweis: Bei Hörgeräten, bei denen der Betriebsmodus manuell einzustellen ist, muss dieser auf Digitaler Modus geschaltet werden.
  • Page 50 iLOFT Monitor iLOFT Monitor Betrieb Anrufannahme Beim Drücken der Ruftaste an der Türstation wird ein Rufton an der Türstation und am Monitor ausgegeben und der Bildschirm schaltet sich ein. Drücken Sie die Taste , um mit dem Besucher zu sprechen. Der Audiokanal wird in beide Richtungen aktiviert und auf Freisprechbetrieb geschaltet.
  • Page 51 iLOFT Monitor iLOFT Monitor Betrieb Unterbrechung des Ruftons Drücken Sie innerhalb von zwei Sekunden drei Mal die Taste wenn sich der Monitor im Bereitschaftsmodus befindet. Die rote LED blinkt im 2-Sekundenintervall auf. Zur Deaktivierung der Ruftonunterbrechung müssen Sie innerhalb von zwei Sekunden die Taste drei Mal drücken.
  • Page 52 iLOFT Monitor iLOFT Monitor EINSTELLUNGEN MONITOR iLOFT Einstellung der Lautstärke und Melodiewahl (5 Sek.) Lautstärkeeinstellung : Melodiewahl Haupttürstation 90 Sek. : Melodiewahl Nebentürstation : Verlassen des Menüs Einstellungen - Zugang in den "Lautstärkemodus": Drücken Sie 5 Sekunden lang die Taste " "...
  • Page 53 iLOFT Monitor iLOFT Monitor Bildeinstellungen (Kontrast, Helligkeit, Farbe) Eigenstart durchführen (Bildanzeige auf dem Monitor) (1 Sek.) : Kontrasteinstellung (cn) (5 Sek.) : Helligkeitseinstellung (br) 30 Sek. : Farbeinstellung (cl) : Verlassen des Menüs Einstellungen Der Monitor iLOFT verfügt über 5 Einstellstufen für Kontrast, Helligkeit und Farbe. - Zugang in den Modus "Kontrasteinstellung": 1.
  • Page 54: Instalação Do Monitor

    - Prof * : A profundidade do Monitor foi considerada com a 131mm 14mm caixa Fermax (*) Tirar a etiqueta electrostática de protecção. Instalação com a CAIXA FERMAX (*) Tirar a etiqueta electrostática de protecção. Instalação com a CAIXA UNIVERSAL PORTUGUÊS Pag 54...
  • Page 55 iLOFT Monitor iLOFT Monitor INSTALAÇÃO DE MONITOR DE SUPE Dimensões do monitor (Altura x Largura x Prof.) 197 x 131 x 34,3 mm / 7,7” x 5,1” x 1,3” Dimensões do monitor Pure (Altura x Largura x Prof.) 197 x 131 x 33,3 mm / 7,7” x 5,1” x 1,3” 197mm MENU 131mm...
  • Page 56: Características Técnicas

    iLOFT Monitor iLOFT Monitor CONEXÕES JP1=DATA TERM No Term NO TERM Bout Bin - F1 F2 JP2=VIDEO TERM NO TERM JP2 JP1 Bout - F1 F2 T Ct A SEC - Term JP2 JP1 Encastrar Superficie - Bus de comunicações áudio+vídeo (sem polaridade) - Conexão monitor/telefone adicional Bout Conexão seguinte monitor/telefone em cascata...
  • Page 57 iLOFT Monitor iLOFT Monitor ESQUEMAS Em distribuição Em cascata No Term No Term Bout Bin - F1 F2 Bout Bin - F1 F2 MADE IN SPAIN REF. 3240 BUS-2 OUTPUT PROX/NEXT DISTRIB DISTRIBUIDOR BUS-2 Term BUS-2 DISTRIBUTOR Term JP2 JP1 JP2 JP1 DERIVACION DERIVACION...
  • Page 58: Programação Do Monitor

    iLOFT Monitor iLOFT Monitor PROGRAMAÇÃO DO MONITOR iLOFT 1º. Entrar na progamação Opção 1 0 0 0 (5 seg.) (3 seg.) Com o monitor conectado: - Premir o botão «MENU» durante 5 segundos. Se escuta a melodía programada para a placa principal. - Premir os botões «F1»...
  • Page 59 iLOFT Monitor iLOFT Monitor 2º. Programar a direcção do monitor Opção 1: Desde a placa da rua Premir o botão de chamada à vivenda (placas de botão) ou código de chamada (placas de teclado). Se produz a confirmação com tom de chamada e se visualiza na ecrã o H IG H IG E S O...
  • Page 60 iLOFT Monitor iLOFT Monitor PROGRAMAÇÃO DO MONITOR iLOFT como SECUNDÁRIO 1º. Entrar na progamação 0 0 0 (5 seg.) (3 seg.) Com o monitor conectado: - Premir o botão «MENU» durante 5 segundos. Se escuta a melodía programada para a placa principal. - Premir os botões «F1»...
  • Page 61 iLOFT Monitor iLOFT Monitor FUNCIONAMENTO DO MONITOR iLOFT COM Circuito indutivo Botoes COM Circuito indutivo. Apresentam-se identificados por este símbolo. · Inclui um circuito que interage com os dispositivos de audição de pessoas com incapacidade auditiva. · Nota: nos dispositivos de audição com selecção manual de modo, deve estar configurado o Modo Digital.
  • Page 62: Funcionamento

    iLOFT Monitor iLOFT Monitor Funcionamento Atender uma chamada Ao pressionar o botão de chamada, na Placa da Rua se produz um tom de chamada tanto na placa da rua como no monitor, acendendo a ecrã. Premir o botón para falar com o visitante Se abre o canal de áudio no sentido rua e vivenda, o funcionamento é...
  • Page 63 iLOFT Monitor iLOFT Monitor Funcionamento Cancelar o tom da Chamada Com o monitor em repouso, premir 3 vezes seguidas o botão num tempo inferior a 2 segundos aproximadamente. A luz vermelha pisca 1 vez a cada 2 segundos. Para desactivar a cancelação do tom da chamada, premir novamente 3 vezes seguidas o botão num tempo inferior a 2 segundos.
  • Page 64: Ajustes Do Monitor

    iLOFT Monitor iLOFT Monitor AJUSTES DO MONITOR iLOFT Ajuste do Volume e Selecção de Melodías : Ajuste do volume. (5 seg.) : Selecção da Melodía da Placa principal. 90 seg. : Selecção da Melodía da Placa secundaria. : Sair do ajuste. - Acesso ao modo «ajuste do volume»: premir o botão «...
  • Page 65 iLOFT Monitor iLOFT Monitor Ajuste da Imagen (contraste, brilho e cor) Realizar o acendimento automatico (visualizar a imagem (1seg.) no monitor) : Ajuste de contraste (cn). (5 seg.) c n 3 : Ajuste de brilho (br). 30 seg. : Ajuste de cor (cl). : Sair do ajuste.
  • Page 66: Installazione Monitor

    131mm 14mm - Prof * : la profondità del Monitor è stata considerata con cassa Fermax (*) Rimuovere l’etichetta elettrostatica di protezione. Impianto con CASSA FERMAX (*) Rimuovere l’etichetta elettrostatica di protezione. Impianto con CASSA UNIVERSALE ITALIANO Pag 66...
  • Page 67 iLOFT Monitor iLOFT Monitor INSTALLAZIONE MONITOR SUPERFICIE Dimensioni monitor (Altezza x Larghezza x Profondità) 197 x 131 x 34,3 mm / 7,7” x 5,1” x 1,3” Dimensioni monitor Pure (Altezza x Larghezza x Profondità) 197 x 131 x 33,3 mm / 7,7” x 5,1” x 1,3” 197mm MENU 131mm...
  • Page 68: Caratteristiche Tecniche

    iLOFT Monitor iLOFT Monitor CONNESSIONI JP1=DATA TERM No Term NO TERM Bout Bin - F1 F2 JP2=VIDEO TERM NO TERM JP2 JP1 Bout - F1 F2 T Ct A SEC - Term JP2 JP1 Incassare Superficie - Bus di comunicazioni audio+video (senza polarità) - Connessione monitor/citofono supplementare Bout Connessione seguente monitor/citofono a cascata...
  • Page 69: Schemi

    iLOFT Monitor iLOFT Monitor SSCHEMI In distribuzione A cascata No Term No Term Bout Bin - F1 F2 Bout Bin - F1 F2 MADE IN SPAIN REF. 3240 BUS-2 OUTPUT PROX/NEXT DISTRIB DISTRIBUIDOR BUS-2 Term BUS-2 DISTRIBUTOR Term JP2 JP1 JP2 JP1 DERIVACION DERIVACION...
  • Page 70: Programmazione Del Monitor

    iLOFT Monitor iLOFT Monitor PROGRAMMAZIONE DEL MONITOR iLOFT 1º. Entrare in modalità programmazione Opzione 1 (5 sec.) (3 sec.) Con il monitor collegato: - Premere il pulsante «MENU» per 5 secondi. Si udirà la melodia programmata per il posto principale - Premere i pulsanti «F1»...
  • Page 71 iLOFT Monitor iLOFT Monitor 2º. Programmare la direzione del monitor Opzione 1: Dal posto esterno Premere il pulsante di chiamata all’appartamento (posto dei pulsanti) o codice di chiamata (posto pulsantiera). Si ode una conferma con tono di chiamata e si visualizza H IG H IG E S O...
  • Page 72 iLOFT Monitor iLOFT Monitor PROGRAMMAZIONE DEL MONITOR iLOFT come SECONDARIO 1º. Entrare in modalità programmazione (5 sec.) (3 sec.) Con il monitor collegato: - Premere il pulsante «MENU» per 5 secondi. Si udirà la melodia programmata per il posto principale - Premere i pulsanti «F1»...
  • Page 73 iLOFT Monitor iLOFT Monitor FUNZIONAMENTO MONITOR iLOFT CON loop induttivo Pulsanti CON loop induttivo. Vengono identificati con questo simbolo. · Include un loop che interagisce con i dispositivi di ascolto delle persone con problemi di udito. · Nota: nei dispositivi di ascolto con selezione manuale della modalità, è neces- sario configurare la Modalità...
  • Page 74: Funzionamento

    iLOFT Monitor iLOFT Monitor FUNZIONAMENTO Rispondere a una chiamata Quando si preme il pulsante di chiamata, nel Posto Esterno si ode un tono di chiamata sia nel posto esterno sia nel monitor, e si accende lo schermo. Premere il pulsante per parlare con il visitatore Si apre il canale audio in direzione esterno e appartamento, il funzionamento si trova in modalità...
  • Page 75 iLOFT Monitor iLOFT Monitor FUNZIONAMENTO Annullare tono di chiamata Con il monitor in standby, premere 3 volte di seguito il pulsante in un tempo inferiore a circa 2 secondi. Il led rosso lampeggia 1 volta ogni 2 secondi. Per disattivare l’annullamento del tono di chiamata, premere nuovamente 3 volte di seguito il pulsante in un tempo inferiore a 2 secondi.
  • Page 76 iLOFT Monitor iLOFT Monitor IMPOSTAZIONI MONITOR iLOFT Impostazioni volume e selezione melodie : Impostazioni volume. (5 sec.) : Selezione Melodia Posto principale. 90 sec. : Selezione Melodia Posto secondario. : Uscire da impostazioni. - Accesso alla modalità «impostazioni volume»: Premere il pulsante « »...
  • Page 77 iLOFT Monitor iLOFT Monitor Impostazioni Immagine (contrasto, luminosità, colore) Eseguire accensione automatica (visualizzare immagine sul (1sec.) monitor) : Impostazioni contrasto (cn). (5 sec.) : Impostazioni luminosità (br). 30 sec. : Impostazioni colore (cl). : Uscire da impostazioni. Il monitor ILOFT, dispone di 5 livelli predefiniti per le impostazioni di contrasto, luminosità e colore.
  • Page 78: Manutenzione(Pulizia)

    iLOFT Monitor iLOFT Monitor MANTENIMIENTO (LIMPEZA) - MAINTENANCE (CLEANING) - MAINTENANCE (NETTOYAGE) - WARTUNG (REINIGUNG) - MANUTENÇÃO (LIMPEZA) - MANUTENZIONE(PULIZIA) No utilizar productos de limpieza que contengan ácidos, vinagre o que sean abrasivos. Do not use cleaning products which contain acids, vinegar or are abrasive in nature.
  • Page 79 iLOFT Monitor iLOFT Monitor 1º. Utilizar um pano húmido. 2º. Passe-o no monitor sempre na mesma direcção. Após limpar o monitor, seque-o cuidadosamente, para eliminar a humidade. 1º. Utilizzare uno panno umido. 2º. Passarlo sopra il monitor sempre nella stessa direzione. Dopo la pulizia del monitor, asciugarlo accuratamente per eliminare l’umidità.
  • Page 80 Publicación técnica de caracter informativo editada por FERMAX ELECTRONICA. FERMAX ELECTRONICA, en su política de mejora constante, se reserva el derecho a modificar el contenido de este documento así como las características de los productos que en él se refieren en cualquier momento y sin previo aviso.

Table des Matières