Publicité

Les langues disponibles
  • FR

Les langues disponibles

Liens rapides

Publicité

Table des Matières
loading

Sommaire des Matières pour auna Areal Nobility

  • Page 3: Table Des Matières

    Sehr geehrter Kunde, wir gratulieren Ihnen zum Erwerb Ihres Gerätes. Lesen Sie die folgenden Hinweise sorgfältig durch und befolgen Sie diese, um möglichen Schäden vorzubeugen. Für Schäden, die durch Missachtung der Hinweise und unsachgemäßen Gebrauch entstehen, übernehmen wir keine Haftung. Scannen Sie den folgenden QR-Code, um Zugriff auf die aktuellste Bedienungsanleitung und weitere Informationen rund um das Produkt zu erhalten:...
  • Page 4: Sicherheitshinweise

    SICHERHEITSHINWEISE Allgemeine Hinweise • Blitzschlag - Wenn Sie das Gerät länger nicht benutzen oder es gewittert, ziehen Sie den Stecker aus der Steckdose der trennen Sie das Gerät vom Antennenanschluss. Dadurch werden Schäden am Produkt durch Blitzschlag und Überspannung vermieden. •...
  • Page 5: Zusammenbau

    ZUSAMMENBAU Befestigen Sie die Säule, indem Sie sie gegen den Uhrzeigersinn am Lautsprecher festschrauben. Schrauben Sie die Säule auf den Ständer. Schieben Sie die Schraube durch die Unterlegscheibe in das Loch am Ständer und drehen Sie sie im Uhrzeigersinn fest. Lautsprechergehäuse Ständer Schraube mit...
  • Page 6: Geräteübersicht

    GERÄTEÜBERSICHT Vorderseite Display Mode Fernbedienungssensor Play/Pause Zurück/Lautstärke- Vor/Lautstärke+ Standby...
  • Page 7 Rückseite Lautsprecherausgang vorne 5.1 Surroundeingang rechts links Lautsprecherausgang vorne 5.1 Surroundeingang links rechts 5.1 Ch Subwoofereingang Surround-Ausgang links 5.1 Center-Lautsprecher- Surround-Ausgang rechts Eingang Center-Lautsprecher- 5.1 Eingang vorne links Ausgang 5.1 Eingang vorne rechts Power (ein/aus) AUX-Eingang AC in...
  • Page 8: Fernbedienung

    FERNBEDIENUNG In den Standby-Modus EQ-Modus starten wechseln Lautstärke erhöhen Stummschaltung Zum vorherigen Titel Zum nächsten Titel springen springen Titel abspielen/pausieren Lautstärke verringern Schnell zurückspulen Schnell vorspulen BT-Modus starten USB-Quelle auswählen BT-Gerät verbinden und Zwischen den Modi wechseln trennen...
  • Page 9: Aufstellung

    Vorbereitung der Fernbedienung Installieren Sie eine Die maximal Entfernung zum CR2025 3V Batterie Gerät beträgt 6 Meter Hinweis: Entfernen Sie vor dem ersten Gebrauch die Schutzfolie. Sie können die Fernbedienung nun normal verwenden. AUFSTELLUNG Lassen Sie genügend Platz um den Lautsprecher herum, um eine gute Belüftung zu gewährleisten und eine Überhitzung des Lautsprechers zu vermeiden.
  • Page 10: Bedienung Mit Usb/Sd-Karte

    BEDIENUNG MIT USB/SD-KARTE Wählen Drücken Sie auf die POWER-Taste, um das Gerät ein- oder auszuschalten. Drücken Sie MODE, um zwischen den Modi BT/AUX/USB/SD CARD zu wählen. Wählen Sie USB/SD CARD aus. Drücken Sie diese Taste, um den Equalizer-Modus auszuwählen. Drücken Sie diese Taste, um zum vorherigen Titel zu springen. Drücken Sie diese Taste, um die Wiedergabe vorübergehend anzuhalten, und drücken Sie sie erneut, um die Wiedergabe fortzusetzen.
  • Page 11: Aux-Bedienung

    Der BT-Name des Geräts lautet „Areal Nobility“. Drücken Sie die Taste [MODE], um zu BT zu wechseln. Verbinden Sie Ihr mobiles BT-Gerät, indem Sie den Lautsprecher suchen und sich mit ihm verbinden. Nach erfolgreicher Verbindung ertönt ein Signalton und sie können nun Musik von Ihrem mobilen Gerät abspielen.
  • Page 12: Reinigung Und Pflege

    REINIGUNG UND PFLEGE • Verwenden Sie ein weiches Tuch, um die Oberfläche des Lautsprechers zu reinigen. Verwenden Sie zur Reinigung keine Scheuerschwämme, Scheuermittel oder scharfe Reiniger. • Wenn der Lautsprecher während eines Gewitters nicht richtig funktioniert, ziehen Sie den Stecker aus der Steckdose und stecken Sie ihn nach einer Minute wieder ein.
  • Page 13: Technische Daten

    TECHNISCHE DATEN Artikelnummer 10033215 Stromversorgung 220-240 V ~ 50/60 Hz Frequenzgang 40 Hz -20 kHz Bluetooth-Bereich > 10 m (~ 4 inch) S/N-Verhältnis > 75 dB USB/SD-Audioformat MP3, WMA Ausgangsleistung 120 W...
  • Page 15: Declaration Of Conformity

    Dear Customer, Congratulations purchasing this equipment. Please read this manual carefully and take care of the following hints to avoid damages. Any failure caused by ignoring the items and cautions mentioned in the instruction manual is not covered by our warranty and any liability.
  • Page 16: Safety Instructions

    SAFETY INSTRUCTIONS General information • Lightning - If you are not going to use the device for a long time or if there is a storm, disconnect the plug from the electrical outlet and disconnect the device from the antenna connector. This will avoid damage to the product that may be caused by lightning or overvoltage.
  • Page 17: Tower Speaker Assembly

    TOWER SPEAKER ASSEMBLY Take metal pillar clockwise rotated to screw of speaker box fasten Take base insert metal pillar. Screw insert washer then go through base,clockwise rotated screw to base fasten Speaker box Base Screw with double thread Washer Metal pillar Screw...
  • Page 18: Product Overview

    PRODUCT OVERVIEW Front Display window Mode Remote receiver window Play/Pause Prev/Vol- Next/Vol+ Standby...
  • Page 19 Rear 5.1 Ch surround right input Speaker front left output 5.1 Ch surround left input Speaker front right output 5.1 Ch subwoofer input Speaker surround left output Speaker surround right 5.1 Ch center input output 5.1 Ch front left input Speaker center output 5.1 Ch front right input Power...
  • Page 20: Remote Control

    REMOTE CONTROL STANDBY : Switch to Press to switch EQ mode standby mode Press to increase the volume Press to mute audio playback level Skip to the previous track Skip to the next track Press for play and pause Press to decrease the volume function level Fast rewind button...
  • Page 21: Installation Location

    Preparing the remote control Insert a Lithium Battery CR2025 3V Within approxinately 6 Meter Note: Before first use, please put the insulation piece out. The remote control can be normal use. INSTALLATION LOCATION Leave suffi cient space around the speaker of at least 5cm from any wall/ obstacle to ensure proper ventilation and prevent the speaker from overheating.The following places are not suitable installation locations for the speakers.
  • Page 22: Usb/Sd Card Operation

    USB/SD CARD OPERATION Select POWER to ON to turn on unit or to “OFF” to turn off unit. Press to select between BT/AUX/USB/SD CARD modes, please press to select to USB/SD CARD. Press to select equalizer mode. Press to skip to previous track. Press to temporarily pause a playback, press it again to resume the playback.
  • Page 23: Aux Operation

    The BT-name of the unit is “Areal Nobility”. Press [MODE] button to switch to the corresponding signal source (BT). Use your enabled mobile device to search and pair the the unit by selecting the unit will synchronize play songs with your mobile device after connected successfully. Disconnect the BT connection by holding [PLAY/PAUSE] on the front panel or the remote control.
  • Page 24: Cleaning And Care

    CLEANING AND CARE • Use a soft cloth or cotton dipped in a neutral solution for cleaning the surface of the speaker. Do not use the type of cloth that you use for washing dishes or aggressive chemical agents. • If the speaker is not working properly during a storm, please disconnect the plug from the power socket and reinsert it after a minute.
  • Page 25: Technical Data

    TECHNICAL DATA Item number 10033215 Power supply 220-240 V ~ 50/60 Hz Frequency response 40 Hz -20 kHz Bluetooth range > 10 m (~ 4 inch) S /N ratio > 75 dB USB/SD audio format MP3, WMA Output power 120 W...
  • Page 27 Estimado cliente: Le felicitamos por la adquisición de este producto. atentamente siguiente manual siga cuidadosamente las instrucciones de uso con el fi n de evitar posibles daños. La empresa no se responsabiliza de los daños ocasionados por un uso indebido del producto o por haber desatendido las indicaciones de seguridad.
  • Page 28: Indicaciones De Seguridad

    INDICACIONES DE SEGURIDAD Indicaciones generales • Relámpago - Si no va a utilizar el aparato durante un periodo largo de tiempo o si hay una tormenta eléctrica, desenchufe el aparato de la toma de corriente y desconecte el conector de antena. De este modo, protegerá...
  • Page 29: Montaje

    MONTAJE Introduzca la columna metálica en el altavoz y gírela en el sentido de las agujas del reloj para fijarla. Introduzca la base en la columna metálica. Inserte el tornillo y la arandela en la base y gire el tornillo en el sentido de las agujas del reloj para fijarlo.
  • Page 30: Vista General Del Aparato

    VISTA GENERAL DEL APARATO Parte frontal Display Modos Display del control remoto Reproducción/Pausa Prev/Vol- Siguiente/Vol+ Standby...
  • Page 31 Parte posterior Salida frontal izquierda 5.1 Ch Entrada surround derecha del altavoz 5.1 Ch Entrada surround Salida frontal derecha del izquierda altavoz Salida izquierda surround 5.1 Ch Salida del subwoofer del altavoz Salida derecha surround 5.1 Ch Entrada central del altavoz 5.1 Ch Entrada frontal izquierda Salida central del altavoz 5.1 Ch Entrada frontal derecha...
  • Page 32: Control Remoto

    CONTROL REMOTO STANDBY: cambia al modo Pulse para cambiar al modo Standby Pulse para aumentar el Pulse para silenciar la música volumen Ir a la pista anterior Ir a la siguiente pista Pulse para reproducir y Pulse para disminuir el pausar la pista volumen Botón de rebobinado rápido...
  • Page 33: Instalación Y Ubicación

    Uso del control remoto Introduzca una pila de Distancia de litio CR2025 de 3 V. aprox. 6 metros. Atención: Antes del primer uso, retire la lengüeta de aislamiento. Ahora puede utilizar el control remoto con normalidad. INSTALACIÓN Y UBICACIÓN Deje una distancia de al menos 5 cm entre el altavoz y las paredes/ cualquier objeto para garantizar una ventilación adecuada y evitar que el altavoz se sobrecaliente.
  • Page 34: Funcionamiento Usb/Tarjeta Sd

    FUNCIONAMIENTO USB/TARJETA SD Pulse POWER u ON para encender el aparato u OFF para apagarlo. Pulse para seleccionar entre los modos BT/AUX/USB/SD CARD. Seleccione el modo USB/SD CARD. Pulse para seleccionar el modo ecualizador. Pulse para ir a la pista anterior. Pulse para pausar temporalmente la reproducción.
  • Page 35: Funcionamiento Aux

    El nombre BT del altavoz es «Areal Nobility». Pulse el botón [MODE] para cambiar a la fuente de señal correspondiente (BT). Utilice su dispositivo móvil activado para buscar y conectarse al altavoz. Una vez conectados, podrá reproducir canciones de su dispositivo móvil. Para interrumpir la conexión BT, mantenga pulsado el botón [PLAY/PAUSE] en el panel frontal...
  • Page 36: Limpieza Y Mantenimiento

    LIMPIEZA Y MANTENIMIENTO • Limpie la superficie del altavoz con un paño suave y un producto de limpieza neutro. No use el tipo de paño que utiliza para lavar platos o productos químicos abrasivos. • Si el altavoz no funciona correctamente durante una tormenta, desconéctelo de la red eléctrica y espere 1 minuto antes de volver a conectarlo.
  • Page 37: Datos Técnicos

    DATOS TÉCNICOS Número de artículo 10033215 Fuente de alimentación 220-240 V ~ 50/60 Hz Respuesta de frecuencia 40 Hz -20 kHz Alcance del Bluetooth > 10 m (~ 4 inch) Relación señal/ruido > 75 dB Formato de audio para USB/SD MP3, WMA Potencia de salida 120 W...
  • Page 39 Cher client, Toutes nos félicitations pour l’acquisition de ce nouvel appareil. Veuillez lire attentivement les instructions suivantes de branchement et d’utilisation afi n d’éviter d’éventuels dommages. Le fabricant ne saurait être tenu pour responsable des dommages dus au non-respect des consignes de sécurité et à la mauvaise utilisation de l’appareil.
  • Page 40: Consignes De Sécurité

    CONSIGNES DE SÉCURITÉ Consignes générales • Foudre - Si vous n‘utilisez pas l‘appareil pendant une longue période ou s‘il y a de l‘orage, débranchez la fiche de la prise et débranchez l‘antenne de l‘appareil. Cela évite d‘endommager le produit à cause de la foudre et des surtensions.
  • Page 41: Zusammenbau

    ZUSAMMENBAU Prendre le pilier en métal et tournez-le dans le sens des aiguilles d‘une montre pour visser l‘enceinte. Prenez le pilier métallique de l‘insert de base. Passez la vis à travers la rondelle puis à travers la base, tournez la vis dans le sens des aiguilles d‘une montre pour fixer la base.
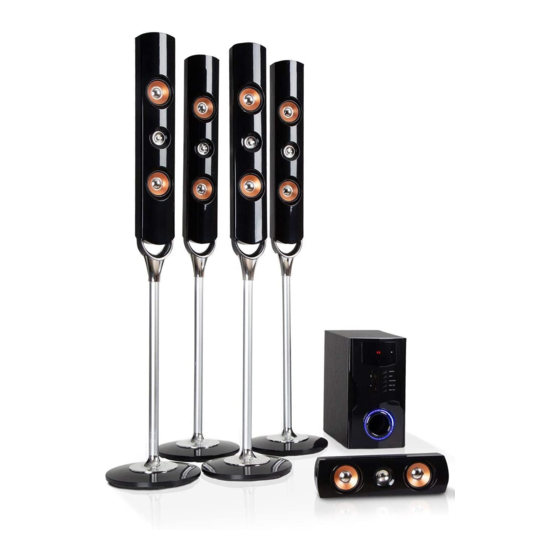
  • Page 42: Aperçu De L'appareil

    APERÇU DE L‘APPAREIL Face avant Fenêtre d'affichage Mode Fenêtre du capteur de la Play/Pause télécommande Précédent / Vol- Suivant / Vol+ Veille...
  • Page 43 Dos de l‘appareil Sortie de l'enceinte avant Entrée droite du surround 5.1 gauche Sortie de l'enceinte avant Entrée gauche du surround 5.1 droite Sortie de l'enceinte Entrée du subwoofer 5.1 Ch surround gauche Entrée de l'enceinte centrale Sortie de l'enceinte 5.1 Ch surround droite Entrée de l'enceinte frontale...
  • Page 44: Télécommande

    TÉLÉCOMMANDE VEILLE : Passer en mode Appuyez pour passer en veille mode EQ Appuyez pour augmenter le Appuyez pour couper le son volume de la lecture audio Retournez à la piste Passez à la piste suivante précédente Appuyez sur pour lire et Appuyez sur pour diminuer le mettre en pause volume...
  • Page 45: Lieu D'installation

    Préparation de la télécommande Insérez une pile au A 6 mètres environ Lithium CR2025 3V au maximum Remarque : Avant la première utilisation, veuillez retirer l‘isolant. La télécommande peut ensuite être utilisée normalement. LIEU D‘INSTALLATION Laissez suffisamment d‘espace autour de l‘enceinte et au moins 5 cm de tout mur / obstacle pour assurer une ventilation adéquate et empêcher la surchauffe de l‘enceinte.
  • Page 46: Utilisation De La Fonction Usb/Cartes Sd

    UTILISATION DE LA FONCTION USB/CARTES SD Mettez le bouton POWER sur ON pour allumer l‘appareil ou sur OFF pour l‘éteindre. Appuyez pour choisir parmi les modes BT / AUX / USB / SD CARD, appuyez pour sélectionner USB / SD CARD. Appuyez sur pour sélectionner le mode égaliseur.
  • Page 47: Fonction Aux

    Le nom BT de l‘appareil est „Areal Nobility“. Appuyez sur le bouton [MODE] pour passer à la source de signal correspondante (BT). Utilisez votre appareil mobile activé pour rechercher les appareils visibles et associez l’appareil en sélectionnant la synchronisation avec votre appareil mobile une fois la connexion réussie pour lire les titres.
  • Page 48: Nettoyage Et Entretien

    NETTOYAGE ET ENTRETIEN • Utilisez un chiffon doux ou du coton trempé dans une solution neutre pour nettoyer la surface de l‘enceinte. N‘utilisez pas le type de tissu que vous utilisez pour laver la vaisselle ni des agents chimiques agressifs. •...
  • Page 49: Fiche Technique

    FICHE TECHNIQUE Numéro d'article 10033215 Alimentation 220-240 V ~ 50/60 Hz Plage de fréquences 40 Hz -20 kHz Portée de Bluetooth > 10 m (~ 4 inch) Rapport S /N > 75 dB Format audio USB/SD MP3, WMA Puissance de sortie 120 W...
  • Page 51 Gentile cliente, La ringraziamo per aver acquistato il dispositivo. La preghiamo di leggere attentamente le seguenti istruzioni per l’uso e di seguirle per evitare possibili danni tecnici. Non ci assumiamo alcuna responsabilità per danni scaturiti da una mancata osservazione delle avvertenze di sicurezza e da un uso improprio del dispositivo.
  • Page 52: Avvertenze Di Sicurezza

    AVVERTENZE DI SICUREZZA Avvertenze generali • Colpo di fulmine – Se il dispositivo non viene utilizzato o c’è un temporale, staccare la spina dalla presa di corrente e scollegare il dispositivo dalla connessione dell’antenna. In questo modo si evitano danni al dispositivo dovuti a colpi di fulmine o sovratensione. •...
  • Page 53: Assemblaggio

    ASSEMBLAGGIO Ruotare l’asta metallica in senso orario per fissare l’altoparlante. Inserire l’asta metallica nella base. Avvitare la rondella poi passare attraverso la base e fissare ruotando in senso orario. Altoparlante Base Vite con doppio filetto Rondella Asta metallica Vite...
  • Page 54: Descrizione Del Prodotto

    DESCRIZIONE DEL PRODOTTO Fronte Finestra display Mode Finestra ricevitore Play/Pausa telecomando Precedente/Vol- Successivo/Vol+ Standby...
  • Page 55 Retro Ingresso 5.1 Ch surround Uscita frontale sinistra destro altoparlante Ingresso 5.1 Ch surround Uscita frontale destra sinistro altoparlante Uscita surround sinistra Ingresso 5.1 Ch subwoofer altoparlante Uscita surround destra Ingresso 5.1 Ch centro altoparlante Ingresso 5.1 Ch fronte sinistro Uscita centro altoparlante Ingresso 5.1 Ch fronte destro Power...
  • Page 56: Telecomando

    TELECOMANDO STANDBY: passare in Premere per passare in modalità standby modalità EQ Premere per aumentare il Premere per mettere in muto volume l’audio Passare alla traccia Passare alla traccia precedente successiva Premere per funzione play e Premere per abbassare il pausa volume Tasto per tornare indietro...
  • Page 57: Luogo Per L'installazione

    Preparare il telecomando Inserire una batteria al Approssimativamente litio CR2025 3V entro 6 metri Avvertenza: prima del primo utilizzo togliere il componente isolante. Il telecomando può essere utilizzato normalmente. LUOGO PER L’INSTALLAZIONE Lasciare almeno 5 cm di spazio su ogni lato dell’altoparlante da pareti/ostacoli per garantire una ventilazione sufficiente ed evitare il surriscaldamento.
  • Page 58: Utilizzo Usb/Scheda Sd

    UTILIZZO USB/SCHEDA SD Posizionare POWER su ON per accendere il dispositivo o su OFF per spegnerlo. Per selezionare tra le modalità BT/AUX/USB/SD CARD. Premere per selezionare USB/SD CARD. Per selezionare la modalità di equalizzazione. Per passare alla traccia precedente. Per mettere in pausa e premere nuovamente per riprendere la riproduzione.
  • Page 59: Utilizzo Aux

    Il nome BT del dispositivo è “Areal Nobility”. Premere MODE per passare alla fonte di segnale corrispondente (BT). Utilizzare il dispositivo mobile abilitato per cercare e accoppiare il dispositivo, selezionandolo dall’elenco e il dispositivo sincronizzerà e riprodurrà i brani del dispositivo mobile non appena la connessione è...
  • Page 60: Pulizia E Manutenzione

    PULIZIA E MANUTENZIONE • Utilizzare un panno o uno straccio inumidito con una soluzione neutra per pulire la superficie dell’altoparlante. Non utilizzare spugne per piatti o prodotti chimici aggressivi. • Se il dispositivo non funziona correttamente durante un temporale, staccare la spina e ricollegarla dopo un minuto. •...
  • Page 61: Dati Tecnici

    DATI TECNICI Numero articolo 10033215 Alimentazione 220-240 V ~ 50/60 Hz Risposta in frequenza 40 Hz -20 kHz Copertura Bluetooth > 10 m (~ 4 inch) Rapporto segnale/rumore > 75 dB Formati audio USB/SD MP3, WMA Potenza 120 W...

Ce manuel est également adapté pour:

10033215

Table des Matières