Defensor Mk4 Manuel
Masquer les pouces
Voir aussi pour Mk4:
- Mode d'emploi (66 pages) ,
- Guide d'installation électrique (40 pages)
Table des Matières
Les langues disponibles
Les langues disponibles
Dampf-Luftbefeuchter / Steam humidifier / Humidificateur à vapeur
Gerätemontage und Dampfinstallation
Unit fitting and steam installation
Montage de l'appareil et raccordement de vapeur
D
Seite 3 - 13
E
Page 15 - 25
F
Page 27 - 37
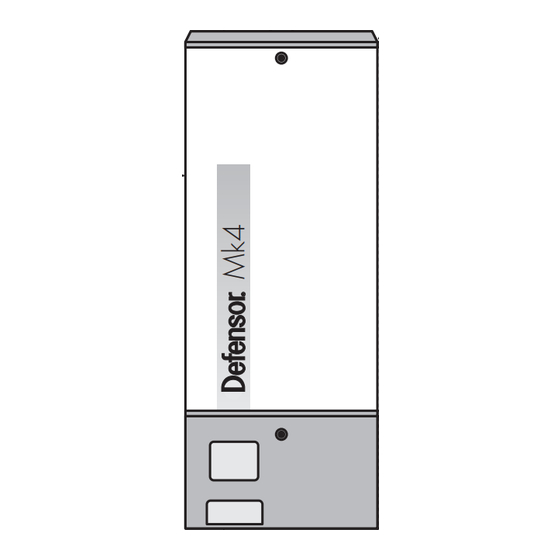
Defensor Mk4
!
Diese Anleitung beschreibt die Gerätemontage und die
Dampfinstallation für die Dampf-Luftbefeuchter Mk4, Typen-
reihe "ST" und "IT". Die Ausführungen und Hinweise sind
von allen Personen, die mit den Montage- und Installations-
arbeiten betraut sind, unbedingt zu beachten und ein-
zuhalten.
This manual describes the unit fitting and the steam instal-
lation of the steam humidifiers Mk4 series "ST" and "IT". It is
mandatory that all persons in charge of fitting and mounting
work strictly observe the instructions and directions
given in this manual.
Ce manuel explique le montage de l'appareil et le raccor-
dement de vapeur pour les humidificateurs à vapeur de la
série "ST" et "IT". Les instructions et directives concernant
le montage de l'appareil et le raccordement de vapeur
doivent être observées et respectées par toutes les
personnes éxecutant ces travaux.
Table des Matières

Manuels Connexes pour Defensor Mk4


Sommaire des Matières pour Defensor Mk4
- Page 1 This manual describes the unit fitting and the steam instal- Page 15 - 25 lation of the steam humidifiers Mk4 series “ST” and “IT”. It is mandatory that all persons in charge of fitting and mounting work strictly observe the instructions and directions given in this manual.
-
Page 27: Montage De L'appareil Et Raccordement De Vapeur
Utiliser exclusivement le matériel de fixation faisant partie de la livraison pour fixer l’humidificateur Defensor Mk4. Choisir un type de fixation stable similaire si celui-ci n’est pas possible dans votre cas particulier avec le matériel de fixation fourni. - Page 28 Monter l’humidificateur de manière absolument horizontale (longitudinale et transversale) afin d’assurer un fonctionnement correct. Dessins cotés/Indications du poids 179.5 " 179.5 79.5 Defensor Mk4 ST 5-../IT 5-.. ST 10-../IT 10-.. ST 20-../IT 20-.. ST 30-../IT 30-.. Poids de service 33 kg...
- Page 29 179.5 " " 179.5 179.5 79.5 79.5 Defensor Mk4 ST 40-../IT 40-.. ST 50-../IT 50-.. ST 60-../IT 60-.. Poids de servcie 89 kg 90 kg 91 kg 55 kg 56 kg 57 kg 179.5 " " " 179.5 179.5 79.5 79.5...
-
Page 30: Fixation De L'appareil
Fixation de l’appareil • Marquer le(s) trou(s) du point de fixation supérieur “A” sur la paroi (voir également sous “Dessins cotés”). Important! Contrôler l’alignement avec un niveau d’eau en cas d’appareils multiples. • Percer le(s) trou(s) (ø10 mm) et engager les chevilles dans le(s) trou(s). •... -
Page 31: Contrôle Du Montage De L'appareil
• Accrocher l’appareil à la vis puis serrer et bloquer les 2 vis de fixation restantes à travers le boîtier dans les trous de fixation inférieurs “B”. Important! Contrôler à nouveau l’alignement horizontal et vertical avec un niveau d’eau. • Monter la cuve à vapeur: 1. -
Page 32: Raccordement De Vapeur
Raccordement de vapeur Recommandations de sécurité pour le raccordement de vapeur Tous les travaux concernant l’installation de vapeur ne doivent être effectués que par du personnel qualifié et formé à cet effet. L’appréciation de la qualification du personnel est du ressort du client. Respecter les prescriptions locales en matière de réalisation d’installations de ventilation et d’humidification. -
Page 33: Distributeur De Vapeur
750…900 81-800 900…1100 81-1000 1000 1100…1300 Distributeurs de vapeur pour Defensor Mk4 ST 20-.. à ST 90-../IT 5-.. à IT 90-.. Distributeurs de vapeur Larg. de gaine (B) Débit de vapeur Type Longueur (L) en mm en mm max. en kg/h 81-350 400…600... -
Page 34: Emplacement Des Distributeurs De Vapeur
ϕ1= 30 %hr, ϕ2= 70 %hr Données: Distance d’humidification B 1,4 m Nota: si, pour raison technique, la distance d’humidification doit être réduite, répartir la quantité de vapeur par appareil de base sur deux distributeurs de vapeur. Dans ce cas, contactez votre fournisseur Defensor. - Page 35 Distances minimales à respecter Les distances minimales seront à respecter sur la base de la distance d’humidifica- tion “B ” calculée: avant/après un étranglement après un évasement avant un coude 0,5 x B 0,5 x B avant une bifurcation avant une grille d’air avant une sonde de régulation 5 x B avant/après une batterie chauffant/filtre...
-
Page 36: Recommandations Pour Le Positionnement Des Canaux De Ventilation
Des conditions de flux défavorables dans la gaine de ventilation (causées par des obstacles, angles prononcés, etc.) peuvent provoquer la condensation de l’air humidifié. Prenez contact avec votre fournisseur Defensor pour les questions relatives au positionnement des gaines de ventilation. -
Page 37: Montage Du Tuyau De Condensat
Montage du tuyau de condensat Utilisez uniquement le tuyau de condensat d’origine Defensor. D’autres tuyaux pourraient conduire à des perturbations d’exploitation indésirables. Pour le cheminement du tuyau, l’emplacement du distributeur de vapeur est déter- minante: min. - Page 38 Notizen/Notes/Notes...
- Page 39 © Axair Ltd. 1995, Printed in Switzerland Technische Änderungen vorbehalten Technical data subject to modification Sous réserve de modifications techniques...