Publicité

Les langues disponibles

Les langues disponibles

Liens rapides

Veripart is a registered trademark
Weena 664
3012CN Rotterdam
The Netherlands
Made in China

Publicité

Chapitres

Table des Matières
loading

Sommaire des Matières pour Veripart VPVR701

  • Page 1 Veripart is a registered trademark Weena 664 3012CN Rotterdam The Netherlands Made in China...
  • Page 2 VRIEZER FREEZER CONGÉLATEUR VPVR701...
  • Page 3: Table Des Matières

    INHOUD Veiligheidsvoorschriften Koelmiddel Productopschrijving Ingebruikname Gebruik Tips Reiniging en onderhoud Storingen zelf oplossen Draairichting deur wijzigen Productkaart...
  • Page 4: Veiligheidsvoorschriften

    VEILIGHEIDSVOORSCHRIFTEN • Lees eerst de gebruiksaanwijzing aandachtig en geheel door voordat u het apparaat gaat gebruiken en bewaar deze zorgvuldig voor latere raadpleging. • Gebruik dit apparaat uitsluitend voor de in de gebruiksaanwijzing beschreven doeleinden. Het apparaat is geschikt voor het bewaren van levensmiddelen.
  • Page 5 • Controleer of het apparaat niet te dicht bij een warmtebron geplaatst wordt. • Om een goede ventilatie te garanderen, moet er een ruimte van 10 cm rondom het apparaat vrij gehouden worden. • Dek de ventilatieopeningen nooit af. • Zorg dat de koelleidingen niet beschadigd raken. •...
  • Page 6 • Bewaar geen explosieve of licht ontvlambare stoffen in het apparaat. De dampen kunnen brandgevaar of een explosie veroorzaken. • Bewaar geen glazen flessen of potten in de vriezer met vloeistoffen, want deze kunnen kapot vriezen. • Gebruik geen mechanische, elektrische of chemische middelen om het ontdooiproces te versnellen.
  • Page 7 • Het apparaat uitsluitend binnenshuis gebruiken en opbergen. • Het netsnoer nooit scherp buigen of over hete delen laten lopen. • Verwijder de stekker altijd uit het stopcontact als het apparaat gereinigd of gerepareerd wordt. • Gebruik het apparaat nooit met onderdelen die niet door de fabrikant zijn aanbevolen of geleverd.
  • Page 8: Koelmiddel

    KOELMIDDEL Het koelmiddel isobuteen (R600a) bevindt zich in het koelmiddelcircuit van het apparaat. Dit is een natuurlijk en uiterst milieuvriendelijk gas. Het is echter wel brandbaar. Zorg ervoor dat tijdens het vervoer en de installatie van het apparaat geen van de onderdelen van het koelmiddelcircuit beschadigd raakt.
  • Page 9: Productomschrijving

    PRODUCTOMSCHRIJVING Thermostaat Vrieslades Stelvoeten INGEBRUIKNAME Voordat u het apparaat voor de eerste maal in gebruik neemt, dient u als volgt te werk te gaan: pak het apparaat voorzichtig uit en verwijder al het verpakkingsmateriaal. De verpakking (plastic zakken, piepschuim en karton) buiten het bereik van kinderen houden.
  • Page 10 Til het apparaat achterover en zoek het schroefgat aan de linkerzijde aan de onderkant. Plaats de rubberen steun over het schroefgat en draai de schroef recht in het schroefgat van de bodemplaat met behulp van een kruiskopschroevendraaier. Plaats het apparaat niet in de buurt van warmtebronnen zoals een verwarming of fornuis.
  • Page 11: Gebruik

    Laat het apparaat, nadat het geplaatst is, minimaal 3 uur staan voordat u de stekker in het stopcontact steekt. Reinig eerst de binnenkant van het apparaat. Gebruik hiervoor een warm sopje met bijvoorbeeld afwasmiddel, allesreiniger of soda. Neem de binnenkant van het apparaat na het schoonmaken af met schoon water en droog alles goed na.
  • Page 12 Zet de thermostaat op de laagste stand en verwijder de stekker uit het stopcontact om het apparaat uit te zetten. Indien de omgevingstemperatuur stijgt, zet u het apparaat op een hogere stand om de binnentemperatuur te kunnen waarborgen. Zet de thermostaat op [ 0 ] om het apparaat uit te zetten. Attentie: De omgevingstemperatuur, de frequentie van het openen van de deur en de positie van het apparaat hebben invloed op de temperatuur...
  • Page 13 • Plaats geen glazen flessen of blikken in het vriesvak. Deze kunnen kapot gaan als de inhoud bevriest. Koolzuurhoudende dranken kunnen zelfs exploderen. Bewaar daarom nooit limonade, bier, wijn, champagne, etc. in het vriesvak. TIPS • Een hoge omgevingstemperatuur beïnvloedt het energieverbruik nadelig.
  • Page 14 Houd u aan de volgende instructies om besmetting van voedsel te voorkomen: Wanneer de deur langere tijd open blijft, kan de temperatuur in de compartimenten van het apparaat significant stijgen. Reinig oppervlakken die in contact met voedsel kunnen komen en toegankelijke afvoersystemen regelmatig. Bewaar rauw vlees en rauwe vis in geschikte verpakkingen in de koelkast, zodat deze niet in contact komen met ander voedsel of vloeistof op ander voedsel kunnen lekken.
  • Page 15 Volgor- Compar- Aanbevo- Geschikt voedsel timenten len be- TYPE waartemp. [°C] Koelkast +2 ≤ +8 Eieren, bereid voedsel, verpakt voedsel, fruit en groenten, zuivelproducten, taarten, dranken en ander voedsel dat niet geschikt is om in te vriezen. (***)*-Vriezer ≤-18 Zeevruchten (zeevis, garnalen, schelpdieren), zoetwaterproducten en vleesproducten (aanbevolen...
  • Page 16 **-Vriezer ≤-12 Zeevruchten (zeevis, garnalen, schelpdieren), zoetwaterproducten en vleesproducten (aanbevolen bewaartijd maximaal 3 maanden, hoe langer de bewaartijd, hoe verder smaak en voedingswaarde achteruit gaan), geschikt voor bevroren vers voedsel. *-Vriezer ≤-6 Zeevruchten (zeevis, garnalen, schelpdieren), zoetwaterproducten en vleesproducten (aanbevolen bewaartijd maximaal 3 maanden, hoe langer de bewaartijd,...
  • Page 17 Koeling Koeling Vers/bevroren varkens- vlees, rundvlees, kip, zoetwaterproducten enz. (7 dagen te bewaren onder 0°C, boven 0°C wordt consumptie op de- zelfde dag aanbevolen, bij voorkeur niet meer dan 2 dagen). Zeevruch- ten (minder dan 0°C gedurende 15 dagen, het wordt niet aanbe- volen dit boven 0°C te bewaren).
  • Page 18 WAARSCHUWING – Verpak voedsel in zakjes en vloeistoffen in flessen en blikken. Hierdoor hoeft u de koelkast minder vaak schoon te maken. ONTDOOIEN Het ontdooien van de koelruimte gebeurt volledig automatisch. De aanwezigheid van waterdruppels op de achterwand aan de binnenkant van de koeler geeft aan dat het koelgedeelte aan het ontdooien is.
  • Page 19: Reiniging En Onderhoud

    REINIGING EN ONDERHOUD Zet voordat u het apparaat wilt reinigen de thermostaat op de laagste stand en verwijder de stekker uit de wandcontactdoos. Reinig de binnenkant van het apparaat. Gebruik hiervoor een warm sopje met bijvoorbeeld afwasmiddel, allesreiniger of soda om vieze geuren te voorkomen.
  • Page 20: Storingen Zelf Oplossen

    STORINGEN ZELF OPLOSSEN Storing Oorzaak Oplossing Apparaat doet niets; Stekker niet in het Steek de stekker in lampje brandt niet. stopcontact. het stopcontact. Temperatuur in de Thermostaat verkeerd Zet de thermostaat op koelkast te hoog of te ingesteld. de juiste stand. laag.
  • Page 21 Attentie: zet de thermostaat op [ 0 ] en verwijder de stekker uit het stopcontact. Haal alle spullen uit het apparaat, ook de schappen/ lades voordat u de draairichting van de deur wijzigt. • Verwijder de schroeven aan de achterkant van het bovenblad. Til het bovenblad aan de achterkant op en verwijder hem uit de voorste bevestigingspunten.
  • Page 22 • Verwijder de schroeven volgens de tekening en verwijder het bovenste scharnier. • Verwijder voorzichtig de deur door deze naar u toe te bewegen en dan van het onderste scharnier te tillen. Leg de deur op een veilige plek.
  • Page 23 • Om het scharnier aan de onderkant te kunnen verwijderen, laat u de koeler achterover hellen (max. 45°). • Verwijder het stelvoetje links door deze helemaal los te draaien. • Verwijder de schroeven terwijl u het onderste scharnier ondersteunt. Verwijder het onderste scharnier. •...
  • Page 24 • Bevestig het bovenste scharnier aan de andere kant met de schroeven. • Plaats het bovenblad op het apparaat en maak deze vast met de schroeven aan de achterkant. • Controleer of de deur goed uitgelijnd is, zowel horizontaal als verticaal, voordat het onderste scharnier volledig vastgedraaid wordt.
  • Page 25: Productkaart

    PRODUCTKAART Typenummer VPVR701 Type koel-/vrieskast vriezer Categorie Energie-efficiëntieklasse A+++ Energieverbruik [Aec] in kWh per jaar Netto inhoud - totaal 82 liter Netto inhoud - koelgedeelte Netto inhoud - vriesgedeelte **** 82 liter Max. bewaartijd bij stroomuitval (aantal uur) Vriesvermogen (kg/24 uur)
  • Page 26 Netto gewicht in kg 36 kg Bruto gewicht in kg 39,5 kg Elektrische aansluitwaarde [W] Netspanning [V] / netfrequentie [Hz] 220-240V ~50Hz Lengte aansluitsnoer [m] Stekkertype VDE plug 90°...
  • Page 27 INDEX Safety instructions Refrigerant Product description First time use Tips Cleaning and maintenance Resolving breakdowns yourself Reversing the door opening Product fiche...
  • Page 28: Safety Instructions

    SAFETY INSTRUCTIONS • First carefully read the instruction manual in full prior to using the appliance and store the manual in a safe place for future reference. • Only use this appliance for the purposes described in the instruction manual. The appliance is suitable for storing food.
  • Page 29: Climate Class

    • Never cover the ventilation holes. • Make sure the cooling pipes do not get damaged. • Install the appliance on a sturdy, flat and stable surface. • Install the appliance in a dry and well ventilated room. The appliance is intended for use in a room where the ambient temperature falls within the applicable class, depending on the climate class found on the information plate on the back of the appliance.
  • Page 30 • The appliance can be used by children of 8 years and older and by persons with limited physical, sensory or mental capacities or lack of experience or knowledge, provided they use the appliance under supervision or have been instructed about its safe use and understand the hazards it may involve.
  • Page 31 • This appliance is only suitable for household use. If the appliance is not used as intended, no compensation can be claimed in case of defects or accidents and the warranty will be invalidated. • If you decide to cease using the appliance due to a de- fect, we recommend cutting off the cord after removing the plug from the wall socket.
  • Page 32 REFRIGERANT The refrigerant isobutene (R600a) is located in the refrigerant circuit of the appliance. This is a natural and highly environmentally friendly gas. However, it is still combustible. During transport and installation of the appliance, make sure that no parts of the refrigerant circuit are damaged.
  • Page 33: Product Description

    PRODUCT DESCRIPTION Thermostat Freezer drawers Adjustable feet FIRST TIME USE Before using the appliance for the first time, proceed as follows: carefully unpack the appliance and remove all packaging material. Keep the packaging (plastic bags, polystyrene and cardboard) out of the reach of children.
  • Page 34 Lift the appliance backwards and search for the screw hole on the left side at the bottom. Place the rubber support over the screw hole and tighten the screw straight into the screw hole of the bottom plate by means of a Phillips screwdriver.
  • Page 35 After placing the appliance, leave it for at least 3 hours before inserting the plug in the socket. First clean the interior of the appliance. Use warm soapy water with, for instance, washing-up liquid, all-purpose cleaner or soda. Wipe the inside of the appliance after cleaning with clean water and properly wipe everything dry.
  • Page 36 Set the thermostat to the lowest position and remove the plug from the socket to switch off the appliance. Attention: The ambient temperature, the frequency of opening the door and the position of the appliance have an effect on the temperature in the appliance.
  • Page 37 TIPS • A high ambient temperature will have a negative effect on the energy consumption. Direct sunlight and other heat sources near the appliance also have a negative effect. • Keep ventilation holes free. Covered and dirty holes cause a higher energy consumption.
  • Page 38 Observe the following instructions to prevent food from getting conta- minated: - When the door remains open for a longer period of time, the tempe- rature in the compartments of the appliance could rise significantly. - Clean surfaces that could come in contact with food and regularly clean accessible discharge systems.
  • Page 39 Compart- Recom- Suitable food ments mended TYPE storage temp. [°C] Refrigerator +2 ≤ +8 Eggs, prepared food, packaged food, fruit and vegetables, dairy, cakes, drinks and other food that is not suitable for freezing. (***)* Freeze ≤-18 Seafood (sea fish, shrimps, shellfish), fresh water products and meat products (recommended storage time...
  • Page 40 ** Freezer ≤-12 Seafood (sea fish, shrimps, shellfish), fresh water products and meat products (recommended storage time maximum 3 months, the longer the storage time, the more the taste and nutritional value deteriorate), suitable for frozen fresh food. * Freezer ≤-6 Seafood (sea fish, shrimps, shellfish), fresh water...
  • Page 41 Fresh food 0 ≤ +4 Fresh pork, beef, fish, chic- ken, prepared processed food, etc. (consumption on the same day recommended, preferably within 3 days). Wine +5 ≤+20 Red wine, white wine, spark- ling wine, etc. Caution: store different types of food according to the instructions on the compartments or the recommended storage temperature of the products you bought.
  • Page 42 DEFROSTING Defrost the appliance when the layer of ice has reached a thickness of 3 to 5 mm. Set the thermostat to the lowest position and remove the plug from the socket. Remove all products from the freezer section. Store the frozen products on a cool location, packaged in newspapers and blankets.
  • Page 43: Cleaning And Maintenance

    CLEANING AND MAINTENANCE Before cleaning the appliance, set the thermostat to the lowest position and remove the plug from the wall socket. Clean the interior of the appliance. Use warm soapy water with, for instance, washing-up liquid, all-purpose cleaner or soda in order to prevent nasty smells.
  • Page 44 RESOLVING BREAKDOWNS YOURSELF Breakdown Cause Solution Appliance does not Plug not in socket. Insert the plug into the do anything; led does socket. not light up. Temperature in the Incorrect thermostat Set the thermostat to refrigerator is too setting. the correct position. high or too low.
  • Page 45 Attention: set the thermostat to [0] and remove the plug from the socket. Remove all items from the appliance, including the shelves and drawers, before reversing the door opening. • Remove the screws at the back of the top. Lift the top at the back and remove it from the front attachment points.
  • Page 46 • Remove the screws according to the drawing and remove the top hinge. • Carefully remove the door by moving it towards you and lifting it off the lower hinge. Place the door on a safe location.
  • Page 47 • In order to remove the hinge at the bottom, you must lift the appliance backwards (max. 45°). • Remove the adjustable foot to the left, by fully unscrewing it. • Remove the screws while supporting the lower hinge. Remove the lower hinge.
  • Page 48 • Attach the upper hinge on the other side with the screws. • Place the top on the appliance and fasten it with the screws at the rear. • Check that the door is properly aligned, both horizontally and vertically, before the lower hinge is fully tightened. •...
  • Page 49: Product Fiche

    PRODUCT FICHE Type number VPVR701 Type refrigerator/freezer freezer Category Energy efficiency class A+++ Energy consumption [Aec] in kWh per year Nett capacity - total 82 litres Nett capacity - cooler section Nett capacity - freezer section **** 82 litres Max. storage time in case of power failure...
  • Page 50: Technical Data

    Technical data Dimensions (wxdxh) in mm 560 x 575 x 845 Nett weight in kg 28,5 kg Gross weight in kg 32 kg Electrical connected load [W] Mains voltage [V] / mains 220-240V ~50Hz frequency [Hz] Length of connection cord [m] Plug type VDE plug 90°...
  • Page 51 TABLE DES MATIÈRES Consignes de sécurité Fluide réfrigérant Description du produit Mise en service Utilisation Conseils Nettoyage et entretien Dépanner soi-même Modification de sens d’ouverture de la porte Product fiche...
  • Page 52: Consignes De Sécurité

    CONSIGNES DE SÉCURITÉ • Lisez attentivement et entièrement le mode d’emploi avant d’utiliser l’appareil pour la première fois, et conservez-le soigneusement pour une consultation future. • Utilisez cet appareil uniquement aux fins décrites dans ce mode d’emploi. Cet appareil convient pour la conservation de produits alimentaires.
  • Page 53: Classe Climatique

    • Afin d’assurer une ventilation correcte, un espace libre de 10 cm doit être conservé autour de l’appareil. • Ne couvrez jamais les orifices de ventilation. • Veillez à ce que les conduites de liquide réfrigérant ne se détériorent pas. •...
  • Page 54 • N’employez pas de moyens mécaniques, électriques ou chimiques pour accélérer le processus de dégivrage. • Veillez à ce que les enfants ne puissent pas jouer avec l’appareil, comme se cacher dedans. Ceci est dangereux. • Tenez l’appareil hors de portée des enfants. Les enfants ne sont pas conscients des dangers qui peuvent résulter de la manipulation d’appareils électriques.
  • Page 55 • Lorsque l’appareil est nettoyé ou réparé, retirez toujours la fiche de la prise de courant. • N’utilisez jamais l’appareil avec des pièces qui n’ont pas été recommandées ou fournies par le fabricant. • Ne tirez pas sur le câble d’alimentation ou sur l’appareil pour retirer la fiche de la prise de courant murale.
  • Page 56: Fluide Réfrigérant

    FLUIDE RÉFRIGÉRANT Le fluide réfrigérant isobutane (R600a) se trouve dans le circuit de réfrigérant de l’appareil. Il s’agit d’un gaz naturel et particulièrement inoffensif pour l’environnement. Il est cependant très inflammable. Pendant le transport et l’installation de l’appareil, veillez à ce qu’aucun des éléments du circuit de réfrigérant soit endommagé.
  • Page 57: Description Du Produit

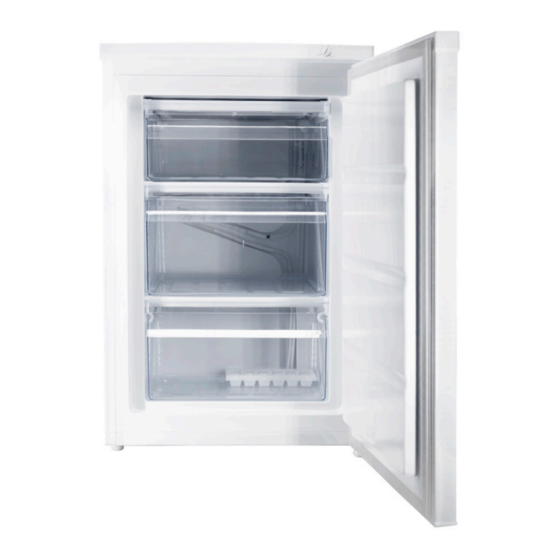
    DESCRIPTION DU PRODUIT Thermostat Bacs de congélation Pieds de réglage MISE EN SERVICE Avant d’utiliser l’appareil pour la première fois, procédez de la manière suivante : déballez l’appareil avec précautions et enlevez tout le matériel d’emballage. Conservez le matériel d’emballage (sacs en plastique, polystyrène expansé...
  • Page 58 Inclinez l’appareil vers l’arrière et cherchez le trou de vis du côté gauche, sous l’appareil. Placez le tampon de soutien en caoutchouc au-dessus du trou de vis et serrez la vis droit dans le trou de la plaque de base, à l’aide d’un tournevis cruciforme.
  • Page 59: Utilisation

    Lorsque l’appareil est installé, laissez-le au repos durant au minimum 3 heures avant de brancher la fiche dans la prise de courant. Nettoyez au préalable l’intérieur de l’appareil. Utilisez à cet effet une eau savonneuse chaude, avec par exemple du liquide vaisselle, du nettoyant ménager ou de la soude.
  • Page 60 Réglez le thermostat sur la position la plus basse et retirez la fiche de la prise de courant pour mettre l’appareil hors tension. Remarque : La température ambiante, la fréquence des ouvertures de la porte et la position de l’appareil ont une influence sur la température à l’intérieur du réfrigérateur.
  • Page 61: Conseils

    CONSEILS • Les températures ambiantes élevées ont un impact négatif sur la consommation d’énergie. La lumière directe du soleil et d’autres sources de chaleur à proximité de l’appareil, ont également une influence négative. • Les orifices de ventilation doivent rester dégagés. Des orifices couverts et encrassés entraînent une hausse de la consommation d’énergie.
  • Page 62 Observez les instructions suivantes afin d’éviter la contamination des aliments : - Lorsque la porte reste ouverte pendant une période prolongée, la température dans les compartiments de l’appareil peut augmenter considérablement. - Nettoyez régulièrement les surfaces qui sont susceptibles d’entrer en contact avec les aliments et les systèmes d’évacuation accessibles.
  • Page 63 TYPE de Temp. conser- Aliments appropriés comparti- vation recom- ment mandée [°C] Réfrigérateur +2 ≤ +8 Œufs, aliments cuisinés, aliments conditionnés, fruits et légumes, produits laitiers, tartes, boissons et autres aliments qui ne conviennent pas pour la congélation. Congélateur ≤-18 Fruits de mer (poisson, crevettes, coquillages), (***)*...
  • Page 64 Congélateur ** ≤-12 Fruits de mer (poisson, crevettes, coquillages), produits d’eau douce et produits à base de viande (durée de conservation maximale recommandée 3 mois, plus la durée de conservation est longue, plus le goût et la valeur nutritive se dégradent), convient pour des aliments frais congelés.
  • Page 65 Réfrigération -2 ≤ +3 Viande de port, bœuf, poisson, poulet frais, aliments transformés, etc. (consommation le jour même recommandée, de préférence dans les 3 jours). Aliments frais 0 ≤ +4 Viande de port, bœuf, poisson, poulet frais, aliments transformés, etc. (consommation le jour même recommandée, de préférence dans les 3...
  • Page 66 L’appareil doit être dégivré dès que la couche de glace atteint une épaisseur de 3 à 5 mm. Placez le thermostat sur [ 0 ] et débranchez la fiche de la prise de courant. Enlevez tous les produits du compartiment de congélation. Conservez les produits congelés dans un endroit froid, emballés dans du papier journal et des couvertures.
  • Page 67: Nettoyage Et Entretien

    NETTOYAGE ET ENTRETIEN Avant de nettoyer l’appareil, éteignez-le en plaçant le thermostat sur la position la plus basse et en débranchant la fiche de la prise murale. Nettoyez l’intérieur de l’appareil. Utilisez à cet effet une eau savonneuse chaude, avec par exemple du produit vaisselle, du nettoyant ménager ou de la soude pour éviter les mauvaises odeurs.
  • Page 68: Dépanner Soi-Même

    DÉPANNER SOI-MÊME Panne Cause Solution L’appareil ne La fiche électrique Branchez la fiche fonctionne pas ; le n’est pas dans la prise de témoin lumineux n’est branchée. courant. pas allumé. La température dans Thermostat mal réglé. Réglez le thermostat le réfrigérateur est sur la bonne position.
  • Page 69: Modification De Sens D'ouverture De La Porte

    MODIFICATION DU SENS D’OUVERTURE DE LA PORTE La porte de l’appareil peut s’ouvrir aussi bien à gauche qu’à droite. Pour modifier le sens d’ouverture de la porte, suivez les instructions ci- dessous. Il est préférable d’être à deux personnes pour effectuer cette opération.
  • Page 70 • Retirez les vis selon le schéma et retirez la charnière supérieure. • Démontez la porte avec précaution, en la tirant vers vous et en la soulevant hors de la charnière inférieure. Posez la porte en lieu sûr.
  • Page 71 • Pour pouvoir retirer la charnière inférieure, vous devez pencher l’appareil en arrière (max. 45°). • Retirez le pied de réglage gauche en le dévissant totalement. • Retirez les vis tout en soutenant la charnière inférieure. Retirez la charnière inférieure. •...
  • Page 72 • Fixez la charnière supérieure de l’autre côté, à l’aide des vis. • Placez le plateau supérieur sur l’appareil et fixez-le à l’arrière à l’aide des vis. • Contrôlez le bon alignement de la porte, horizontalement comme verticalement, avant de fixer entièrement la charnière inférieure. •...
  • Page 73: Fiche Du Produit

    FICHE DU PRODUIT Numéro de type VPVR701 Type de réfrigérateur/ Congélateur congélateur Catégorie Catégorie de rendement énergétique A+++ Consommation énergétique [Aec] en kWh par Capacité nette - totale 82 litres Capacité nette - partie réfrigérateur Capacité nette - partie 82 litres congélateur ****...
  • Page 74: Spécifications Techniques

    Nombre de bacs à légumes Sans CFC / HFC Sans Type de réfrigérant R600a Nombre de compresseurs Spécifications techniques Dimensions (l x p x h) en mm 494 x 494 x 847 Poids net en kg 36 kg Poids brut en kg 39,5 kg Puissance connectée [W] Tension de secteur [V] /...

Table des Matières