Table des Matières
Publicité
Les langues disponibles
Les langues disponibles
Liens rapides
Accessori Elettrici
Electric Accessories
MANUALE DI INSTALLAZIONE E D'USO - INSTALLATION AND USER'S MANUAL
MANUEL D'INSTALLATION ED D'UTILISATION - MANUAL DE INSTALACIÓN Y USO
INSTALLATION UND BEDIENUNG
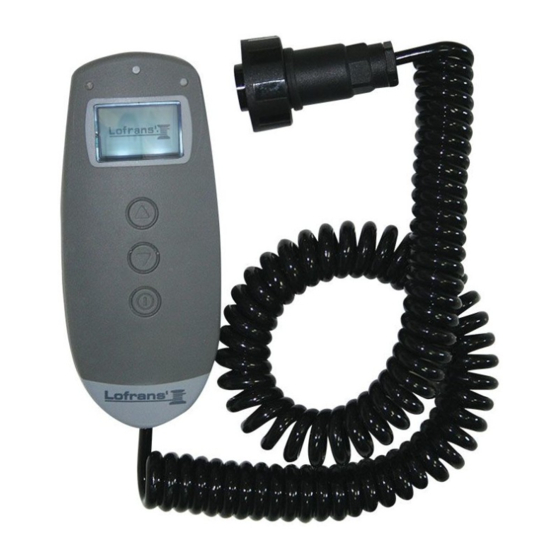
GALAXY 503
UK
3
2
Years Limited
IT
Years Limited
Warranty
Warranty
FR
DE
ES
Via Philips, 5 - 20052 Monza (MB) (Italy) - www.lofrans.com - e-mail: contact@lofrans.com
www.busse-yachtshop.de | info@busse-yachtshop.de
Publicité
Chapitres
Table des Matières

Manuels Connexes pour Lofrans GALAXY 503


Sommaire des Matières pour Lofrans GALAXY 503
- Page 1 MANUALE DI INSTALLAZIONE E D’USO - INSTALLATION AND USER’S MANUAL MANUEL D’INSTALLATION ED D’UTILISATION - MANUAL DE INSTALACIÓN Y USO INSTALLATION UND BEDIENUNG GALAXY 503 Years Limited Years Limited Warranty Warranty Via Philips, 5 - 20052 Monza (MB) (Italy) - www.lofrans.com - e-mail: contact@lofrans.com www.busse-yachtshop.de | info@busse-yachtshop.de...
- Page 2 GALAXY 503 www.busse-yachtshop.de | info@busse-yachtshop.de...
-
Page 3: Table Des Matières
Lofrans declines any liability for possible inaccuracies due to print errors in this manual and reserves the right to introduce any changes deemed appropriate. For this reason, Lofrans does not guarantee the accuracy of the manual after the date of issue and declines all liability for possible errors and omissions. -
Page 4: Introduction
1.2 Assistance The Lofrans products are backed throughout the world by a network of authorised distributors and assistance. In case of need, please contact your local Lofrans distributor. Details on website www.lofrans.com 1.3 Receipt and Storage... -
Page 5: Installing The Magnetic Sensor For Vertical Shaft Anchor Windlasses
1. A hole having a diameter of 6.5 mm (~1/4”) and depth of 8 mm (5/16”) must be drilled on a tooth of the gipsy, in a place outside the chain’s path. 2. In the case of vertical shaft anchor windlasses (see Fig.1B), drill the hole in the lower circumference of the gipsy. -
Page 6: Installing The Chain Counter
GALAXY 503 2.6 Installing the chain counter The chain counter must be positioned so that the display will be easy to read. It should not be exposed to direct sunlight. Secure the instrument in place with the bracket provided, tightening the two screws using a cross screwdriver. -
Page 7: Chain Counter Setting Menu
Once the initialisation procedure is complete, the main page will appear. V=11.6 Vdc Where: STATUS: indicates the status of the instrument and any failure. SPEED’: indicates the chain speed during hoisting or lowering in meters per minute or feet per minute. -
Page 8: Alarm And Functions Menu
GALAXY 503 5.4 Alarm and functions menu Use the (DOWN) or (UP) key to move around the parameters Up Alarm Select with It is possible to enable the function and establish the Select value with height at which the anchor-winch stops; after which it is only possible to give pulsed commands. -
Page 9: Sensor Calibration Menu
5.7 Sensor calibration menu Use the (DOWN) or (UP) key to move around the parameters Select with Sensor Selection Sensor Selection PROJ Press Confirm with Once the “Sensor Detection” function has recognised a “Standard” type sensor instead of a “Project” sensor, when the “Sensor Calibrat.”... -
Page 10: Check Menu
GALAXY 503 5.9 Table 2 - 1000 – 1500 – 2000W Project series sensor (magnet and sensor placed on motor) Gipsy Circumf. Reduction Number of Chain type Reduction Type (cm) ratio recesses (mm-inches) Factor 1:52 8-5/16”HT 1:52 10 DIN 766... -
Page 11: Measurement Reset
6 USE (ON) key to activate controls and to switch on the display lighting. The display lighting switches off 60 seconds Press the after the last command given (adjustable default time – see “BkLight Time”). Press key (UP) to control the anchor ascending V=11.6 Vdc... -
Page 12: Wiring Diagram
GALAXY 503 8 WIRING DIAGRAM Buzzer www.busse-yachtshop.de | info@busse-yachtshop.de... -
Page 13: Warranty Conditions
- Lofrans does not assume any responsibility for an incorrect choice of product made by the purchaser. - The responsibility of Lofrans shall be limited to the repair or replacement of all parts of the product that originally present material and/ or manufacturing defects. - Page 14 Tutti i nostri prodotti sono costruiti con ottimi materiali adatti al lavoro in ambiente marino e sono soggetti a continui controlli per migliorare i livelli qualitativi e renderli privi di difetti di fabbricazione. Accanto a tali requisiti, i salpa ancora Lofrans sono una sintesi di affidabilità...
-
Page 15: Introduzione
1.2 Assistenza I prodotti Lofrans sono supportati in tutto il mondo da una rete di distributori e assistenza autorizzati. In caso di necessità contattare il distributore locale Lofrans. Dettagli sul sito www.lofrans.com 1.3 Ricevimento e Stoccaggio... -
Page 16: Installazione Del Magnete Sul Salpaancora
GALAXY 503 2.3 Installazione del magnete sul salpa ancora Su alcuni modelli di salpa ancora il sensore ed il magnete sono stati già installati (predisposizione contametri) non è quindi necessario eseguire le operazioni indicate di seguito. 1. Il foro da praticare su un dente del barbotin - del diametro di 6,5 mm (~1/4”) e della profondità di 8 mm (5/16”) - deve trovarsi in una zona non interessata dal passaggio della catena. -
Page 17: Installazione Contametri
2.6 Installazione contametri Il contametri deve essere posizionato in modo che il display sia facilmente leggibile e non esposto ai raggi solari. Fissare lo strumento con la staffa in dotazione serrando le due viti con un cacciavite a croce. Praticare, sulla plancia, un foro da 20,5 mm (~13/16”) e 4 fori da 2,2 mm (~3/32”) per il fissaggio della presa del connettore. -
Page 18: Menù Impostazione Contametri
GALAXY 503 All’accensione lo strumento emetterà un suono e comparirà per alcuni secondi la seguente pagina: Completata la procedura di inizializzazione comparirà la pagina principale. Dove:: STATO: indica lo stato dello strumento ed eventuali anomalie. VELOCITA’: indica la velocità della catena, in salita o discesa, in metri al minuto o piedi al minuto. -
Page 19: Menù Allarmi E Funzioni
5.4 Menù Allarmi e Funzioni Utilizzare i tasti (DOWN) o (UP) per spostarsi tra i parametri. Allarme Salita Selezionare con È possibile abilitare la funzione e stabilire la quota Impostare il valore con alla quale il salpa ancora si arresta;... -
Page 20: Menù Calibrazione Sensore
GALAXY 503 5.7 Menù Calibrazione Sensore Utilizzare i tasti (DOWN) o (UP) per spostarsi tra i parametri. Selezionare con Calib. Sensore Calib. Sensore Selezionare Sensore Selezionare Sensore C. Barbotin Selezionare Sensore C. Barbotin U s c i t a U s c i t a... -
Page 21: Menù Verifiche
5.9 Tabella 2 - Sensore Project serie 1000 – 1500 – 2000W (sensore e magnete applicati nel motore) Circonferenza Rapporto Numero di Misura catena Fattore Modello Barbotin (cm) riduzione rientranze (mm-pollici) Riduzione 1:52 8-5/16”HT 1:52 10 DIN 766 Project 1000 1:52 10 ISO-3/8”HT... -
Page 22: Uso
GALAXY 503 6 USO Premere il tasto (ON) per attivare i comandi e illuminare il display. Lo spegnimento dell’illuminazione del display avviene 30 secondi dopo l’ultimo comando dato (tempo di default modificabile – vedi “Tempo BkLight”) Premendo il tasto (UP) si comanda la salita dell’ancora. -
Page 23: Schema Di Collegamento
8 SCHEMA DI COLLEGAMENTO Buzzer www.busse-yachtshop.de | info@busse-yachtshop.de... -
Page 24: Condizioni Di Garanzia
9.4 Procedura La richiesta di garanzia deve essere notificata per iscritto a Lofrans srl o ad un centro di assistenza Lofrans autorizzato ed inviata via fax o email, allegando il numero di serie del prodotto. - Page 25 C’est la raison pour laquelle Lofrans ne garantit pas l’exactitude du manuel après sa date de parution et décline toute responsabilité pour les éventuelles erreurs ou omissions.
-
Page 26: Introduction
1.2 Assistance Les produits Lofrans jouissent d’un réseau d’assistance à travers le monde entier, par le biais de ses distributeurs et du service d’assistance agréé. En cas de besoin, contacter le distributeur local Lofrans. Voir les détails sur le site www.lofrans.com 1.3 Réception et Stockage... -
Page 27: Installation De L'aimant Sur Leguindeau
2.3 Installation de l’aimant sur leguindeau Sur un nombre de modèles de guindeau le capteur et l’aimant sont déjà installés (configuration compteur métrique). Les opérations spécifiées ci-dessous ne doivent donc pas être effectuées. 1. Le trou à réaliser sur une dent du barbotin- d’un diamètre de 6,5 mm (~1/4”) et d’une profondeur de 8 mm (5/16”) - ne doit pas se trouver à... -
Page 28: Section Cables Eletriques
GALAXY 503 2.6 Installazione contametri Le compteur métrique doit être positionné de telle sorte que les indications affichées par le moniteur soient facilement lisibles évitant l’exposition aux rayons solaires. Fixer l’instrument à l’aide de la bride fournie et serrer les deux vis en utilisant un tournevis cruciforme. Réaliser sur le tableau de bord un trou de 20,5 mm (~13/16”) et 4 trous de 2,2 mm (~3/32”) pour fixer la prise du connecteur. -
Page 29: Menu De Programmation Du Compteur Métrique
Lors de l’allumage de l’instrument on entend un beep sonore et apparaît pour quelques secondes la page suivante: Une fois terminée la procédure d’initialisation, apparaît la page principale Où: ÉTAT: indique l’état de l’instrument et les anomalies éventuelles. VITESSE: indique la vitesse de la chaîne, remontée ou descente, en mètres ou pieds par minute. -
Page 30: Menu Alarmes Et Fonctions
GALAXY 503 5.4 Menu alarmes et fonctions Utiliser les touches (DOWN) ou (UP) pour se déplacer parmi les paramètres. Alarme montée Sélectionner avec On peut activer la fonction et établir la hauteur Sélectionner la valeur au d’arrêt du guindeau. Après, seule la commande par moyen de impulsions est possible. -
Page 31: Menu Calibrage Capteur
Utiliser les touches (DOWN) ou (UP) pour se déplacer parmi 5.7 Menu calibrage capteur les paramètres. Sélectionner avec Sélectionnez Capteur Appuyer sur Valider avec Quand la procédure «Détection capteur» a relevé un capteur de type «Standard» plutôt qu’un capteur «Project», lors de l’accès ultérieur au menu «Calibrage Capteur»... -
Page 32: Facteur De Réduction
GALAXY 503 5.9 Tableau 2 - Capteur Project série 1000 – 1500 – 2000W (capteur et aimant appliqués dans le moteur) Circonférence Rapport Facteur Nombre de Mesure chaîne Modèle renfoncement (mm-pouces) Barbotin (cm) réduction Réduction 1:52 8-5/16”HT 1:52 10 DIN 766... -
Page 33: Utilisation
UTILISATION Appuyer sur la touche (ON) pour activer les commandes et éclairer le moniteur. L’extinction de l’éclairage du moniteur se produit 30 secondes après la dernière commande utilisée (temps par défaut modifiable – voir «Temps BkLight»). En appuyant sur la touche (UP) on commande la remontée de l’ancre. -
Page 34: Schema De Cablage
GALAXY 503 8 SCHEMA DE CABLAGE Buzzer www.busse-yachtshop.de | info@busse-yachtshop.de... -
Page 35: Conditions De Garantie
9 CONDITIONS DE GARANTIE Lofrans garantit une couverture de 3 ans sur son produit à partir de la première date d’achat, à condition d’en faire un usage normal et de respecter les programmes d’entretien, sauf dans les circonstances, limites et exceptions décrites par la suite. Tout produit s’avérant défectueux dans le cadre d’une utilisation standard au cours de cette période sera réparé... - Page 36 GALAXY 503 Sehr geehrter Kunde, Vielen Dank, dass Sie ein Produkt des Unternehmens Lofrans gewählt haben. Lofrans ist ein führendes Unternehmen bei der Produktion und dem weltweiten Vertrieb nautischer Anlagen, die mit modernsten Technologien und entsprechend der Vorgaben internationaler Rechtsvorschriften sowie der bedeutendsten Zertifizierungsinstitute hergestellt werden. Alle unsere Produkte werden mit hochwertigen Materialien hergestellt, die für einen Einsatz im Marinebereich geeignet sind, und die ständigen Kontrollen zur Verbesserung des...
-
Page 37: Einführung
Personenunfälle oder Schäden am Boot verursachen könnten. 1.2 Kundendienst Für die Produkte des Unternehmens Lofrans gibt es ein weltweites Netz von Händlern und autorisierten Kundendienststellen Setzten Sie sich gegebenenfalls mit dem örtlichen Händler der Lofrans in Verbindung. Einzelheiten auf der Internetseite wwwlofrans.com 1.3 Empfang und Lagerung... -
Page 38: Installation Des Magneten Im Ankerspill
GALAXY 503 2.3 Installation des Magneten im Ankerspill Bei einigen Ankerspillmodellen sind Sensor und Magnet bereits installiert (Einrichtung für Meterzähler), deshalb müssen die nachstehenden Arbeitsgänge nicht ausgeführt werden 1. Das Bohrloch an einem Zahn der Kettennuss - Durchmesser 6,5 mm (~1/4”) und Tiefe 8 mm (5/16”) – muss an einer Stelle gebohrt werden, an der die Kette nicht durchläuft. -
Page 39: Installation Des Meterzähler
2.6 Installation des Meterzählers Der Meterzähler muss so positioniert sein, dass das Display gut ablesbar und nicht dem Sonnenlicht ausgesetzt ist. Das Instrument mit dem mitgelieferten Bügel und den zwei Schrauben mit einem Kreuzschraubenzieher festschrauben. Ein Loch mit 20,5 mm (~13/16”) und 4 Löcher mit 2,2 mm (~3/32”) für die Befestigung der Steckdose bohren. -
Page 40: Mess-Menü
GALAXY 503 Beim Einschalten des Instruments ertönt ein akustisches Signal und ein paar Sekunden lang erscheint die folgende Seite: Nach Beendigung der Initialisierung erscheint die Hauptseite. Mit folgenden Angaben: ZUSTAND: Zustand es Instruments und eventuelle Störungen. GESCHWINDIGKEIT: Kettengeschwindigkeit in beiden Richtungen, in Metern oder Fuß pro Minute. -
Page 41: Sprachmenü
5.4 Menu alarmes et fonctions Mit der Taste (DOWN) und (UP) zu den verschiedenen Parametern springen. Fierenalarm Anwählen mit Die Funktion kann frei geschaltet und das Maß fest- gelegt werden, bei dem das Ankerspill stoppt. Danach Wert einstellen mit ist nur noch die Tippsteuerung möglich. -
Page 42: Menü Sensorkalibrierung
GALAXY 503 Mit der Taste (DOWN) und (UP) zu den verschiedenen Parame- 5.7 Menü Sensorkalibrierung tern springen Anwählen mit Sensor Wahlen Sensor Wählen PROJ oder drücken Bestätigen mit Wenn die Sensorerfassungsroutine einmal einen Sensor des Typs “Standard” anstelle des “Project”... -
Page 43: Menü Überprüfungen
5.9 Tabelle 2 - Sensor Project serien 1000 – 1500 – 2000W (sensor und magnet in den motor angebracht) Umfang Untersetzu- Anzahl Kettenmass Red. Modell Kettennuss ngsverhältnis Aussparungen (mm-Zoll) Faktor (cm) 1:52 8-5/16”HT 1:52 10 DIN 766 Project 1000 1:52 10 ISO-3/8”HT... -
Page 44: Gebrauch
GALAXY 503 GEBRAUCH Die Taste (ON) zur Aktivierung der Steuerungen und Beleuchtung des Displays drücken. Die Display-Beleuchtung wird 30 Sekunden nach dem letzten Steuerbefehl ausgeschaltet (änderbare Default-Zeit– siehe “Zeit BkLight”). Die Taste (UP) steuert das Lichten des Ankers Die Taste (DOWN) steuert das Auswerfen. -
Page 45: Schalplan
8 SCHALPLAN Buzzer www.busse-yachtshop.de | info@busse-yachtshop.de... -
Page 46: Garantiebedingungen
9 GARANTIEBEDINGUNGEN Lofrans warrants that in normal use and observing the maintenance schedules, the product is covered by warranty for a period of 2 years from the date of purchase by the original purchaser, without prejudice to the conditions, limitations and exceptions listed below. Any product that proves defective in normal use during said period shall be repaired or replaced, as Lofrans chooses. - Page 47 Estimado cliente, gracias por haber elegido un producto Lofrans. Lofrans es una empresa leader en la producción y distribución mundial de equipos náuticos realizados con las tecnologías más modernas, conforme a los requisitos indicados por las normativas internacionales y por los entes de certificación más importantes.
-
Page 48: Introducción
1.2 Servicio posventa Los productos Lofrans están apoyados en todo el mundo por una red de distribuidores y servicio posventa autorizados. En caso de necesidad contacte con el distribuidor local Lofrans. Más detalles en la página web www.lofrans.com 1.3 Recepción y almacenaje... -
Page 49: Instalación Del Imán En El Molinete
2.3 Instalación del imán en el molinete En algunos modelos de torno de ancla el sensor y el imán se encuentran ya instalados (predisposición cuentametros) por lo que no es necesario efectuar las operaciones que se indican a continuación. -
Page 50: Instalación Del Cuentametros
GALAXY 503 2.6 Instalación del cuentametros El cuentametros debe quedar colocado de manera que la pantalla pueda ser leída con facilidad y sin que quede expuesta a los rayos solares. Fijar el instrumento utilizando el elemento de fijación adjuntos, apretando los dos tornillos con un destornillador tipo Phillips. -
Page 51: Menú De Configuración Cuentametros
Al encenderlo, el instrumento emitirá un sonido y durante algunos segundos aparecerá la siguiente página: Una vez concluido el procedimiento de inicialización, aparecerá la página principal. En la que: ESTADO: indica el estado del instrumento así como posibles anomalías. -
Page 52: Menú De Alarmas Y Funciones
GALAXY 503 5.4 Menú de alarmas y funciones Utilizar la tecla (DOWN) o (UP)para desplazarse entre los parámetros. Alarma Subida Es posible habilitar la función y establecer la cuota a Seleccionar con la cual el molinete se detiene; después de lo cual es Incorporar el valor con posible operar sólo con el mando por impulsos. -
Page 53: Menú De Calibración Sensor
5.7 Menú de calibración sensor Utilizar la tecla (DOWN) o (UP) para desplazarse entre los parámetros. Select with Seleccione Sensor Seleccione Sensor PROJ Presionar Confirmar con Una vez que la rutina de “Detección Sensor” ha individuado un sensor de tipo “Estándar” en lugar de “Project”, con la sucesiva entrada en el Menú... -
Page 54: Menú De Verificaciones
GALAXY 503 5.9 Tabla 2 - Sensor Project serie 1000 – 1500 – 2000W (sensor y magneto aplicados en el motor) Circunferencia Relación de Número de Medida cadena Factor Modelo Barbotén (cm) reducción muescas (mm-pulgadas) Project 1:52 8-5/16”HT 1:52 10 DIN 766... -
Page 55: Uso
6 USO Presionar la tecla (ON) para activar los mandos e iluminar el monitor. El monitor se apaga 30 segundos después de lanzarse el último mando (tiempo predeterminado modificable, véase “Tiempo Ilum.”). Presionando la tecla (UP) se obtiene la subida del ancla. -
Page 56: Diagrama De Cableado
GALAXY 503 8 DIAGRAMA DE CABLEADO Buzzer www.busse-yachtshop.de | info@busse-yachtshop.de... -
Page 57: Condiciones De Garantía
9.4 Procedimiento La solicitud de garantía debe ser notificada por escrito a Lofrans sl o a un centro de asistencia Lofrans autorizado y enviada por fax o por email, siempre acompañada por el número de serie del producto. Excepto en caso de disposiciones diferentes provenientes directamente de Lofrans, cualquier producto sujeto a una solicitud de garantía debe ser devuelto directamente a Lofrans - via Philips... - Page 58 GALAXY 503 NOTES www.busse-yachtshop.de | info@busse-yachtshop.de...
- Page 59 NOTES www.busse-yachtshop.de | info@busse-yachtshop.de...
- Page 60 Via Philips, 5 - 20052 Monza (MB) (Italy) www.lofrans.com - e-mail: contact@lofrans.com www.busse-yachtshop.de | info@busse-yachtshop.de...