Niko 10-286 Information De Produit
Poste extérieure modulaire
Table des Matières
Les langues disponibles
Les langues disponibles
Liens rapides
Modulaire buitenpost
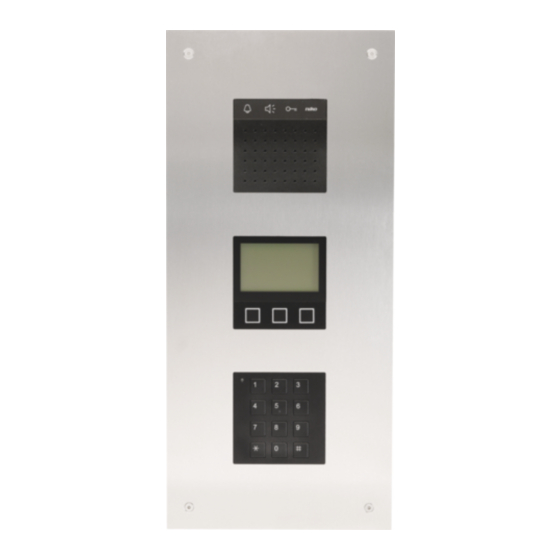
Poste extérieure modulaire
Modulare außenstation
Modular outdoor station
1
2
3
4
5
6
7
8
9
0
(voorgemonteerd: 3 modules 10-286, 4 modules 10-386)
(pré-monté, 3 modules 10-286, 4 modules 10-386)
(vormontiert, 3 modulen 10-286, 4 modules 10-386)
(pre-assembled, 3 modules 10-286, 4 modules 10-386)
1
4
7
10-286 / 10-386
10-286 / 10-386
2
3
5
6
8
9
0
Productinformatie
Information de produit
Produktinformation
Product information
Table des Matières

Manuels Connexes pour Niko 10-286


Sommaire des Matières pour Niko 10-286
- Page 1 10-286 / 10-386 Modulaire buitenpost (voorgemonteerd: 3 modules 10-286, 4 modules 10-386) Poste extérieure modulaire (pré-monté, 3 modules 10-286, 4 modules 10-386) Modulare außenstation (vormontiert, 3 modulen 10-286, 4 modules 10-386) Modular outdoor station (pre-assembled, 3 modules 10-286, 4 modules 10-386)
- Page 2 10-286 / 10-386 Nederlands Français Deutsch English...
-
Page 13: Éléments De Base
Les postes modulaires encastrables jusqu’à 256 appartements font partie de la gamme contrôle d’accès. Les postes extérieurs sont destinés à la parlo-et vidéophonie. Ces postes extérieurs encastrables sont disponibles en deux modèles : sans caméra (10-286) et avec caméra dôme (10-386). Les deux postes extérieurs sont équipés d’un clavier, d’un écran LCD, d’un microphone et d’un haut-parleur. -
Page 14: Description Des Éléments De Base
10-286 / 10-386 2.4. Description des éléments de base 2.4.1. Module audio Leds de statut : appel (jaune), conversation (vert), ouvrir la porte (bleu) Microphone Détecteur de lumière Haut-parleur LED rouge indication d’erreur, affichage de la programmation des boutons-poussoirs de sonnerie Raccordement d‘un module supplémentaire à... - Page 15 • Base de données des résidents : 256 ensembles de données (24 caracteres pour le nom, 6 chiffres pour le numéro de l'appartement, 2 numéros de série • par résident, numéro d'appel de 10 chiffres au maximum pour appel direct) • Configuration uniquement a l'aide du logiciel de configuration Niko Réglages d’usine du module écran : Time-out de l’éclairage d’arriere-plan en mode...
-
Page 16: Module Caméra Dôme
Quel type de câble dois-je utiliser ? Le poste extérieur audio 10-286 est raccordé au moyen d’un câble torsadé à 3 fils en vue d’un fonctionnement optimal. Le diamètre des conducteurs détermine la distance maximale entre l’alimentation et le poste intérieur ou extérieur. Le tableau ci-dessous donne un aperçu de la distance maximale par type de câble. -
Page 17: Alimentation
Note: 1. Si les postes extérieurs sont appelés en même temps, veuillez alors tenir compte du fait qu'il faut régler l'adresse des postes extérieurs . 2. Veuillez prendre contact avec Niko pour de plus grandes installations. Alimentation Max # 10-575... -
Page 18: Mise En Service
10-286 / 10-386 6. Pose de la plaque frontale • Placez les charnières au-dessus des boulons, fournis Avant que les charnières ne soient totalement fixées; vous devez ajuster la plaque frontale afin que celle-ci soit contre dans le boîtier d'encastrement (fig. 6). -
Page 19: Appeler Un Résident...en Introduisant Le Numéro D'appartement
10-286 / 10-386 Sélectionnez le nom correct Appuyez sur la smartkey pour parcourir la liste vers le bas et la smartkey pour la parcourir vers le haut. Appelez le résident Appuyez sur la smartkey . Le résident en question est appelé... -
Page 20: Ouvrir La Porte À L'aide Du Code D'accès
10-286 / 10-386 5.3. Liaison vocale Module d’écran Écran Établir la liaison vocale Si vous répondez à l’appel (décrocher le combiné, appuyer sur la touche de parole), une liaison vocale est établie avec le poste intérieur. Mettre fin à la liaison vocale La liaison vocale est interrompue : •... -
Page 21: Remplacement Du Poste Extérieur
8. CARACTÉRISTIQUES TECHNIQUES Code de référence 10-286 (sans caméra) 10-386 Dimensions boîtier d’encastrement 10-286 420 x 180 x 50 mm (H x B x D) Dimensions boîtier d’encastrement 10-386 540 x 180 x 50 mm (H x B x D) -
Page 22: Mises En Garde Concernant L'installation
10. SUPPORT DE NIKO En cas de doute ou si vous voulez échanger le produit en cas de défaut éventuel, veuillez prendre contact avec votre grossiste ou avec le service support de Niko: • Belgique: +32 3 778 90 80 •... - Page 48 10-286 / 10-386 nv Niko sa Industriepark West 40, BE-9100 Sint-Niklaas, Belgium tel. +32 3 778 90 00 — fax +32 3 777 71 20 — e-mail: support@niko.be — www.niko.eu PM010-28600R16401...