Table des Matières
Publicité
Les langues disponibles
Les langues disponibles
Liens rapides
1. BEFORE YOU BEGIN
A. HOW TO USE THESE INSTRUCTIONS
Please read these instructions carefully to familiarize
yourself with the required tools, materials, and
installation sequences. Follow the sections that pertain
to your particular installation. This will aid you in avoiding
the unnecessary expense associated with improper
installation. In addition to proper installation, read all
operating and safety instructions.
B. INSTALLER HAZARD NOTIFICATION
DANGER: Risk of electrical shock. Connect
only to a properly grounded, grounding-type
receptacle, protected by a ground-fault circuit
interrupter (GFCI).
DANGER: Risk of injury or product damage.
Handle vitreous china products very carefully.
Vitreous china can break and chip if you
over-tighten bolts and nuts.
NOTICE:
Follow
electrical codes.
D. PRODUCT REQUIREMENTS
S
Toilet should be installed with a 3/8" shut-off valve.
S
Since all toilets do not have the same supply rough-in,
you may have to change the location of the supply
stop to install this toilet.
S
Closet flange must be 12" (30.5cm) on-center from
wall.
S
Electrical service requirements: dedicated 120 VAC,
15A, 60 Hz. (circuit protected by Class A GFCI.)
F. MATERIALS REQUIRED
S
3/8" shut-off valve
S
Closet flange
S
Toilet T-bolts (2) 5/16" diameter
S
Toilet gasket (wax seal)
A
1007288-2-
R
all local plumbing and
Español, Página 9
Français, Page 17
TROCADERO POWER LITE
All information in this manual is based on the latest
product information available at the time of publication.
Kohler Co. reserves the right to make changes in product
characteristics, packaging, or availability at any time
without notice.
These instructions contain important care, cleaning, and
warranty information - please leave for the consumer.
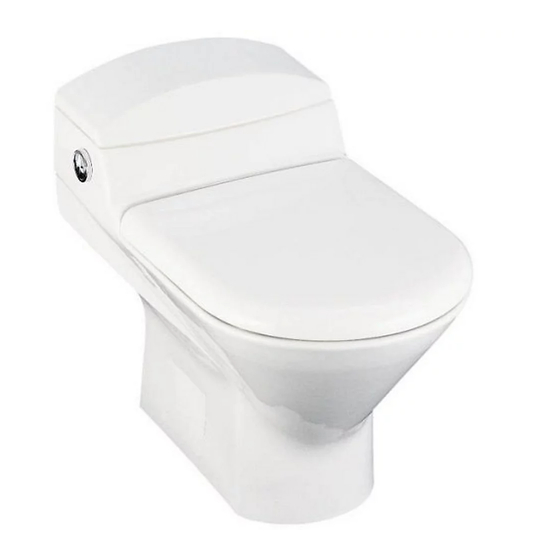
C. PRODUCT PROPERTIES
S
One–piece vitreous china toilet.
S
Water depth from rim is 5-1/2" (14cm).
S
Seat post holes are on 12-5/8" (32.1cm) centers.
S
2-1/4" (5.7cm) passageway.
S
3' (91.4cm) electrical cord length.
S
For roughing-in and overall dimensions, See Fig. #3 .
S
Fixture dimensions are nominal and conform to
tolerances by ANSI/ASME standards (A112.19.2M).
S
Pump Information – 1/5 hp, 120V, 8.5A, 60 Hz
E. ORDERING INFORMATION
Trocadero Power Lite Toilet
When specified:
floor bolts (pr.)
. . . . . . . . . . . . . . . . . . . . . . . . . .
3/8" supply
. . . . . . . . . . . . . . . . . . . . . . . . . . . .
NOTE:
For service parts ordering information, see
separate Service Parts document enclosed with product.
G. TOOLS REQUIRED
S
10" adjustable wrench
S
12" pipe wrench
S
Tubing cutter
S
Level
S
Putty knife
S
Hacksaw/metal file (for shortening T-bolts)
S
Screwdriver
NOTE: Site preparation may require additional tools.
1 1
VITREOUS CHINA
TOILET
. . . . . . . . . . . . . . . . .
K-3437
K-7638
E2001 Kohler Co.
21401
Publicité
Table des Matières

Manuels Connexes pour Kohler TROCADERO POWER LITE


Sommaire des Matières pour Kohler TROCADERO POWER LITE
- Page 1 Please read these instructions carefully to familiarize product information available at the time of publication. yourself with the required tools, materials, and Kohler Co. reserves the right to make changes in product installation sequences. Follow the sections that pertain characteristics, packaging, or availability at any time to your particular installation.
-
Page 2: Site Preparation
Fig. #2 C. ROUGH-IN PLUMBING Turn off water supply. Install or relocate supplies and outlets as necessary to conform to roughing-in dimensions. See Fig. #3 . For shut-off valve location, see Fig. #4 . 1007288-2- Kohler Co., Kohler, WI U.S.A. - Page 3 Locate supply shut-off valve so it is 2-5/8” (6.7cm) above (6.7cm) the floor-line and 4” (10.2cm) to the left of the centerline of the closet flange. 12” (30.5cm) Fig. #4 Install new 5/16” diameter T-bolts. T-Bolts Closet Flange Fig. #5 Kohler Co., Kohler, WI U.S.A. 1007288-2-...
- Page 4 CAUTION: Do not lift or rock toilet after placement. A new gasket must be reapplied if you break the watertight seal. Apply full body weight to toilet rim to set seal. Closet Flange T-Bolts Fig. #7 1007288-2- Kohler Co., Kohler, WI U.S.A.
- Page 5 Align the seat ring and cover over the hinges and bushings. Slide the bushings from the Hinge outside in through the seat and cover brackets. Screw Align seat on toilet. Tighten hinges with a slotted screwdriver. Fig. #11 Kohler Co., Kohler, WI U.S.A. 1007288-2-...
-
Page 6: Check For Leaks
Turn shut-off valve on. Check for leaks. Check all bowl and tank connections for leaks for several days. The nuts on the T-bolts may also require re-tightening. Check here for leaks Shut-off Valve Check here for leaks Fig. #13 1007288-2- Kohler Co., Kohler, WI U.S.A. - Page 7 Long Flush (1.6 gpf (6 Lpf)) Short Flush (1.1 gpf (4.2 Lpf)) Fig. #16 L. TROUBLESHOOT AS NECESSARY To troubleshoot any problems that may occur, see the owner’s manual also packed with the product. Kohler Co., Kohler, WI U.S.A. 1007288-2-...
-
Page 8: Consumer Responsibilities
Products containing chlorine (calcium hypochlorite) can seriously damage fittings in the tank. This damage can cause leakage and property damage. Kohler Company shall not be responsible or liable for any tank fitting damage caused by the use of cleaners containing chlorine (calcium hypochlorite). -
Page 9: Antes De Comenzar
Toda la información contenida en las instrucciones está Lea estas instrucciones atentamente para familiarizarse basada en la información más reciente disponible al con las herramientas requeridas, los materiales y la momento de su publicación. Kohler Co. se reserva el secuencia instalación. Siga secciones derecho de efectuar cambios en las características del... -
Page 10: Preparación Del Sitio
Instale o reubique las salidas y los suministros según sea necesario para cumplir con las dimensiones del diagrama de instalación. Consulte la Fig. #3 . Para la ubicación de la llave de paso, consulte la Fig. #4 . 1007288-2- Kohler Co., Kohler, WI U.S.A. - Page 11 4” (10,2cm) a la izquierda del centro de la brida. 12” (30,5cm) Fig. #4 Instale dos pernos en T nuevos de 5/16” de diámetro. Pernos en T Brida del inodoro Fig. #5 Kohler Co., Kohler, WI U.S.A. 1007288-2-...
- Page 12 Si se rompe el sello hermético, se deberá instalar uno nuevo. Aplique todo el peso del cuerpo en los bordes del inodoro para afirmar el sello. Brida del inodoro Pernos en T Fig. #7 1007288-2- Kohler Co., Kohler, WI U.S.A.
- Page 13 Deslice los bujes tornillo de desde el exterior hacia el interior del inodoro a través del bisagra asiento y la cubierta. Alinee el asiento sobre el inodoro. Asegure las bisagras con un destornillador plano. Fig. #11 Kohler Co., Kohler, WI U.S.A. 1007288-2-...
-
Page 14: Verifique Que No Haya Fugas
Es posible que se deba ajustar las tuercas y los pernos en T nuevamente. Verifique que no haya fugas aquí Llave de paso Verifique que no haya fugas aquí Fig. #13 1007288-2- Kohler Co., Kohler, WI U.S.A. - Page 15 (1,6 gpd (6 Lpd)) Verifique que ambas descargas funciónen correctamente. Descarga corta (1,1 gpd (4,2 Lpd)) Fig. #16 L. PROBLEMAS DE REPARACIÓN Utilice la guía del propietario incluida con el inodoro para los problemas de reparación. Kohler Co., Kohler, WI U.S.A. 1007288-2-...
- Page 16 (hipocloruro de calcio) pueden dañar los accesorios del inodoro. Esto puede causar fugas y daños a la propiedad Kohler Co. no se hace responsable por concepto de daños ocurridos a los accesorios causados por el uso de limpiadores que contienen cloro (hipocloruro de calcio).
-
Page 17: Avant De Commencer
Veuillez lire avec attention cette notice pour connaître les moment d'aller sous presse. La société Kohler se réserve le outils et matériaux requis, ainsi que les étapes droit d'apporter des modifications aux caractéristiques, d'installation. -
Page 18: Préparation Du Site
Fermer l’arrivée d’eau. Installer ou déplacer les robinets d’arrêt et les sorties au besoin, selon le diagramme de raccordement. Voir la Fig. #3 . Pour l’emplacement du robinet d’arrêt, voir la Fig. #4 . 1007288-2- Kohler Co., Kohler, WI U.S.A. -
Page 19: Dimensions Du Diagramme De Raccordement
4 po (10,2cm) à gauche de l’axe de la bride de sol. 12 po (30,5cm) Fig. #4 Installer les boulons à T de 5/16 po dia. Boulons à T Bride de sol Fig. #5 Kohler Co., Kohler, WI U.S.A. 1007288-2-... -
Page 20: Installer La Bague D'échantéité
Appliquer une pression de tout son poids de corps répartie sur le rebord de la cuvette pour fixer le joint. Bride de sol Boulons à T Fig. #7 1007288-2- Kohler Co., Kohler, WI U.S.A. -
Page 21: Installer Le Couvercle Du Boulon
Glisser les bagues depuis l’extérieur vers l’intérieur à travers les supports du siège et de l’abattant. Fig. #11 Aligner le siège sur la cuvette. Serrer les charnières avec un tournevis pour écrous à fente. Kohler Co., Kohler, WI U.S.A. 1007288-2-... - Page 22 Il se peut que les écrous sur les boulons à T nécessitent être serrés à nouveau. Vérifier s’il y a des fuites Robinet d’arrêt Vérifier s’il y a des fuites Fig. #13 1007288-2- Kohler Co., Kohler, WI U.S.A.
-
Page 23: Verifier La Soupape De Remplissage Et Le Niveau Repère
(1.6 gpc (6 Lpc)) Vérifier le fonctionnement des deux opérations. Courte chasse (1,1 gpc (4,2 Lpc)) Fig. #16 L. RÉPARER AU BESOIN Pour résoudre les problèmes possibles, voir le manuel du propriétaire qui accompagne le produit. Kohler Co., Kohler, WI U.S.A. 1007288-2-... -
Page 24: Responsabilités Du Consommateur
Ceci peut se solder en fuites et dommages matériels. La société Kohler décline toute responsabilité quant à tout endommagement de composants internes de réservoir causé par l’utilisation de nettoyants qui contiennet du chlore (hypochlorite de calcium).