
Manuels Connexes pour LEGRAND LE07976AB-12/15-01


Sommaire des Matières pour LEGRAND LE07976AB-12/15-01
- Page 1 Chargeur de batterie 240V Manuel d’installation • Installation manual Part. LE07976AB-12/15-01 GF...
- Page 2 Chargeur de batterie 240V FRANÇAIS ENGLISH ITALIANO DEUTSCH ESPAÑOL...
-
Page 3: Table Des Matières
Chargeur de batterie 240V Index 1 Introduction 2 Conditions d’utilisation 3 Installation 4 Spécifications 5 Garantie... -
Page 4: Introduction
être tenu de prendre les mesures adéquates. ATTENTION Legrand se réserve à tout moment le droit de modifier le contenu de ce manuel et de com- muniquer les changements apportés sous quelque forme et modalité que ce soit. -
Page 5: Chargeur De Batterie 240V
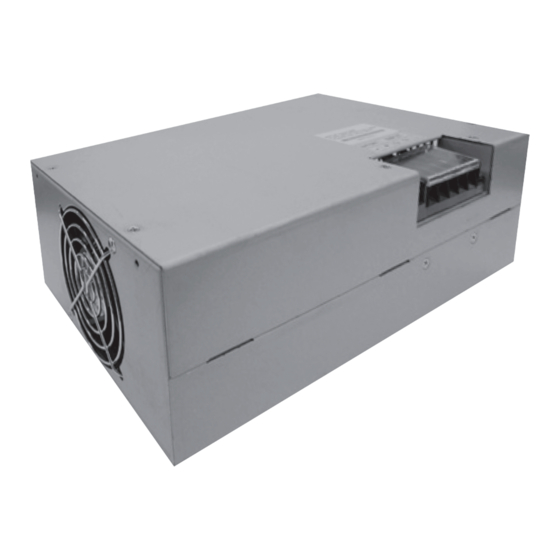
Chargeur de batterie 240V 3 Installation Contenu de l’emballage Guide d’installation et de câblage ATTENTION Seul un électricien qualifié et expert est autorisé à installer le chargeur de batterie. Picture 1 Picture 3 1. Éteindre toutes les sources d’énergie qui alimentent l’Onduleur, les armoires et les chargeurs batterie. - Page 6 3 Installation 5. A l’aide des câbles L1 ou L2, raccorder le chargeur de batterie aux batteries (picture 4,5). Picture 4 - Daker DK Picture 5 - Keor S 6. Keor S: assurer une installation sans danger pour l’utilisateur final en appliquant le couvercle et le gland de protection aux bornier de l’armoire des batteries pour garantir l’insolation de partie avec tension dangereuse.
- Page 7 Chargeur de batterie 240V 3 Installation Installation Panneau arrière armoire Panneau arrière armoire des batteries Daker DK des batteries Keor S Vue de coté Montage mural Application Exemple de connection standard Chargeur de batterie 240V en parallèle : max 4 Unitès Courant d’entrée max :18.4A Courant de charge max : 20A ATTENTION...
-
Page 8: Spécifications
éviter des perturbations aux autres équipements électriques présentes. 5 Garantie Les conditions de garantie peuvent varier en fonction du pays où le chargeur de batterie est vendu. S’ il vous plaît vérifiez avec votre représentant local Legrand la validité et la durée de la garantie. - Page 9 Battery Charger 240V Index 1 Introduction 2 Conditions of use 3 Installation 4 Specifications 5 Warranty...
-
Page 10: Introduction
• In a domestic environment this product may cause radio interference in which case the user may be required to take adequate measures. CAUTION Legrand reserve at any time the right to modify the content of this manual and to communicate in any form and modality, the changes brought to the same. -
Page 11: Installation
Battery Charger 240V 3 Installation Package Contents Wiring installation guide CAUTION Only a licensed and expert electrician is authorized to install the Battery Charger BOX. Picture 1 Picture 3 1. Switch off all the power sources that supply UPS, battery banks and chargers. Ensure that the Battery Charger is unplugged. - Page 12 3 Installation 5. Connect the battery charger to the battery bank through the DC cable L1 or L2 (picture 4,5). Picture 4 - Daker DK Picture 5 - Keor S 6. Keor S : Ensure the installation is safe for the final user applying to the battery cabinet terminal block insulating cover and cables glands.
- Page 13 Battery Charger 240V 3 Installation Installation Keor S battery bank rear Daker DK battery bank rear panel Panel Flat plane Wall Mounted Application Standard Connection example Battery chargers 240V in parallel : max 4 Units Max Input current :18.4A Max charging current : 20A CAUTION - Recommended cables (max 2 battery chargers in parallel) : UL 1015 16AWG - Recommended cables (max 3/4 battery chargers in parallel) : UL 1015 14AWG...
-
Page 14: Specifications
5 Warranty The guarantee conditions may vary depending on the country where the battery charger is sold so please check with your local Legrand sale representative for validity and duration. - Page 15 Caricabatterie 240V Indice 1 Introduzione 2 Condizioni d’uso 3 Installazione 4 Specifiche 5 Garanzia...
-
Page 16: Introduzione
• In ambiente domestico questo dispositivo potrebbe causare interferenze radio per le quali l’uti- lizzatore potrebbe essere tenuto ad adottare adeguate misure. ATTENZIONE Legrand si riserva il diritto di variare in qualsiasi momento i contenuti illustrati nel presente stampato e di comunicare, in qualsiasi forma e modalità, i cambiamenti apportati. -
Page 17: Installazione
Caricabatterie 240V 3 Installazione Contenuto della confezione Guida per il cablaggio ATTENZIONE Solamente elettricisti esperti e autorizzati possono installare la SCATOLA del Caricabatterie. Fig. 1 Fig. 3 1. Spegnere tutte le fonti di alimentazione che alimentano i gruppi di batterie UPS e i caricatori. - Page 18 3 Installazione 5. Collegare il caricabatterie al gruppo di batterie con il cavo DC L1 o L2 (Fig. 4,5). Fig. 4 - Daker DK Fig. 5 - Keor S 6. Keor S: Accertarsi che l’installazione risulti sicura per l’utilizzatore finale, applicando alla mor- settiera dell’armadio delle batterie un’adeguata copertura isolante e i pressacavi.
- Page 19 Caricabatterie 240V 3 Installazione Installazione Pannello posteriore del Pannello posteriore del gruppo di batterie Daker DK gruppo di batterie Keor S Superficie piana A parete Applicazioni Esempio di collegamento Caricabatterie 240V in parallelo: max 4 Unità standard Corrente massima in entrata: 18,4A Corrente massima di caricamento: 20A ATTENZIONE - Cavi raccomandati (max 2 caricabatterie in parallelo): UL 1015 16AWG...
-
Page 20: Specifiche
5 Garanzia Le condizioni di garanzia possono variare in funzione del Paese nel quale viene venduto il Caricabat- terie. Richiedere le condizioni di durata e validità della garanzia al rappresentante Legrand di zona. - Page 21 Batterie-Ladegerät 240V Inhaltsverzeichnis 1 Einleitung 2 Gebrauchsbedingungen 3 Installation 4 Spezifikationen 5 Garantie...
-
Page 22: Einleitung
• In einer Wohnumgebung kann dieses Produkt Funkstörungen erzeugen; in diesem Fall muss der Betreiber angemessene Maßnahmen ergreifen. ACHTUNG Legrand behält sich das Recht vor, den Inhalt dieses Handbuchs jederzeit zu ändern und die Änderungen in einer beliebigen Form und Weise mitzuteilen. -
Page 23: Installation
Batterie-Ladegerät 240V 3 Installation Packungsinhalt Anweisungen zur Verkabelung ACHTUNG Das Gehäuse des Batterie-Ladegeräts darf ausschließlich von einem erfahrenen Elektriker installiert werden. Bild 1 Bild 3 1. Schalten Sie alle Stromquellen aus, die die UPS-Batterieblöcke und Ladegeräte versorgen. Vergewissern Sie sich, dass das Batterie-Lade- gerät von der Steckdose abgetrennt ist. - Page 24 3 Installation 5. Verbinden Sie das Batterie-Ladegerät mit den Batterieblöcken mit Hilfe des DC-Kabels L1 oder L2 (Abbildung 4,5). Fig. 4 - Daker DK Fig. 5 - Keor S 6. Keor S : Stellen Sie sicher, dass die Installation für den Endverbraucher sicher ist, indem Sie die Batterieblöcke abdecken und verschrauben.
- Page 25 Batterie-Ladegerät 240V 3 Installation Installation Keor S Batterieblock- Daker DK Batterieblock-Rückseite Rückseite Ebene Fläche Wandinstallation Anwendung Beispiel einer Batterie-Ladegerät 240V parallel geschaltet: max 4 Einheiten Standardverbindung Max. Eingangsstrom: 18,4 A Max. Ladestrom: 20A ACHTUNG - Empfohlenes Kabel (max. 2 Batterie-Ladegeräte parallel geschaltet): UL 1015 16AWG - Empfohlenes Kabel (max.
-
Page 26: Spezifikationen
Bereich. In einer anderen Umge- bung sind zusätzliche Maßnahmen erforderlich, um Störungen zu vermeiden 5 Garantie Die Garantiebedingungen können je nach Land, in dem das Ladegerät verkauft wird, unterschiedlich sein. Bitte überprüfen Sie mit Ihrem lokalen Legrand Verkaufsvertreter die Gültigkeit und Dauer. - Page 27 Cargador de batería de 240V Índice 1 Introducción 2 Condiciones de uso 3 Instalación 4 Características 5 Garantía...
-
Page 28: Condiciones De Uso
Se ruega leer detenidamente este manual y esta hoja de instrucciones de seguridad incluidos en el embalaje antes de instalar el cargador de batería. Entre en el sitio web www.ups.legrand.com para bajarse la última versión del manual y descubrir la oferta completa de SAI Legrand 2 Condiciones de uso •... - Page 29 Cargador de batería de 240V 3 Instalación Contenido del embalaje Guía para instalación del cableado PELIGRO Solamente un electricista cualificado y experto puede instalar el cargador de batería. Figura 1 Figura 3 1. Apague todas las fuentes de alimentación que abastecen SAI, baterías y cargadores. Asegúrese de haber desconectado el cargador de batería.
- Page 30 3 Instalación 5. Conecte el cargador de batería a las baterías mediante el cable CC L1 o L2 (figura 4,5). Fig. 4 - Daker DK Fig. 5 - Keor S 6. Keor S : Asegúrese de que la instalación sea segura para el usuario final aplicando la tapa de aislamiento del bloque terminal del armario de la batería y protecciones de los cables.
- Page 31 Cargador de batería de 240V 3 Instalación Instalación Panel trasero banco de Panel trasero banco de baterías Daker DK baterías Keor S Superficie plana Mural Aplicación Ejemplo de conexión estándar Cargadores de batería de 240V en paralelo: máx. 4 unidades Corriente entrada máxima:18,4A Corriente de carga máxima: 20A PELIGRO...
- Page 32 4 Especificaciones Entrada AC Tensión entrada 160V-280V Corriente entrada máxima 4.6A Máx. Frecuencia entrada nominal 50Hz/60Hz±10% Factor de potencia entrada > 0.85 Fases entrada Monofásica SALIDA CC Tensión salida CC nominal 273Vcc±3Vcc (Sin Carga) Corriente salida CC nominal 2,5A (5A Máx.) Potencia salida nominal 1000W Máx.
- Page 36 LEGRAND Pro and Consumer Service BP 30076 - 87002 LIMOGES CEDEX FRANCE www.legrand.com Legrand se réserve le droit de modifier à tout moment le contenu de cet imprimé et de communiquer, sous n’importe quelle forme et modalité, les changements apportés.