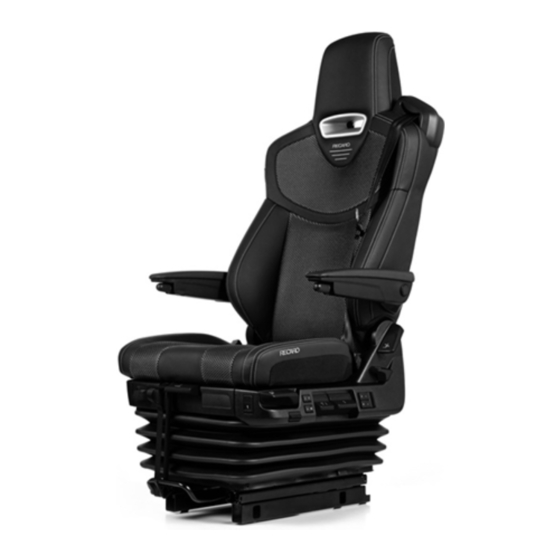
RECARO C 6000 Instructions D'utilisation
Scania streamline
Masquer les pouces
Voir aussi pour C 6000:
- Instructions d'utilisation (220 pages) ,
- Notice de montage (236 pages)

Manuels Connexes pour RECARO C 6000


Sommaire des Matières pour RECARO C 6000
- Page 42 Notice de montage pour RECARO C 6000 / C 7000 SCANIA Streamline (à partir de l'année-modèle 2014) Sommaire Tableaux des codes, sièges ................2 Consignes générales de sécurité ............... 2 Symboles et mots clefs .................. 5 ...
-
Page 43: Tableaux Des Codes, Sièges
RECARO C 6000 91303 2. Consignes générales de sécurité Vous avez acquis un siège RECARO qui offre confort et sécurité. Remarque importante : L'autorisation d'utilisation générale n'est valable que si le siège RECARDO est installé en combinaison avec le kit de montage complet spécifique au véhicule. - Page 44 être garanti. Une sollicitation similaire à un crash (accident) peut entraîner le déplacement du siège. Les sièges RECARO ne doivent être montés dans les véhicules que lorsqu'une autorisation a été octroyée pour leur montage par le "Kraftfahrt-Bundesamt - Office fédéral des véhicules à moteur" - (véhicules sans 2ème rangée de sièges / sans airbag au volant, sièges avec ceinture intégrale à...
- Page 45 Si l'on remplace un siège d'origine sans fonctions ergonomiques électriques par un siège RECARO, le connecteur électrique de l'adaptateur pour faisceau de tuyaux - de câbles fourni peut être débranché. Un spécialiste qualifié doit raccorder le faisceau de câbles à une source de courant appropriée à...
-
Page 46: Symboles Et Mots Clefs
2.2 Exclusion de la responsabilité et garantie Les sièges RECARO sont généralement uniquement appropriés pour les cabines à l'état d'origine. Vous trouverez les cabines correspondantes dans l'autorisation d'utilisation générale jointe au kit de montage ou à télécharger sur notre site internet. -
Page 47: Notice De Montage Du Siège Recaro
Avant de commencer le démontage du siège de série, assurez-vous que votre kit de montage contient toutes les pièces mentionnées ci-dessus. Remarque importante : Collez l'étiquette jointe au kit de montage dans la notice d'utilisation du siège RECARO afin d'avoir à l'avenir l'information correspondante à portée de main. RECARO Automotive Seating... -
Page 48: Outils De Montage
3.2 Outils de montage Cliquet Clé dynamométrique Embout Torx T 30 RECARO Automotive Seating Page 7... -
Page 49: Démonter Le Siège De Série
Démonter entièrement du véhicule le siège de série, rails de siège et boucle de la ceinture compris. Pour fixer le siège RECARO, utiliser impérativement les vis neuves fournies avec le siège. Réglage du volant - avant Réglage du siège de série - arrière, supérieur... - Page 50 2 Vis à l'arrière K0240 Desserrez les quatre vis (2) fixant le rail et retirez les vis. Reculez le siège dans la position maximum. Desserrez les deux vis (1) fixant le rail à l'avant et retirez les vis. RECARO Automotive Seating Page 9...
-
Page 51: Avertissement (Risque De Coincement)
14. Démontez le connecteur électrique (3) en exerçant une pression des deux côtés sur les ergots. 15. Ramenez le siège dans sa position initiale. Avertissement (risque de coincement) : Risque de coincement et de pincement de vos doigts lors de l'abaissement du siège. RECARO Automotive Seating Page 10... - Page 52 Risque de coincement et de pincement de vos doigts lors du déplacement des rails inférieurs. Attention : Veuillez noter que le siège peut peser jusqu'à 50 kg. Utilisez, le cas échéant, un outil de levage ou de manutention.. RECARO Automotive Seating Page 11...
-
Page 53: Montage Du Siège Recaro Dans La Cabine
3.4 Montage du siège RECARO dans la cabine Remarque importante : Effectuer le montage du faisceau de flexibles sur le siège RECARO à l'extérieur du véhicule. Enlevez d'abord le faisceau de flexibles (s'il existe) fixé au siège et éliminez-le. Posez pour cela le siège sur le dossier afin d'éviter d'endommager les caches et les poignées. - Page 54 Veillez à ne pas endommager le siège avec les outils de levage ou de manutention. Remarque importante : Pour faciliter l'installation, mettez le dossier dans sa position avancée maximale et posez les rails supérieur et inférieur devant dans l'alignement. Position centrale des rails 1 Rail supérieur 2 Rail inférieur RECARO Automotive Seating Page 13...
- Page 55 10. Relier les raccords du véhicule au raccord pneumatique (1) et au raccord électrique (2). 11. Activez l'abaissement rapide. 12. Démarrez le véhicule pour établir la pression d'air nécessaire à la réalisation des autres étapes de montage. RECARO Automotive Seating Page 14...
- Page 56 Réglage du volant - avant Réglage du siège RECARO - arrière, supérieur 13. Désactivez l'abaissement rapide. 14. Réglez la hauteur en position supérieure maximale. 1 Siège RECARO 2 Vis à l'avant - Kit de montage M8 3 Vis au centre - Kit de montage M8 4 Vis à...
- Page 57 En cas d'usage réitéré, le micro-encapsulage perd de son efficacité et ne peut plus garantir le freinage durable de l'assemblage par vis. 16. Avancez le siège RECARO dans sa position maximum. 17. Vissez à la main les quatre vis arrière (3, 4), provenant du kit de montage, dans l'adaptateur du siège.
-
Page 58: Après Le Montage
Dans le cas contraire, il faut vérifier le branchement électrique. 5. Schéma de câblage Siège Cabine bleu 24 V noir Signal rose d'avertissement boucle de ceinture GND avertissement noir/blanc boucle de ceinture RECARO Automotive Seating Page 17... -
Page 59: Autocollant Du Kraftfahrtbundesamt Siège Recaro
6. Autocollant du Kraftfahrtbundesamt Siège RECARO L'autocollant indiquant le type de siège et l'homologation de type prescrite par l'office Kraftfahrtbundesamt (autocollant KBA) se trouve sous le coussin de siège, sur la traverse, à droite dans le sens de la marche. Il faut démonter le coussin de siège pour contrôler l'autocollant. - Page 60 Insérer les glissières dans les guidages correspondants. Remarque importante : Faites faire de légers mouvements de va-et-vient et soulevez légèrement le coussin de siège pour contrôler que la glissière s'est complètement enclenchée dans les guidages. RECARO Automotive Seating Page 19...
- Page 61 Glissière 1 enclenchée dans le guidage 2 Faire glisser le coussin de siège dans la position longitudinale souhaitée. Remarque importante : Assurez-vous par des mouvements de va-et-vient du coussin de siège que celui-ci est complètement verrouillé. RECARO Automotive Seating Page 20...
- Page 182 SELLERIE MINOT Parc d'activités de la Bouchardière 230 rue Francis Perrin 37260 MONTS Téléphone: 06 51 55 10 37 Email: sellerieminot@gmail.com Internet: www.sellerieminot.com...