Table des Matières
Publicité
Les langues disponibles
Les langues disponibles
Liens rapides
ATTACH YOUR RECEIPT HERE
Serial Number
Questions, problems, missing parts? Before returning to your retailer, call our customer
service department at 1-877-447-4768, 8:30 a.m. – 4:30 p.m. CST, Monday – Friday, or
log on to customerservice@ghpgroupinc.com
70-10-117
Purchase Date
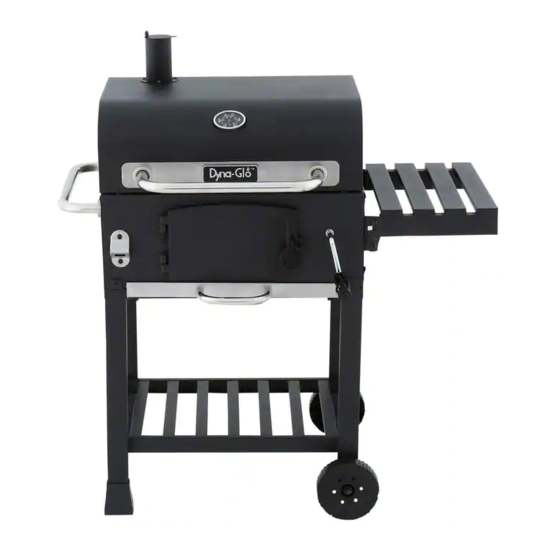
CHARCOAL GRILL
1
COMPACT
MODEL #DGD381BNC-D
Français p. 20
Español p. 39
Rev. 1/20/15
Publicité
Chapitres
Table des Matières

Manuels Connexes pour Dyna-Glo DGD381BNC-D


Sommaire des Matières pour Dyna-Glo DGD381BNC-D
- Page 1 COMPACT CHARCOAL GRILL MODEL #DGD381BNC-D Français p. 20 Español p. 39 ATTACH YOUR RECEIPT HERE Purchase Date Serial Number Questions, problems, missing parts? Before returning to your retailer, call our customer service department at 1-877-447-4768, 8:30 a.m. – 4:30 p.m. CST, Monday – Friday, or log on to customerservice@ghpgroupinc.com...
-
Page 2: Table Des Matières
TABLE OF CONTENTS Safety Information ....................... 2 Package Contents ....................... 4 Hardware Contents......................5 Preparation .......................... 5 Assembly Instructions......................6 Operating Instructions ....................... 15 Care and Maintenance ...................... 17 Warranty ..........................17 Replacement Parts List ..................... 18 SAFETY INFORMATION Please read and understand this entire manual before attempting to assemble, operate or install the product. - Page 3 SAFETY INFORMATION • Use caution when lifting and moving the unit to avoid back strain or back injury. Do not move the unit while it is in use. • DO NOT operate the unit near or under flammable or combustible materials such as decks, porches or carports.
-
Page 4: Package Contents
PACKAGE CONTENTS PART DESCRIPTION QUANTITY PART DESCRIPTION QUANTITY Smoke Stack Axle Charcoal Grill Lid Wheel Temperature Gauge Left Leg Assembly Lid & Side Handle Leg Base Left Panel of the Firebox Right Leg Assembly Front Panel of the Firebox Cart Base Back Panel of the Firebox Rear Cart Brace Right Panel of the Firebox... -
Page 5: Hardware Contents
HARDWARE CONTENTS M6x35 Screw M6x30 Screw M6 Nut M6x15 Screw M8 Nut Qty. 4 Qty. 5 Qty. 8 Qty. 45 Qty. 2 Cotter Pin M8 Washer M6 Shoulder Hinge Bolt Lid Pin Qty. 5 Qty. 2 Qty. 2 Qty. 2 Screw Qty. -
Page 6: Assembly Instructions
ASSEMBLY INSTRUCTIONS 1. Attach right panel of the firebox (H) to front pane of the firebox (F) and back panel of the fireb (G) using four M6x15 screw (AA). Hardware Used M6x15 Screw 2. Attach left panel of the firebox (E) to front panel of the firebox (F) and back panel of th firebox (G) using six M6x15 screw (AA) Hardware Used... - Page 7 ASSEMBLY INSTRUCTIONS 4. Attach Lid & side handle (D) to left panel of the firebox (E) using two M6x15 screw (AA) Hardware Used M6x15 Screw 5. Attach charcoal tray assembly (L) & threaded mount (M) to front panel of the firebox (F) using four M6x15 screw (AA).
- Page 8 ASSEMBLY INSTRUCTIONS 7. Attach bottle opener (J) to front panel of the firebox (F) using two M6x15 screw (AA) Hardware Used M6x15 Screw 8. Thread crank handle (N) into front panel of the firebox (F). Secure with one cotter pin (HH) Hardware Used Cotter Pin 9.
- Page 9 ASSEMBLY INSTRUCTIONS 10. Attach two leg base (S) to left leg assembly (R) using two M6x30 screw (CC). Hardware Used M6x30 Screw 11. Insert axle (P) into right leg assembly (T). Attach one wheel (Q) to each side of axle (P) using one M8 washer (FF), and one M8 nut (DD).
- Page 10 ASSEMBLY INSTRUCTIONS 13. Attach rear cart brace (V) to left leg assembly (R) and right leg assembly (T) using two M6x15 screw (AA) on each side. Hardware Used M6x15 Screw 14. Attach firebox assembly to the cart assembl . Secure firebox assembly on top of left leg assembly (R) and right leg assembly (T) using six M6x15 screw (AA).
- Page 11 ASSEMBLY INSTRUCTIONS 16. Attach side table (Z) to front support for side table (A1) and rear support for side table (B1) using four M6 shoulder screw (JJ). Hardware Used M6 Shoulder Screw 17. Attach lid & side handle (D) to charcoal grill lid (B) using two M6x15 screw (AA).
- Page 12 ASSEMBLY INSTRUCTIONS 19. Attach smoke stack (A) to charcoal grill lid (B) using three M6x15 screw (AA) and three M6 nut (EE). Hardware Used M6x15 Screw M6 Nut 20. Attach upper lid hinge (D1) to charcoal grill lid (B) using four M6x35 screw (BB). Hardware Used M6x35 Screw 21.
- Page 13 ASSEMBLY INSTRUCTIONS 22. Attach one M6x30 screw (CC) on each side of lid assembly (B). DO NOT fully tighten. Insert one end of warming rack (O) onto M6x30 screw (CC) and into the hole on lid assembly (B). Repeat for other side.
- Page 14 ASSEMBLY INSTRUCTIONS 25. Insert ash tray (X) into firebox assembl .
-
Page 15: Operating Instructions
OPERATING INSTRUCTIONS DANGER • CARBON MONOXIDE HAZARD. Burning charcoal inside can kill you. It gives off carbon monoxide, which has no odor. NEVER burn charcoal inside homes, vehicles or tents. This grill has an adjustable charcoal tray. By turning the crank handle, the charcoal tray can be raised or lowered to desired height. - Page 16 OPERATING INSTRUCTIONS Rust can appear on the inside of your grill. Maintaining a light coating of vegetable oil on interior surfaces will aid in the protection of your grill. Exterior surfaces of the grill may need occasional touch up. We recommend the use of commercially available black high temperature spray paint. NEVER PAINT THE INTERIOR OF THE UNIT! Operating The Front Door, Dampers, And Smoke Stack WARNING: These metal parts could be very hot while grilling.
-
Page 17: Care And Maintenance
This warranty gives you specific legal rights and you may also ave other legal rights which may vary from state to state. Manufactured by: GHP Group Inc. 6440 W. Howard St. Niles, IL, USA 60714-3302 Item Name: Compact Charcoal Grill Model #: DGD381BNC-D... -
Page 18: Replacement Parts List
REPLACEMENT PARTS LIST For replacement parts, call our customer service department at 1-877-447-4768, 8:30 a.m. – 4:30 p.m. CST, Monday – Friday. PART DESCRIPTION PART # Smoke stack 403-01002-05 Lid – Without smoke stack, temp gauge and lid handle 70-01-210 Temperature gauge 403-01002-03 Lid &... - Page 19 REPLACEMENT PARTS LIST Printed in China...
- Page 20 ROBUSTE BARBECUE AU CHARBON MODELE #DGD381BNC-D JOIGNEZ VOTRE REÇU ICI Numéro de série_____________________________ Date d’achat _____________________ Des questions, des problèmes, des pièces manquantes? Avant de retourner l’article au détaillant, appelez notre service à la clientèle au 1-877-447-4768, 08:30-16 heures 30, HNC, du lundi - vendredi ou par e-mail à...
-
Page 21: Consignes De Sécurité
TABLE DES MATIÈRES Consignes de sécurité ........................ 21 Contenu de l’emballage ......................23 Quincaillerie incluse ........................24 Préparation ..........................24 Instructions pour l’assemblage ....................25 Mode d’emploi ..........................34 Entretien ............................36 Dépannage ..........................36 Liste des pièces de rechange ..................... 37 CONSIGNES DE SÉCURITÉ... -
Page 22: Proposition 65 De Californie
CONSIGNES DE SÉCURITÉ • Soyez prudent lorsque vous le levage et le déplacement de l'appareil pour éviter les maux de dos ou de blessures au dos. Ne déplacez pas l'appareil lorsqu'il est en cours d'utilisation. • Ne pas faire fonctionner l'appareil à proximité de matériaux inflammables ou combustibles ou sous tel que les terrasses, les vérandas ou abris d'auto. -
Page 23: Contenu De L'emballage
CONTENU DE L’EMBALLAGE PIÈCE DESCRIPTION QTÉ PIÈCE DESCRIPTION QTÉ L’indicateur de température L’axe de roue B-B-Q au charbon couvercle Roue Indicateur de température Gauche assemblée pied Couvercle et poignée latérale Pied base Panneau de gauche de la B-B-Q Droit assemblée pied Panneau avant de la B-B-Q Panier base Panneau arrière de la B-B-Q... -
Page 24: Quincaillerie Incluse
QUINCAILLERIE INCLUSE (grandeur réelle) Vis M6 Vis M6 Vis M6 Ecrou M6 Ecrou M8 de 30 mm Qté. 5 de 35 mm Qté. 2 de 15 mm Qté. 8 Qté. 4 Qté. 45 Charnière Pin Rondelle de M8 Boulon à Boulon Couvercle Pin Qté. -
Page 25: Instructions Pour L'assemblage
INSTRUCTIONS POUR L’ASSEMBLAGE 1. Fixez le panneau droit du B-B-Q (H) au panneau frontal du B-B-Q (F) et au panneau arrière du B-B-Q (G). Utilisez 4 vis M6x15 (AA). Quincaillerie utilisée Vis M6 de 15 mm 2. Fixez le panneau gauche du B-B-Q (E) au panneau frontal du B-B-Q (F) et au panneau arrière du B-B-Q (G). - Page 26 INSTRUCTIONS POUR L’ASSEMBLAGE 4. Fixez le couvercle et la poignée latérale (D) au panneau gauche du B-B-Q (E). Utilisez 2 vis M6x15 (AA). Quincaillerie utilisée Vis M6 de 15 mm 5. Fixez le plateau de charbon de bois (L) et le montage fileté...
- Page 27 INSTRUCTIONS POUR L’ASSEMBLAGE 7. Fixez l’ouvre-bouteille (J) au panneau frontal du B-B-Q (F). Utilisez 2 vis M6x15 (AA). Quincaillerie utilisée Vis M6 de 15 mm 8. Insérez la manivelle (N) en la tournant dans le panneau frontal du B-B-Q (F). Faites tenir avec 1 goupille fendue (HH).
- Page 28 INSTRUCTIONS POUR L’ASSEMBLAGE 10. Fixez 2 embouts de patte (S) à l’assemblage de pattes gauches (R). Utilisez 2 vis M6x30 (CC). Quincaillerie utilisée Vis M6 de 30 mm 11. Insérez l’axe de roue (P) dans les roues (T). Fixez une roue (Q) à chaque extrémité de l’axe de roue (P).
- Page 29 INSTRUCTIONS POUR L’ASSEMBLAGE 13. Fixez le support arrière du charriot (V) au montant des pattes gauches (R) et au montant des pattes droites (T). Utilisez 2 vis M6x15 (AA) à chaque côté. Quincaillerie utilisée Vis M6 de 15 mm 14. Installez le B-B-Q au chariot. Fixez le B-B-Q sur le dessus des pattes gauches (R) et des pattes droites (T).
- Page 30 INSTRUCTIONS POUR L’ASSEMBLAGE 16. Fixez la tablette latérale (Z) au support frontal de la tablette latérale (A1) et au support arrière de la tablette latérale (B1). Utilisez 4 vis à épaulement M6 (JJ). Quincaillerie utilisée Boulon à épaulement M6 17. Fixez le couvercle et la poignée latérale (D) au couvercle du B-B-Q au charbon de bois (B).
- Page 31 INSTRUCTIONS POUR L’ASSEMBLAGE 19. Fixez la cheminée (A) au couvercle du B-B-Q au charbon de bois (B). Utilisez 3 vis M6x15 (AA) et 3 écrous M6 (EE). Quincaillerie utilisée Vis M6 de 15 mm Ecrou M6 20. Fixez les charnières supérieures du couvercle (D1) au couvercle du B-B-Q au charbon de bois (B).
- Page 32 INSTRUCTIONS POUR L’ASSEMBLAGE 22. Insérez 1 vis M6x30 (CC) dans chaque côté du couvercle (B). NE SERREZ PAS complètement. Insérez une extrémité de la grille de réchauffement (O) dans la vis M6x30 (CC) et dans le trou du couvercle (B). Faites la même avec l’autre côté. Serrez complètement les vis M6x30 (CC) de chaque côté...
- Page 33 INSTRUCTIONS POUR L’ASSEMBLAGE 25. Insérez le plateau à cendres (X) dans le B-B-Q.
-
Page 34: Mode D'emploi
MODE D’EMPLOI DANGER • DANGER MONOXYDE DE CARBONE. Faire brûler du charbon à l’intérieur peut vous tuer. Les émissions de monoxyde de carbone qui s’y dégage n’ont pas d’odeur. Ne faites JAMAIS brûler du charbon dans une maison, un véhicule ou une tente. Il y a un plateau à... - Page 35 MODE D’EMPLOI Des traces de rouille peuvent apparaître à l’intérieur du barbecue. Une fine couche d’huile végétale à l’intérieur du barbecue protègera votre barbecue. Il faudra peut-être apporter des retouches sur les surfaces extérieures du barbecue. Nous vous recommandons d’utiliser de la peinture haute température en vaporisateur.
-
Page 36: Entretien
à vous. Cette garantie vous donne des droits légaux spécifiques et vou pouvez avoir d'autres droits légaux qui peuvent varier également d'un État à État. Fabriqué par: GHP Group Inc. 6440 W. Howard St. Niles, IL, USA 60714-3302 Nom d'article: ROBUSTE BARBECUE AU CHARBON Modèle #: DGD381BNC-D... -
Page 37: Liste Des Pièces De Rechange
LISTE DES PIÈCES DE RECHANGE Pour les pièces détachées, appelez notre service à la clientèle au 1-877-447-4768, 8 heures 30-16h30, HNC, du lundi - vendredi. PART DESCRIPTION PART # Pile de fumée 403-01002-05 Couvercle - Sans pile de fumée, jauge de température et poignée du couvercle 70-01-210 Indicateur de température 403-01002-03... - Page 38 LISTE DES PIÈCES DE RECHANGE Imprimé en China...
- Page 39 PARRILLA A CARBÓN PARA TRABAJO PESADO MODELO #DGD381BNC-D ADJUNTE SU RECIBO AQUÍ Número de serie _______________________ Fecha de compra __________________ ¿Preguntas, problemas, piezas faltantes? Antes de volver a la tienda, llame a nuestro Departamento de Servicio al Cliente al 1-877-447-4768, de 8:30 am - 4:30 pm, hora central, de lunes - viernes o envíe un correo electrónico a customerservice@ghpgroupinc.com.
- Page 40 INDICE Informacion de seguridad ......................40 Contenido del paquete ....................... 42 Aditamentos ..........................43 Preparacion ..........................43 Instrucciones de ensamblaje ..................... 44 Instrucciones de funcionamiento ....................53 Cuidado y mantenimiento ......................55 Garantla ............................55 Lista de piezas de repuesto ....................... 56 INFORMACION DE SEGURIDAD Lea y comprenda completamente este manual antes de intentar ensamblar, usar o instalar el producto.
-
Page 41: Informacion De Seguridad
INFORMACION DE SEGURIDAD • Tenga cuidado al levantar o mover el aparato para evitar lesiones en la espalda tensión o hacia atrás. No mueva la unidad mientras esté en uso. • NO utilice el aparato cerca de materiales inflamables o combustibles o bajo Tales como terrazas, porches o cocheras. -
Page 42: Contenido Del Paquete
CONTENIDO DEL PAQUETE PIEZA DESCRIPCIÓN CANT. PIEZA DESCRIPCIÓN CANT. Chimenea de humo Parrilla de carbón Rueda Medidor de temperatura Izquierda asamblea pierna Tapa y lado de la manija Pata de la Base Panel izquierdo del combustión Derecho Asamblea Pierna Panel frontal del c aja combustión Cesta base Panel posterior del caja combustión Cesta brace trasero... -
Page 43: Preparacion
CONTENIDO DE HARDWARE (muestra en tamaño real) Perno Perno Perno M6 Tuerca M8 Tuerca M6 x 30 M6 x 35 Cant. 5 M6 x 15 Cant. 2 Cant. 4 Cant. 8 Cant. 45 Pasador M6 Tornillo Arandela de M8 Perno de la Pin Tapa de hombro Bisagra... -
Page 44: Instrucciones De Ensamblaje
INSTRUCCIONES DE ENSAMBLAJE 1. Fije el panel derecho de la cámara de combustión (H) en el panel frontal de la cámara de combustión(F) y el panel posterior de la cámara de combustión (G) con cuatro tornillos M6x15 (AA). Aditamentos utilizados Perno M6 x 15 2. - Page 45 INSTRUCCIONES DE ENSAMBLAJE 4. Fije la tapa del lado del agarrador (D) al panel izquierdo de la cámara de combustión (E) Utilizan do dos tornillos M6x15 (AA). Aditamentos utilizados Perno M6 x 15 5. Fije el conjunto de bandeja de acceso al carbón (L) y montaje roscado (M) al panel frontal de la cámara de combustión (F) Utilizando cuatro tornillos M6x15 (AA).
- Page 46 INSTRUCCIONES DE ENSAMBLAJE 7. Fije el abrebotellas (J) en el panel frontal de la cámara de combustión(F) Utilizando dos tornillos M6x15 (AA). Aditamentos utilizados Perno M6 x 15 8. La Manivela de rosca (N) insértela en el panel frontal de la cámara de combustión (F). Fíjela con una chaveta (HH) Aditamentos utilizados Pasador...
- Page 47 INSTRUCCIONES DE ENSAMBLAJE 10. Adjuntar dos bases pierna (S) para montaje de la pierna izquierda (R) utilizando dos tornillos M6x30 (CC). Aditamentos utilizados Perno M6 x 30 11. Inserte el eje (P) en el panel de la pata derecha (T). Adjuntar una rueda (Q) a cada lado del eje (P) utilizando una arandela M8 (FF), y una tuerca M8 (DD).
- Page 48 INSTRUCCIONES DE ENSAMBLAJE 13. Fije el tirante posterior del carrito (V) para ensamblar la pata izquierda (R) y el conjunto de la pierna derecha (T) utilizando dos M6x15 tornillo (AA) en cada lado. Aditamentos utilizados Perno M6 x 15 14. Fije el conjunto de la cámara de combustión al ensamble del carrito.
- Page 49 INSTRUCCIONES DE ENSAMBLAJE 16. Fije la mesa auxiliar (Z) para soporte frontal para mesa auxiliar (A1) y el apoyo posterior para mesa auxiliar (B1) con cuatro tornillos M6 hombro (JJ). Aditamentos utilizados M6 Tornillo de Hombro 17. Coloque la tapa al lado de la agarradera(D) de tapa de la parrilla de carbón (B) utilizando dos tornillos M6x15 (AA).
- Page 50 INSTRUCCIONES DE ENSAMBLAJE 19. Coloque la chimenea de humo(A) a la tapa de la parrilla de carbón (B) con tres tornillos M6x15 (AA) y tres tuercas M6. Aditamentos utilizados Perno M6 x 15 M6 Tuerca 20. Fije la bisagra de la tapa superior (D1) para la tapa de la parrilla de carbón (B) con cuatro tornillos M6x35 (BB).
- Page 51 INSTRUCCIONES DE ENSAMBLAJE 22. Fije un tornillo M6x30 (CC) en cada lado del panel de la tapa (B). No apretar demasiado. Inserte uno en el extremo de la rejilla para calentar (O) sobre el tornillo M6x30 (CC) y dentro del orificio del panel de la tapa (B) Repita para el otro lado.
- Page 52 INSTRUCCIONES DE ENSAMBLAJE 25. Inserte cenicero (X) en el conjunto de la cámara de combustión.
-
Page 53: Instrucciones De Funcionamiento
INSTRUCCIONES DE FUNCIONAMIENTO PELIGRO • PELIGRO CON EL MONÓXIDO DE CARBONO. La combustión de carbón en recintos cerrados puede causarle la muerte. Dicha combustión produce monóxido de carbono, el cual no tiene olor. NUNCA queme carbón dentro de viviendas, vehículos o tiendas de campaña. Esta parrilla cuenta con una bandeja de carbón ajustable. - Page 54 INSTRUCCIONES DE FUNCIONAMIENTO 4. Cubra las superficies internas con aceite vegetal de cocina 5. Encienda las briquetas y gradúe la bandeja del carbón a media altura, girando la manivela correspondiente. 6. Mantenga la combustión durante unas dos horas, con la tapa cerrada y todos los amortiguadores abiertos a 1/4.
-
Page 55: Cuidado Y Mantenimiento
Esta garantía le otorga derechos legales específicos usted también puede tener otros derechos legales que pueden variar de estado a estado. Fabricado por: GHP Group Inc. 6440 W. Howard St. Niles, IL, USA 60714-3302 Nombre del Producto: PARRILLA A CARBÓN PARA TRABAJO PESADO Modelo #: DGD381BNC-D... -
Page 56: Lista De Piezas De Repuesto
LISTA DE PIEZAS DE REPUESTO Para obtener piezas de repuesto, llame a nuestro Departamento de Servicio al Cliente al 1-877-447-4768, de 8:30 am - 4:30 pm, hora central, de lunes - viernes. REF. DESCRIPCIÓN PIEZA # Pila de humo 403-01002-05 Tapa - Sin pila de humo, indicador de temperatura y el mango de la tapa 70-01-210 Indicador de temperatura... - Page 57 LISTA DE PIEZAS DE REPUESTO Impreso en China...