Celestron Astromaster 90 AZ Mode D'emploi
Télescope réfracteur de 90 mm
Masquer les pouces
Voir aussi pour Astromaster 90 AZ:
- Mode d'emploi (80 pages) ,
- Guide de l'utilisateur (25 pages) ,
- Guide de démarrage rapide (10 pages)

Manuels Connexes pour Celestron Astromaster 90 AZ


Sommaire des Matières pour Celestron Astromaster 90 AZ
- Page 1 T E L E S C O P E 9 0 A Z 90 M M REFRACTO R E NG LISH INSTRUCTION MANUAL 22069 AstroMaster 90AZ...
-
Page 3: Table Des Matières
TABLE OF CONTENTS INTRODUCTION Parts List . . . . . . . . . . . . . . . . . . . . . . . . . . . . . . . . . . . . . . . . . . . . . . . . . . . . . . . . . . . . 6 ASSEMBLY Setting up the Tripod . - Page 4 ENGLISH...
-
Page 5: Introduction
In addition, your AstroMaster telescope is ideal for terrestrial observations which will open your eyes with superb high power viewing . AstroMaster telescopes carry a two year limited warranty . For details see our website at www .celestron .com Some of the many standard features of the AstroMaster include: •... -
Page 6: Parts List
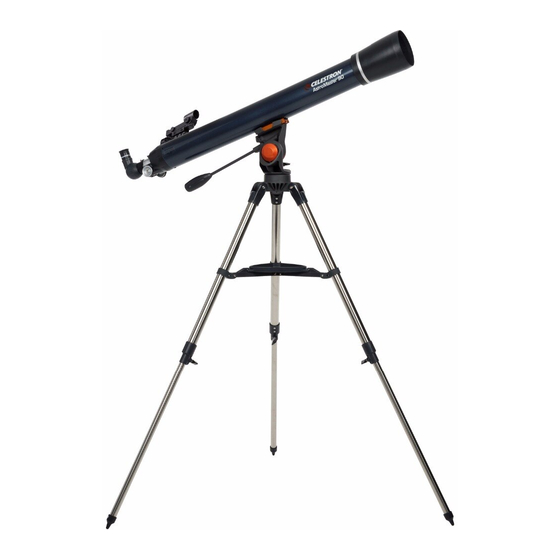
PARTS LIST Figure 1-2 Telescope Tube Accessory Tray Star Pointer Finderscope Tripod Leg Clamp Eyepiece Objective Lens Diagonal Dovetail Mounting Bracket Focus Knob Azimuth Tension Knob Pan Handle Smartphone Adapter Tripod ENGLISH... -
Page 7: Assembly
ASSEMBLY This section covers the assembly instructions for your AstroMaster telescope . Your telescope should be set up indoor the first time so that it is easy to identify the various parts and familiarize yourself with the correct assembly procedure before attempting it outdoor . -
Page 8: Moving The Telescope Manually
MOVING THE TELESCOPE MANUALLY The AstroMaster Alt-Az mount is easy to move wherever you want to point it . The up and down (altitude) is controlled by the pan handle (Figure 2-10) . The side-to-side (azimuth) is controlled by the azimuth lock (Figure 2-9) . The pan handle and the azimuth lock are both loosened by turning the handle and lock counterclockwise . -
Page 9: Installing The Diagonal & Eyepieces
INSTALLING DIAGONAL & EYEPIECES The diagonal is a prism that diverts the light at a right angle to the light path of the refractor . This allows you to observe in a position that is more comfortable than if you looked straight through . This diagonal is an erect image model that corrects the image to be right side up and oriented correctly left-to-right which is much easier to use for terrestrial observing . -
Page 10: Battery Access Instructions
BATTERY ACCESS INSTRUCTIONS The StarPointer finderscope is powered by a long life 3V lithium battery (#CR2032) located directly under the StarPointer’s front end (Figure 2-15) . NOTE: Before using the StarPointer, remove the protective plastic cover over the battery . To access the battery compartment, turn the StarPointer upside down . -
Page 11: Your First Astronomical Observing Session
YOUR FIRST ASTRONOMICAL OBSERVING SESSION THE MOON Now you are ready to take your telescope out at night and do some real observing! Let’s start with the Moon . The Moon takes about one month go through a complete phase cycle, from new Moon to full Moon and back again . -
Page 12: Installing The Smartphone Adapter
Z axis knob to move closer or further away from the eyepiece until you have achieved your desired framing . Finally, adjust the focus using the focuser on your optics and snap the image . For more tips and tricks, visit celestron .com/blogs/knowledgebase/smartphone-adapter-tips ENGLISH... -
Page 13: Calculating Magnification
CALCULATING MAGNIFICATION You can change the power of your telescope just by changing the eyepiece (ocular) . To determine the magnification of your telescope, simply divide the focal length of the telescope by the focal length of the eyepiece used . In equation format, the formula looks like this: Focal Length of Telescope (mm) Magnification = ______________________________... -
Page 14: Seeing Conditions
• Hazy skies, fog, and mist can also make it difficult to focus when viewing terrestrially . The amount of detail seen under these conditions is greatly reduced . • If you wear corrective lenses (specifically glasses), you may want to remove them when observing with an eyepiece attached to the telescope . -
Page 15: Telescope Maintenance
. Internal adjustments and cleaning should be done only by the Celestron repair department . If your telescope is in need of internal cleaning, please call the factory for a return authorization number and price quote . -
Page 16: Astromaster Specifications
AstroMaster Specifications 22069 AM 90 AZ Optical Design Refractor Aperture 90 mm (3 .5”) Focal Length 1000 mm Focal Ratio f/11 .1 Secondary Mirror Obstruction -- Dia . - Area Optical Coatings Multi-coated Finderscope Star Pointer Diagonal 1 .25” Erect Image Eyepieces 1 .25”... -
Page 17: Recycling Batteries
RECYCLING BATTERIES Many old batteries end up in landfill, where they can leak harmful chemicals into the soil . You can help tackle this problem by recycling your batteries . Most supermarkets and shops that sell batteries now have collection bins for used batteries . Some town halls, libraries or schools may also set up collection points . -
Page 18: Notes
NOTES ENGLISH... - Page 19 NOTES ENGLISH...
- Page 20 This product is designed and intended for use by those 14 years of age and older . WARNING: This product contains a button battery . If swallowed, it could cause severe injury or death in just 2 hours . Seek medical attention immediately . © 2019 Celestron • All rights reserved celestron .com/pages/technical-support Telephone: 1(800) 421-9649 2835 Columbia Street •...
- Page 21 T É L E S C O P E 90AZ RÉFRACTEUR DE 90 MM FRANÇAIS MODE D'EMPLOI 22069 AstroMaster 90AZ...
- Page 23 TABLE DES MATIÈRES INTRODUCTION Liste des pièces . . . . . . . . . . . . . . . . . . . . . . . . . . . . . . . . . . . . . . . . . . . . . . . . . . . . . . . . 6 ASSEMBLAGE Installer le trépied .
- Page 24 FRANÇAIS...
-
Page 25: Introduction
AstroMaster est idéal pour les observations terrestres, et vous offrira des images agrandies de superbe qualité . Les télescopes AstroMaster sont accompagnés d'une garantie limitée de deux ans . Pour en savoir plus, visitez notre site Internet à l’adresse www .celestron .com Voici quelques fonctions standards parmi tant d’autres offertes par AstroMaster : •... -
Page 26: Liste Des Pièces
LISTE DES PIÈCES Figure 1-2 Tube du télescope Plateau à accessoires Chercheur StarPointer Pince d'extension de pied de trépied Oculaire Lentille de l’objectif Diagonale Barre de monture en queue d'aronde Molette de mise au point Molette de tension d'azimut Poignée d'orientation Adaptateur pour téléphone intelligent Trépied FRANÇAIS... -
Page 27: Assemblage
ASSEMBLAGE Cette section décrit les instructions d’assemblage de votre télescope AstroMaster . Nous vous conseillons de procéder à l’assemblage de votre télescope à l’intérieur la première fois, de manière à pouvoir aisément identifier ses composants variés et vous familiariser ainsi avec la méthode d’assemblage correcte, avant de l’effectuer en extérieur . Chaque AstroMaster est livré... -
Page 28: Orienter Le Télescope Manuellement
ORIENTER LE TÉLESCOPE MANUELLEMENT La monture altazimutale de l’AstroMaster peut être orientée aisément dans la direction de votre choix . L’orientation verticale (altitude) est contrôlée avec la poignée d'orientation (Figure 2-10) . L’orientation horizontale (azimut) est contrôlée avec le verrou d’azimut (Figure 2-9) . La poignée d'orientation et le verrou d’azimut sont tous deux desserrés en faisant tourner la poignée et verrouillés en la faisant tourner dans le sens inverse des aiguilles d'une montre . -
Page 29: Installer Le Renvoi Coudé Et Les Oculaires
INSTALLER LE RENVOI COUDÉ ET LES OCULAIRES Le renvoi coudé est un prisme qui redirige la lumière selon un angle droit par rapport au chemin pris par la lumière du réfracteur . Lors de l'observation du ciel, cela vous permet d'être installé plus confortablement que si vous deviez regarder directement dans l'axe du tube . -
Page 30: Instructions D'accès À La Pile
INSTRUCTIONS D’ACCÈS À LA PILE Le chercheur StarPointer est alimenté par une pile au lithium 3 V longue durée de vie (#CR2032), installée directement sous la partie avant du StarPointer (Figure 2-15) . NOTE : Avant d’utiliser le StarPointer, retirez le cache de protection en plastique de la pile . Pour accéder au compartiment de pile, retournez le StarPointer . -
Page 31: Votre Première Séance D'observation Astronomique
VOTRE PREMIÈRE SÉANCE D’OBSERVATION ASTRONOMIQUE LA LUNE Vous voilà fin prêt à sortir le télescope de nuit pour faire une vraie observation! Commençons avec la Lune . La Lune passe par toutes ses phases en un cycle d’environ un mois, de la nouvelle Lune à la pleine Lune, et inversement . -
Page 32: Installer L'adaptateur Pour Téléphone Intelligent
. Enfin, réglez la mise au point sur le système de mise au point de votre système optique et capturez votre cliché . Pour lire plus de conseils, visitez celestron .com/blogs/knowledgebase/smartphone-adapter-tips FRANÇAIS... -
Page 33: Calculer Le Grossissement
CALCULER LE GROSSISSEMENT Vous pouvez changer la puissance de votre télescope en changeant simplement l'oculaire . Pour déterminer le grossissement de votre télescope, divisez simplement la distance focale du télescope par la distance focale de l'oculaire utilisé . Sous forme d’équation, la formule est la suivante : Longueur de focale du télescope (mm) Grossissement = _________________________________... -
Page 34: Conditions D'observation
• Un ciel voilé, le brouillard et le brume peuvent rendre la mise au point difficile lors de l’observation terrestre . La quantité de détails visibles sous ces conditions est grandement réduite . • Si vous portez des lentilles correctrices (des lunettes plus spécialement), il est recommandé de les retirer si vous observez avec un oculaire inséré... -
Page 35: Maintenance Du Télescope
. Les réglages internes et le nettoyage ne devraient être effectués que par le service de réparation de Celestron . Si votre té- lescope a besoin d'un nettoyage interne, veuillez appeler l'usine pour obtenir un numéro d'autorisation de retour et un devis . -
Page 36: Caractéristiques Techniques De L'astromaster
Caractéristiques techniques de 22069 l’AstroMaster AM 90 AZ Type d’optique Réfracteur Ouverture 90 mm (3,5 po) Distance de focale 1000 mm Rapport focal f/11,1 Obstruction de miroir secondaire par région -- Dia . - surface Revêtements optiques Revêtement multiple Chercheur StarPointer Diagonale 3,18 cm (1,25 po) Renvoi coudé... -
Page 37: Recycler Les Piles
RECYCLER LES PILES Un grand nombre de piles usées se retrouvent à la décharge, où elles peuvent libérer des produits chimiques dangereux dans le sol . Vous pouvez participer à combattre ce problème en recyclant vos batteries . La majorité des supermarchés et des magasins qui vendent des piles disposent maintenant de points de collecte pour les piles usées . -
Page 38: Notes
NOTES FRANÇAIS... - Page 39 NOTES FRANÇAIS...
- Page 40 AVERTISSEMENT : Ce produit contient une pile-bouton . Si elle est avalée, elle peut causer des blessures sérieuses ou même la mort en seulement deux heures . Prenez contact avec un médecin immédiatement . © 2019 Celestron • Tous droits réservés . celestron .com/pages/technical-support Téléphone : 1(800) 421-9649...