Publicité
Les langues disponibles
Les langues disponibles
Liens rapides
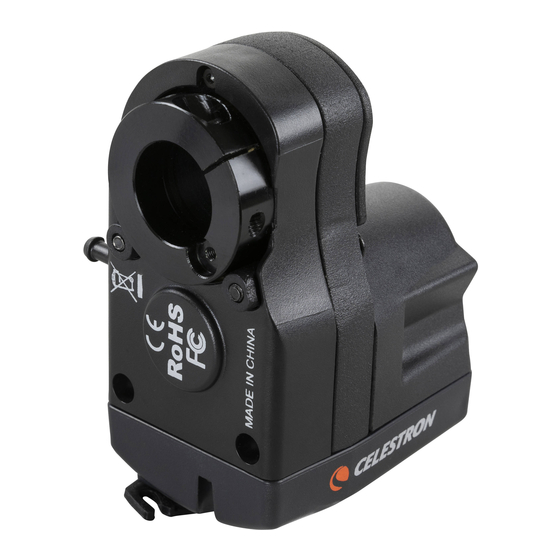
FOCUS MOTOR
#94155-A - Setup Guide
The focus motor is compatible with all Celestron SCTs from
6" to 14" in aperture that have been produced since the year
2006; it is not compatible with 5" SCTs or older models. It
is compatible with all EdgeHD telescopes. It is compatible
with the 8" and 36cm Rowe-Ackermann Schmidt Astrograph
(RASA) models, and the Celestron 7" Maksutov-Cassegrain.
The focus motor can also be used with the 11" RASA, but
if it has the FeatherTouch MicroFocuser installed, then it will
require the Focuser Retrofit Kit for the RASA 11 (#94255).
For 6" Schmidt-Cassegrain telescopes only, the Off-Axis
Guider (#93648) cannot be used when the focus motor is
installed due to mechanical interferences.
This setup guide will guide you through installation and basic
operation of the focus motor. The full instruction manual
can be downloaded from the focus motor webpage at
celestron.com. For the 36cm RASA, refer to the "Focus
Motor Installation for the RASA 36cm" instructions found on
the focus motor webpage at celestron.com.
Fig.1
PARTS LIST
1. Focus Motor Assembly
2. Cover Plate, 6"
through 9.25" Fig.1
3. Cover Plate, 11" & 14" Fig.2
4. Adapter Sleeve
5. Adapter Sleeve Screw
6. Set Screw
7. AUX Cable
8. Hex Key
9. Wrench
10. Screwdriver
Fig.2
WARNINGS
• Do not run the focus motor when the clamping screw
is not tightened, as the unthreaded screw can interfere
with the motor housing, which will prevent the motor from
turning. If the screw is unthreaded and interferes with
the motor housing, do not use the supplied wrench to
force the motor to turn. Doing so can damage the motor.
Instead, tighten the clamping screw, and the motor
should operate properly.
Unthreaded clamping screw can interfere with motor housing
• Never use the wrench to turn the motor when the motor
is powered. If you should ever need to use the wrench,
first disconnect power to the motor and confirm the
clamping screw is not interfering with the motor housing.
• Do not attempt to tighten the motor's clamping screw
onto the focuser knob until the motor is firmly connected
to the cover plate. Otherwise, the focus motor may
become tilted relative to the cover plate, which can
cause the focus motor to bind.
• If the motor does not turn the focuser after initial
installation, DO NOT USE THE WRENCH TO FORCE
THE MOTOR TO TURN! Likely an improper installation
is causing the focuser to bind and using the wrench
to turn the motor can damage the gears in the motor's
gearbox and break the motor. If the focus motor will still
not properly turn the focuser after reinstalling carefully
following the steps below, please contact Celestron
Technical Support at:
celestron.com/pages/technical-support
INSTALLATION
1. Remove the rubber cover from the telescope's focuser
knob. If you cannot simply pull it off, use a flat head
screwdriver or other tool to pry off the rubber cover.
2. Loosen and remove the 3x screws on the cover plate of
the focuser.
3. Carefully remove the cover plate.
4. Identify which one of the two supplied cover plates is for
your size optical tube as indicated in the parts list.
5. Orient the new orange cover plate for your size optical
tube as shown below.
6. Reuse the 3 screws previously removed to install the
new orange cover plate in place of the old one. We
recommend first placing the telescope tube in a vertical
position (i.e. with the front aperture facing the ground),
as this will prevent any sagging due to gravity before
the screws are tightened. Install the three cover plate
mounting screws loosely; do not fully tighten them.
7. While the cover plate can still move around slightly, make
sure the central hole in the cover plate is concentric with
the brass cylinder of the focuser knob.
Keep the brass cylinder of the focuser knob centered relative to
the inner diameter of the cover plate.
8. Hold the brass cylinder concentric with the cover plate
while tightening the three screws by a small amount
each. Follow the arrows in the illustration below for
the tightening sequence. This will require two or three
passes. DO NOT OVERTIGHTEN THE SCREWS!
This can cause the focuser bearing to bind. The screws
should be tight enough to prevent any lateral movement
of the focuser knob, but not so tight that it binds. The
cover plate must install flatly onto the machined surface in
the recess without tilting.
6" and 7"
Tighten a screw by a small amount, then move on to the next screw
9. Check to make sure the focuser knob cannot move when
applying side pressure to it. If the focuser knob can move,
then the brass cylinder will need to be re-centered (as in
step 7), and the screws will need to be tightened a little
more. This is an important step, as it will ensure the focus
motor will install straight and won't bind and become
inoperable. However, do not overtighten the screws!
10. Rotate the focuser knob a couple rotations in each
8" and 9.25"
direction to make sure it moves smoothly and does not
bind. If it does bind, then repeat all previous steps.
11. Check to see if the arrow indicator on the motor housing
is pointing within the "range" marking on the rear of
the motor coupling. If it isn't, rotate the motor coupling
using the supplied wrench as shown until the arrow
points within the range. This allows access to the motor
coupling's clamping screw after the motor is installed
on the focuser.
11" and
14"
Arrow Indicator
12. Loosen the focus motor's clamping screw a few turns
using the supplied 2.5mm hex key.
13. FOR 6" THROUGH 9.25" TELESCOPES ONLY:
Install the adapter sleeve into the focus motor. Use
the supplied adapter sleeve screw to secure the
sleeve.
Adapter
Sleeve
Range Marking
Clamping
Screw
Adapter Sleeve Screw
Publicité

Manuels Connexes pour Celestron 94155-A


Sommaire des Matières pour Celestron 94155-A
- Page 1 The The focus motor is compatible with all Celestron SCTs from 3. Carefully remove the cover plate. cover plate must install flatly onto the machined surface in 6”...
- Page 2 Again, If using a Celestron mount and plugged into an AUX port, key. Do not tighten the set screw yet, only thread it in a first loosely connect the screws to the cover the focus motor can be controlled from the mount’s...
- Page 3 Le moteur de mise au point est compatible avec tous les de mise au point ne tourne toujours pas correctement SCT de Celestron d’une ouverture de 6" à 14" qui ont été après l’avoir réinstallé en suivant scrupuleusement produits entre 2006 et aujourd'hui. Il n'est pas compatible les étapes décrites ci-dessous, prenez contact avec...
- Page 4 Ne serrez pas excessivement les vis! CONTRÔLER LE MOTEUR DE MISE AU POINT AVEC UN CONTRÔLE À MAIN CELESTRON Si vous utilisez un monture Celestron et que vous avez branché le dispositif à un port AUX, alors le moteur de Vis de fixation mise au point peut être contrôlé...
- Page 5 Le moteur de mise au point peut également TEILELISTE Abb. 1 être contrôlé avec le programme PWI de Celestron. 1. Montage des Pour plus d'informations, téléchargez le mode d'emploi Fokussiermotors complet depuis la page du moteur de mise au point à...
- Page 6 (Schritt 15) oder Sie drehen die gesamte Abdeckplatte (Schritt 5). STROMVERSORGUNG DES FOKUSSIERMOTORS Es gibt drei Möglichkeiten, den Fokussiermotor mit Strom zu versorgen: 1. Verwenden eine Computermontierung Celestron. Verbinden AUX-Port Fokussiermotor über das mitgelieferte Kabel mit einem AUX-Port an der Halterung. Adapter-hülse 2. Verwenden Sie einen USB3-Anschluss oder einen Adapterhülse-Schraube...
- Page 7 Il motore per fuoco è compatibile con tutti gli SCT contattare l'assistenza tecnica Celestron all'indirizzo: COMPUTER Celestron da 6” a 14” di apertura che sono stati prodotti celestron.com/pages/technical-support Wenn Sie eine Celestron-Montierung verwenden und dal 2006; non è compatibile con SCT da 5” o modello INSTALLAZIONE diese an einen AUX-Anschluss anschließen, schließen...
- Page 8 6. Riutilizzare le 3 viti rimosse in precedenza per installare 16. Far scorrere il motore di messa a fuoco sulla manopola del focalizzatore fino a quando i due punti di attacco Marcatura intervallo la nuova piastra di copertura arancione al posto di sulla faccia del motore sono piatti contro la piastra di quella vecchia.
- Page 9 1219 encallada. Se si usa un supporto Celestron e si collega una porta AUX, il motore per fuoco può essere controllato dal ESPAÑOL controllo manuale del supporto. Può essere usato •...
- Page 10 14. SOLO PARA TELESCOPIOS DE 6” A 9,25”: Instale el tornillo en el agujero estriado de la abrazadera de fijación del motor de enfoque usando la llave hexagonal incluida. No apriete aún el tornillo, introdúzcalo solamente unas pocas vueltas. 6» y 7» Tornillo de fijación Apriete un tornillo ligeramente y pase al siguiente tornillo.
- Page 11 CONTROLAR EL MOTOR DE ENFOQUE CON hexagonal UN ORDENADOR Tornillo Tornillo Si usa un soporte Celestron conectado a un puerto AUX, conecte el controlador manual al ordenador con un cable cautivo cautivo USB A a mini B (no incluido). Un extremo del cable se conecta al puerto mini B USB de la parte inferior del mando manual, el otro extremo se conecta al ordenador.
- Page 12 celestron.com...