EuroLite LCD-4 MP/S Mode D'emploi
Masquer les pouces Voir aussi pour LCD-4 MP/S:

Publicité

Les langues disponibles

Les langues disponibles

Liens rapides

BEDIENUNGSANLEITUNG
LCD-4 MP/S
Dimmer controller
Für weiteren Gebrauch aufbewahren!
Keep this manual for future needs!
Gardez ce mode d'emploi pour des
utilisations ultérieures!
Guarde este manual para posteriores usos.
USER MANUAL
MODE D'EMPLOI
MANUAL DEL USUARIO
©
Copyright
Nachdruck verboten!
Reproduction prohibited!
Réproduction interdit!
Prohibida toda reproducción.

Publicité

Table des Matières
loading

Sommaire des Matières pour EuroLite LCD-4 MP/S

  • Page 1 BEDIENUNGSANLEITUNG USER MANUAL MODE D'EMPLOI MANUAL DEL USUARIO LCD-4 MP/S Dimmer controller © Für weiteren Gebrauch aufbewahren! Copyright Keep this manual for future needs! Nachdruck verboten! Gardez ce mode d’emploi pour des Reproduction prohibited! utilisations ultérieures! Réproduction interdit! Guarde este manual para posteriores usos.
  • Page 2: Table Des Matières

    MULTI-LANGUAGE-INSTRUCTIONS Inhaltsverzeichnis Table of contents Sommaire Contenido 1. EINFÜHRUNG ............................... 4 2. SICHERHEITSHINWEISE..........................4 3. BESTIMMUNGSGEMÄSSE VERWENDUNG ....................6 4. GERÄTEBESCHREIBUNG........................... 7 4.1 Features ..............................7 4.2 Geräteübersicht............................7 5. SETUP ................................8 5.1 Installation ..............................8 5.2 Musiksteuerung............................8 5.3 Anschluss ans Netz..........................
  • Page 3 You can find the latest update of this user manual in the Internet under: Vous pouvez trouvez la dernière version de ce mode d'emploi dans l'Internet sous: Vd. puede encontrar la versión más reciente de este manual en el Internet bajo: www.eurolite.de 3/36 00026201.DOC, Version 2.3...
  • Page 4: Einführung

    - sich die letzte Version der Anleitung im Internet herunter laden 1. EINFÜHRUNG Wir freuen uns, dass Sie sich für einen EUROLITE LCD-4 MP/S entschieden haben. Sie haben hiermit ein leistungsstarkes und vielseitiges Gerät erworben. Wenn Sie nachfolgende Hinweise beachten, sind wir sicher, dass Sie lange Zeit Freude an Ihrem Kauf haben werden.
  • Page 5 Das Gerät darf nicht in Betrieb genommen werden, nachdem es von einem kalten in einen warmen Raum gebracht wurde. Das dabei entstehende Kondenswasser kann unter Umständen Ihr Gerät zerstören. Lassen Sie das Gerät solange uneingeschaltet, bis es Zimmertemperatur erreicht hat! Bitte überprüfen Sie vor der ersten Inbetriebnahme, ob kein offensichtlicher Transportschaden vorliegt.
  • Page 6: Bestimmungsgemässe Verwendung

    3. BESTIMMUNGSGEMÄSSE VERWENDUNG Bei diesem Gerät handelt es sich um einen elektronischen Dimmer, mit dem sich andere Geräte wie Scheinwerfer in Diskotheken, auf Bühnen etc. dimmen lassen. Dieses Produkt ist für den Anschluss an 230 V, 50 Hz Wechselspannung zugelassen und wurde ausschließlich zur Verwendung in Innenräumen konzipiert.
  • Page 7: Gerätebeschreibung

    4. GERÄTEBESCHREIBUNG 4.1 Features 4-Kanal Lichtsteuerung 4 Kanäle • Fade Time-Fader mit LED zur Einstellung der Step-Geschwindigkeit • Master-Fader mit LED zur Einstellung des Gesamt-Ausgangspegels • Audio-Fader mit LED zur Einstellung der Musik-Empfindlichkeit • Flashtaster pro Kanal und Master-Flash (Full On-Taste) • LED-Anzeige aller Modi • 42 eingebaute Programme •...
  • Page 8: Setup

    5. SETUP 5.1 Installation Stellen Sie das Gerät auf einer ebenen Fläche auf oder installieren Sie es in Ihrem Rack. Rackinstallation: Dieses Gerät ist für ein 483-mm-Rack (19") vorgesehen. Bei dem Rack sollte es sich um ein „Double-Door-Rack“ handeln, an dem sich sowohl die Vorder- als auch die Rückseite öffnen lassen. Das Rackgehäuse sollte mit einem Lüfter versehen sein.
  • Page 9: Bedienung

    Diese Funktion ist für Theaterbühnen oder Beleuchtungsaufgaben auf Messeständen sehr sinnvoll. 6.2 Hold-Sound Modus Scheinwerfer als Lichtorgel: In diesem Modus arbeitet der LCD-4 MP/S wie eine Lichtorgel. Jedem Kanal ist eine bestimmte Frequenz zugeordnet. Die Scheinwerfer reagieren je nach Lautstärke des Musiksignals. Gleichzeitig können die Flashtasten manuell genutzt werden.
  • Page 10: Auto-Speed/Auto-Sound Modus

    Programmes ankommt. 6.5 Auto-Speed/Auto-Sound Modus Die Scheinwerfer durchlaufen alle Programme: Die Scheinwerfer durchlaufen nun alle 42 Programme des LCD-4 MP/S. Dieser Modus kann sound- oder speedgetaktet erfolgen. 1. Gerät einschalten 2. Mode Select Taste so oft drücken, bis die Auto Speed/Auto Sound LED leuchtet. Bei blinkender LED ist der Speed-Modus aktiviert und bei dauerhaft leuchtender LED ist der Sound-Modus aktiv.
  • Page 11: Sicherungswechsel

    Das Gerät sollte regelmäßig von Verunreinigungen wie Staub usw. gereinigt werden. Verwenden Sie zur Reinigung ein fusselfreies, angefeuchtetes Tuch. Auf keinen Fall Alkohol oder irgendwelche Lösungsmittel zur Reinigung verwenden! Im Geräteinneren befinden sich außer der Sicherung keine zu wartenden Teile. Wartungs- und Service- arbeiten sind ausschließlich dem autorisierten Fachhandel vorbehalten! Sicherungswechsel Wenn die Feinsicherung des Gerätes defekt ist, darf diese nur durch eine Sicherung gleichen Typs ersetzt...
  • Page 12: Technische Daten

    Schutzkontakt-Stecker, schlagfest, schw. Best.-Nr. 30236215 EUROLITE SB-46 Stromverteiler 15m+Multi Best.-Nr. 30248100 EUROLITE EC-610 Multikabel 10m, 6-polig Best.-Nr. 30247500 EUROLITE AB-410 Alu-Bar 1.5m 10pol IN Best.-Nr. 60003634 EUROLITE AB-46 Alu-Bar 1.5m 6-pol IN Best.-Nr. 60003641 EUROLITE AB-410X Alu-bar 1.5m IN/OUT Best.-Nr. 60003632 EUROLITE CLS-80 Fluter f.8xENH +6er Multi...
  • Page 13: Introduction

    - pass this manual on to every further owner or user of the product - download the latest version of the user manual from the Internet 1. INTRODUCTION Thank you for having chosen a EUROLITE LCD-4 MP/S. You will see you acquired a powerful and versatile device. Unpack your LCD-4 MP/S.
  • Page 14: Operating Determinations

    If the device has been exposed to drastic temperature fluctuation (e.g. after transportation), do not switch it on immediately. The arising condensation water might damage your device. Leave the device switched off until it has reached room temperature. Please make sure that there are no obvious transport damages. Should you notice any damages on the A/C connection cable or on the casing, do not take the device into operation and immediately consult your local dealer.
  • Page 15: Description

    Do not shake the device. Avoid brute force when installing or operating the device. When choosing the installation-spot, please make sure that the device is not exposed to extreme heat, moisture or dust. There should not be any cables lying around. You endanger your own and the safety of others! This device must never be operated or stockpiled in sourroundings where splash water, rain, moisture or fog may harm the device.
  • Page 16: Overview

    4.2 Overview Overview on the control elements 1) POWER SWITCH 2) KANAL-LEDs 3) CHANNEL FADERS 4) FLASH-BUTTONS 5) MODE LEDs 6) MODE SELECT-BUTTON 7) PROG SELECT-BUTTON 8) DISPLAY 9) FADE TIME-FADER 10) DIMMER 11) AUDIO-FADER 12) SPEED-FADER 13) STANDBY-BUTTON 14) FULL ON-BUTTON 15) TAP SYNC-BUTTON 5.
  • Page 17: Connection With The Mains

    (inductive). Please note that the maximum current of 16 A must never be exceeded. The occupation of the 6-pin industrial socket is: 6. OPERATION After you connected the device to the mains, the LCD-4 MP/S is ready for use. 6.1 Hold-Dimmer Mode Call spots manually: In the Hold Dimmer Mode, the connected spots can be called manually and be controlled via the channel faders.
  • Page 18: Prog-Sound Mode

    In this mode, the LCD-4 MP/S works as light organ. Every channel is assigned to a special frequency. The spots reacts in accordance to the music level. Additionally, the Flash-buttons can be used.. 1. Turn controller ON 2. Press Mode Select until Hold Sound LED is illuminated 3.
  • Page 19: Memory-Function

    6.6 Memory-function Function: programmng 1. Select Memory via the MODE SELECT button. 2. Press and hold the PROG SELECT-button and Stand By until the display shows "PA". The display shows "01". Now you can program the first step via the channelfaders and the master-fader ("DIMMER“). Save the step with the PROG SELECT-button and the display shows "02“.
  • Page 20: Technical Specifications

    No. 60003634 EUROLITE AB-46 Alu-Bar 1.5m 6-pin IN No. 60003641 EUROLITE AB-410X Alu-bar 1.5m IN/OUT No. 60003632 EUROLITE CLS-80 Multi pin for 8x ENH No. 41907050 PAR-64 Profi spot, with cable, alu No. 42100950 PAR-64 Profi spot, with cable, black No.
  • Page 21: Introduction

    - transmettre le mode d'emploi à un éventuel acheteur ou utilisateur de l'appareil - télécharger la version ultérieure du mode d'emploi d'Internet 1. INTRODUCTION Nous vous remercions d'avoir choisi un EUROLITE LCD-4 MP/S. Vous êtes en possession d'un appareil très performant. Sortez le LCD-4 MP/S de son emballage.
  • Page 22 L'appareil ne doiit pas être mis en service lorsqu'il à été transporté d'un endroit froid à un endroit chaud. Il se forme de la condensation qui pourrait endommager l'appareil. Laissez celui-ci atteindre la température ambiante avant de le mettre en service. Avant tout, assurez-vous que l'appareil n'a pas subi de dommages lors de son transport.
  • Page 23: Emploi Selon Les Prescriptions

    Ne jamais faire marcher sans surveillance. 3. EMPLOI SELON LES PRESCRIPTIONS Cet appareil est un dimmeur électronique pour dimmer autres appareils comme spots en discothèques, sur scènes etc. Cet appareil doit être connecté avec une tension alternative de 230 V, 50 Hz et a été conçu pour un usage dans des locaux clos.
  • Page 24: Aperçu De L'appareil

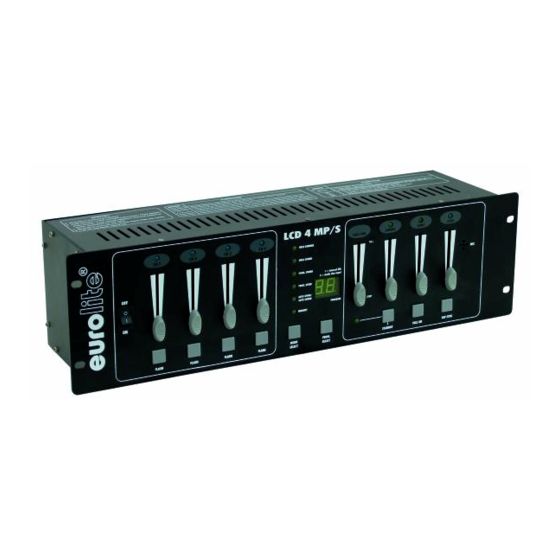
    microphone intégré • Entrée audio via douille cinch • Sorties grâce à 4 prises de sécurité ou 2 prise industriels • Dimensions 19" avec 3 unités 4.2 Aperçu de l'appareil Aperçu des éléments de manipulation 1) Interrupteur On/Off 2) Canaux-LEDs 3) CHANNEL FADERS 4) Touches FLASH 5) MODE LEDs...
  • Page 25: Alimentation

    16 A ne soit jamais dépassé. L'occupation des prises de 6 pôles est: 6. MANIEMENT Le LCD-4 MP/S est prêt à l'usage dès que vous le brancherez au secteur. 6.1 Mode Hold-Dimmer Appeler les spots manuellement: En mode Hold Dimmer, vous pouvez appeler les spots connectés manuellement et contrôler grâce aux...
  • Page 26: Mode Prog-Sound

    6.5 Mode Auto-Speed/Auto-Sound Contrôler les spots avec les programmes et par la musique ou la vitesse: En ce mode, tous les 42 programmes du LCD-4 MP/S peuvent être utilisés avec le fader Audio ou fader speed. Vous pouvez contrôler les spots manuellement grâce aux faders canaux, dimmerfader et touches Flash.
  • Page 27: Remplacer Le Fusible

    L'appareil doit être nettoyé régulièrement de contaminations comme de la poussière etc. Pour le nettoyage, utilisez un torchon non pelucheux humide. Ne pas utiliser un aucun cas de l’alcool ou des détergents pour le nettoyage. L'intérieur de l'appareil ne contient pas de parts nécessitant un entretien sauf le fusible. L'entretien et les réparations doivent être effectués uniquement par du personnel de service compétent! Remplacer le fusible Toujours remplacer un fusible par un autre de modèle identique.
  • Page 28: Caractéristiques Techniques

    EUROLITE AB-46 Alu-Bar 1.5m 6-pin IN N° d'art. 60003641 EUROLITE AB-410X Alu-Bar 1.5m IN/OUT N° d'art. 60003632 EUROLITE CLS-80 multi pin for 8x ENH N° d'art. 41907050 PAR-64 Profi spot, avec câblé, alu N° d'art. 42100950 PAR-64 Profi spot, avec câble, noir N°...
  • Page 29: Introducción

    -mantener el manual durante la vida del producto -pasar el manual a cada sucesivo poseedor o usuario del producto -descargar la última versión del manual del Internet 1. INTRODUCCIÓN Gracias por haber elegido un EUROLITE LCD-4 MP/S. Desembale su LCD-4 MP/S. 2. INSTRUCCIONES DE SEGURIDAD ¡PRECAUCIÓN! ¡Tenga cuidado cuando opere con este aparato.
  • Page 30: Instrucciones De Manejo

    Si el aparato ha estado expuesto a grandes cambios de temperatura (p.e. tras el transporte), no lo enchufe inmediatamente. La condensación de agua producida podría dañar su aparato. Deje el aparato desconec- tado hasta que llegue a la temperatura ambiente. Antes de la puesta en marcha inicial, por favor asegúrese de que no hay daños causados durante el transporte.
  • Page 31: Descripción Del Aparato

    humo, el aparato debe ser instalado con una distancia mínima de 0,5 métros a la máquina de humo. La sala debe sólo estar saturado con humo que una visibilidad de 10 metros está garantizado. La temperatura ambiente debe ser entre -5° C y +45° C. Mantenga el aparato alejado del sol directo (especialmente en el coche) y de fuentes de calor.
  • Page 32: Setup

    1) Interruptor On/Off 2) Canal-LEDs 3) CHANNEL FADERS 4) Teclas FLASH 5) MODE LEDs 6) Tecla MODE SELECT 7) Tecla PROG SELECT 8) DISPLAY 9) FADE TIME-FADER 10) DIMMER 11) AUDIO-FADER 12) SPEED-FADER 13) Tecla STANDBY 14) Tecla FULL ON 15) Tecla TAP SYNC 5.
  • Page 33: Alimentación

    La ocupación de los casquillos 6 polos es: 6. OPERACIÓN Tras la conexión del aparato a la red, el LCD-4 MP/S comienza a funcionar. 6.1 Modo Hold-Dimmer Llamar los spots manualmente: En el modo Hold Dimmer, Vd. puede llamar los spots conectados manualmente y controlar mediante los faders de canal.
  • Page 34: Modo Prog-Sound

    6.5 Modo Auto-Speed/Auto-Sound Spots juegan todos los programas: En este modo, todos los 42 programas del LCD-4 MP/S pueden ser utilizados mediante el speed fader o audio fader. Mediante los faders de canal, el dimmerfader y las teclas Flash, es posible manualmente controlar los spots.
  • Page 35: Reemplazar El Fusible

    Recomendamos una limpieza frecuente del aparato. Por favor utilice un paño suave que no suelte pelusa humedecido. ¡No utilizar nunca alcohol o disolventes! No hay piezas que necesiten de servicio dentro del aparato excepto el fusible. Las operaciones de mantenimiento y servicio deben ser llevadas a cabo únicamente por distribuidores autorizados. Reemplazar el fusible Reemplazar el fusible por un fusible del mismo tipo.
  • Page 36: Especificaciones Técnicas

    Referencia 60003634 EUROLITE AB-46 Alu-Bar 1.5m 6-pin IN Referencia 60003641 EUROLITE AB-410X Alu-Bar 1.5m IN/OUT Referencia 60003632 EUROLITE CLS-80 multi pin for 8x ENH Referencia 41907050 PAR-64 Profi spot, con cable, alu Referencia 42100950 PAR-64 Profi spot, con cable, negro Referencia 42100960 Nota: Todas las especificaciones dadas en este manual están sujetas a modificación sin previo...

Table des Matières