Table des Matières

Publicité

Les langues disponibles
  • FR

Les langues disponibles

  • FRANÇAIS, page 88

Liens rapides

INSTALLATION MANUAL
MANUEL D'INSTALLATION
NAVIGATION AV SYSTEM
SISTEMA DE NAVEGACIÓN AV
NAVIGATIONS-/AV-SYSTEM
SYSTEME DE NAVIGATION AV
SISTEMA DI NAVIGAZIONE AV
AV NAVIGATIESYSTEEM
AVIC-F20BT
AVIC-F920BT

Publicité

Table des Matières
loading

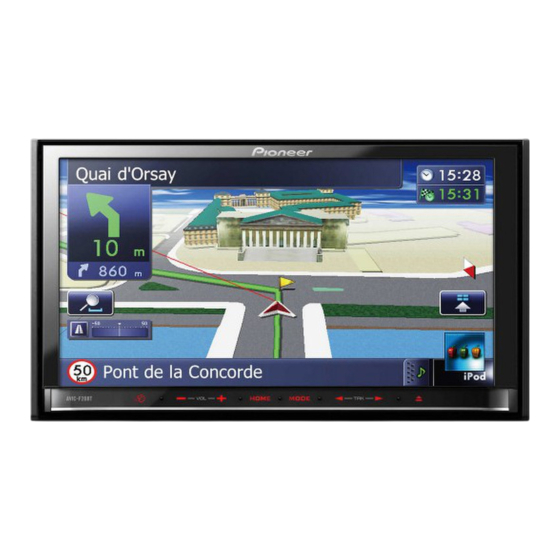
Sommaire des Matières pour Pioneer AVIC-F20BT

  • Page 1 INSTALLATION MANUAL MANUEL D’INSTALLATION NAVIGATION AV SYSTEM SISTEMA DE NAVEGACIÓN AV NAVIGATIONS-/AV-SYSTEM SYSTEME DE NAVIGATION AV SISTEMA DI NAVIGAZIONE AV AV NAVIGATIESYSTEEM AVIC-F20BT AVIC-F920BT...
  • Page 2: Table Des Matières

    Contents – For AVIC-F20BT users 21 IMPORTANT INFORMATION Installing this navigation system 21 ABOUT YOUR NEW NAVIGATION SYSTEM – Installation notes 21 AND THIS MANUAL 3 – Parts supplied 22 – Before installing this navigation IMPORTANT SAFEGUARDS unit 23 PLEASE READ ALL OF THESE –...
  • Page 3: Important Information

    Section IMPORTANT INFORMATION ABOUT YOUR NEW NAVIGATION SYSTEM AND THIS MANUAL ! The navigation features of this product (and rear view camera option if purchased) are intended solely to aid you in the opera- tion of your vehicle. It is not a substitute for your attentiveness, judgement and care when driving.
  • Page 4: Important Safeguards

    WARNING properly fastened. Pioneer does not recommend that you install 7 Certain country and government laws may your navigation system yourself. We recom- prohibit or restrict the placement and use of mend that only authorised Pioneer service this system in your vehicle.
  • Page 5: Connecting The System Precautions Before Connecting The System

    Section Connecting the System ! Do not shorten any leads. If you do, the Precautions before protection circuit (fuse holder, fuse resis- connecting the system tor or filter, etc.) may fail to work properly. ! Never feed power to other electronic pro- CAUTION ducts by cutting the insulation of the ! If you decide to perform the installation...
  • Page 6: To Prevent Damage

    Section Connecting the System ! Since a unique BPTL circuit is employed, To prevent damage do not directly earth the * side of the speaker lead or connect the * sides of the WARNING ! Use speakers over 50 W (output value) speaker leads together.
  • Page 7: Parts Supplied

    Section Connecting the System Parts supplied AVIC-F20BT AVIC-F920BT The navigation unit Power cord The navigation unit Power cord RDS-TMC tuner USB and mini-jack RDS-TMC tuner USB and mini-jack connector connector RCA connector GPS aerial RCA connector GPS aerial Microphone Microphone...
  • Page 8: Connecting The System

    Section Connecting the System Connecting the system 3.55 m The navigation unit Green IP-BUS connector (IP-BUS connector is available for AVIC-F20BT.) USB and mini-jack connector Aerial WIRED REMOTE INPUT jack Please see the Instruction Manual for the Wired Remote Control Adapters (sold separately).
  • Page 9 Section Connecting the System GPS aerial WARNING · To avoid the risk of accident and the potential violation of applicable laws, this product should never be used while the vehicle is being driven except for navigation purposes. And, also Rear Displays should not be in a location where it is a visible distraction to the driver.
  • Page 10: Connecting The Power Cord (1)

    Section Connecting the System Connecting the power cord (1) Notes Note Depending on the kind of vehicle, the function · When a subwoofer (*5) is connected to this of *2 and *4 may be different. In this case, be navigation system instead of a rear speaker, change sure to connect *1 to *4 and *3 to *2.
  • Page 11 Section Connecting the System The navigation unit Fuse (10 A) RCA connector Power cord 15 cm Yellow/black If you use an equipment with mute function, connect that equipment to the Audio Mute lead. If not, keep this lead free of any connections. Note Audio source will be set to mute or attenuate, while the following sounds will not be muted or attenuated.
  • Page 12: Connecting The Power Cord (2)

    Note The position of the speed detection circuit and the position of the handbrake switch vary depending on the vehicle model. For details, consult your authorised Pioneer dealer or an installation professional. Light green (PARKING BRAKE) Used to detect the ON/OFF status of the handbrake. This lead must be connected to the power supply side of the handbrake switch.
  • Page 13 Section Connecting the System The navigation unit Power cord Violet/white (REVERSE GEAR SIGNAL INPUT) This is connected so that the navigation system can detect whether the vehicle is moving forwards or backwards. Connect the violet/white lead to the lead whose voltage changes when the reverse gear is engaged.
  • Page 14: When Connecting To Separately Sold Power Amp

    30 cm (*1) 15 cm (*2) Front output (FRONT OUTPUT) The navigation unit 30 cm (*1) 15 cm (*2) (*1) (*2) Power cord AVIC-F20BT AVIC-F920BT Blue/white To system control terminal of the power amp (max. 300 mA 12 V DC). Engb...
  • Page 15 Section Connecting the System Power amp (sold separately) RCA cables (sold separately) Power amp (sold separately) Power amp (sold separately) System remote control Left Right   Front speaker Front speaker     Rear speaker Rear speaker  ...
  • Page 16: When Connecting A Rear View Camera

    REVERSE (R). Rear (*1) Brown AVIC-F20BT (REAR VIEW CAMERA IN) View mode also allows you to check what is (*2) behind you while driving.
  • Page 17: When Connecting The External Video Component

    Section Connecting the System When connecting the CAUTION external video component Be sure to use a CD-RM10 (sold separately) for wiring. If you use other cables, there is a case Using “AV1 Input” (AV1) where wiring position differs, images and sounds may be disturbed.
  • Page 18: Using "Av2 Input" (Av2)

    Section Connecting the System Using “AV2 Input” (AV2) When connecting the rear display The navigation unit The navigation unit (*1) AVIC-F20BT 20 cm (*1) This connection (*2) 23 cm (*2) is available for AVIC-F920BT 15 cm AVIC-F20BT. RCA connector Red, white...
  • Page 19: When Connecting The External Unit Featuring Video Source

    (VIDEO INPUT) To IP-BUS output RCA cable (sold separately) Pioneer external unit (sold separately) To video output ! It is necessary to set “AV2 Input” in “AV Settings” to “EXT” when connecting the ex- ternal unit. (For details, refer to Operation Manual.)
  • Page 20: Installation

    Section Installation Precautions before buttons or (iii) impair the driver’s ability to safely operate the vehicle. installation ! Install the navigation system between the driver’s seat and front passenger seat so CAUTION that it will not be hit by the driver or pas- ! Never install this product in places where, senger if the vehicle stops quickly.
  • Page 21: For Avic-F20Bt Users

    Section Installation ! Install the navigation unit horizontally on a For AVIC-F20BT users surface within 0 degrees to 30 degrees tol- ! Do not install this navigation system in a erance (within 5 degrees to the left or position where the opening of the LCD right).
  • Page 22: Parts Supplied

    Section Installation ! The cords must not cover up the area Parts supplied shown in the figure below. This is neces- Parts marked (*) are pre-installed. sary to allow the amps and navigation me- chanism to dissipate heat. The navigation unit Holder* Do not cover this area.
  • Page 23: Before Installing This Navigation Unit

    Section Installation Before installing this Dashboard navigation unit Remove the trim ring. Extend top and bottom of the trim ring out- wards to remove the trim ring. Holder Install this navigation unit and fasten the screws. Trim ring Dashboard Remove the holder. Loosen the screws (3 mm ×...
  • Page 24: Installation Using The Screw Holes On The Side Of The Navigation Unit

    Section Installation Installation using the screw holes If the pawl gets in the way, bend it down on the side of the navigation unit Factory radio mounting bracket Remove the side brackets. Side bracket Binding screw or flush surface screw Be sure to use the screws supplied Screw for fixing the side bracket...
  • Page 25: Installing The Gps Aerial

    Section Installation Installing the GPS aerial Parts supplied CAUTION Do not cut the GPS aerial lead to shorten it or use an extension to make it longer. Alter- ing the aerial cable could result in a short cir- GPS aerial Metal sheet cuit or malfunction and permanent damage to the navigation system.
  • Page 26: When Installing The Aerial Inside The Vehicle (On The Dashboard Or Rear Shelf)

    Section Installation When installing the aerial inside the vehicle (on the dashboard or rear shelf) WARNING Do not install the GPS aerial over any sen- sors or vents on the dashboard of the vehicle, as doing so may interfere with the proper functioning of such sensors or vents and may compromise the ability of the metal sheet under the GPS aerial to properly and se-...
  • Page 27: Installing The Microphone

    Section Installation Installing the microphone Attach the microphone clip to the sun visor. ! Install the microphone in a place where its Microphone clip direction and distance from the driver make it easiest to pick up the driver’s voice. ! Make sure to connect the microphone to the navigation system after the system is turned off.
  • Page 28: Installation On The Steering Column

    Section Installation Installation on the steering column Adjusting the microphone angle % Mount the microphone on the steering The microphone angle can be adjusted. column. Double-sided tape Install the microphone on the steering column, keeping it away from the steering wheel. Clamps Use separately sold clamps to secure the...
  • Page 29 INFORMACIÓN IMPORTANTE interferencias electromagnéticas 48 ACERCA DE SU NUEVO SISTEMA DE Antes de la instalación 49 NAVEGACIÓN Y ESTE MANUAL 30 – Para usuarios AVIC-F20BT 49 PRECAUCIONES IMPORTANTES Instalación de este sistema de LEA TODAS ESTAS INSTRUCCIONES navegación 49 – Notas acerca de la instalación 49 RELACIONADAS CON SU SISTEMA DE –...
  • Page 30: Información Importante

    Sección INFORMACIÓN IMPORTANTE ACERCA DE SU NUEVO SISTEMA DE NAVEGACIÓN Y ESTE MANUAL ! Las funciones de navegación de este pro- ducto (y de la opción de cámara para visión trasera si se ha adquirido) están pensadas únicamente para ayudarle en el manejo de su vehículo.
  • Page 31: Precauciones Importantes

    5 Al igual que con cualquier otro accesorio del ADVERTENCIA interior, el sistema de navegación nunca debe- Pioneer aconseja que no realice usted mismo rá distraerle ni poner en peligro el manejo se- la instalación del sistema de navegación. Re- guro de su vehículo.
  • Page 32: Conexión Del Sistema

    Sección Conexión del sistema Precauciones antes de el producto puede sufrir un deterioro per- manente. conectar el sistema ! No corte el cable de la antena GPS para reducir su longitud ni utilice una exten- PRECAUCIÓN sión para alargarlo. La alteración del cable ! Si decide efectuar la instalación usted de la antena puede causar un cortocircui- mismo y cuenta con formación especiali-...
  • Page 33: Para Impedir Daños

    Sección Conexión del sistema Para impedir daños color, es decir, el conector azul al puerto azul, el conector negro al puerto negro, etc. ! Consulte el manual del propietario para ob- ADVERTENCIA ! Utilice altavoces con capacidad superior a tener información sobre la conexión del 50 W (valor de salida) y entre 4 W a 8 W amplificador de potencia y de otras unida- des y, a continuación, realice las conexio-...
  • Page 34: Partes Suministradas

    Sección Conexión del sistema Partes suministradas AVIC-F20BT AVIC-F920BT La unidad de navega- Cable de alimentación La unidad de navega- Cable de alimentación ción ción Sintonizador RDS-TMC Conector USB y mini- Sintonizador RDS-TMC Conector USB y mini- jack jack Conector RCA...
  • Page 35 Sección Conexión del sistema...
  • Page 36: Conexión Del Sistema

    Conexión del sistema 3,55 m La unidad de navegación Verde Conector IP-BUS (El conector IP-BUS está disponible para AVIC-F20BT.) Conector USB y Toma de minijack WIRED REMOTE INPUT antena Consulte el Manual de instrucciones para los adaptadores de control remoto alámbrico (se venden por separado).
  • Page 37 Sección Conexión del sistema Antena GPS ADVERTENCIA · Para evitar el riesgo de accidente y la posible violación de las leyes aplicables, nunca se debe utilizar este producto mientras se conduce el vehículo, excepto para la finalidad de navegación. Además, no se debe posicionar la pantalla trasera donde la misma pueda presentar una distracción visible al conductor.
  • Page 38: Conexión Del Cable De Alimentación (1)

    Sección Conexión del sistema Conexión del cable de alimentación (1) Nota Notas Según cual sea el tipo de vehículo, la función · Al conectar a este sistema de navegación un de *2 y *4 puede variar. En tal caso, asegúrese subwoofer (*5) en lugar de un altavoz trasero, cambie el ajuste de salida trasera en Ajustes de conectar *1 a *4 y *3 a *2.
  • Page 39 Sección Conexión del sistema La unidad de navegación Fusible (10 A) Conector RCA Cable de 15 cm alimentación Amarillo/negro Si utiliza un equipo con una función de silencio, conecte ese equipo al cable de silencio de audio. Si no, deje ese cable sin conexión. Nota La fuente de audio se silenciará...
  • Page 40: Conexión Del Cable De Alimentación (2)

    La posición del circuito de detección de velocidad y la posición del interruptor de freno de aparcamiento dependen del modelo del vehículo. Para más información, pregunte a su distribuidor autorizado de Pioneer o a un instalador profesional. Verde claro (PARKING BRAKE) Se utiliza para detectar el estado ON/OFF del freno de mano.
  • Page 41 Sección Conexión del sistema La unidad de navegación Cable de alimentación Violeta/blanco (REVERSE GEAR SIGNAL INPUT) Ésta se conecta para que el sistema de navegación pueda detectar si el automóvil está moviéndose hacia adelante o hacia atrás. Conecte el cable violeta/ blanco al cable cuya tensión cambia cuando la palanca de cambios se pone en la posición de marcha atrás.
  • Page 42: Conexión Al Amplificador De Potencia Que Se Vende Por Separado

    15 cm (*2) Salida delantera (FRONT OUTPUT) La unidad de navegación 30 cm (*1) 15 cm (*2) Cable de (*1) (*2) alimentación AVIC-F20BT AVIC-F920BT Azul/blanco Al terminal de control del sistema del amplificador de potencia (máx. 300 mA 12 V CC).
  • Page 43 Sección Conexión del sistema Amplificador de potencia (en venta por separado) Cables RCA (en venta por separado) Amplificador de potencia (en venta por separado) Amplificador de potencia (en venta por separado) Control remoto de sistema Izquierda Derecha   Altavoz Altavoz delantero delantero...
  • Page 44: Conexión De Una Cámara Para Visión Trasera

    (*1) de vista trasera cuando se desplaza la palanca Marrón AVIC-F20BT (REAR VIEW CAMERA IN) de cambio al modo de marcha atrás (R). El (*2) modo Vista posterior también le permite veri-...
  • Page 45: Al Conectar El Componente De Vídeo Externo

    Sección Conexión del sistema Al conectar el componente PRECAUCIÓN de vídeo externo Utilice un CD-RM10 (en venta por separado) para realizar la conexión. Si utiliza otros cables, hay un Utilización de “Entrada AV1” (AV1) caso en la que la posición de cableado difiere, y las imágenes y los sonidos pueden perturbarse.
  • Page 46: Utilización De "Entrada Av2" (Av2)

    Sección Conexión del sistema Utilización de “Entrada AV2” (AV2) Al conectar la pantalla posterior La unidad de navegación La unidad de navegación (*1) AVIC-F20BT 20 cm (*1) Esta conexión está (*2) 23 cm (*2) disponible para AVIC-F920BT 15 cm AVIC-F20BT.
  • Page 47: Al Conectar La Unidad Externa Con Fuente De Vídeo

    IP-BUS Cable RCA (en venta por separado) Unidad externa de Pioneer (en venta por separado) A la salida de vídeo ! Al conectar la unidad externa, se debe ajustar “Entrada AV2” en “Conf. sistema AV” a “EXT”. (Para los detalles, consulte el...
  • Page 48: Instalación

    Sección Instalación Precauciones antes de la equipos de su vehículo funcionan correc- tamente. instalación ! No instale este sistema de navegación en puntos en los que pueda (i) dificultar la vi- PRECAUCIÓN sión del conductor, (ii) comprometer el ! Nunca instale este producto en lugares en funcionamiento de alguno de los sistemas los que, o de manera que: de seguridad del vehículo, como los air-...
  • Page 49: Antes De La Instalación

    Para usuarios AVIC-F20BT que se produzcan errores en la visualiza- ! No instale este sistema de navegación en ción de ubicación, y podría a su vez mer- un lugar en el que la apertura del panel mar el rendimiento de la pantalla.
  • Page 50: Partes Suministradas

    Sección Instalación ! Los cables no deben cubrir la zona que Partes suministradas aparece en la figura inferior. Ello es necesa- Las piezas marcadas con un asterisco (*) rio para que los amplificadores y el meca- están instaladas previamente. nismo de navegación puedan disipar el calor.
  • Page 51: Antes De Instalar Esta Unidad De Navegación

    Sección Instalación Antes de instalar esta unidad Para asegurar esta unidad de navegación, doble las pestañas 90 grados.) de navegación Salpicadero Extraiga el anillo embellecedor. Extienda la parte superior y la parte inferior del anillo embellecedor hacia fuera para ex- traer el anillo embellecedor.
  • Page 52: Instalación Utilizando Los Orificios Del Tornillo Al Lado De La Unidad De Navegación

    Sección Instalación Coloque el anillo embellecedor. Si el trinquete está en medio, dóblelo hacia abajo Soporte de montaje de radio de fábrica Anillo embellecedor Instalación utilizando los orificios del tornillo al lado de la unidad de navegación Retire los soportes laterales. Tornillo de unión o Soporte lateral tornillo de superficie...
  • Page 53: Instalación De La Antena Gps

    Sección Instalación Instalación de la antena GPS Partes suministradas PRECAUCIÓN No corte el cable de la antena GPS para redu- cir su longitud, ni utilice una extensión para alargarlo. La alteración del cable de la antena Antena GPS Hoja de metal puede provocar un cortocircuito o una avería y daños permanentes al sistema de navega- ción.
  • Page 54: Cuando Instale La Antena En El Interior Del Vehículo (En El Salpicadero O En La Bandeja Trasera)

    Sección Instalación Cuando instale la antena en el interior del vehículo (en el salpicadero o en la bandeja trasera) ADVERTENCIA No instale la antena GPS sobre sensores o aberturas de ventilación en el tablero de ins- trumentos del vehículo, ya que eso puede in- terferir con el funcionamiento apropiado de tales sensores o aberturas de ventilación y puede comprometer la habilidad de adheren-...
  • Page 55: Instalación Del Micrófono

    Sección Instalación Instalación del micrófono Notas ! Instale el micrófono de tal forma que esté ! Cuando monte la hoja de metal, no la corte correctamente orientado y a la distancia en piezas pequeñas. correcta del conductor y resulte fácil reco- ! Algunos modelos utilizan ventanas con un ger la voz del conductor.
  • Page 56: Instalación En La Columna De Dirección

    Sección Instalación Fije el clip del micrófono al parasol. Instalación en la columna de dirección Clip del micrófono % Monte el micrófono en la columna de dirección. Cinta de doble cara Instale el micrófono en la colum- na de dirección, manteniéndolo alejado del volante.
  • Page 57: Ajuste Del Ángulo Del Micrófono

    Sección Instalación Ajuste del ángulo del micrófono Se puede ajustar el angulo del microfono.
  • Page 58 Zur Vermeidung elektromagnetischen UND DIESE ANLEITUNG 59 Rauschens 78 WICHTIGE SICHERHEITSHINWEISE Vor dem Einbau 79 – Für Benutzer des AVIC-F20BT 79 BITTE LESEN SIE DIESE ANLEITUNG ZUM NAVIGATIONSSYSTEM AUFMERKSAM Einbau dieses Navigationssystems 79 – Hinweise zum Einbau 79 DURCH UND BEWAHREN SIE DIE –...
  • Page 59: Wichtige Information

    Abschnitt WICHTIGE INFORMATION ÜBER IHR NEUES NAVIGATIONSSYSTEM UND DIESE ANLEITUNG ! Die Eigenschaften dieses Produktes (und der Option Heckkamera, sofern erworben) dienen nur zu Ihrer Unterstützung beim Fahren Ihres Fahrzeugs. Es ist keinesfalls ein Ersatz für Ihre Aufmerksamkeit und Umsicht beim Fahren. ! Benutzen Sie dieses Navigationssystem nie, um im Notfall zu einem Krankenhaus, einer Polizeiwache oder ähnlichen Einrich-...
  • Page 60: Wichtige Sicherheitshinweise

    5 Wie alles andere Zubehör im Innenraum des nicht selbst einzubauen. Dieses Produkt soll- Fahrzeugs sollte das Navigationssystem Ihre te nur von autorisierten Pioneer-Mitarbeitern Aufmerksamkeit niemals von der sicheren Be- eingebaut werden, die entsprechend ausge- dienung Ihres Fahrzeugs ablenken. Falls...
  • Page 61: Anschluss Des Systems

    Abschnitt Anschluss des Systems Vor dem Anschließen des längerungskabel verlängern, da beides zu einem Kurzschluss oder einer Fehlfunk- Systems zu beachten tion führen kann. ! Kabel sollten grundsätzlich nicht gekürzt VORSICHT werden. Durch Kürzen der Kabel kann es ! Wenn Sie den Einbau selbst vornehmen eventuell zu einem Versagen der Sicher- möchten und über die dafür erforderlichen heitsschaltung kommen (Sicherungshal-...
  • Page 62: Zur Vermeidung Von Schäden

    Abschnitt Anschluss des Systems ! Um Kurzschlüsse im elektrischen System Zur Vermeidung von Schäden zu verhindern, ist unbedingt vor dem Ein- bau das Minus-Batteriekabel (–) abzutren- WARNUNG ! Verwenden Sie Lautsprecher mit mehr als nen. 50 W (Belastbarkeit) und 4 W bis 8 W (Impe- danz).
  • Page 63: Anmerkung Zum Blau/Weißen Kabel

    Abschnitt Anschluss des Systems ! Die Anschlussstecker auf die gleichfarbi- hohem Stromverbrauch und Fehlfunktio- gen Anschlüsse aufstecken (blauer Stecker nen führen. auf blauen Anschluss, schwarz auf schwarz usw.) ! Einzelheiten zum Anschluss des Leistungs- verstärkers und anderer Geräte siehe Be- nutzerhandbuch.
  • Page 64: Mitgelieferte Teile

    Abschnitt Anschluss des Systems Mitgelieferte Teile AVIC-F20BT AVIC-F920BT Die Navigationseinheit Netzkabel Die Navigationseinheit Netzkabel RDS-TMC-Tuner Steckverbinder zwi- RDS-TMC-Tuner Steckverbinder zwi- schen USB und Mini- schen USB und Mini- Buchse Buchse Cinch-Anschluss GPS-Antenne Cinch-Anschluss GPS-Antenne Mikrofon Mikrofon...
  • Page 65 Abschnitt Anschluss des Systems...
  • Page 66: Anschluss Des Systems

    Anschluss des Systems Anschluss des Systems 3,55 m Die Navigationseinheit Grün IP-BUS-Stecker (Der IP-BUS-Stecker steht nur für das Modell AVIC-F20BT zur Verfügung.) Steckverbinder zwischen Antennenbuchse USB und Mini-Buchse WIRED REMOTE INPUT Weitere Informationen finden sie in der Bedienungsanleitung für die Adapter zur Steuerung der verdrahteten Selbstbedienungen (getrennt erhältlich).
  • Page 67 Abschnitt Anschluss des Systems GPS-Antenne WARNUNG · Zur Vermeidung von Unfallgefahren und der möglichen Verletzung geltenden Rechts sollte dieses Produkt außer zu Navigationszwecken nie während der Fahrt benutzt werden. Die Heckanzeigen sollten so installiert sein, dass sie den Fahrer nicht ablenken können. ·...
  • Page 68: Stromkabel Anschließen (1)

    Abschnitt Anschluss des Systems Stromkabel anschließen (1) Hinweise Hinweis · Wenn anstelle von Hecklautsprechern ein Je nach Art des Fahrzeugs können die Subwoofer (*5) an dieses Navigationssystem Funktionen *2 und *4 anders sein. In diesem Fall muss *1 an *4 und *3 an *2 angeschlossen angeschlossen wird, ändern Sie die Einstellung des werden.
  • Page 69 Abschnitt Anschluss des Systems Die Navigationseinheit Sicherung (10 A) Cinch-Anschluss Netzkabel 15 cm Gelb/Schwarz Wenn Sie Geräte mit Stummschaltfunktion verwenden, schließen Sie diese Geräte an die Audio Mute-Leitung an. Wenn nicht, nehmen Sie keine Anschlüsse an die Audio Mute-Leitung vor. Hinweis Die Audioquelle wird stummgeschaltet oder leiser gestellt, während die folgenden Töne des Navigationssystems nicht stummgeschaltet oder...
  • Page 70: Stromkabel Anschließen (2)

    Die Position der Geschwindigkeits-Erkennungsschaltung (Tachosignal) und die Position des Schalters der Standbremse hängt vom Fahrzeug ab. Einzelheiten erfahren Sie bei Ihrem autorisierten Pioneer-Händler oder einem professionellen Einbaudienst. Hellgrün (PARKING BRAKE) Dieser Anschluss dient zur Erkennung des ON/OFF-Status der Handbremse. Das Kabel ist an die Stromversorgungsseite des Handbremsschalters anzuschließen.
  • Page 71 Abschnitt Anschluss des Systems Die Navigationseinheit Netzkabel Violett/Weiß (REVERSE GEAR SIGNAL INPUT) Über diesen Anschluss erkennt das Navigationssystem, ob der Wagen vorwärts oder rückwärts fährt. Die violett/weiße Leitung an die Leitung anklemmen, deren Spannung sich ändert, wenn der Rückwärtsgang eingestellt wird. Wenn der Sensor nicht richtig angeschlossen ist, erkennt er nicht genau, ob Ihr Fahrzeug vorwärts oder rückwärts fährt.
  • Page 72: Beim Anschluss An Den Separat Erhältlichen Leistungsverstärker

    Ausgang für hinteren Zusatzlautsprecher (REAR OUTPUT) 30 cm (*1) 15 cm (*2) Ausgang für vorderen Zusatzlautsprecher (FRONT OUTPUT) Die Navigationseinheit 30 cm (*1) 15 cm (*2) (*1) (*2) Netzkabel AVIC-F20BT AVIC-F920BT Blau/Weiß Zum Systemsteueranschluss des Leistungsverstärkers (max. 300 mA 12 V DC).
  • Page 73 Abschnitt Anschluss des Systems Leistungsverstärker (getrennt erhältlich) Cinch-Kabel (getrennt erhältlich) Leistungsverstärker (getrennt erhältlich) Leistungsverstärker (getrennt erhältlich) Systemfernbedienung Links Rechts   Lautsprecher Lautsprecher vorne vorne     Lautsprecher Lautsprecher hinten hinten     Subwoofer Subwoofer  ...
  • Page 74: Beim Anschluss Einer Heckkamera

    Heckkamera verwendet wird, kann das System so eingestellt werden, dass automatisch auf (*1) Heckansicht umgeschaltet wird, wenn Sie den Braun AVIC-F20BT (REAR VIEW CAMERA IN) Gangschalthebel in die Position REVERSE (*2) (R) bringen. Mit dem Modus Rückansicht kön- 20 cm (*1)
  • Page 75: Bei Anschluss Der Externen Videokomponente

    Abschnitt Anschluss des Systems Bei Anschluss der externen VORSICHT Videokomponente Verwenden Sie ein CD-RM10 (separat erhältlich) zur Verkabelung. Bei anderen Kabeln können un- Gebrauch von “AV1- Eingang” (AV1) terschiedliche Belegungen zu Bild- und Tonstö- rungen führen. Die Navigationseinheit L : Audio links (Weiß) R : Audio rechts (Rot) V : Video (Gelb) G : Masse...
  • Page 76: Gebrauch Von "Av2- Eingang" (Av2)

    Die Navigationseinheit Die Navigationseinheit (*1) Dieser Anschluss steht AVIC-F20BT 20 cm (*1) nur für das Modell 15 cm (*2) 23 cm (*2) AVIC-F20BT zur Verfügung. AVIC-F920BT Cinch-Anschluss Cinch-Anschluss Rot, weiß Rot, weiß (AUDIO INPUT) Gelb (REAR MONITOR Gelb (REAR MONITOR...
  • Page 77: Beim Anschluss Der Externen Einheit Mit Videoquelle

    Abschnitt Anschluss des Systems Beim Anschluss der externen Einheit mit Videoquelle p Dieser Anschluss steht beim AVIC-F20BT zur Verfügung. Die Navigationseinheit Blau Cinch-Anschluss 20 cm IP-BUS-Kabel (getrennt Schwarz erhältlich) Gelb (VIDEO INPUT) An IP-BUS- Ausgang Cinch-Kabel (getrennt Pioneer externe erhältlich) Einheit (getrennt erhältlich)
  • Page 78: Einbau

    Abschnitt Einbau ! Vergewissern Sie sich, dass sich die Vor der Installation zu Kabel nicht in der Tür oder im Sitzver- beachten stellmechanismus verfangen und dadurch einen Kurzschluss auslösen können. VORSICHT ! Vergewissern Sie sich nach dem Einbau ! Dieses Produkt niemals an folgenden des Navigationssystems, dass alle ande- Orten oder in folgender Weise einbauen: ren Vorrichtungen des Fahrzeugs ord-...
  • Page 79: Vor Dem Einbau

    System ordnungsgemäß arbeitet. leranz liegt, erhöht die Gefahr einer falschen Standortanzeige und einer ver- minderten Anzeigeleistung. Für Benutzer des AVIC-F20BT ! Installieren Sie dieses Navigationssystem nicht in einer Position, in der die Öffnung der LCD-Anzeige durch andere Objekte, wie beispielsweise dem Schalthebel, behin- dert werden.
  • Page 80: Mitgelieferte Teile

    Abschnitt Einbau ! Damit die bei Betrieb dieses Geräts entwik- Mitgelieferte Teile kelte Wärme richtig abgeleitet werdenkann, Mit einem (*) markierte Teile sind vorinstal- sorgen Sie beim Einbau dafür, dass ausrei- liert. chend Platz hinter der Rückwand bleibt, und wickeln Sie lockere Kabel so, dass die- sekeine Öffnungen blockieren können.
  • Page 81: Vor Der Installation Des Navigationsgerätes

    Abschnitt Einbau Vor der Installation des der Stärke des Armaturenbrettmaterials. (Sor- gen Sie durch Rückbiegen der oberen und un- Navigationsgerätes teren Haltelaschen für eine absolut feste Entfernen Sie den Abdeckring. Installation des Navigationsgerätes. Zum si- Ziehen Sie die obere und die untere Seite des cheren Fixieren des Gerätes biegen Sie die La- Abdeckrings nach außen, um den Abdeckring schen um 90 Grad zurück.)
  • Page 82: Installation Mit Hilfe Der Schraubenbohrungen An Der Seite Des Navigationsgerätes

    Abschnitt Einbau Bringen Sie den Abdeckring an. Falls die Sperre im Weg sein sollte, biegen Sie diese nach unten. Vorinstallierte Radio-Montagebügel Abdeckring Installation mit Hilfe der Schraubenbohrungen an der Seite des Navigationsgerätes Entfernen Sie die Seitenbügel. Seitenbügel Klemmschraube oder Senkschraube. Verwenden Sie in jedem Fall die mit dem Navigationssystem...
  • Page 83: Einbau Der Gps-Antenne

    Abschnitt Einbau Einbau der GPS-Antenne Mitgelieferte Teile VORSICHT Das GPS-Antennenkabel darf nicht verkürzt oder verlängert werden. Veränderungen am Antennenkabel können zu einem Kurz- GPS-Antenne Metallblech schluss oder einer Funktionsstörung und dauerhaften Beschädigung des Navigations- systems führen. Hinweise zur Befestigung ! Die Antenne ist auf einer ebenen Fläche zu befestigen, die für Funkwellen gut zugäng- lich sein sollte.
  • Page 84: Einbau Der Antenne Im Fahrzeuginnenraum (Auf Dem Armaturenbrett Oder Der Hutablage)

    Abschnitt Einbau Einbau der Antenne im Fahrzeuginnenraum (auf dem Armaturenbrett oder der Hutablage) WARNUNG Installieren Sie die GPS-Antenne nicht über Sensoren oder Öffnungen am Armaturen- brett des Fahrzeugs, da anderenfalls der sachgemäße Betrieb dieser Sensoren oder Öffnungen beeinträchtigt werden könnte. Außerdem könnte es in diesem Fall ggf.
  • Page 85: Einbau Des Mikrofons

    Abschnitt Einbau Einbau des Mikrofons Hinweise ! Bauen Sie das Mikrofon so ein, dass die ! Beim Einbau des Metallblechs keine ande- Richtung und der Abstand zum Fahrer ren Bauteile beschädigen. ideal sind, um die Stimme des Fahrers opti- ! Einige Modelle verwenden Glas, das Signa- mal zu empfangen.
  • Page 86: Montage Auf Der Lenksäule

    Abschnitt Einbau Befestigen Sie den Mikrofon-Clip an Montage auf der Lenksäule der Sonnenblende. % Montieren Sie den Mikrofon auf der Mikrofon-Clip Lenksäule. Doppelseitiges Klebeband Montieren Sie den Mikrofon auf der Lenksäule, aber halten Sie ihn weg vom Lenkrad. Kabelklemmen Das Mikrofonkabel mit ge- trennt erhaltlichen Kabel- klemmen im Fahrzeuginnenraum verle-...
  • Page 87: Anpassen Des Mikrofonwinkels

    Abschnitt Einbau Anpassen des Mikrofonwinkels Der Mikrofonwinkel kann eingestellt werden.
  • Page 88 A PROPOS DE VOTRE NOUVEAU SYSTEME électromagnétiques 106 DE NAVIGATION ET DE CE MANUEL 89 Avant de procéder à l’installation 107 – Pour les utilisateurs AVIC-F20BT 107 IMPORTANTES MESURES DE Installation de ce système de SECURITE navigation 107 VEUILLEZ LIRE TOUTES LES EXPLICATIONS –...
  • Page 89: Information Importante

    Section INFORMATION IMPORTANTE A PROPOS DE VOTRE NOUVEAU SYSTEME DE NAVIGATION ET DE CE MANUEL ! La fonction de navigation de ce produit (et la caméra de rétrovisée en option le cas échéant) est uniquement destinée à vous assister lors de la conduite de votre véhi- cule.
  • Page 90: Importantes Mesures De Securite

    à la sécurité de la uniquement à un personnel de service conduite. Si vous éprouvez des difficultés à Pioneer agréé, qui a été spécialement formé utiliser le système ou à lire l’écran, effectuez et est expérimenté en matière de systèmes les réglages nécessaires après vous être garé...
  • Page 91: Branchement Du Système

    Section Branchement du système Précautions à prendre avant modification pourrait provoquer un court- circuit ou un dysfonctionnement. de brancher le système ! Ne raccourcissez aucun fil conducteur. Vous risquez sinon de provoquer un dys- ATTENTION fonctionnement du circuit de protection ! Si vous décider de réaliser l’installation (porte-fusibles, résistance de fusible ou vous-même, et possédez une expérience...
  • Page 92: Pour Éviter Toute Détérioration

    Section Branchement du système ! Raccordez les connecteurs de même cou- Pour éviter toute leur au port de couleur correspondant, détérioration c’est-à-dire le connecteur bleu au port bleu, le noir au noir, etc. AVERTISSEMENT ! Pour raccorder l’amplificateur de puis- ! Utilisez des haut-parleur de plus de 50 W sance à...
  • Page 93: Pièces Fournies

    Section Branchement du système Pièces fournies AVIC-F20BT AVIC-F920BT Unité de navigation Cordon d’alimentation Unité de navigation Cordon d’alimentation Tuner RDS-TMC Connecteur USB et Tuner RDS-TMC Connecteur USB et mini prise mini prise Connecteur RCA Antenne GPS Connecteur RCA Antenne GPS...
  • Page 94: Branchement Du Système

    Branchement du système 3,55 m Unité de navigation Vert Connecteur IP-BUS (Le connecteur IP-BUS est disponible pour le AVIC-F20BT.) Connecteur USB et mini prise Prise WIRED REMOTE INPUT d’antenne Consultez le manuel d’utilisation pour plus de détails sur les adaptateurs de commande à...
  • Page 95 Section Branchement du système Antenne GPS AVERTISSEMENT · Pour éviter tout risque d’accident et de violation des lois en vigueur, ce produit ne doit jamais être utilisé pendant la conduite, hormis à des fins de navigation. De plus, les écrans arrière ne doivent pas se trouver à un endroit où ils risquent de détourner l’attention du conducteur.
  • Page 96: Branchement Du Cordon D'alimentation (1)

    Section Branchement du système Branchement du cordon d’alimentation (1) Remarques Remarque La fonction du *2 et du *4 peut différer en · Quand un haut-parleur d’extrêmes graves (*5) est fonction du type de véhicule. Dans ce cas, connecté à ce système de navigation à la place du assurez-vous que *1 est connecté...
  • Page 97 Section Branchement du système Unité de navigation Fusible (10 A) Connecteur RCA Cordon 15 cm d’alimentation Jaune/noir Si vous utilisez un équipement doté d’une fonction de sourdine, branchez-le au câble de mise en sourdine audio. Sinon, laissez libre le câble de mise en sourdine audio.
  • Page 98: Branchement Du Cordon D'alimentation (2)

    La position du circuit de détection de vitesse et la position du frein de stationnement peuvent varier en fonction du modèle du véhicule. Pour plus de détails, consultez votre revendeur Pioneer agréé ou un installateur professionnel. Vert clair (PARKING BRAKE) Utilisé...
  • Page 99 Section Branchement du système Unité de navigation Cordon d’alimentation Violet/blanc (REVERSE GEAR SIGNAL INPUT) Cette connexion est effectuée de sorte que le système de navigation puisse détecter si le véhicule avance ou recule. Raccordez le cordon violet/blanc au cordon dont la tension change quand le levier de vitesse est mis en marche arrière.
  • Page 100: Branchement D'un Amplificateur De

    30 cm (*1) 15 cm (*2) Sortie avant (FRONT OUTPUT) Unité de navigation 30 cm (*1) 15 cm (*2) (*1) (*2) Cordon d’alimentation AVIC-F20BT AVIC-F920BT Bleu/blanc A la borne de commande d’ensemble de l’amplificateur de puissance (max. 300 mA 12 V c.c.).
  • Page 101 Section Branchement du système Amplificateur de puissance (vendu séparément) Câble àfiches Cinch (RCA) (vendu séparément) Amplificateur de puissance (vendu séparément) Amplificateur de puissance (vendu séparément) Télécommande d’ensemble Gauche Droite   Haut-parleur Haut-parleur avant avant     Haut-parleur Haut-parleur arrière arrière ...
  • Page 102: Branchement D'une Caméra De Rétrovisée

    (*1) Marron AVIC-F20BT (REAR VIEW CAMERA IN) tesse est mis dans la position REVERSE (R). (*2) Le mode Vue Arrière vous permet aussi de vé-...
  • Page 103: Branchement D'un Appareil Vidéo Externe

    Section Branchement du système Branchement d’un appareil ATTENTION vidéo externe Veiller à utiliser un CD-RM10 (vendu séparément) pour le câblage. En cas d’utilisation d’autres câ- Utilisation de “Entrée AV1” (AV1) bles, il se peut que la position du câblage diffère, entraînant des troubles de l’image et du son.
  • Page 104: Utilisation De "Entrée Av2" (Av2)

    Unité de navigation Unité de navigation (*1) Cette connexion AVIC-F20BT 20 cm (*1) est disponible pour 15 cm (*2) 23 cm (*2) le AVIC-F20BT. AVIC-F920BT Connecteur RCA Connecteur RCA Rouge, blanc Rouge, blanc (AUDIO INPUT) Jaune Jaune (REAR MONITOR (VIDEO INPUT)
  • Page 105: Branchement De L'unité Externe Avec Source Vidéo

    Câble à fiches À la sortie Cinch (RCA) IP-BUS (vendu séparément) Unité externe Pioneer (vendue séparément) À la sortie vidéo ! Il est nécessaire de régler “Entrée AV2” dans “Paramètres système A/V” sur “EXT” lors de la connexion d’un appareil ex- terne.
  • Page 106: Installation

    Section Installation ! N’installez pas ce système de navigation Précautions à prendre à un endroit où il risque (i) d’entraver la vi- avant l’installation sibilité du conducteur, (ii) de réduire l’effi- cacité des systèmes de commande des ATTENTION fonctions de sécurité du véhicule, y ! Ne jamais installer ce produit à...
  • Page 107: Avant De Procéder À L'installation

    Pour les utilisateurs AVIC-F20BT duire les performances d’affichage. ! N’installez pas ce système de navigation à un endroit où l’ouverture du panneau LCD risque d’être entravée par des obstacles,...
  • Page 108: Pièces Fournies

    Section Installation ! Les câbles ne doivent pas traverser la zone Pièces fournies indiquée dans la figure ci-dessous, afin que Les pièces indiquées par un astérisque (*) la chaleur dégagée par les amplificateurs sont pré-installées. et le mécanisme de navigation puissent se dissiper la chaleur librement.
  • Page 109: Avant D'installer Cette Unité De Navigation

    Section Installation Avant d’installer cette unité de aussi solidement que possible en utilisant les languettes supérieures et inférieures. Pour navigation fixer l’unité de navigation, courbez les languet- Retirez l’anneau de garniture. tes de 90 degrés.) Étirez vers l’extérieur la partie supérieure et in- Tableau de bord férieure de l’anneau de garniture pour le reti- rer.
  • Page 110: Installation En Utilisant Les Trous De Vis Sur Les Côtés De Cette Unité De Navigation

    Section Installation Attacher l’anneau de garniture. Si le cliquet ressort, le courber Plaque de fixation de l’autoradio Anneau de garniture Installation en utilisant les trous de vis sur les côtés de cette unité de navigation Retirer les supports latéraux. Vis de pression ou vis à...
  • Page 111: Installation De L'antenne Gps

    Section Installation Installation de l’antenne GPS Pièces fournies ATTENTION Ne coupez pas le câble d’antenne GPS pour le raccourcir et n’utilisez pas d’extension pour le rallonger. Le fait d’intervenir sur le Antenne GPS Plaque métallique câble d’antenne risque d’entraîner un court- circuit ou un dysfonctionnement et d’endom- mager définitivement le système de naviga- tion.
  • Page 112: Installation De L'antenne Dans Le Véhicule (Sur Planche De Bord Ou Lunette Arrière)

    Section Installation Installation de l’antenne dans le véhicule (sur planche de bord ou lunette arrière) AVERTISSEMENT N'installez pas l'antenne GPS par-dessus un capteur ou une bouche d'air du tableau de bort du véhicule, car cela pourrait interférer avec la fonctionnement normal du capteur ou de la bouche d'air et compromettre la capa- cité...
  • Page 113: Installation Du Microphone

    Section Installation Installation du microphone Remarques ! Installez le microphone à un emplacement ! Lors de la fixation de la plaque métallique, permettant une bonne réception de la voix ne la coupez pas en petits morceaux. du conducteur. ! Les vitres de certains modèles de véhicules ! Eteignez le système avant de connecter le ne laissent pas passer les signaux des sa- microphone (ACC OFF).
  • Page 114: Installation Sur La Colonne De Direction

    Section Installation Fixez l’agrafe pour micro au pare-soleil. Installation sur la colonne de direction Agrafe pour micro % Montez le microphone sur la colonne de direction. Bande adhésive à double face Installez le microphone sur la co- lonne de direction, à distance du volant.
  • Page 115: Réglage De L'angle Du Microphone

    Section Installation Réglage de l’angle du microphone L’angle du microphone peut être.
  • Page 116 INFORMAZIONI IMPORTANTI disturbi elettromagnetici 134 USO DEL NUOVO SISTEMA DI Prima dell’installazione 134 NAVIGAZIONE E DEL PRESENTE – Per gli utenti di AVIC-F20BT 135 MANUALE 117 Installazione di questo sistema di MISURE DI SICUREZZA IMPORTANTI navigazione 135 – Note sull’installazione 135 LEGGERE TUTTE LE PRESENTI ISTRUZIONI –...
  • Page 117: Informazioni Importanti

    Sezione INFORMAZIONI IMPORTANTI USO DEL NUOVO SISTEMA DI NAVIGAZIONE E DEL PRESENTE MANUALE ! Le caratteristiche di navigazione di questo prodotto (e la telecamera a vista posteriore, se acquistata) sono da considerare soltanto come un ausilio alla conduzione del Vostro veicolo.
  • Page 118: Misure Di Sicurezza Importanti

    MISURE DI SICUREZZA IMPORTANTI o nella lettura dello schermo, eseguire le rego- AVVERTENZA lazioni dopo aver parcheggiato in un luogo si- Pioneer raccomanda di non installare perso- curo. nalmente il sistema di navigazione. Consi- 6 Ricordare di allacciare sempre la cintura di si- gliamo che solo il personale di manutenzione curezza durante l’uso dell’automobile.
  • Page 119: Collegamento Del Sistema

    Sezione Collegamento del sistema Precauzioni prima di allungarlo. Un’alterazione del cavo anten- na può causare un cortocircuito. collegare il sistema ! Non accorciare alcun cavo. Facendolo ciò, il circuito di protezione (supporto fusibile, ATTENZIONE resistore fusibile o filtro, ecc.) può non ! Se decidete di eseguire l’installazione da funzionare più...
  • Page 120: Per Evitare Danni

    Sezione Collegamento del sistema Per evitare danni nettore blu alla porta blu, il nero a quella nera, ecc. ! Fare riferimento al manuale dell’utente per AVVERTENZA ! Utilizzare diffusori con potenza superiore i dettagli sul collegamento di amplificatore a 50 W (valore di uscita) e tra 4 W e 8 W (va- ed altre unità, quindi eseguire i collega- menti secondo quanto previsto.
  • Page 121: Pezzi In Dotazione

    Sezione Collegamento del sistema Pezzi in dotazione AVIC-F20BT AVIC-F920BT L’unità di navigazione Cavo di alimentazione L’unità di navigazione Cavo di alimentazione Sintonizzatore RDS- Connettore USB e Sintonizzatore RDS- Connettore USB e mini-spinotto mini-spinotto Connettore RCA Antenna GPS Connettore RCA Antenna GPS...
  • Page 122: Collegamento Del Sistema

    Sezione Collegamento del sistema Collegamento del sistema 3,55 m L’unità di navigazione Verde Connettore IP-BUS (disponibile per l’AVIC-F20BT) Connettore USB e mini-spinotto Presa WIRED REMOTE INPUT d’antenna Per informazioni sugli adattatori per controllo remoto a filo (in vendita a parte) si prega di vederne il manuale d’istruzioni.
  • Page 123 Sezione Collegamento del sistema Antenna GPS AVVERTENZA · Per evitare il rischio d’incidenti e di violare il codice della strada, mentre il veicolo è in movimento questo apparecchio deve essere usato esclusivamente per la navigazione. I display posteriori, inoltre, non devono essere installati in un punto in cui siano visibili al conducente distraendolo.
  • Page 124: Collegamento Del Cavo Di Alimentazione (1)

    Sezione Collegamento del sistema Collegamento del cavo di alimentazione (1) Nota Note A seconda del tipo di veicolo, la funzione di *2 e · Quando al sistema di navigazione si collega un *4 può essere differente. In questo caso, subwoofer (*5) anziché un diffusore posteriore, nelle assicurarsi di collegare *1 a *4 e *3 a *2.
  • Page 125 Sezione Collegamento del sistema L’unità di navigazione Fusibile (10 A) Connettore RCA Cavo di 15 cm alimentazione Giallo/nero Se utilizzate un’apparecchiatura con funzione di muto, collegate questo apparecchio al cavo Audio Muto. Altrimenti, tenete il cavo Audio Muto libero da qualsiasi collegamento.
  • Page 126: Collegamento Del Cavo Di Alimentazione (2)

    La posizione del circuito sensore velocità e la posizione dell’interruttore freno di parcheggio dipendono dal modello di veicolo. Per dettagli, si prega di consultare il Vostro rivenditore Pioneer autorizzato o un installatore professionista. Verde chiaro (PARKING BRAKE) Usato per individuare lo stato attivato/disattivato del freno a mano. Questo cavo deve essere collegato al lato alimentazione dell’interruttore freno a mano.
  • Page 127 Sezione Collegamento del sistema L’unità di navigazione Cavo di alimentazione Violetto/bianco (REVERSE GEAR SIGNAL INPUT) Questo è collegato in modo che il sistema di navigazione possa capire se l’auto si sta muovendo in avanti o all’indietro. Collegare il cavo violetto/bianco al cavo la cui tensione cambia quando la leva del cambio è...
  • Page 128: Quando Si Collega Ad Un Amplificatore In Vendita Separatamente

    (REAR OUTPUT) 30 cm (*1) 15 cm (*2) Uscita anteriore (FRONT OUTPUT) L’unità di navigazione 30 cm (*1) 15 cm (*2) Cavo di (*1) (*2) alimentazione AVIC-F20BT AVIC-F920BT Blu/bianco Al morsetto controllo sistema dell’amplificatore (max. 300 mA 12 V CC).
  • Page 129 Sezione Collegamento del sistema Amplificatore (venduto separatamente) Cavo RCA (venduto separatamente) Amplificatore (venduto separatamente) Amplificatore (venduto separatamente) Controllo a distanza sistema Sinistra Destra   Diffusore Diffusore anteriore anteriore     Diffusore Diffusore posteriore posteriore    ...
  • Page 130: Quando Si Collega Con Una Telecamera A Vista Posteriore

    (*1) Marrone AVIC-F20BT (REAR VIEW CAMERA IN) dalla telecamera stessa. Durante la guida la (*2) modalità Vista Posteriore permette inoltre di...
  • Page 131: Quando Si Collega Il Componente Video Esterno

    Sezione Collegamento del sistema Quando si collega il ATTENZIONE componente video esterno Assicurarsi di usare un CD-RM10 (venduto sepa- ratamente) per il cablaggio. Se si usano altri cavi Uso di “Ingresso AV1” (AV1) vi è la possibilità che la posizione di cablaggio possa variare e che le immagini e i suoni risultino L’unità...
  • Page 132: Uso Di "Ingresso Av2" (Av2)

    Sezione Collegamento del sistema Uso di “Ingresso AV2” (AV2) Quando si collega il display posteriore L’unità di navigazione Unità di navigazione (*1) AVIC-F20BT 20 cm (*1) Collegamento (*2) 23 cm (*2) 15 cm disponibile per AVIC-F920BT l’AVIC-F20BT. Connettore RCA Rosso, bianco...
  • Page 133: Quando Si Collega L'unità Esterna Munita Di Sorgente Video

    (VIDEO INPUT) All’uscita IP-BUS Cavo RCA (venduto separatamente) Unità esterna Pioneer (venduta separatamente) All’uscita video ! Per collegare l’unità esterna, è necessario impostare “Ingresso AV2” in “Impostazio- ni sistema AV” su “EXT”. (Per i dettagli, ve- dere il Manuale di funzionamento.)
  • Page 134: Installazione

    Sezione Installazione ! Non installare questo sistema di naviga- Precauzioni prima zione dove può (i) ostruire la visione del dell’installazione conducente, (ii) compromettere le presta- zioni di un qualunque sistema operativo ATTENZIONE sul veicolo o le funzioni di sicurezza, in- ! Non installare mai questo sistema di navi- clusi airbag, pulsanti delle luci di emer- gazione in luoghi dove, o in maniera che:...
  • Page 135: Per Gli Utenti Di Avic-F20Bt

    Per gli utenti di AVIC-F20BT sualizzazione della posizione e potrebbe ! Non installare questo sistema di navigazio- anche comportare una riduzione delle pre- ne in una posizione dove l’apertura del pan-...
  • Page 136: Pezzi In Dotazione

    Sezione Installazione ! I cavi non devono coprire la zona mostrata Pezzi in dotazione nella figura sotto. Ciò è necessario per con- Le parti contrassegnate con (*) sono pre-in- sentire agli amplificatori e al meccanismo stallate. di navigazione di dissipare il calore. L’unità...
  • Page 137: Prima Di Installare Questo Unità Di Navigazione

    Sezione Installazione Prima di installare questo unità inferiori. Per fissare questo unità di navigazio- ne, piegare le linguette a 90 gradi.) di navigazione Cruscotto Rimuovere la cornice di finitura. Per rimuovere la cornice di finitura occorre ti- rarne verso l’esterno le parti superiore e infe- riore.
  • Page 138: Installazione Usando I Fori Delle Viti Sul Lato Del Unità Di Navigazione

    Sezione Installazione Fissare la cornice di finitura. Se il nottolino è d’intralcio, piegarlo verso il basso Staffa di montaggio radio alla fonte cornice di finitura Installazione usando i fori delle viti sul lato del unità di navigazione Rimuovere le staffe laterali. Staffa laterale Vite di fermo o vite a testa piatta...
  • Page 139: Installazione Dell'antenna Gps

    Sezione Installazione Installazione dell’antenna GPS Pezzi in dotazione ATTENZIONE Non tagliare il cavo dell’antenna GPS per ac- corciarlo e non usare una prolunga per allun- garlo. L’alterazione del cavo dell’antenna può Antenna GPS Lastra metallica causare cortocircuiti o malfunzionamenti e danni permanenti al sistema di navigazione.
  • Page 140: Quando Si Installa L'antenna All'interno Del Veicolo (Sul Cruscotto O Sul Piano Portaoggetti Posteriore)

    Sezione Installazione Quando si installa l’antenna all’interno del veicolo (sul cruscotto o sul piano portaoggetti posteriore) AVVERTENZA Non installare l’antenna GPS su eventuali sensori o aperture presenti sul cruscotto del veicolo poiché ciò potrebbe interferire con il corretto funzionamento di tali sensori e aper- ture e compromettere il corretto fissaggio della placca metallica dell’antenna GPS al cruscotto.
  • Page 141: Installazione Del Microfono

    Sezione Installazione Installazione del microfono Note ! Installare il microfono in un luogo dove la ! Quando fissate la lastra metallica, non ta- sua direzione e distanza dal conducente gliatela in pezzi piccoli. rendano facile il rilevamento della voce del ! Alcuni modelli usano per i finestrini un conducente.
  • Page 142: Installazione Sulla Colonna Di Sterzo

    Sezione Installazione Fissare il morsetto del microfono al pa- Installazione sulla colonna di rasole. sterzo Morsetto del microfono % Montare il microfono sulla colonna di sterzo. Nastro a doppio lato Installare il microfono sulla co- lonna di sterzo, tenendolo lonta- no dal volante.
  • Page 143: Regolazione Dell'angolazione Del Microfono

    Sezione Installazione Regolazione dell’angolazione del microfono L’angolo del microfono è regolabile.
  • Page 144 Inhoudsopgave Voorkomen van elektromagnetische BELANGRIJKE INFORMATIE storingen 162 BETREFFENDE UW NIEUWE Voor de installatie 163 NAVIGATIESYSTEEM EN HET GEBRUIK – Voor AVIC-F20BT gebruikers 163 VAN DEZE HANDLEIDING 145 Dit navigatiesysteem inbouwen 163 – Opmerkingen betreffende het BELANGRIJKE inbouwen 163 VEILIGHEIDSMAATREGELEN –...
  • Page 145: Belangrijke Informatie

    Hoofdstuk BELANGRIJKE INFORMATIE BETREFFENDE UW NIEUWE het type voertuig of de vorm van het interi- eur van het voertuig. NAVIGATIESYSTEEM EN HET GEBRUIK VAN DEZE HANDLEIDING ! De navigatie-elementen van dit product (en de optionele achteruitkijkcamera, indien deze is aangeschaft) zijn uitsluitend be- doeld als hulpmiddel voor de bedining van uw voertuig.
  • Page 146: Belangrijke Veiligheidsmaatregelen

    WAARSCHUWING matie op het beeldscherm niet duidelijk is, Pioneer raadt u af het navigatiesysteem zelf parkeer de auto dan op een veilige plaats in te bouwen. Wij adviseren u om alleen be-...
  • Page 147: Aansluitingen

    Hoofdstuk Aansluitingen Voorzorgen voor het nente beschadiging aan dit product op- treedt. aansluiten van het systeem ! Maak de GPS antennedraad niet korter en ook niet langer. Wijzigen van de antenne- BELANGRIJK draad kan resulteren in kortsluiting. ! Indien u besluit de installatie zelf uit te ! Maak ook geen enkele andere draad kor- voeren, een speciale opleiding heeft ter.
  • Page 148: Voorkomen Van Beschadigingen

    Hoofdstuk Aansluitingen Voorkomen van z. de blauwe stekker op de blauwe poort, zwart op zwart, enz. beschadigingen ! Zie voor nadere informatie over het aanslui- ten van de eindversterker en andere toestel- WAARSCHUWING len de gebruikershandleiding en voer de ! Gebruik luidsprekers van meer dan 50 W aansluiting vervolgens uit zoals hierin be- (uitgangsvermogen) en tussen 4 W t/m 8 W schreven.
  • Page 149: Bijgeleverde Accessoires

    Hoofdstuk Aansluitingen Bijgeleverde accessoires AVIC-F20BT AVIC-F920BT De navigatie-eenheid Stroomsnoer De navigatie-eenheid Stroomsnoer RDS-TMC tuner USB en ministekker- RDS-TMC tuner USB en ministekker- aansluiting aansluiting RCA-connector GPS-antenne RCA-connector GPS-antenne Microfoon Microfoon...
  • Page 150: Systeemcomponenten Aansluiten

    Hoofdstuk Aansluitingen Systeemcomponenten aansluiten 3,55 m De navigatie-eenheid Groen IP-BUS aansluiting (IP-BUS aansluiting beschikbaar op de AVIC-F20BT.) USB en Antenneaansluiting ministekker-aansluiting WIRED REMOTE INPUT Raadpleeg de handleiding van de adapter voor een afstandsbediening met draad (los verkrijgbaar). ( * 1)
  • Page 151 Hoofdstuk Aansluitingen GPS-antenne WAARSCHUWING · Om het risico op ongevallen en mogelijke overtreding van toepasselijke wetten en regels te voorkomen, mag dit product in geen geval worden gebruikt terwijl er met het voertuig gereden wordt, behalve voor navigatiedoeleinden. Bovendien mag een eventueel display voor de achterpassagiers in geen geval zo geplaatst zijn dat dit de aandacht van de bestuurder zou kunnen afleiden.
  • Page 152: Het Stroomsnoer Aansluiten (1)

    Hoofdstuk Aansluitingen Het stroomsnoer aansluiten (1) Opmerking Opmerkingen · Wanneer een subwoofer (*5) op dit Afhankelijk van het soort voertuig, kan de navigatiesysteem is aangesloten in plaats van een functie van *2 en *4 afwijken. Sluit in dit geval achterluidspreker, moet u de *1 op *4 en *3 op *2 aan.
  • Page 153 Hoofdstuk Aansluitingen De navigatie-eenheid Zekering (10 A) RCA-connector Stroomsnoer 15 cm Geel/zwart Wanneer u een apparaat met een mutefunctie gebruikt, dient u deze aan te sluiten op het Audio Mute-snoer. Is dit niet het geval, sluit dan niets aan op het Audio Mute-snoer.
  • Page 154: Het Stroomsnoer Aansluiten (2)

    Opmerking De positie van het snelheidsdetectiecircuit en de positie van de parkeerremschakelaar variëren afhankelijk van het voertuigmodel. Win advies in bij uw erkende Pioneer-dealer of een vakkundige installateur. Lichtgroen (PARKING BRAKE) Via deze draad wordt de stand van de handrem (aangetrokken/ontspannen) aan het autonavigatiesysteem doorgegeven.
  • Page 155 Hoofdstuk Aansluitingen De navigatie-eenheid Stroomsnoer Paars/wit (REVERSE GEAR SIGNAL INPUT) Via deze draad wordt aan het navigatiesysteem doorgegeven of de auto vooruit of achteruit rijdt. U dient de paars/witte draad te verbinden met de draad waarvan de spanning verandert wanneer de schakelhendel in de achteruit wordt gezet. Als de sensor niet is aangesloten, kan deze wellicht niet goed waarnemen of uw voertuig voor- of achteruit rijdt.
  • Page 156: Voor Aansluiting Op Een Los Verkrijgbare Eindversterker

    31 cm (*2) RCA-connector Achteruitgang (REAR OUTPUT) 30 cm (*1) 15 cm (*2) Vooruitgang (FRONT OUTPUT) De navigatie-eenheid 30 cm (*1) 15 cm (*2) (*1) (*2) Stroomsnoer AVIC-F20BT AVIC-F920BT Blauw/wit Naar de systeemregelklem van de eindversterker (max. 300 mA 12 V DC).
  • Page 157 Hoofdstuk Aansluitingen Eindversterker (los verkrijgbaar) RCA-kabels (los verkrijgbaar) Eindversterker (los verkrijgbaar) Eindversterker (los verkrijgbaar) Systeem-afstandsbediening Links Rechts   Voorluidspreker Voorluidspreker     Achterluidspreker Achterluidspreker     Subwoofer Subwoofer   Opmerking Afhankelijk van uw subwoofersysteem kunt u de RCA-uitgang van de subwoofer veranderen.
  • Page 158: Bij Aansluiting Van Een Achteruitkijkcamera

    (*1) Bruin AVIC-F20BT ACHTERUIT (R). De Achteraanzicht stand (REAR VIEW CAMERA IN) (*2) stelt u ook in staat te controleren wat er achter...
  • Page 159: Bij De Aansluiting Van Een Extern Videocomponent

    Hoofdstuk Aansluitingen Bij de aansluiting van een BELANGRIJK extern videocomponent Zorg dat u verbinding maakt met een CD-RM10 (los verkrijgbaar). Wanneer u andere kabels ge- Gebruik van de “AV1 Input” (AV1) bruikt ontstaat de kans op foutieve aansluitingen en verstoord beeld of geluid. De navigatie-eenheid L : Linkeraudio (Wit) R : Rechteraudio (Rood)
  • Page 160: Gebruik Van De "Av2 Input" (Av2)

    Hoofdstuk Aansluitingen Gebruik van de “AV2 Input” (AV2) Tijdens het aansluiten van het achterdisplay De navigatie-eenheid De navigatie-eenheid (*1) AVIC-F20BT 20 cm (*1) Deze aansluiting is (*2) 23 cm (*2) beschikbaar op de 15 cm AVIC-F920BT AVIC-F20BT. RCA-connector Rood, wit...
  • Page 161: Tijdens De Aansluiting Van De Externe Eenheid Met Videobron

    Zwart Geel (VIDEO INPUT) Naar IP-BUS uitgang RCA-kabel (los verkrijgbaar) Pioneer externe eenheid (los verkrijgbaar) Naar video-uitgang ! Wanneer er externe apparatuur wordt aan- gesloten, moet “AV2 Input” in “Instellin- gen AV-systeem” op “EXT” worden ingesteld. (Zie de Bedieningshandleiding voor meer details.)
  • Page 162: Inbouwen

    Hoofdstuk Inbouwen ! Bouw dit navigatiesysteem niet in op Voorzorgen voor installatie plaatsen waar het (i) het zicht van de be- stuurder kan hinderen, (ii) de werking van BELANGRIJK ! Installeer dit product nooit op plaatsen een van de bedieningssystemen of veilig- heidsvoorzieningen van de auto, inclusief waar, of op een manier waardoor: —...
  • Page 163: Voor De Installatie

    Een verkeerde installa- tie van het apparaat waarbij het oppervlak meer dan het toegestane aantal graden ge- Voor AVIC-F20BT gebruikers kanteld is, verhoogt het risico op fouten in ! Dit navigatiesysteem mag niet op een posi-...
  • Page 164: Bijgeleverde Accessoires

    Hoofdstuk Inbouwen ! Om verzekerd te kunnen zijn van voldoende Bijgeleverde accessoires ventilatie bij gebruik van dit toestel, dient u De met een asterisk (*) gemarkeerde onderde- er bij de installatie voor te zorgen dat u ach- len zijn reeds geïnstalleerd. ter het achterpaneel en rondom het toestel voldoende ruimte vrij laat, en dient u even- tuele losse bedrading samen te bundelen...
  • Page 165: Vóór Het Installeren Van Dit Navigatie-Eenheid

    Hoofdstuk Inbouwen Vóór het installeren van dit jes 90 graden om het navigatie-eenheid te vergrendelen.) navigatie-eenheid Dashboard Verwijder de afwerkingsrand. Buig de bovenkant en de onderkant van de af- werkingsrand naar buiten om deze te verwijde- ren. Houder Installeer dit navigatie-eenheid en Afwerkingsrand draai de schroeven vast.
  • Page 166: Installatie Met Gebruik Van De Schroefgaten Aan De Zijkant Van Het Navigatie-Eenheid

    Hoofdstuk Inbouwen Bevestig de afwerkingsrand. Buig het palletje naar beneden indien het in de weg zit. Montageplaatjes van de orignele autoradio Afwerkingsrand Installatie met gebruik van de schroefgaten aan de zijkant van het navigatie-eenheid Verwijder de zijbeugels. Drukkingsschroeven Zijbeugel of schroeven met platte kop Zorg ervoor dat u de schroeven geleverd...
  • Page 167: Bevestigen Van De Gps-Antenne

    Hoofdstuk Inbouwen Bevestigen van de GPS- Bijgeleverde accessoires antenne BELANGRIJK Maak de GPS antennedraad niet korter en ook niet langer. Wijzigingen aan de antenne- GPS-antenne Metalen plaatje kabel kunnen leiden tot kortsluiting of storin- gen en permanente schade aan het navigatiesysteem.
  • Page 168: Bevestigen Van De Antenne Binnen In De Auto (Op Het Dashboard Of De Hoedenplank)

    Hoofdstuk Inbouwen Bevestigen van de antenne binnen in de auto (op het dashboard of de hoedenplank) WAARSCHUWING Installeer de GPS-antenne niet over andere sensoren of de ventilatie-openingen in het dashboard van het voertuig, want hierdoor kan de juiste werking van de sensoren of ventilatie-openingen belemmerd worden en is het ook mogelijk dat de GPS-antenne niet goed meer met de metalen plaat onderaan...
  • Page 169: De Microfoon Installeren

    Hoofdstuk Inbouwen De microfoon installeren Opmerkingen ! Installeer de microfoon in de juiste richting ! Let er bij het aanbrengen van het metalen en op de juiste afstand zodat de microfoon plaatje op dat het niet in kleine onderdelen gemakkelijk de stem van de bestuurder kan wordt gesneden.
  • Page 170: Installatie Op Stuurkolom

    Hoofdstuk Inbouwen Bevestig de microfoonklem aan de zon- Installatie op stuurkolom neklep. % Bevestig de microfoon op de stuurko- Microfoonklem lom. Dubbelzijdig tape Plaats de microfoon op de stuur- kolom en houd hem uit de buurt van het stuurwiel. Klemmen Gebruik los verkrijgbare klemmen om de draad waar nodig binnenin de auto te...
  • Page 171: De Hoek Van De Microfoon Aanpassen

    Hoofdstuk Inbouwen De hoek van de microfoon aanpassen De hoek van de microfoon kan worden inge- steld.
  • Page 172 PIONEER CORPORATION 1-1, Shin-Ogura Saiwai-ku, Kawasaki-shi Kanagawa-ken 212-0031, JAPAN Published by Pioneer Corporation. PIONEER ELECTRONICS (USA) INC. Copyright © 2010 by Pioneer Corporation. P.O. Box 1540, Long Beach, California 90801-1540, U.S.A. All rights reserved. TEL: (800) 421-1404 Publié par Pioneer Corporation.

Ce manuel est également adapté pour:

Avic-f920bt

Table des Matières