Grandstream GXP2110 Guide D'installation Rapide

Masquer les pouces Voir aussi pour GXP2110:

Publicité

Les langues disponibles
  • FR

Les langues disponibles

  • FRANÇAIS, page 10

Liens rapides

Grandstream Networks, Inc.
1297 Beacon Street, 2nd Floor
Brookline, MA 02446. USA
Tel : +1 (617) 566 – 9300
Fax: +1 (617) 249 – 1987
www.grandstream.com
For Warranty and RMA information, please visit www.grandstream.com

Publicité

Table des Matières
loading

Sommaire des Matières pour Grandstream GXP2110

  • Page 1 Grandstream Networks, Inc. 1297 Beacon Street, 2nd Floor Brookline, MA 02446. USA Tel : +1 (617) 566 – 9300 Fax: +1 (617) 249 – 1987 www.grandstream.com For Warranty and RMA information, please visit www.grandstream.com...
  • Page 2 GXP2110 Enterprise IP Phone Quick Start Guide...
  • Page 3 The GXP2110 is not pre-configured to support or carry emergency calls to any type of hospital, law enforcement agency, medical care unit (“Emergency Service(s)”) or any other kind of Emergency Service. You must make additional arrangements to access Emergency Services. It is Your responsibility to...
  • Page 4: Package Contents

    Using an alternative non-qualified power adapter may possibly damage the unit. OVERVIEW The GXP2110 IP Phones has sleek outer design and delivers excellent call quality and enterprise grade feature set that includes advanced XML capabilities, multi-party conferencing, multi-language support, presence and BLF (busy lamp field), security protection, automated provisioning, and broad compatibility with leading SIP platforms.
  • Page 5: Phone Setup

    PHONE SETUP: Wall Mount Holes are available Slot for the phone stand if placing the phone on the table Slot for the wall mount spacers if placing the phone on the wall Installing the phone (Wall Mount): 1. Attach the two wall mount spacers to the slot for wall mount spacers on the back of the phone.
  • Page 6: Connecting The Phone

    PC Port LAN Port Power Headset Port To setup the GXP2110, follow the steps below: 1. Connect the handset and main phone case with the phone cord. 2. Connect the LAN port of the phone to the RJ-45 socket of a hub/switch or a router (LAN side of the router) using the Ethernet cable.
  • Page 7 MENU mode is left idle for 20 seconds. PHONE CONFIGURATION: Configure the GXP2110 using a Web Browser: 1. Ensure your phone is powered up and connected to the Internet. 2. Press MENU button to go into menu of the phone.
  • Page 8 Each expansion module has 56 programmable buttons. The GXP phone sup- ports up to two EXT Modules, adding 112 fully programmable phone extensions to the phone. Note: The extension module is an additional accessory for the GXP2110 and is not included in the box...
  • Page 9 Installing the Extension Module for the GXP2110 Extension Connector Extension Stand Power Port SETUP 1. Attach the stand to the extension module 2. Connect the extension module with the phone main body by sliding it into the bracket on the side of the phone.
  • Page 10 Le GXP2110 n’est pas pré configuré pour soutenir ou réaliser des appels d’urgence à tout type d’hôpital, organisme d’application de la loi, unité de soins médi- caux ou tout autre type de service d’urgence. Vous devez prendre des dispositions supplémentaires pour accéder à...
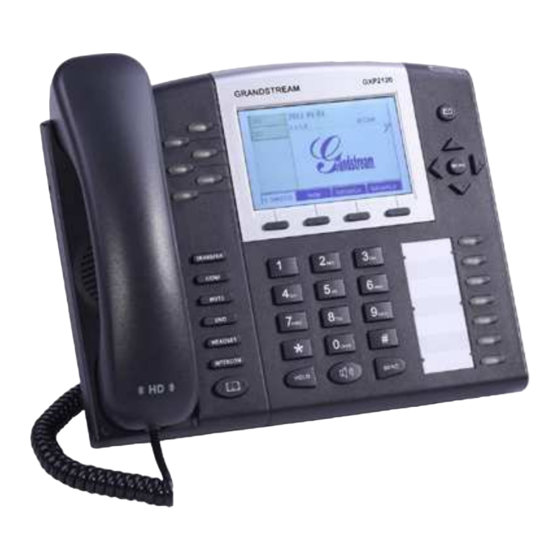
  • Page 11: Presentation

    GXP2110. L’utilisation d’un autre boîtier d’alimentation non qualifié peut endom- mager l’unité. PRESENTATION Les Téléphones IP GXP2110 ont un design extérieur élégant et offrent une excellente qualité d’appel et un ensemble de caractéristiques de qualité d’entreprise qui inclut des capacités XML avancées, multi conférence, le support de plusieurs langues, la présence et BLF, la sécurité...
  • Page 12: Installation Du Telephone

    INSTALLATION DU TELEPHONE: Les trous pour le montage sur le mur sont dis- ponibles La fente pour le positionneur téléphonique si vous allez placer le téléphone sur la table La fente pour les entretoises en cas de montage du téléphone sur le mur Installation du téléphone (montage sur le mur): 1.
  • Page 13: Installation Du Téléphone (Positionneur Téléphonique)

    Port PC Port LAN Alimentation Port Combiné Pour installer le GXP2110, suivez les instructions ci-dessous : 1. Connectez le combiné et le boîtier de téléphone principal avec le câble télé- phonique. 2. Connecter le port LAN de votre téléphone au port RJ-45 d’un concentrateur / commutateur ou un routeur (côté...
  • Page 14: Conseils D'utilisation Du Clavier

    20 secondes. CONFIGURATION DU TELEPHONE : Configurer le GXP2110 en utilisant le Navigateur web : 1. Vérifiez que votre téléphone est sous tension et connecté à Internet. 2. Appuyez sur le bouton MENU pour aller dans le menu du téléphone.
  • Page 15: Configurer Le Gxp2110 En Utilisant Le Clavier

    Le téléphone GXP prend en charge jusqu’à deux mod- ules EXT, ajoutant 112 extensions téléphoniques entièrement programmables pour le téléphone. Note: Le module d’extension est un accessoire supplémentaire pour le GXP2110 et n’est pas inclus dans la boîte.
  • Page 16: Installation Du Module D'extension Pour Le Gxp2110

    Installation du module d’extension pour le GXP2110 Positionneur de Alimentation Port de connexion de l’extension l’extension INSTALLATION 1. Fixez le positionneur sur le module d’extension 2. Connectez le module d’extension au téléphone principal en le glissant dans le support du le côté du téléphone.
  • Page 17 CIA A CUALQUIER RECLAMO O CONSECUENCIA PROVENIENTE O RELACIONADO DE LA INHAB- ILIDAD DE CONTACTAR SERVICIOS DE EMER- GENCIAS CON EL GXP2110 Y SU FALTA DE NO HABER HECHO LOS ARREGLOS DE LUGAR PARA ACCESAR ESTOS SERVICIOS DE EMERGENCIA DE ACUERDO CON EL PÁRRAFO ANTERIOR.
  • Page 18: Información General

    BLF(busy lamp field), proteccion de seguridad, aprovisionamiento automatico y excelente compatibili- dad con la gran mayoria de las plataformas SIP. El GXP2110 tiene 4 lineas, 18 teclas programables, 3 teclas suaves programbles mientras.
  • Page 19: Instalación Del Teléfono

    INSTALACIÓN DEL TELÉFONO: Disponibilidad de orificios para montura de pared. Ranura para el soporte del teléfono si va a ser colocado sobre un escritorio Orificio para los espaciadores de montura sobre la pared del teléfono Instalando el teléfono (Montura de Pared): 1.
  • Page 20 Puerto PC Puerto LAN Alimentación Puerto del auricular Para configurar el GXP2110, siga los pasos detallados abajo: 1. Conecte el auricular a la unidad utilizando el cable telefónico. 2. Conecte el puerto LAN del teléfono al zócalo RJ-45 de un hub/switch o router usando el cable Ethernet.
  • Page 21: Configuración Del Teléfono

    20 segundos. CONFIGURACIÓN DEL TELÉFONO: Configurando el GXP2110 utilizando un navegador Web: 1. Asegure que su teléfono este conectado a la red y tenga electricidad. 2. Presione el botón de MENU.
  • Page 22: Modulo De Extensión Gxp2110 Ext

    Cada modulo de expansión tiene 56 teclas programables. El teléfono GXP soporta hasta dos módulos EXT, añadiendo hasta 112 teclas programables al teléfono. Nota: El modulo de extensnion es un accesorio adicional para el GXP2110 y no es incluido en el paquete.
  • Page 23 Installazione del modulo di estensione per GXP2110 Estante de la Puerto Conector del Alimentación Extensión Modulo de Extensión INSTALACIÓN 1. Adhiera el estante al modulo de extensión. 2. Conecte el modulo de extensión al teléfono deslizándolo por la ranura lateral.
  • Page 24 Sie müssen zusätzliche Vorkehrungen treffen, um auf Notdienste zuzugreifen. Es liegt in Ihrer Verantwortung, einen SIP-konformen Internettelefondienst zu erwerben, damit Sie das GXP2110 richtig konfigurieren können, um diesen Dienst zu verwenden und regelmäßig seine Konfiguration zu prüfen, und somit zu bestätigen, dass es nach Ihren Erwartungen funktioniert.
  • Page 25 Netzadapter. Die Verwendung eines alternativen, nicht geeigneten Netzadapt- ers kann vielleicht das Gerät beschädigen. ÜBERSICHT: Die IP-Telefone GXP2110 haben glatten äußeren Entwurf und liefern die aus- gezeichnete Anrufqualität und die Funktionseigenschaften für den Rang jedes Unternehmens, die Folgendes beinhalten: die fortgeschrittenen XML-Ressour- cen, die Multiparteien-Konferenzschaltung, mehrsprachige Unterstützung, Anwe-...
  • Page 26 TELEFON-SETUP: Wandhalter- ungslöcher sind vorhanden Steckplatz für den Telefonstandplatz, wenn das Telefon auf den Tisch gelegt wird Steckplatz für den Wanddistanzhal- ter, wenn das Tele- fon an die Wand gelegt wird Telefoninstallation (Wandhalterung): 1. Bringen Sie 2 Wanddistanzhalter in den Steckplatz für die Wanddistanzhalter an der Unterseite des Telefons an.
  • Page 27: Anschließen Des Telefons

    LAN-Anschluss Netz Kopfhörer- Anschluss Für das GXP2110-Setup folgen Sie den Schritten unten: 1. Schließen Sie den Hörer und das Haupttelefongehäuse an die Telefonschnur 2. Schließen Sie den LAN-Anschluss des Telefons an die RJ-45 Steckdose eines Netzknotens/Schalters oder eines Routers (LAN-Seite des Routers), unter Ver- wendung des Ethernet-Kabels an.
  • Page 28 Standardtastatur Senden Sprecher Halten GXP2110 1. Um auf das MENÜ zuzugreifen, drücken Sie den runden MENÜKNOPF. 2. Steuern Sie das Menü, indem Sie die Knöpfe UP/DOWN und LEFT/RIGHT verwenden. 3. Drücken Sie den runden MENÜKNOPF, um eine Menüauswahl zu bestätigen.
  • Page 29 Konfigurieren Sie das GXP2110, unter Verwendung von der Tastatur: 1. Stellen Sie sicher, dass das Telefon nicht in Betrieb ist. 2. Drücken Sie den Knopf ”MENÜ”, damit Sie auf das MENÜ der Tastatur zugrei- fen, um das Telefon zu konfigurieren.
  • Page 30 Installation des Erweiterungsmoduls für GXP2110 Netz Erweiterungsstand Erweiterungsstecker- Anschluss SETUP 1. Bringen Sie den Standplatz an dem Erweiterungsmodul an. 2. Schließen Sie das Erweiterungsmodul an den Telefonhauptteil, indem Sie es in den Halter auf der Telefonseite gleiten. 3. Schließen Sie das Erweiterungsmodul an den GXP-Hauptteil an, indem Sie den bereitgestellten Kabel verwenden.
  • Page 31 RECLAMO, DANNO O PERDITA , E DI QUALSIASI AZIONE LEGALE DERIVI DA TALI RECLAMI O CAUSE IN RELAZIONE ALL’IMPOSSIBILITÀ DI USARE IL GXP2110 PER CHIAMATE AI SERVIZI DI EMERGENZA E ALL’IMPOSSIBILITÀ DI EFFETTU- ARE ACCORDI SUPPLEMENTARI PER ACCEDERE AI SERVIZI DI EMERGENZA IN CONFORMITÀ AL...
  • Page 32 XML avanzate, conferenza multiutente, supporto multi- lingue, presenza e BLF (campo spia occupato), protezione di sicurezza e ampia compatibilità con le principali piattaforme SIP. Il GXP2110 offre 4 linee, 18 tasti programmabili, 3 tasti funzione XML programmabili. PACKAGE CONTENTS:...
  • Page 33 MONTAGGIO TELEFONO: Fori per montaggio a parete disponibili Alloggiamento per supporto telefono se l’apparecchio è posto sul tavolo Alloggiamento per i distanziali per il supporto a parete se l’apparecchio è posto a parete Installazione del telefono (montaggio a parete): 1. Fissare i due distanziali per il supporto a parete nell’apposito alloggiamento sul retro del telefono..
  • Page 34 Porta cuffia auricolare Per impostare il GXP2110, seguire la seguente procedura: 1. Collegare il ricevitore e il case principale del telefono con il cavo telefonico. 2. Collegare la porta LAN del telefono alla presa RJ-45 di un hub o di un router (lato LAN del router) usando un cavo ethernet.
  • Page 35: Configurazione Del Telefono

    è sganciato o quando la modalità MENU non è usata per 20 sec. CONFIGURAZIONE DEL TELEFONO: Configurazione del GXP2110 mediante un browser web: 1. Assicurarsi che il telefono sia in corrente e collegato a internet. 2. Premere il pulsante MENU per accedere al menu del telefono.
  • Page 36 Ogni modulo di espansione ha 56 pulsanti programmabili. Il telefono GXP supporta fino a due moduli EXT, aggiungendo 112 estensioni completamente programmabili al telefono. Nota: Il modulo di estensione è un accessorio aggiuntivo per il GXP2110 e non è incluso nella confezione...
  • Page 37 Installazione del modulo di estensione per GXP2110 Supporto Alimentazione Porta connettore estensione espansione IMPOSTAZIONE 1. Collegare il supporto al modulo di estensione 2. Collegare il modulo di estensione al case principale del telefono facendolo scorrere nella staffa sul lato del telefono.
  • Page 38 GXP2110, her türlü hastane, emniyet kuvveti, tıbbi bakım ünitesi (“Acil Servis(ler)”) ya da diğer her- hangi tür Acil Servis aramalarını desteklemek ya da yapmak için önceden yapılandırılmamıştır. Acil Servislere erişim için ek ayarlamalar yapmalısınız. SIP uyumlu internet telefon hizmetini satın almak, bu servisi kullanmak için GXP2110 birimini uygun...
  • Page 39: Genel Bakiş

    XML yeteneği, çoklu taraf konferans, çoklu dil desteği, hazır olma ve BLF (meşgul ışık alanı), güvenlik koruma, otomatik yapılandırma, öncü SIP platformları ile geniş uyumluluk içeren işletme sınıfı özellikler seti sağlar. GXP2110, 4 adet hat, 18 adet programlanabilir tuşlar, 3 adet XML programla- nabilir yumuşak tuş sunar. AMBALAJ İÇERİKLERİ: 1 X Telefon Ana Kasası...
  • Page 40 TELEFON KURULUMU: Duvar Monte De- likleri Mevcuttur Eğer masaya yerleştirilecekse, telefon standı için slot Telefon duvara monte edilecekse, duvar monte ara parçalarý için montaj yuvasý Telefonun Kurulumu (Duvara Monte): 1. Duvar monte ara parçaları olarak telefon standını telefonun altına takın. 2.
  • Page 41 PC Port LAN Port Güç Ahize Portu GXP2110 birimini kurmak için aşağıdaki adımları izleyiniz: 1. Ahizeyi, ana telefon kasasına telefon kablosu ile bağlayınız. 2. Telefonun LAN portunu, Ethernet kablosunu kullanarak hub/anahtara veya bir yönlendiriciye (yönlendiricinin LAN tarafına) ait RJ-45 soketine bağlayınız.
  • Page 42 5. Gelen bir çağrı olduğunda, ahize kaldırıldığında ya da MENÜ modu 20 saniye boyunca işlem yapılmadığında, telefon otomatik olarak MENÜ modundan çıkar. TELEFON YAPILANDIRMASI: Web Tarayıcı kullanarak GXP2110 yapılandırılması: 1. Telefonunuzun gücünün açık olduğundan ve İnternete bağlı olduğundan emin olun.
  • Page 43 çağrı yapma yeteneğini eklemek için ideal bir çözümdür. Her genişleme modülünün 56 adet programlanabilir düğmesi vardır. GXP telefonu, telefon için 112 adet tam programlanabilir telefon genişlemesi ekleyerek, iki adet EXT Modül- üne kadar destek sağlar. Not: Genişleme modülü GXP2110 için ek bir aksesuardır ve kutusunun içinde yoktur.
  • Page 44 GXP2110 için Genişleme Modülünün Kurulumu Genişleme Bağlantı Genişleme Standı Güç Portu KURULUM 1. Standı genişleme modülüne bağlayınız. 2. telefonun kenarında bulunan desteğin içine doğru kaydırarak genişleme modül- ünü telefonun ana kasasına bağlayınız. 3. Verilen kabloyu kullanarak Genişleme Modülünü GXP ana kasasına bağlayınız.

Table des Matières