
Manuels Connexes pour JVC TK-C9510E


Sommaire des Matières pour JVC TK-C9510E
- Page 1 COLOUR VIDEO CAMERA INSTRUCTIONS TK-C9510E BEDIENUNGSANLEITUNG TK-C9511EG MANUEL D’INSTRUCTIONS MANUAL DE INSTRUCCIONES ISTRUZIONI ИHСТРУКЦИR ПО ЭКСПЛУАТАЦИИ LST1119-001A...
-
Page 2: Safety Precautions
Dear Customer This apparatus is in conformance with the valid European directives and standards regarding electromagnetic compatibility and electrical safety. European representative of Victor Company of Japan, Limited is: JVC Technical Services Europe GmbH Postfach 10 05 04 61145 Friedberg Germany... - Page 3 (Business users) If you wish to dispose of this product, please visit our web page http://www.jvc.eu to obtain information about the take-back of the product. [Other Countries outside the European Union] If you wish to dispose of this product, please do so in accordance with applicable national legislation or other rules in your country for the treatment of old electrical and electronic equipment.
- Page 4 Please refer to your dealer for installation. R Rating label is pasted on the camera unit. R JVC is not liable for any compensation if you drop the camera due to insecure mounting by not following the installation description. Pay careful attention during installation.
- Page 5 Safety Precautions R The camera may drop if the mounting screws are not tightened securely. Check that the screws are tightened appropriately and securely. R Do not install the camera near lighting fixtures of high temperature, such as spot lights. It might result in failure or fires.
-
Page 6: Introduction
Introduction Features This camera employs a 1/2-inch CCD, which realizes colour with a minimum illumination of 0.025 lx (F1.2, 25 %). A page 71 Realizes stable Equipped with a wide dynamic range. image quality Corrects dark and white regions due to drastic brightness differences in the subject. - Page 7 Introduction Eight scene files are available. Supports registration Each scene file has preset of scene files for settings for different applications. different They can also be customized. environments A page 35 Changes in scene such as movement inside the set area are Detects suspicious automatically detected, and an movements inside...
-
Page 8: Table Des Matières
Introduction Contents Introduction Features .................... 6 Contents .................... 8 How to Read This Manual ............... 10 Operating Precautions ..............11 Names of Parts ................14 Connection/Installation Quick Installation ................16 System Connection ................. 18 Mounting the Lens ................20 Connection ..................21 Mounting the Camera .............. - Page 9 Introduction Detailed Settings Default Values of Scene Files ............54 Motion Detect Area Setting .............. 56 Scene Name/Camera Title Setting ..........58 Manual White Balance Adjustment ..........60 Output of Black-and-white/Colour Switch Signal ......61 Controlling Black-and-white/Colour Switch Signal Externally ..63 Privacy Mask Setting ...............
-
Page 10: Contents
: Indicates a reference page or item. Contents of this manual JVC holds the copyright to this manual. Any part or all of this manual may not be reproduced without prior consent from the company. Product names of other companies described in this manual are trademarks or registered trademarks of the respective companies. -
Page 11: Operating Precautions
Introduction Operating Precautions Storage and Location of Use Do not install the camera in the following places. In a place exposed to rain or moisture. In a place with vapor or oil, for example in a kitchen. When the ambient temperature rises above or falls below the acceptable range (from -10 f to 50 f). - Page 12 Introduction Operating Precautions (Continued) Disclaimer Motion detection is not a feature to prevent theft or fire. We do not accept liability for any damages that may occur. We will not be responsible for any inconveniences or disturbances caused in the event of privacy invasion as a result of camera footages of this product.
- Page 13 Introduction When the [WHITE BALANCE] of this camera is set to “ATW-N” or “ATW-W”, the colour tone may differ slightly from the actual colour depending on the condition of the subject. This is due to the principle of the automatic tracking white balance circuit, and is not a malfunction. When switching from colour to black-and-white images, operation sound of optical filter switching may be heard, and the image may become noisy and dark momentarily.
-
Page 14: Names Of Parts
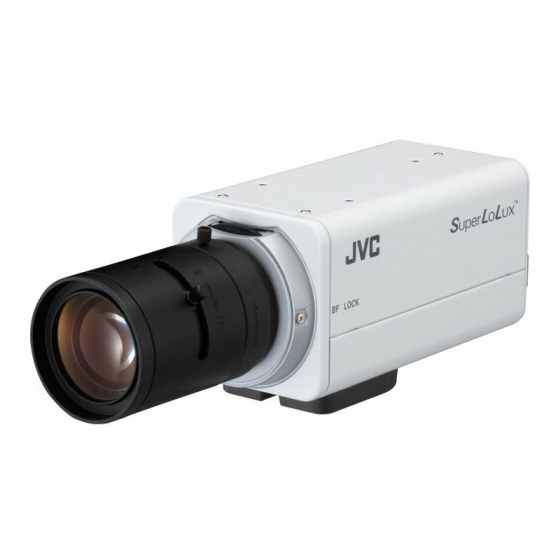
Introduction Names of Parts Front/Top/Side POWER IRIS A Back focus adjustment ring B Lens mount C [POWER] Power indicator D [IRIS] Iris terminal E Camera-mounting bracket fastening screws (x2, M2.6 x 6 mm) F Rotation preventive hole G Camera mounting screw hole (1/4-20UNC) H Camera mounting bracket I Back focus fastening screw E-14... - Page 15 B [SYNC IN] Synchronizing signal input terminal C AC 220 V - AC 240 V power cord (TK-C9511EG) D AC 24 V, DC 12 V power input terminal (TK-C9510E) E [TX+ E, TX- F, RX+ G, RX- H] Control signal connectors...
-
Page 16: Connection/Installation Quick Installation
(e.g. sensor) POWER IRIS Connect to remote control unit, etc. To AC 24 V or DC 12 V power supply (TK-C9510E) Mounting the Camera (A page 24) MAX. 6 mm 2 mm POWER IRIS M3 x 6 mm... - Page 17 Connection/Installation Switch Settings (A page 26) Adjusting the Back Focus (A page 28) Menu Setting (A page 34) Completion POWER SUPPLY REMOTE CONTROL E-17...
-
Page 18: System Connection
Connection/Installation System Connection Connection Diagram Power cable CAMERA1 Control signal MACHINE ID : 1 cable (MENU Screen) RX TERM : OFF Video signal cable (Switch) CAMERA2 MACHINE ID : 2 (MENU Screen) RX TERM : OFF (Switch) CAMERA8 MACHINE ID : 8 (MENU Screen)... - Page 19 Connection/Installation Connection Settings Control Signal Cable Connection on Camera (Rear) Memo Connect the cables correctly such that the A,B, C, D marks of the camera terminals coincide with those TO CAMERA DATA I / O RX+ RX- TX+ TX- COM 9/1 10/2 11/3 12/4 13/5 14/6 15/7 16/8 COM AUTO UNIT ALARM...
-
Page 20: Mounting The Lens
POWER IRIS If the plug of the lens cable is different, connect with a four- Memo pin plug. For details on the four-pin plug, consult your JVC dealer. (Part no.: SCV2859-001) 4 pin plug Pin No. DC IRIS lens... -
Page 21: Connection
(TK-C9511EG) (A page 23) To AC 24 V or DC 12 V power supply Connect to remote control unit, etc. (TK-C9510E) (A page 21) (A page 22) Control Signal Connection For systems using RM-P2580, connect using a control signal cable. - Page 22 When power is supplied to the camera, the [POWER] power indicator on the side panel lights up. AC 24 V or DC 12 V (TK-C9510E) To prevent connection errors or a cable disconnection, use a lug plate to connect to the terminal. The following table shows the connection distances when a two-core VVF (vinyl-insulated vinyl sheath cable) is used.
-
Page 23: Alarm Input
Connection/Installation AC 220 V to AC 240 (TK-C9511EG) When using this camera, install it near the socket so that power disconnection may be made immediately. Alarm Signal Connection For details on the settings, refer to "AUX FUNCTION" (A page 52). The default setting has been set to alarm input. -
Page 24: Mounting The Camera
Connection/Installation Mounting the Camera When mounting the camera on a fixer, pan/tilt and the like, use the camera-mounting screw hole located on the camera-mounting bracket. (Length of screw: 7 mm or less) Camera-mounting bracket fastening screws (x2: M2.6 x 6 mm) Camera-mounting screw hole (1/4-20UNC) MAX. - Page 25 Connection/Installation 6 mm Fall Prevention Wire M3 x 6 mm 2 mm When mounting the camera to the ceiling, ensure to wear Note safety glasses to protect the eye from any falling objects. Mounting the Camera-Mounting Bracket on Top of the Camera The camera-mounting bracket is originally mounted at the bottom of the camera before shipment but it can also be mounted on top of the camera.
-
Page 26: Setting/Adjustment Switch Settings
Setting/Adjustment Switch Settings A [LLlINT/VL] Synchronous system selection switch For setting the camera’s synchronous system. : Set to this option when adjusting the vertical sync of the camera according to the commercial power frequency. INT/VL : Set to this option during internal synchronization (INT) or external synchronization (V). - Page 27 Setting/Adjustment C [RX TERM OFFlON] RX terminal ON/OFF switch For setting whether to apply termination at a resistance value of 110 K between the RX+ and RX- control signal connectors. : Does not terminate. : Terminates. (Default setting: ON) If the system including this camera employs an M.DROP Memo (Multi DROP, RS-485) system, such as RM-P2580, set only the camera connected at the other end of the control signal...
-
Page 28: Adjusting The Back Focus
Setting/Adjustment Adjusting the Back Focus This camera is adjusted to an optimum wide range before shipment but readjustment is required when using zoom lens or when the lens focus ring is out of focus. Back focus adjustment ring Lens focus ring Tighten Back focus fastening screw (M2) - Page 29 Setting/Adjustment With a Zoom Lens If the image is out of focus when zooming (telephoto - wide angle), adjust the camera as follows. 1 Loosen the back focus fastening screw by turning it anti- clockwise with a + screwdriver. 2 Shoot some fine patterns on the subject or away from the subject.
-
Page 30: Fine-Tuning The Focus
Setting/Adjustment Fine-tuning the Focus When adjusting the focus of the auto iris lens, use the Focus Adjust mode for easy focusing as the iris opens and depth of field becomes shallower. (Refer also to the instruction manual of the lens.) 1 Press and hold down the Up cross key. -
Page 31: Adjusting The Auto White Balance
Setting/Adjustment Adjusting the Auto White Balance Each light source has its own colour temperature. Therefore, when the main light source illuminating the subject is changed, adjust the white balance again. Perform white balance adjustment for each scene file. 1 Press the [MENU] button. 2 Select the scene file for which white balance is to be adjusted. -
Page 32: Menu Settings Menu Screen Flow
Menu Settings Menu Screen Flow MENU (A page 35) SCENE FILE (A page 35) SCENE NAME SCENE NAME EDIT (A page 35) COPY INITIALIZE (A page 35) (A page 36) BASIC SETTINGS (A page 36) MONITOR TYPE WHITE BALANCE W.BAL CONTROL (A page 36) AGC GAIN (A page 37) - Page 33 Menu Settings MOTION DETECT (A page 47) (A page 47) DETECT LEVEL DETECT EDIT (A page 47) AREA EDIT TITLE SIZE (A page 47) (A page 47) TITLE COLOUR (A page 48) ALARM TIME DEMONSTRATION DETECT DEMONSTRATION (A page 48) MAINTENANCE (A page 49) Not displayed during menu...
-
Page 34: Menu Setting
Menu Settings Menu Setting 1 Press the MENU button. 2 Move the cross key up/down to align the cursor (E) with the item to set. 3 Move the cross key to the left/right to change the setting. When a setting has been changed, a change mark (Z) is displayed. 4 Press the [MENU] button to exit setting. -
Page 35: Scene File
Menu Settings SCENE FILE This camera comes with eight different scene files (SCENE A to SCENE H), which enable detailed image setting according to the shooting condition of the subject. You can make use of the AUX terminal input or external communication to switch to a different scene file. -
Page 36: Basic Settings
Menu Settings BASIC SETTINGS Item Function and Setting MONITOR Set according to the monitor in use. TYPE [Setting values: LCD1, LCD2, LCD3] (Default value: LCD1) WHITE For selecting a white balance adjustment feature. BALANCE [Setting values: ATW-N, ATW-W, AWC] (Default value: ATW-W) ATW-N : This is the ATW-N (Auto-Tracking White Balance) mode. - Page 37 Menu Settings Item Function and Setting For setting AGC (Automatic Gain Control). When AGC is working, the screen appears grainy in dark places. Select “FIXED”, and press the [SET] button to display the [AGC GAIN] screen. [Setting values: OFF, MID, HIGH, FIXED] (Default value: HIGH) When [DAY/NIGHT] is set to “AUTO”, Memo...
- Page 38 Menu Settings BASIC SETTINGS (Continued) Item Function and Setting CAMERA For setting the title to be displayed on the bottom left of TITLE EDIT the screen. Press the [SET] button to display the [CAM.TITLE EDIT] screen. You can enter up to 24 characters for the title.
-
Page 39: Setting Example
Menu Settings Item Function and Setting Set this item when the subject is not readily visible due to backlight. Visibility is enhanced by adjusting the photometry area according to the subject. [Setting values: OFF, AREA1 to AREA4, EDIT1, EDIT2] (Default value: OFF) Set this item when the subject is backlit by a strong light source in the same direction. - Page 40 Menu Settings BASIC SETTINGS (Continued) Item Function and Setting For setting whether to prioritize motion or SETTINGS PRIORITY picture quality when the subject becomes dark. [Setting values: MOTION, COMBO, PICTURE] (Default value: COMBO) MOTION : Prioritizes motion. AGC (Automatic Gain Control) operates with priority.
- Page 41 Menu Settings Item Function and Setting WIDE-D Enables subjects with a high contrast to SETTINGS LEVEL be seen clearly and naturally. The larger the value, dark area becomes more visible. The smaller the value, bright area becomes more visible. [Setting values: -5 to NORMAL to 5] (Default value: NORMAL) Memo When [SHUTTER/WIDE-D] is not set to“A.WIDE-D”...
- Page 42 Menu Settings BASIC SETTINGS (Continued) Item Function and Setting AES LIMIT For setting the maximum shutter speed SETTINGS limit when [SHUTTER/WIDE-D] is set to “AES”. [Setting values: 1/1000, 1/2000, 1/4000, 1/10000, 1/20000, 1/40000, 1/100000] (Default value: 1/100000) Memo When [SHUTTER/WIDE-D] is not set to “AES”, “---”...
- Page 43 Menu Settings Item Function and Setting DAY/ DAY/ For setting the condition for switching NIGHT NIGHT video images to the Black-and-white (Continued) mode when [DAY/NIGHT] is set to “AUTO”. AUTO : For setting the brightness LEVEL level at which the camera switches between the Colour and Black-and-white modes.
-
Page 44: Video Settings
Menu Settings VIDEO SETTINGS Item Function and Setting WB AREA For setting the white balance target area. Select “ON” and press the [SET] button to display the [WB AREA EDIT] screen. Move the displayed frame up/down/left/right using the cross key to set the area for white balance adjustment. - Page 45 Menu Settings Item Function and Setting For setting DNR (Digital Noise Reduction). LEVEL When set to “HIGH”, noise is effectively reduced but moving objects can be blurred. [Setting values: LOW, NORMAL, HIGH] (Default value: NORMAL) ANTI FOG Function to make the image clearer when shooting distant views, or when the image appears blurry due to fog and the like.
-
Page 46: Video Effect
Menu Settings VIDEO EFFECT Item Function and Setting D.ZOOM For setting the digital zoom magnification ratio. [Setting values: VARIABLE, WIDE(x1), MID(x1.4), TELE(x2)] (Default value: VARIABLE) Memo As the video is digitally processed when digital zoom is used, the image quality may deteriorate slightly. -
Page 47: Motion Detect
Menu Settings MOTION DETECT Item Function and Setting MOTION For setting the Motion Detect feature to ON/OFF. DETECT [Setting values: OFF, ON] (Default value: OFF) Memo When [D.ZOOM MAX] is set to x8, "---" is displayed and the camera operates in the "OFF"... - Page 48 Menu Settings MOTION DETECT (Continued) Item Function and Setting MOTION ALARM TIME For setting the output time of the DETECT alarm signal and the time to display alarm on the screen. [Setting values: OFF, 5s to 10s, 15s, 20s, 30s, 60s] (Default value: 5s) DEMONSTRATION Use this to check whether the Motion...
-
Page 49: Maintenance
Menu Settings MAINTENANCE Item Function and Setting REVERSE For setting the Reverse mode. When set to “ON”, the MODE image is inverted horizontally and vertically. [Setting values: OFF, ON] (Default value: OFF) V.PHASE Aligns the vertical sync with other cameras during operation of line lock (LL) or external sync (V). -
Page 50: Factory Settings
Menu Settings MAINTENANCE (Continued) Item Function and Setting COMMUNICATION COMMUNICATION Set this item when operating using a (continued) (JCCP) controller that is compliant with JCCP. Set “PROTOCOL1” and “PROTOCOL 2” to the same values as those of the controller. Set the “MACHINE ID” while ensuring that it does not duplicate with that for other cameras. -
Page 51: Privacy Mask
Menu Settings PRIVACY MASK Item Function and Setting BRIGHTNESS For setting the brightness of the part of the image that is masked. The smaller the value, the darker the image. The larger the value, the brighter the image. [Setting values: 0 to 10] (Default value: 10) MASK No.1 For setting a mask (gray display) to hide areas in an image that you do not want to capture. -
Page 52: Aux Function
Menu Settings AUX FUNCTION Item Function and Setting For setting the input/output signal of the AUX terminal. FUNCTION [Setting values: IN:ALARM, IN:SCENE A to IN:SCENE H, OUT:ALARM, OUT:B&W] (Default value: IN:ALARM) Memo Select “IN ALARM”, and press the [SET] button to display the [AUX ALARM] screen. - Page 53 Menu Settings Item Function and Setting For setting the polarity of the AUX input signal. POLARITY [Setting values: MAKE, BREAK] (Default value: MAKE) MAKE : Inputs alarm when the contact of the AUX and GND terminals switches from open to close.
-
Page 54: Detailed Settings
Detailed Settings Default Values of Scene Files Select a setting between “SCENE A” and “SCENE H” according to the surveillance conditions. All scene files can be customized. (A page 32) You can also switch the scene file to set via external input. (A page 63) SCENE FILE SCENE NAME Surveillance Condition... - Page 55 Detailed Settings SCENE FILE SCENE NAME Surveillance Condition SCENE F WIDE-D Suitable for surveillance of scenes such as at entrances or in a backlit scene, where there is a mixture of bright and dark subjects. SCENE G M.DET Setting that enables the Motion Detect function which outputs an alarm when human motion or object motion is detected.
-
Page 56: Motion Detect Area Setting
Detailed Settings Motion Detect Area Setting For setting the area in which Motion Detect functions, which outputs alarm signals when there is movement in the video image. When [AUX FUNCTION] is set to “OUT:ALARM”, alarm signals are output from the rear AUX terminal. - Page 57 Motion Detect is not a function for preventing theft and fire. It Note may not function properly depending on the condition of the subject and settings. JVC will not be liable for any accident or damage that arises as a result. E-57...
-
Page 58: Scene Name/Camera Title Setting
Detailed Settings Scene Name/Camera Title Setting You can change a scene file name (up to eight characters). You can add a title to a camera (up to 24 characters). Changing the Scene File Name (SCENE NAME) "Default Values of Scene Files" (A page 54) 1 On the [MENU] screen, select [SCENE FILE], and move the cross key to the left/right to select the scene file for which you want to specify a name. -
Page 59: Detailed Settings
Detailed Settings Setting the [CAMERA TITLE] 1 Select the [BASIC SETTINGS] item on the [MENU] screen, and press the [SET] button. The [BASIC SETTINGS] screen appears. 2 Move the cross key up/down to select [CAMERA TITLE EDIT], and press the [SET] button. The [CAM.TITLE EDIT] screen appears. -
Page 60: Manual White Balance Adjustment
Detailed Settings Manual White Balance Adjustment White balance of this camera can be set to adjust automatically according to the subject. When the automatic adjustment results in, for example, a reddish screen, adjust the white balance manually. 1 Select the [BASIC SETTINGS] item on the [MENU] screen, and press the [SET] button. -
Page 61: Output Of Black-And-White/Colour Switch Signal
Detailed Settings Output of Black-and-white/Colour Switch Signal The state of rear AUX terminal can be changed at colour/black-and- white switch. This is enabled when [AUX FUNCTION] is set to “OUT:B&W”. (A page 52) Setting [AUX FUNCTION] to “OUT:B&W” 1 Select the [AUX FUNCTION] item on the [MENU] screen, and press the [SET] button. - Page 62 Detailed Settings Output of Black-and-white/Colour Switch Signal (Continued) Setting [DAY/NIGHT] to “AUTO” 1 Select the [BASIC SETTINGS] item on the [MENU] screen, and press the [SET] button. The [BASIC SETTINGS] screen appears. 2 Move the cross key up/down to select [DAY/NIGHT]. 3 Move the cross key to the left/right to set to “AUTO”.
-
Page 63: Controlling Black-And-White/Colour Switch Signal Externally
Switching signal from an external controller can be used to switch the image on the camera between colour/black-and-white, and also enable simultaneous operation of lighting such as near-infrared light. For details on the devices to connect, consult your JVC dealer. Infrared Lighting, etc. Sensor or Switch... - Page 64 Detailed Settings Controlling Black-and-white/Colour Switch Signal Externally (Continued) Switching Between Day/Night Video Setting Using Scene File Function Example: Switching to SCENE D when AUX input is in the Make state AUX FUNCTION : IN : SCENE D IN POLARITY : MAKE AUX Input: Break State Setting example for day use SCENE NAME : CASINO...
-
Page 65: Privacy Mask Setting
Detailed Settings Privacy Mask Setting 1 Select the [PRIVACY MASK] item on the [MENU] screen, and press the [SET] button. The [PRIVACY MASK] screen appears. 2 Move the cross key up/down to select [MASK No.*], move the cross key to the left/right to select “ON”, followed by pressing the [SET] button. The [MASK EDIT (MASK No.*)] screen appears. -
Page 66: Blc Photometry Area Setting
Detailed Settings BLC Photometry Area Setting For setting the photometry area for backlight compensation. You can perform setting on two types of screens, [EDIT1] and [EDIT2]. 1 Select the [BLC] item on the [BASIC SETTINGS] screen, and select [EDIT1]. 2 Press the [SET] button. The [BLC EDIT] screen appears. - Page 67 Others Troubleshooting Operational Error Reference State Action Page Check the power A page 22 indicator on the camera, and also whether the coaxial cable is connected properly. A page 44 Check whether the brightness and contrast of the monitor are set appropriately.
-
Page 68: Others Troubleshooting
Others Troubleshooting (Continued) Operational Error (continued) Reference State Action Page Check whether the video cable is A page 21 Unable to switch correctly connected. between AUX A page 52 Check whether the [AUX input/output. FUNCTION] item is correctly set. The [SET] button Press the [SET] button down operation cannot vertically. - Page 69 Others Error Display Reference Error Message Action Page There is insufficient white A page 31 in the subject, or the A page 60 colour temperature AWC ERROR: setting is inappropriate. NG OBJECT Fill the screen with a white object thoroughly and adjust the white balance again.
-
Page 70: Index
Others Index AGC ................. 37 ALC SETTINGS ............... 39 Auto White Balance Adjustment (AWC) ......36 Automatic Electronic Shutter (AES) ......... 38 Back Focus ..............28 BLC .................. 39 Camera Title ..............38, 59 DAY/NIGHT ..............42 Digital Noise Reduction (DNR) ........45 Focus Adjust .............. -
Page 71: Specifications
0.003 lx (Standard, 25 %, F1.2, AGC HIGH) Lens mount : CS mount Power supply : AC 24 V 50 Hz/60 Hz, DC 12 V (TK-C9510E) AC 220 V - AC 240 V 50 Hz/60 Hz (TK-C9511EG) Length of power : 1900 mm (TK-C9511EG) - Page 72 E-72...
- Page 73 COLOUR VIDEO CAMERA BEDIENUNGSANLEITUNG TK-C9510E TK-C9511EG...
-
Page 74: Sicherheitsvorkehrungen
● Die Einheit muss an AC24 V oder DC12 V Strom angeschlossen sein. (nur TK-C9510E) Die AC24 V und 12 V DC Stromzufuhr soll konform mit dem folgenden sein: ● nur Isolierte Stromzufuhr. (nur TK-C9510E) ● Diese Installation sollte von einer qualifizierten Person, die mit den örtlichen Vorschriften vertraut ist, vorgenommen werden. - Page 75 Das Etikett befindet sich auf der Kamera. ● ● JVC übernimmt keine Haftung, falls Ihnen die Kamera herunterfällt, weil Sie die Montage nicht sicher oder nicht entsprechend der Gebrauchsanweisung durchgeführt haben. Führen Sie die Installation mit äußerster Sorgfalt durch. Wenn Sie dieses Produkt an einer Decke oder einer Wand installieren, ●...
-
Page 76: Wichtige Sicherheitshinweise
Sicherheitsvorkehrungen WICHTIGE SICHERHEITSHINWEISE Alle Warnungen auf dem Produkt sowie in der Betriebsanleitung sind unbedingt zu beachten. Ziehen Sie den Netzstecker dieses Systems aus der Steckdose, bevor Sie das Gerät reinigen. Benutzen Sie keine Flüssigreiniger und keine Sprühreiniger. Verwenden Sie zum Reinigen lediglich ein leicht angefeuchtetes Tuch. - Page 77 Sicherheitsvorkehrungen Das Gerät ist mit einem Schutzkontaktstecker (einem Stecker mit Erdungs- bügeln an beiden Seiten) ausgestattet. Dieser Stecker lässt si ch nur in eine geerdete Schutzkontaktsteckdose einstecken. Dies dient Ihrer Sicherheit. Falls sich der Stecker nicht problemlos in die Steckdose einstecken lassen sollte, lassen Sie die (veraltete) Steckdose von einem Elektriker austauschen.
- Page 78 Einleitung Merkmale und Funktionen Diese Kamera verwendet einen 1/2- Inch-CCD-Sensor, der Farben mit einer Mindestbeleuchtung von 0,025 lx (F1.2, 25 %) umsetzt. A S. 51 Gewährleistet stabile Verfügt über einen weiten Bildqualität Dynamikbereich. Korrigiert dunkle und weiße Stellen aufgrund von drastischen Helligkeitsunterschieden im Zielbereich.
- Page 79 Einleitung Es sind acht Szenendateien Unterstützt die verfügbar. Jede Szenendatei Registrierung von besitzt Voreinstellungen für Szenendateien für verschiedene Anwendungen. verschiedene Sie können außerdem Umgebungen angepasst werden. Änderungen in der Szene wie beispielsweise Bewegungen im Einstellungsbereich Erkennt verdächtige werden automatisch erkannt Bewegungen innerhalb und es kann eine des Einstellungsbereichs...
- Page 80 Einleitung Inhaltsverzeichnis Einleitung Merkmale und Funktionen ..............6 Inhaltsverzeichnis ................8 Hinweise zu dieser Anleitung ............10 Vorsichtshinweise für die Bedienung ..........11 Name der Teile ................14 Anschluss/Installation Schnellinstallation ................16 Systemanschluss ................18 Anbringen des Objektivs ..............20 Anschluss ..................
-
Page 81: Einleitung
Einleitung Detaillierte Einstellungen Standardwerte der Szenendateien ..........35 Einstellung des Bewegungsmelder-Bereichs ........37 Szenenname/Kameratitel-Einstellung ..........39 Manuelle Anpassung des Weißabgleichs ........41 Ausgabe des Signals für den Wechsel zwischen Schwarz-Weiß-/ Farbe .................... 42 Externe Kontrolle Schwarz-Weiß-/Farb-Signalwechsels ....44 Einstellung der Maskenfunktion ............46 Einstellung des Fotometriebereichs für den Gegenlichtkompensation ...................... -
Page 82: Hinweise Zu Dieser Anleitung
Bitte lesen Sie sich diese „BEDIENUNGSANLEITUNG“ und die beigefügten Informationen durch, bevor Sie das Gerät in Betrieb nehmen, um eine ordnungsgemäße Benutzung zu gewährleisten. Die Anweisungen in dieser Anleitung gelten für TK-C9510E/TK- C9511EG. Hinweise zu dieser Anleitung Hinweise zu dieser Anleitung Grundsätze und Symbole... -
Page 83: Vorsichtshinweise Für Die Bedienung
Einleitung Vorsichtshinweise für die Bedienung Aufbewahrung und Nutzungsstandort Installieren und benutzen Sie die Kamera nicht an den folgenden Standorten. An einem Ort an dem die Kamera Regen oder Feuchtigkeit ausgesetzt ist. An einem Ort, an dem Dampf oder Oil ist, wie z.B. in einer Küche. Wenn die vor Ort herrschenden Temperaturen den empfohlenen Betriebstemperaturbereich (von -10 f bis 50 f) übersteigen bzw. - Page 84 Einleitung Vorsichtshinweise für die Bedienung (Fortsetzung) Haftungsausschluss Mit einem Bewegungsmelder können Diebstahl und Feuer nicht verhindert werden. Wir haften nicht für eventuell entstehende Schäden. Wir übernehmen keinerlei Haftung für Unzulänglichkeiten bzw. Störungen, wenn aufgrund der Kameraaufnahmen mit diesem Produkt die Privatsphäre verletzt wird. Andere Wird diese Kamera von einem kalten an einen warmen Standort umgesetzt, kann Kondensation auftreten bzw.
- Page 85 Einleitung Wird der [WHITE BALANCE] der Kamera auf „ATW-N“ oder „ATW-W“ eingestellt, kann der Farbton entsprechend des Motivumfelds aufgrund der automatischen Anpassung des Weißabgleichs leicht von der tatsächlichen Farbe abweichen. Dies ist auf die automatische Anpassung des Weißabgleichs zurückzuführen und keine Fehlfunktion. Beim Wechseln von Farb- auf Schwarz-Weiß-Bildern, ist eventuell das Betriebsgeräusch des optischen Filterwechselmotors zu hören und das Bild kann vorübergehend verzerrt oder schwarz werden.
-
Page 86: Name Der Teile
Einleitung Name der Teile Vorderseite/Oberseite/Seite POWER IRIS A Einstellungsring für die Schnittweite B Objektiv-Verschluss C [POWER] Stromanzeige D [IRIS] Iris-Terminal E Befestigungsschrauben für Montagebügel der Kamera (x2, M2,6 x 6 mm) F Drehschutzöffnung G Loch für Kamera-Befestigungsschrauben (1/4-20UNC) H Montagebügel der Kamera I Schnittweiten-Anbringungsschraube D-14... - Page 87 A [VIDEO OUT] Ausgangsterminal des Videosignals B [SYNC IN] Eingangsterminal des Synchronisationssignals C AC 220 V - AC 240 V Stromkabel (TK-C9511EG) D AC 24 V, DC 12 V Stromeingangsterminal (TK-C9510E) E [TX+ E, TX- F, RX+ G, RX- H] Kontrollsignalanschlüsse (RS-485- konform) F AUX, GND-Anschlüsse...
-
Page 88: Anschluss/Installation Schnellinstallation
An externes Gerät anschließen (z. B. Sensor) POWER IRIS An Fernbedienungsgerät anschließen, etc. An AC 24 V- oder DC 12 V-Spannungsquelle (TK-C9510E) Montage der Kamera (A S. 24) MAX. 6 mm 2 mm POWER IRIS M3 x 6 mm D-16... - Page 89 Anschluss/Installation Schaltereinstellungen (A S. 26) Anpassen der optischen Schnittweite (A S. 28) Menüeinstellungen (A S. 34) Fertigstellung Stromzufuhr Fernbedienung D-17...
-
Page 90: Systemanschluss
Anschluss/Installation Systemanschluss Anschlussdiagramm Stromkabel KAMERA 1 Kontrollsignal MACHINE ID : 1 kabel (Menübildschirm) Videosignalkabel RX TERM : OFF (Schaltere) KAMERA 2 MACHINE ID : 2 (Menübildschirm) RX TERM : OFF (Schaltere) KAMERA 8 MACHINE ID : 8 (Menübildschirm) RX TERM : ON TO CAMERA DATA I / O UNIT... - Page 91 Anschluss/Installation Verbindungseinstellungen Kontrollsignalkabelanschluss an Kamera (Rückseite) Notiz Schließen Sie die Kabel richtig an, damit die A-, B-, C-, D-Zeichen der Kameraterminals mit denen der TO CAMERA DATA I / O RX+ RX- TX+ TX- UNIT CAMERA SERIAL-1 SERIAL-2 COM 9/1 10/2 11/3 12/4 13/5 14/6 15/7 16/8 COM AUTO ALARM VIDEO INPUT...
-
Page 92: Anbringen Des Objektivs
Diese Kamera ist mit Objektiven mit CS-Verschluss kompatibel. Für die Verwendung eines Objektivs mit C-Verschluss ist ein C-Adapter erforderlich. Ausführliche Informationen zum C-Adapter erhalten Sie bei Ihrem JVC-Händler. Verwenden Sie in keinem Fall ein Objektiv mit größeren Abmessungen als nachfolgend unter (a) aufgeführt, da dies zu Beschädigungen im Inneren der Kamera führen kann. -
Page 93: Anschluss
An AC 220 V - AC 240 V-Ausgang (TK-C9511EG) (A S. 23) An AC 24 V- oder DC 12 V-Spannungsquelle An Fernbedienungsgerät (TK-C9510E) anschließen, etc. (A S. 22) (A S.21) Kontrollsignalanschluss Für Systeme, die die RM-P2580 verwenden, verwenden Sie zur Verbindung ein Kontrollsignalkabel. - Page 94 Wird es versehentlich angeschlossen, können die internen Schaltkreise beschädigt werden. Benutzen Sie in diesem Fall die Kamera nicht weiter und schicken Sie sie zur Prüfung an einen JVC-Händler in Ihrer Nähe. Schließen Sie DC 12 V- und AC 24 V-Kabel nicht gleichzeitig an.
- Page 95 Anschluss/Installation AC 220 V bis AC 240 (TK-C9511EG) Installieren Sie die Kamera in der Nähe einer Steckdose, damit Sie sie gegebenenfalls sofort vom Stromnetz nehmen können. Alarmsignalanschluss Für Details zu den Einstellungen siehe [AUX FUNCTION]. Werksseitig ist der Alarmeingang voreingestellt. ([IN:ALARM]) Alarmeingang Schließen Sie den Infrarotsensor, den Türsensor, den Metallsensor, den Sensor für den manuellen Schalter usw.
-
Page 96: Montage Der Kamera
Anschluss/Installation Montage der Kamera Wenn Sie die Kamera an einem festen Standort, einem Schwenk-/Beugearm oder ähnlichem anbringen, nutzen Sie das speziell dafür vorgesehene Schraubloch im Montagebügel der Kamera. (Schraubenlänge: 7 mm oder weniger) Befestigungsschrauben für Kamera-Montagebügel (x2, M2,6 x 6) Loch für Kamera- Befestigungsschrauben MAX. - Page 97 Anschluss/Installation verwendete Schraube darf nicht länger als 6 mm sein, da sie ansonsten Teile im Geräteinneren beschädigen kann. 6 mm Sicherheitsdraht M3 x 6 mm 2 mm Tragen Sie bei der Deckenmontage der Kamera in jedem Fall eine Hinweis Schutzbrille, um Ihre Augen vor herabfallenden Objekten zu schützen. Anbringen des Montagebügels auf der Oberseite der Kamera Der Montagebügel ist bei Lieferung an der Unterseite der Kamera angebracht.
-
Page 98: Einstellung/Anpassung Schaltereinstellungen
Einstellung/Anpassung Schaltereinstellungen A [LLlINT/VL] Auswahlschalter für synchrones System Zur Einstellung des synchronen Systems der Kamera. : Stellen Sie diese Option ein, wenn Sie die vertikale Synchronisation der Kamera gemäß der üblichen Stromfrequenz anpassen. INT/VL : Stellen Sie diese Option während der internen Synchronisation (INT) oder externen Synchronisation (V) ein. - Page 99 Einstellung/Anpassung C [RX TERM OFFlON] AN-/AUS-Schalter für RX-Terminal Um einzustellen, ob bei einem Widerstandswert von 110 K ein Abschluss zwischen den RX+- und RX--Kontrollsignalabschlüssen angewendet werden soll. : Kein Abschluss. : Abschluss. (Standardeinstellung: ON) Falls das System inklusive dieser Kamera ein M.DROP- Notiz (Multi DROP, RS-485) System wie die RM-P2580 verwendet, stellen Sie nur die Kamera, die am anderen...
-
Page 100: Anpassen Der Optischen Schnittweite
Einstellung/Anpassung Anpassen der optischen Schnittweite Diese Kamera wird vor der Lieferung auf eine optimale Schnittweite eingestellt. Bei Verwendung eines Zoomobjektivs, oder wenn der Fokusring des Objektivs nicht mehr exakt fokussiert, ist jedoch eine Neuanpassung erforderlich. Einstellungsring für die Schnittweite Fokusring des Objektivs Anziehen Feststellschraube... - Page 101 Einstellung/Anpassung Bei Verwendung eines Zoomobjektivs Sind Sie mit der Schärfe des Bildes beim Zoomen nicht zufrieden (Telefoto-Weitwinkel), stellen Sie die Kamera wie folgt ein. 1 Lockern Sie die Schraube des Einstellungsrings für die Schnittweite, indem Sie die Schraube mit einem + Schraubenzieher entgegen dem Uhrzeigersinn lockern.
-
Page 102: Feinabstimmung Des Fokus
Einstellung/Anpassung Feinabstimmung des Fokus Nutzen Sie zur Feinabstimmung des Fokus des Auto-Iris-Objektivs den Modus Fokuseinstellung. Wenn sich die Iris öffnet und die Tiefenschärfe verringert, kann die Schärfe des Bildes problemlos angepasst werden. (Lesen Sie bitte auch im Benutzerhandbuch des Objektivs nach.) 1 Halten Sie die Hoch-Taste auf dem Steuerkreuz gedrückt. -
Page 103: Anpassung Des Automatischen Weißabgleichs
Einstellung/Anpassung Anpassung des automatischen Weißabgleichs Jede Lichtquelle besitzt eine bestimmte Farbtemperatur. Deshalb sollten Sie den Weißabgleich erneut anpassen, wenn sich die Hauptlichtquelle, die das Motiv beleuchtet, verändert. Passen Sie den Weißabgleich für jede Szenendatei an. 1 Drücken Sie die [MENU]-Taste. 2 Wählen Sie die Szenendatei, für die der Weißabgleich angepasst werden soll. -
Page 104: Agc
Menüeinstellungen Schema des Menübildschirms MENU SCENE FILE SCENE NAME SCENE NAME EDIT COPY INITIALIZE BASIC SETTINGS MONITOR TYPE WHITE BALANCE W.BAL CONTROL AGC GAIN SENSE UP CAM. TITLE EDIT CAMERA TITLE EDIT SHUTTER/WIDE-D BLC EDIT ALC SETTINGS ALC SETTINGS DAY/NIGHT DAY/NIGHT VIDEO SETTINGS WB AREA... - Page 105 Menüeinstellungen MOTION DETECT DETECT LEVEL AREA EDIT DETECT EDIT TITLE SIZE TITLE COLOUR ALARM TIME DEMONSTRATION DETECT DEMONSTRATION MAINTENANCE Wird bei der Menüeinstellung mit einer Fernbedienung nicht angezeigt. REVERSE MODE V.PHASE COMMUNICATION (JCCP) COMMUNICATION COMMUNICATION (PELCO) CCD SPOT CORRECTION CCD SPOT CORRECTION FACTORY SETTINGS FACTORY SETTINGS PRIVACY MASK...
-
Page 106: Menüeinstellung
Menüeinstellungen Menüeinstellung 1 Drücken Sie die MENU-Taste. 2 Bewegen Sie die Hoch-/Runter-Tasten des Steuerkreuzes, um den Cursor (E) auf die anzupassende Einstellung zu führen. 3 Bewegen die die Links-/Rechts-Taste des Steuerkreuzes, um die Einstellung zu ändern. Haben Sie eine Einstellung geändert, wird eine (Z) Änderungsmarkierung eingeblendet. -
Page 107: Detaillierte Einstellungen
Detaillierte Einstellungen Standardwerte der Szenendateien Wählen Sie eine Einstellung zwischen „SCENE A“ und „SCENE H“, entsprechend den Überwachungsbedingungen. Alle Szenendatei können angepasst werden. (A S. 32) Sie können die Szenendatei außerdem über externe Eingabe ändern. (A S. SCENE FILE SCENE NAME Überwachungsbedingungen SCENE A GENERAL... - Page 108 Detaillierte Einstellungen Standardwerte der Szenendateien (Fortsetzung) SCENE FILE SCENE NAME Überwachungsbedingungen SCENE F WIDE-D Für die Überwachung von Bereichen wie Eingängen oder hinterleuchteten Umgebungen geeignet, in denen eine Mischung heller und dunkler Objekte vorkommt. SCENE G M.DET Einstellung, die den Bewegungsmelder aktiviert, der einen Alarm ausgibt, wenn eine menschliche oder eine Objektbewegung erkannt...
-
Page 109: Einstellung Des Bewegungsmelder-Bereichs
Detaillierte Einstellungen Einstellung des Bewegungsmelder-Bereichs Um den Bereich einzustellen, in dem der Bewegungsmelder funktioniert, der die Alarmsignale ausgibt, wenn im Videobild eine Bewegung stattfindet. Wenn [AUX FUNCTION] auf „OUT:ALARM“ eingestellt ist, werden Alarmsignale vom AUX-Terminal auf der Geräterückseite ausgegeben. Notiz Nehmen Sie die Einstellung des Bewegungsmelders wie erforderlich für jede Szenendatei vor. - Page 110 Objektiv an, so dass das Objekt groß genug ist, um mehrere Blöcke einzunehmen. Mit einem Bewegungsmelder können Diebstahl und Feuer nicht verhindert Hinweis werden. Er funktioniert eventuell nicht richtig, je nach Umfeld des Objekts und Einstellungen. JVC kann nicht für daraus resultierende Unfälle oder Schäden haftbar gemacht werden. D-38...
-
Page 111: Szenenname/Kameratitel-Einstellung
Detaillierte Einstellungen Szenenname/Kameratitel-Einstellung Sie können einen Szenendateinamen ändern (bis zu acht Zeichen). Sie können einen Titel zu einer Kamera hinzufügen (bis 24 Zeichen). Ändern des Szenendateinamens (SCENE NAME) „Standardwerte der Szenendateien“ (A S. 35) 1 Wählen Sie auf dem [MENU]-Bildschirm [SCENE FILE] und bewegen Sie die Links-/Rechts-Taste des Steuerkreuzes, um die Szenendatei auszuwählen, deren Namen Sie festlegen möchten. - Page 112 Detaillierte Einstellungen Szenenname/Kameratitel-Einstellung (Fortsetzung) Einstellen des [CAMERA TITLE] 1 Wählen Sie den Menüpunkt [BASIC SETTINGS] auf dem [MENU]- Bildschirm aus und drücken Sie die [SET]-Taste. Der [BASIC SETTINGS]-Bildschirm erscheint. 2 Bewegen Sie das Steuerkreuz hoch/runter, um [CAMERA TITLE EDIT] auszuwählen und drücken Sie die [SET]-Taste. Der [CAM.TITLE EDIT]-Bildschirm erscheint.
-
Page 113: Manuelle Anpassung Des Weißabgleichs
Detaillierte Einstellungen Manuelle Anpassung des Weißabgleichs Der Weißabgleich dieser Kamera kann so eingerichtet werden, dass er automatisch entsprechend des Motivs angepasst wird. Wenn aufgrund der automatischen Einstellung zum Beispiel ein rötlichen Bildschirm angezeigt wird, müssen Sie den Weißabgleich manuell anpassen. 1 Wählen Sie den Menüpunkt [BASIC SETTINGS] auf dem [MENU]- Bildschirm aus und drücken Sie die [SET]-Taste. -
Page 114: Ausgabe Des Signals Für Den Wechsel Zwischen Schwarz-Weiß-/Farbe
Detaillierte Einstellungen Ausgabe des Signals für den Wechsel zwischen Schwarz- Weiß-/Farbe Der Status des rückseitigen AUX-Terminals kann mit dem Farb-/ Schwarz-Weiß-Schalter geändert werden. Dies wird aktiviert, wenn [AUX FUNCTION] auf „OUT:B&W“ eingestellt wird. Einstellen von [AUX FUNCTION] auf „OUT:B&W“ 1 Wählen Sie den Menüpunkt [AUX FUNCTION] auf dem [MENU]- Bildschirm aus und drücken Sie die [SET]-Taste. - Page 115 Detaillierte Einstellungen Einstellen von [DAY/NIGHT] auf „AUTO“ 1 Wählen Sie den Menüpunkt [BASIC SETTINGS] auf dem [MENU]- Bildschirm aus und drücken Sie die [SET]-Taste. Der [BASIC SETTINGS]-Bildschirm erscheint. 2 Bewegen Sie das Steuerkreuz hoch/runter, um [DAY/NIGHT] auszuwählen. 3 Bewegen Sie das Steuerkreuz nach links/rechts die Einstellung zu „AUTO“...
-
Page 116: Externe Kontrolle Schwarz-Weiß-/Farb-Signalwechsels
Bild der Kamera zwischen Farbe/Schwarz-Weiß zu ändern und ebenfalls, um eine gleichzeitige Benutzung von Beleuchtung wie beispielsweise Nahinfrarotlicht zu ermöglichen. Ausführliche Informationen zu den anzuschließenden Geräten erhalten Sie bei Ihrem JVC-Händler. Infrarot-Beleuchtung, etc. Sensor oder Schalter Externer Controller Szenendatei verfügbar, um AGC- und SHUTTER-Einstellungen zu... -
Page 117: Day/Night
Detaillierte Einstellungen Wechsel zwischen Tag/Nacht-Videoeinstellung mithilfe der Szenendatei-Funktion Beispiel: Wechseln zu SCENE D, wenn sich die AUX-Eingabe im Make-Status befindet AUX FUNCTION : IN : SCENE D IN POLARITY : MAKE AUX-Ausgabe: Break-Status Beispiel für Tag-Einstellung SCENE NAME : CASINO : MID DAY/NIGHT : COLOUR... -
Page 118: Scene File
Detaillierte Einstellungen Einstellung der Maskenfunktion 1 Wählen Sie den Menüpunkt [PRIVACY MASK] auf dem [MENU]-Bildschirm aus und drücken Sie die [SET]-Taste. Der [PRIVACY MASK]-Bildschirm erscheint. 2 Bewegen Sie das Steuerkreuz hoch/runter, um den Menüpunkt [MASK No.*] auszuwählen. Bewegen Sie das Steuerkreuz nach links/rechts, um „ON“ auszuwählen und drücken Sie anschließend die [SET]-Taste. -
Page 119: Einstellung Des Fotometriebereichs Für Den Gegenlichtkompensation
Detaillierte Einstellungen Einstellung des Fotometriebereichs für den Gegenlichtkompensation Einstellen eines Fotometriebereichs zur Gegenlichtkompensation. Sie können die Einstellung auf zwei Bildschirmarten vornehmen, [EDIT1] und [EDIT2]. 1 Wählen Sie den Menüpunkt [BLC] auf dem [BASIC SETTINGS]-Bildschirm und wählen Sie [EDIT1]. 2 Drücken Sie die [SET]-Taste. Der [BLC EDIT]-Bildschirm erscheint. -
Page 120: Andere
Andere Fehlerbehebung Betriebsfehler Status Aktion Referenzseite Prüfen Sie die A S. 22 Stromanzeige der Kamera und vergewissern Sie sich, dass das Koaxialkabel richtig angeschlossen ist. Prüfen Sie, ob die Helligkeit und der Kontrast des Monitors richtig eingestellt wurden. Bild wird nicht A S. - Page 121 Andere Status Aktion Referenzseite Prüfen Sie, ob das A S. 21 Videokabel richtig Wechsel zwischen angeschlossen wurde. AUX-Eingabe/ Prüfen Sie, ob der Ausgabe nicht Menüpunkt [AUX möglich. FUNCTION] richtig eingestellt wurde. Drücken Sie die [SET]- Die Betätigung der Taste vertikal. Falls die [SET]-Taste wird Taste winklig gedrückt wird, nicht richtig erkannt.
- Page 122 Andere Fehlerbehebung (Fortsetzung) Fehleranzeige Fehlermeldung Aktion Referenzseite Es gibt nicht genügend Weiß A S. 31 im Zielbereich oder die A S. 41 Farbtemperatureinstellung ist falsch. Nehmen Sie einen AWC ERROR: NG weißen Gegenstand so auf, OBJECT dass er den Bildschirm vollkommen ausfüllt und führen Sie den Weißabgleich noch einmal durch.
-
Page 123: Technische Daten
0,003 lx (Standard, 25 %, F1,2, AGC HIGH) Objektiv-Verschluss : CS-Halterung Stromzufuhr : AC 24 V 50 Hz/60 Hz, DC 12 V (TK-C9510E) AC 220 V - AC 240 V 50 Hz/60 Hz (TK-C9511EG) Länge des : 1900 mm (TK-C9511EG) - Page 124 D-52...
- Page 125 COLOUR VIDEO CAMERA MANUEL D’INSTRUCTIONS TK-C9510E TK-C9511EG...
-
Page 126: Mesures De Sécurité
Cet appareil est conforme aux directives et normes européennes en vigueur concernant la compatibilité électromagnétique et à la sécurité électrique. Représentant européen de la société Victor Company of Japan, Limited : JVC Technical Services Europe GmbH Postfach 10 05 04 61145 Friedberg Allemagne Cet appareil nécessite une alimentation électrique de 24 V c.a. -
Page 127: Informations Relatives À L Élimination Des Appareils Usagés, À L'fintention Des Utilisateurs
Mesures de sécurité ● JVC décline toute responsabilité en cas de dommage causé à la caméra suite à une chute ou à un montage ne respectant pas les instructions d’installation. ● Lors du montage de ce produit au plafond ou au mur, choisissez un endroit suffisamment solide pour supporter le poids et veillez à... - Page 128 Introduction Caractéristiques Cette caméra est dotée d’un capteur CCD 1/2" capable de reproduire la couleur, avec un éclairage minimum de 0,025 lx (F1,2, 25 %). A p. 49 Offre une qualité d’image stable Possède une large gamme dynamique. Corrige les zones sombres ou blanches dues aux variations de l’intensité...
- Page 129 Introduction Huit fichiers de scènes Prend en charge disponibles. Chaque fichier de l’enregistrement de scène possède des réglages fichiers de scènes pour préprogrammés pour différentes différents applications. Ils peuvent environnements également être personnalisés. Les changements se produisant dans la scène, comme des Détecte les mouvements dans la zone mouvements suspects...
- Page 130 Introduction Contenu Introduction Caractéristiques ................. 4 Table des matières ................6 Comment lire ce manuel ..............8 Précautions d’utilisation ..............9 Noms des pièces ................12 Connexion/Installation Installation rapide ................14 Connexion du système ..............16 Installation de l’objectif ..............18 Connexion ..................
-
Page 131: Introduction
Introduction Réglages détaillés Valeurs par défaut des fichiers de scènes ........33 Réglage de la zone de détection des mouvements ......35 Réglage du nom de scène/titre de caméra ........37 Ajustement manuel de l’équilibrage des blancs ......39 Sortie du signal de commutation noir et blanc/couleur ....40 Contrôle externe du signal de commutation noir et blanc/couleur ...................... -
Page 132: Comment Lire Ce Manuel
: désigne une page ou un élément de référence. Contenu de ce manuel JVC détient les droits d’auteur de ce manuel. Il est défendu de reproduire ce manuel en partie ou en totalité sans le consentement préalable de la compagnie. -
Page 133: Précautions D'utilisation
Introduction Précautions d’utilisation Emplacement et endroits d’utilisation N’installez et n’utilisez pas la caméra dans les endroits suivants : Dans un endroit exposé à la pluie ou à l’humidité. Là où il y a de la vapeur ou de l’huile, par exemple dans une cuisine. Dans un endroit où... - Page 134 Nous ne serons en aucun cas responsables de tout dommage qui pourrait se produire. JVC décline toute responsabilité en cas de dérangement ou trouble occasionné par une atteinte à la vie privée résultant d’enregistrements réalisés avec ce produit.
- Page 135 Introduction Lorsque le [WHITE BALANCE] de cette caméra est réglé sur “ATW-N” ou sur “ATW-W”, le ton de la couleur peut être légèrement différent de la couleur réelle, selon les conditions dans lesquelles se trouve le sujet. Cela se doit au principe du circuit d’équilibrage automatique des blancs; ce n’est pas un dysfonctionnement.
-
Page 136: Noms Des Pièces
Introduction Noms des pièces Vue avant/supérieure/de côté POWER IRIS A Bague d’ajustement de la mise au point arrière B Monture d’objectif C [POWER] Voyant d’alimentation D [IRIS] Borne du diaphragme E Vis de fixation du support de fixation de la caméra (x2, M2,6 x 6 F Orifice de prévention de rotation G Orifice de vis de fixation de la caméra (1/4-20UNC) H Support de fixation de la caméra... - Page 137 B [SYNC IN] Terminal d’entrée du signal de synchronisation C Cordon d’alimentation 220 V à 240 V c.a. (TK-C9511EG) D Terminal d’entrée de puissance 24 V c.a., 12 V c.c. (TK-C9510E) E [TX+ E, TX- F, RX+ G, RX- H] Connecteurs des signaux de contrôle (à...
-
Page 138: Connexion/Installation Installation Rapide
(p. ex. capteur) POWER IRIS Relier à une unité de contrôle à distance, etc. Vers l’alimentation 12 volts c.c. ou 24 volts c.a (TK-C9510E) Installation de la caméra (A p. 22) MAX. 6 mm 2 mm POWER IRIS... - Page 139 Connexion/Installation Réglages des commutateurs Ajustement de la mise au point (A p. 24) arrière (A p. 26) Réglages du menu (A p. 32) Achèvement Alimentation électrique Télécommande F-15...
-
Page 140: Connexion Du Système
Connexion/Installation Connexion du système Diagramme de connexion Câble d’alimentation CAMÉRA 1 Câble de signal MACHINE ID : 1 de contrôle (Écran menu) Câble de signal vidéo RX TERM : OFF (Commutateur) CAMÉRA 2 MACHINE ID : 2 (Écran menu) RX TERM : OFF (Commutateur) CAMÉRA 8 MACHINE ID : 8... - Page 141 Connexion/Installation Réglages de connexion Branchement des câbles de signaux de contrôle sur la caméra (arrière) Memo Branchez les câbles correctement, de sorte à ce que les marques A, B, C, D des terminaux des caméras TO CAMERA DATA I / O RX+ RX- TX+ TX- COM 9/1 10/2 11/3 12/4 13/5 14/6 15/7 16/8 COM AUTO...
-
Page 142: Installation De L'objectif
Si la prise du câble de l’objectif est différente, connectez-la avec une Memo prise à 4 broches. Pour plus d’informations sur les prises à 4 broches, veuillez consulter votre revendeur JVC. (Pièce nº: SCV2859-001) Prise à 4 broches Broche nº... -
Page 143: Connexion
(TK-C9511EG) (A p. 21) Vers l’alimentation 12 volts c.c. ou 24 volts c.a Relier à une unité de contrôle (TK-C9510E) à distance, etc. (A p. 20) (A p. 19) Connexion des signaux de contrôle Connectez les systèmes utilisant le terminal RM-P2580 au moyen d’un câble de signaux de contrôle. - Page 144 électrique du réseau extérieur. S’il y est connecté par erreur, le circuit interne pourrait être endommagé. Dans ce cas, arrêtez d’utiliser la caméra et confiez-la au revendeur JVC le plus proche pour une inspection. Ne pas connecter les câbles 12 volts c.c. et 24 volts c.a. en même temps.
- Page 145 Connexion/Installation 220 V à 240 V c.a. (TK-C9511EG) Lors de l’utilisation de cette caméra, installez-la à côté d’une prise afin de pouvoir la déconnecter immédiatement au besoin. Connexion du signal d’alarme Pour de plus amples informations sur les réglages, reportez-vous à [AUX FUNCTION].
-
Page 146: Installation De La Caméra
Connexion/Installation Installation de la caméra Pour fixer la caméra sur un support (panoramique, inclinaison, etc.), utilisez l’orifice de vis de fixation de la caméra situé sur le support de fixation. Longueur de vis: 7 mm maximum Vis de fixation du support de montage de la caméra (x2, M2,6 x 6) Orifice de vis de fixation de la caméra (1/4-20UNC) - Page 147 Connexion/Installation 6 mm Attache antichute M3 x 6 mm 2 mm Lors de l’installation de la caméra au plafond, veillez à porter des Remarque lunettes de sécurité pour protéger vos yeux contre tout objet susceptible de tomber. Installation du support de fixation sur le dessus de la caméra Le support de fixation de la caméra a été...
-
Page 148: Réglages/Ajustements
Réglages/ajustements Réglages des commutateurs A [LLlINT/VL] Commutateur de sélection du système synchrone Permet de régler le système synchrone de la caméra. : Sélectionnez cette option lorsque vous ajustez la synchronisation verticale de la caméra selon la fréquence du réseau électrique. INT/VL : Sélectionnez cette option pendant la synchronisation interne (INT) ou externe (V). - Page 149 Réglages/ajustements C [RX TERM OFFlON] Commutateur ON/OFF du terminal RX Permet de choisir d’appliquer ou non une interruption à une valeur de résistance de 110 K entre les connecteurs de signaux de contrôle RX+ et RX-. : Pas d’interruption. : Interruption. (Par défaut: ON) Si le système, y compris cette caméra, utilise un système Memo...
-
Page 150: Ajustement De La Mise Au Point Arrière
Réglages/ajustements Ajustement de la mise au point arrière En usine, cette caméra a été réglée de sorte à afficher la plus grande distance, mais des réajustements sont nécessaires lors de l’utilisation du zoom ou lorsque la bague de mise au point de l’objectif est mal réglée. -
Page 151: À L'aide D'un Tournevis Cruciforme, Desserrez La Vis De Fixation
Réglages/ajustements Avec un objectif à focales variables Si l’image est floue lorsque vous zoomez (téléphoto, grand angle), ajustez la caméra comme suit. 1 À l’aide d’un tournevis cruciforme, desserrez la vis de fixation de la mise au point arrière (sens inverse des aiguilles d’une montre). -
Page 152: Réglage Précis De La Mise Au Point
Réglages/ajustements Réglage précis de la mise au point Lors de l’ajustement de la mise au point d’un objectif à diaphragme automatique, utilisez le mode d’ajustement de la mise au point lorsque le diaphragme s’ouvre et que la profondeur de champ se réduit. (Lisez également le manuel d’instructions de l’objectif.) 1 Appuyez et maintenez enfoncée la flèche du haut du bouton en croix. -
Page 153: White Balance
Réglages/ajustements Ajustement de l’équilibrage automatique des blancs Chaque source lumineuse a sa propre température de couleur. Par conséquent, lorsque la source principale de lumière qui éclaire le sujet change, il faut ajuster de nouveau l’équilibrage des blancs. Réalisez un ajustement de l’équilibre des blancs pour chaque fichier de scène. -
Page 154: Réglages Du Menu
Réglages du menu Présentation de l’écran Menu MENU SCENE FILE SCENE NAME SCENE NAME EDIT COPY INITIALIZE BASIC SETTINGS MONITOR TYPE WHITE BALANCE W.BAL CONTROL AGC GAIN SENSE UP CAM. TITLE EDIT CAMERA TITLE EDIT SHUTTER/WIDE-D BLC EDIT ALC SETTINGS ALC SETTINGS DAY/NIGHT DAY/NIGHT... - Page 155 Réglages du menu MOTION DETECT DETECT LEVEL DETECT EDIT AREA EDIT TITLE SIZE TITLE COLOUR ALARM TIME DEMONSTRATION DETECT DEMONSTRATION MAINTENANCE Ne s’affiche pas si le réglage du menu est réalisé à l’aide d’une télécommande. REVERSE MODE V.PHASE COMMUNICATION (JCCP) COMMUNICATION (PELCO) COMMUNICATION CCD SPOT CORRECTION...
-
Page 156: Réglage Du Menu
Réglages du menu Réglage du menu 1 Appuyez sur le bouton MENU. 2 Utilisez les flèches haut/bas du bouton en croix pour aligner le curseur (E) sur l’élément à régler. 3 Utilisez les flèches gauche/droite du bouton en croix pour changer le réglage. -
Page 157: Réglages Détaillés
Réglages détaillés Valeurs par défaut des fichiers de scènes Sélectionnez un réglage entre “SCENE A” et “SCENE H” selon les conditions de surveillance. Tous les fichiers de scènes peuvent être personnalisés. (A p. 30) Vous pouvez également changer le fichier de scène à régler par une entrée externe. -
Page 158: Wide-D
Réglages détaillés Valeurs par défaut des fichiers de scènes (suite) SCENE FILE SCENE NAME Conditions de surveillance SCENE F WIDE-D Adapté pour la surveillance de scènes comme une entrée ou une scène rétroéclairée, où il existe à la fois des sujets lumineux et des sujets sombres. -
Page 159: Réglage De La Zone De Détection Des Mouvements
Réglages détaillés Réglage de la zone de détection des mouvements Permet de régler la zone d’action du détecteur de mouvements; signal d’alarme sera émis en cas de mouvement sur l’image vidéo. Lorsque [AUX FUNCTION] est réglé sur “OUT:ALARM”, les signaux d’alarme sont émis à l’arrière du terminal AUX. - Page 160 La détection des mouvements n’est pas une fonction conçue Remarque pour éviter les vols ou les incendies. Elle peut ne pas fonctionner correctement selon les conditions dans lesquelles se trouve le sujet et les réglages. JVC n’assume aucune responsabilité en cas d’accident ou de dommage en résultant. F-36...
-
Page 161: Réglages Détaillés
Réglages détaillés Réglage du nom de scène/titre de caméra Vous pouvez changer le nom d’un fichier de scène (jusqu’à huit caractères). Vous pouvez ajouter un titre à une caméra (jusqu’à 24 caractères). Changer le nom d’un fichier de scène (SCENE NAME) "Valeurs par défaut des fichiers de scènes"... - Page 162 Réglages détaillés Réglage du nom de scène/titre de caméra (suite) Régler le [CAMERA TITLE] 1 Sélectionnez l’élément [BASIC SETTINGS] sur l’écran [MENU] et appuyez sur le bouton [SET]. L’écran [BASIC SETTINGS] s’affiche. 2 Utilisez les flèches haut/bas du bouton en croix pour sélectionner [CAMERA TITLE EDIT], et appuyez sur le bouton [SET].
-
Page 163: Ajustement Manuel De L'équilibrage Des Blancs
Réglages détaillés Ajustement manuel de l’équilibrage des blancs L’équilibrage des blancs de cette caméra peut être ajusté automatiquement selon le sujet. Lorsque l’ajustement automatique affiche un écran rougeâtre par exemple, ajustez l’équilibrage des blancs manuellement. 1 Sélectionnez l’élément [BASIC SETTINGS] sur l’écran [MENU] et appuyez sur le bouton [SET]. -
Page 164: Sortie Du Signal De Commutation Noir Et Blanc/Couleur
Réglages détaillés Sortie du signal de commutation noir et blanc/couleur L’état du terminal AUX arrière peut être changé grâce au commutateur couleur/noir et blanc. Il est actif lorsque [AUX FUNCTION] est réglé sur “OUT:B&W”. Régler [AUX FUNCTION] sur “OUT:B&W” 1 Sélectionnez l’élément [AUX FUNCTION] sur l’écran [MENU] et appuyez sur le bouton [SET]. - Page 165 Réglages détaillés Régler [DAY/NIGHT] sur “AUTO” 1 Sélectionnez l’élément [BASIC SETTINGS] sur l’écran [MENU] et appuyez sur le bouton [SET]. L’écran [BASIC SETTINGS] s’affiche. 2 Utilisez les flèches haut/bas du bouton en croix pour sélectionner [DAY/NIGHT]. 3 Utilisez les flèches gauche/droite du bouton en croix pour sélectionner “AUTO”.
-
Page 166: Contrôle Externe Du Signal De Commutation Noir Et Blanc/Couleur
à noir et blanc, ou pour activer le fonctionnement d’un éclairage tel qu’une lumière infrarouge proche. Pour plus d’informations sur les dispositifs à connecter, veuillez consulter votre revendeur JVC. Éclairage infrarouge, etc. Capteur ou commutateur Commande externe Il est possible de changer les réglages AGC et SHUTTER des... - Page 167 Réglages détaillés Changer les paramètres vidéo jour/nuit au moyen de la fonction fichier de scène Exemple: Passer à SCENE D lorsque l’entrée AUX est en état Make AUX FUNCTION : IN : SCENE D IN POLARITY : MAKE Entrée AUX: État Break Exemple de réglage de jour SCENE NAME : CASINO : MID...
-
Page 168: Réglage Du Masque De Confidentialité
Réglages détaillés Réglage du masque de confidentialité 1 Sélectionnez l’élément [PRIVACY MASK] sur l’écran [MENU] et appuyez sur le bouton [SET]. L’écran [PRIVACY MASK] s’affiche. 2 Utilisez les flèches haut/bas du bouton en croix pour sélectionner l’élément [MASK No.*], utilisez les flèches gauche/droite du bouton en croix pour régler sur “ON”;... -
Page 169: Réglage De La Zone De Photométrie Blc
Réglages détaillés Réglage de la zone de photométrie BLC Permet de régler la zone de photométrie pour la compensation du rétroéclairage. Vous pouvez réaliser le réglage sur deux types d’écrans, [EDIT1] et [EDIT2]. 1 Sélectionnez l’élément [BLC] sur l’écran [BASIC SETTINGS] et sélectionnez [EDIT1]. -
Page 170: Résolution De Problèmes
Autres Résolution de problèmes Erreur de fonctionnement Page de État Solution référence Vérifiez le voyant A p. 20 d’alimentation de la caméra et assurez-vous que le câble coaxial est bien branché. Assurez-vous que la luminosité et le contraste du moniteur sont correctement réglés. - Page 171 Autres Page de État Solution référence Assurez-vous que le câble A p. 19 Impossible de vidéo est bien branché. basculer entre Assurez-vous que l’élément l’entrée et la sortie [AUX FUNCTION] est bien AUX. réglé. Appuyez sur le bouton Le fonctionnement [SET], verticalement.
- Page 172 Autres Résolution de problèmes (suite) Affichage d’erreur Page de Message d’erreur Solution référence Le sujet n’est pas A p. 29 suffisamment blanc, ou le A p. 39 réglage de température de AWC ERROR: NG couleur est inapproprié. OBJECT Remplissez la totalité de l’écran avec un objet blanc puis ajustez de nouveau l’équilibrage des blancs.
-
Page 173: Spécifications
0,003 lx (typique, 25 %, F1,2, AGC HIGH) Monture d’objectif : Monture CS Alimentation : 24 V c.a. 50 Hz/60 Hz, 12 V c.c. (TK-C9510E) électrique 220 V c.a. - 240 V c.a. 50 Hz/60 Hz (TK-C9511EG) Longueur du câble : 1.900 mm (TK-C9511EG) - Page 174 F-50...
- Page 175 COLOUR VIDEO CAMERA MANUAL DE INSTRUCCIONES TK-C9510E TK-C9511EG...
-
Page 176: Precauciones De Seguridad
CA24 V o CC12 V. (sólo TK-C9510E) Sólo puede y debe utilizarse una fuente de alimentación de CA24 V / CC12 V ● conforme, es decir una fuente de alimentación aislada. (sólo TK-C9510E) Esta instalación debe ser realizada por el personal de mantenimiento ●... - Page 177 Precauciones de seguridad JVC no está sujeto a compensación alguna si su cámara se cae debido a un ● montaje poco seguro que no ha seguido la descripción de instalación. Preste especial atención durante la instalación. Cuando vaya a montar este producto en un techo o una pared, ●...
- Page 178 Introducción Características Esta cámara utiliza un dispositivo CCD de 1/2 pulgadas que ofrece un color una iluminación mínima de 0,025 lx (F1.2, 25 %). A p. 49 Ofrece una calidad de Está equipada con un amplio rango imagen estable dinámico. Corrige las zonas oscuras y blancas causadas por grandes diferencias de brillo en el objeto.
- Page 179 Introducción Hay ocho archivos de escena Permite registrar disponibles. Cada archivo de archivos de escena escena incluye ajustes para distintos predefinidos para distintas entornos aplicaciones. Dichos ajustes se pueden personalizar. Los cambios de escena, como Detecta movimientos dentro de un área movimientos definida, se detectan sospechosos dentro...
- Page 180 Introducción Índice Introducción Características ................... 4 Índice ....................6 Cómo leer este manual ..............8 Instrucciones de utilización ..............9 Nombres de las piezas ..............12 Conexión/Instalación Instalación rápida ................14 Conexiones del sistema ..............16 Montaje del objetivo ................. 18 Conexión ..................
- Page 181 Introducción Ajustes detallados Valores predeterminados de los archivos de escena ...... 33 Ajuste del área de detección de movimiento ........35 Ajuste del nombre de escena/cámera ..........37 Ajuste manual del balance de blancos ..........39 Salida de la señal de conmutación de blanco y negro/color ... 40 Control externo de la señal de conmutación de blanco y negro/color ......................
-
Page 182: Introducción
: indica una página u opción de referencia. Contenido de este manual JVC es titular de los derechos de autor de este manual. Este manual no puede ser reproducido, parcial o totalmente, sin la previa autorización de la compañía. -
Page 183: Instrucciones De Utilización
Introducción Instrucciones de utilización Almacenamiento y lugar de utilización No instale la cámara en los lugares que se mencionan a continuación. en lugares expuestos a la lluvia o a la humedad. en lugares cerca de vapor o de aceite, por ejemplo en la cocina. cuando la temperatura ambiente sea superior o inferior al nivel aceptable (de -10 f a 50 f). -
Page 184: Descargo De Responsabilidad
Introducción Instrucciones de utilización (continuado) Descargo de responsabilidad La detección de movimiento no evita el robo o incendio. No aceptamos la responsabilidad por los daños que puedan producirse. No seremos responsables de los inconvenientes o alteraciones que puedan resultar en caso de que las imágenes grabadas por esta cámara provoquen una invasión de la privacidad. - Page 185 Introducción Cuando el elemento [WHITE BALANCE] de esta cámara se establece en “ATW-N” o “ATW-W”, la tonalidad del color puede variar ligeramente con respecto al color real en función de las condiciones del objeto. Esto se debe al principio del circuito de balance de blancos de la búsqueda automática y no constituye un fallo de funcionamiento.
-
Page 186: Nombres De Las Piezas
Introducción Nombres de las piezas Vista frontal/Superior/lateral POWER IRIS A Anillo de ajuste de foco posterior B Montaje del objetivo C Indicador de alimentación [POWER] D Terminal del iris [IRIS] E Tornillos de ajuste del soporte de montaje de la cámara (2 de M2,6 x 6 mm) F Orificio de prevención de rotación G Orificio para tornillo de montaje de la cámara (1/4-20UNC) - Page 187 C Cable de alimentación de 220 - 240 V de CA (TK-C9511EG) D Terminal de entrada de alimentación de 24 V de CA y 12 V de CC (TK-C9510E) E Conectores de señales de control [TX+ E, TX- F, RX+ G, RX- H]...
-
Page 188: Conexión/Instalación Instalación Rápida
POWER IRIS sensor) Conexión a una unidad de control remoto, etc. A fuente de alimentación de 24 V de CA ó 12 V (TK-C9510E) de CC Montaje de la cámara ( p. 22) MAX. 6 mm 2 mm... - Page 189 Conexión/Instalación Configuración de los Ajuste del foco posterior p. 24) p. 26) conmutadores Terminación p. 32) Ajustes del menú Fuente de alimentación Control Remoto S-15...
-
Page 190: Conexiones Del Sistema
Conexión/Instalación Conexiones del sistema Diagrama de conexiones Cable de suministro de corriente CÁMARA 1 Cable de señal MACHINE ID : 1 de control Pantalla de menús Cable de señal de vídeo RX TERM : OFF (Conmutador) CÁMARA 2 MACHINE ID : 2 Pantalla de menús RX TERM : OFF (Conmutador) - Page 191 Conexión/Instalación Ajustes de la conexión Conexión del cable de señal de control de la cámara (posterior) Memo Conecte los cables correctamente de manera que las marcas A, B, C y D de los terminales de la cámara TO CAMERA DATA I / O RX+ RX- TX+ TX- UNIT CAMERA...
-
Page 192: Montaje Del Objetivo
Si el enchufe del cable del objetivo es diferente, conecte un enchufe de Memo cuatro clavijas. Para obtener más información sobre el enchufe de cuatro clavijas, póngase en contacto con su distribuidor de JVC. (N.º de pieza: SCV2859-001) Enchufe de 4 clavijas N.º... -
Page 193: Conexión
(TK-C9511EG) (A p. 21) A fuente de alimentación de 24 V de CA ó 12 V de CC Conexión a una unidad (TK-C9510E) de control remoto, etc. (A p. 20) (A p. 19) Conexión de señales de control En los sistemas que utilizan la unidad RM-P2580, realice la conexión con un cable de señal de control. - Page 194 No conecte el cable de 24 V de CA a una fuente de alimentación comercial. Si se conecta por error, el circuito interno puede sufrir daños. En este caso, deje de utilizar la cámara y envíela al distribuidor de JVC más cercano para que realice una inspección.
- Page 195 Conexión/Instalación De 220 V a 240 V de CA (TK-C9511EG) Cuando use esta cámara, instálela cerca del enchufe para poder desenchufarla inmediatamente. Conexión de señales de alarma Para obtener más información sobre los ajustes, consulte [AUX FUNCTION]. Se ha seleccionado el ajuste por defecto para la entrada de alarma. ([IN:ALARM]) Entrada de alarma Conecte el sensor infrarrojo, el sensor de puerta, el sensor de metal, el sensor de conmutación manual u otro dispositivo similar.
-
Page 196: Montaje De La Cámara
Conexión/Instalación Montaje de la cámara Cuando instale la cámara en un fijador o en una base, giratoria o con posibilidad de inclinación, utilice el orificio del tornillo de montaje de la cámara situado en el soporte de montaje de la cámara. (Longitud del tornillo: 7 mm o menos) Tornillos de ajuste del soporte de montaje de la cámara (2 de M2,6 x 6 mm) Orificio para tornillo de... - Page 197 Conexión/Instalación 6 mm Dispositivo anticaídas M3 x 6 mm 2 mm Cuando coloque la cámara en el techo, asegúrese de llevar gafas de Nota seguridad para proteger los ojos frente a cualquier objeto que pueda caer. Montaje del soporte de montaje de la cámara en la parte superior de la misma El soporte de montaje de la cámara ha sido instalado originalmente, es decir antes de la entrega, en la parte inferior de la cámara;...
-
Page 198: Configuración/Ajuste
Configuración/Ajuste Configuración de los conmutadores A Conmutador de selección del sistema de sincronización [LLlINT/VL] Para ajustar el sistema de sincronización de la cámara. : Seleccione esta opción al ajustar la sincronización vertical de la cámara según la frecuencia de línea comercial. INT/VL : Seleccione esta opción durante la sincronización interna (INT) o la sincronización externa (V). - Page 199 Configuración/Ajuste C Conmutador de activación/desactivación del terminal RX [RX TERM OFFlON] Para establecer si se debe aplicar una terminación con un valor de resistencia de 110 K entre los conectores de señales de control RX+ y RX-. : No se aplica la terminación. : Se aplica la terminación.
-
Page 200: Ajuste Del Foco Posterior
Configuración/Ajuste Ajuste del foco posterior Esta cámara se ha ajustado para un espectro de amplitud óptima antes de su envío, pero puede ser necesario realizar un reajuste al usar una lente de zoom o cuando el anillo de enfoque del objetivo esté desenfocado. - Page 201 Configuración/Ajuste Con una lente de zoom Si la imagen está fuera de foco cuando se utiliza la lente de zoom (telefoto - ángulo amplio), ajuste la cámara como se indica a continuación. 1 Afloje el tornillo de ajuste de foco posterior girándolo en el sentido contrario a las agujas de un reloj con un destornillador de cruz.
-
Page 202: Puesta A Punto Del Enfoque
Configuración/Ajuste Puesta a punto del enfoque Al ajustar el foco del objetivo con iris automático, utilice el modo de ajuste de enfoque para realizar un enfoque sencillo a medida que el iris se abre y la profundidad de campo se hace más superficial. (Además, asegúrese de consultar el manual de instrucciones del objetivo.) 1 Mantenga pulsado hacia abajo el botón en forma de cruz superior. -
Page 203: Ajustar El Balance Automático De Blancos
Configuración/Ajuste Ajustar el balance automático de blancos Cada fuente de luz tiene su propia temperatura de color. Por lo tanto, cuando cambie la fuente de luz principal que ilumina el objeto, ajuste de nuevo el balance de blancos. Realice el ajuste del balance de blancos para cada archivo de escena. -
Page 204: Ajustes Del Menú
Ajustes del menú Flujo de pantallas del menú MENU SCENE FILE SCENE NAME SCENE NAME EDIT COPY INITIALIZE BASIC SETTINGS MONITOR TYPE WHITE BALANCE W.BAL CONTROL AGC GAIN SENSE UP CAM. TITLE EDIT CAMERA TITLE EDIT SHUTTER/WIDE-D BLC EDIT ALC SETTINGS ALC SETTINGS DAY/NIGHT DAY/NIGHT... - Page 205 Ajustes del menú MOTION DETECT DETECT LEVEL AREA EDIT DETECT EDIT TITLE SIZE TITLE COLOUR ALARM TIME DEMONSTRATION DETECT DEMONSTRATION MAINTENANCE No se muestra durante el ajuste del menú mediante un control remoto. REVERSE MODE V.PHASE COMMUNICATION (JCCP) COMMUNICATION (PELCO) COMMUNICATION CCD SPOT CORRECTION CCD SPOT CORRECTION...
-
Page 206: Ajuste Del Menú
Ajustes del menú Ajuste del menú 1 Pulse el botón MENU. 2 Mueva el botón en forma de cruz hacia arriba o hacia abajo para alinear el cursor (E) con el elemento que desea ajustar. 3 Mueva el botón en forma de cruz hacia la izquierda o hacia la derecha para cambiar el ajuste. -
Page 207: Ajustes Detallados
Ajustes detallados Valores predeterminados de los archivos de escena Seleccione un ajuste entre “SCENE A” y “SCENE H” en función de los requisitos de vigilancia. Todos los archivos de escena se pueden personalizar. (A p. 30) También puede cambiar el archivo de escena que desea ajustar a través de la entrada externa. - Page 208 Ajustes detallados Valores predeterminados de los archivos de escena (continuación) SCENE FILE SCENE NAME Características de la vigilancia SCENE F WIDE-D Es adecuado para la vigilancia de escenas en vestíbulos o escenas a contraluz en las que se combinan objetos brillantes y oscuros. SCENE G M.DET Su ajuste habilita la función de...
-
Page 209: Ajuste Del Área De Detección De Movimiento
Ajustes detallados Ajuste del área de detección de movimiento Para establecer el área para la detección de movimiento, la cual emite señales de alarma cuando se detecta movimiento en la imagen de vídeo. Cuando el elemento [AUX FUNCTION] se establece en “OUT:ALARM”, las señales de alarma se emiten desde el terminal AUX posterior. - Page 210 La detección de movimiento no es una función para prevenir robos Nota e incendios. Su correcto funcionamiento depende de las condiciones del objeto y de los ajustes. JVC no se hará responsable de los accidentes ni los daños que se produzcan. S-36...
-
Page 211: Ajuste Del Nombre De Escena/Cámera
Ajustes detallados Ajuste del nombre de escena/cámera Puede cambiar el nombre de un archivo de escena (hasta ocho caracteres). También puede asignar un nombre a una cámara (hasta 24 caracteres). Modificación del nombre de un archivo de escena (SCENE NAME) "Valores predeterminados de los archivos de escena"... -
Page 212: Procedimiento De Operación
Ajustes detallados Ajuste del nombre de escena/cámera (continuacion) Ajuste de [CAMERA TITLE] 1 Seleccione el elemento [BASIC SETTINGS] de la pantalla [MENU] y pulse el botón [SET]. Aparece la pantalla [BASIC SETTINGS]. 2 Mueva el botón en forma de cruz hacia arriba o hacia abajo para seleccionar [CAMERA TITLE EDIT] y pulse el botón [SET]. -
Page 213: Ajuste Manual Del Balance De Blancos
Ajustes detallados Ajuste manual del balance de blancos El balance de blancos de esta cámara puede configurarse para ajustarse automáticamente en función del objeto. Cuando el ajuste automático produzca, por ejemplo, una pantalla rojiza, ajuste el balance de blancos manualmente. 1 Seleccione el elemento [BASIC SETTINGS] de la pantalla [MENU] y pulse el botón [SET]. -
Page 214: Salida De La Señal De Conmutación De Blanco Y Negro/Color
Ajustes detallados Salida de la señal de conmutación de blanco y negro/color El estado del terminal AUX posterior puede establecerse en color o blanco y negro. Se habilita cuando [AUX FUNCTION] se establece en “OUT:B&W”. Ajuste de [AUX FUNCTION] en “OUT:B&W” 1 Seleccione el elemento [AUX FUNCTION] de la pantalla [MENU] y pulse el botón [SET]. - Page 215 Ajustes detallados Ajuste de [DAY/NIGHT] en “AUTO” 1 Seleccione el elemento [BASIC SETTINGS] de la pantalla [MENU] y pulse el botón [SET]. Aparece la pantalla [BASIC SETTINGS]. 2 Mueva el botón en forma de cruz hacia arriba o hacia abajo para seleccionar [DAY/NIGHT].
-
Page 216: Control Externo De La Señal De Conmutación De Blanco Y Negro/Color
Para obtener más información sobre los dispositivos que se pueden conectar, póngase en contacto con su distribuidor de JVC. Luz infrarroja, etc. Sensor o conmutador... - Page 217 Ajustes detallados Cambio entre el ajuste de vídeo diurno y nocturno mediante la función de archivo de escena Ejemplo: Cambiar a SCENE D cuando la entrada AUX se encuentra en estado Make AUX FUNCTION : IN : SCENE D IN POLARITY : MAKE Entrada AUX: Estado Break Ejemplo de ajuste diurno...
-
Page 218: Ajuste De La Máscara De Privacidad
Ajustes detallados Ajuste de la máscara de privacidad 1 Seleccione el elemento [PRIVACY MASK] de la pantalla [MENU] y pulse el botón [SET]. Aparece la pantalla [PRIVACY MASK]. 2 Mueva el botón en forma de cruz hacia arriba o hacia abajo para seleccionar el elemento [MASK No.*], mueva el botón en forma de cruz hacia la izquierda o hacia la derecha para establecerlo en “ON”... -
Page 219: Ajuste Del Área De Fotometría Blc
Ajustes detallados Ajuste del área de fotometría BLC Para establecer el área de fotometría para la compensación de contraluz. Puede realizar ajustes en dos tipos de pantallas: [EDIT1] y [EDIT2]. 1 Seleccione el elemento [BLC] de la pantalla [BASIC SETTINGS] y seleccione [EDIT1]. -
Page 220: Varios
Varios Resolución de problemas Error de funcionamiento Página de Estado Acción referencia Compruebe el indicador de A p. 20 alimentación de la cámara y que el cable coaxial esté bien conectado. Compruebe que el brillo y el contraste del monitor estén bien configurados. - Page 221 Varios Página de Estado Acción referencia Compruebe que el cable de A p. 19 No se puede vídeo esté bien conectado. alternar entre Compruebe que el entrada y salida elemento [AUX FUNCTION] AUX. esté bien configurado. Pulse el botón [SET] hacia La operación del abajo en sentido vertical.
- Page 222 Varios Resolución de problemas (continuacion) Visualización de errores Página de Mensaje de error Acción referencia No hay suficiente color blanco A p. 29 en el objeto o el ajuste de la A p. 39 temperatura del color no es el AWC ERROR: NG apropiado.
-
Page 223: Especificaciones
0,003 lx (estándar, 25 %, F1,2, AGC HIGH) Montaje del objetivo : Montura CS Fuente de : 24 V de CA, 50/60 Hz, 12 V de CC (TK-C9510E) alimentación 220 - 240 V de CA, 50/60 Hz (TK-C9511EG) Longitud del cable : 1900 mm (TK-C9511EG) de alimentación... - Page 224 S-50...
- Page 225 COLOUR VIDEO CAMERA ISTRUZIONI TK-C9510E TK-C9511EG...
-
Page 226: Precauzioni Di Sicurezza
Germania Questo apparecchio essere alimentato con una fornitura di energia elettrica ● da 24 V o da 12 V CC CA. (solo TK-C9510E) La fornitura di energia elettrica da 24 V CA o da 12 V CC deve essere ●... - Page 227 Precauzioni di sicurezza JVC non è responsabile dell’eventuale caduta della videocamera dovuta a ● un montaggio inadeguato derivante dal mancato rispetto delle procedure di installazione descritte. Prestare attenzione durante l’installazione. Quando si monta il presente prodotto a soffitto o a parete, scegliere un punto ●...
- Page 228 Introduzione Funzioni Questa videocamera utilizza un CCD da 1/2 pollice, grazie al quale si ottiene il colore con un’illuminazione minima di 0,025 lx (F1.2, 25 %). Offre una A pag. 49 qualità di immagine Dotata di un’ampio range dinamico. stabile Corregge le zone scure e bianche, dovute alle marcate differenze di luminosità...
- Page 229 Introduzione Sono disponibili otto file scena. Supporta la Ciascun file scena ha delle registrazione di file impostazioni preimpostate, per le scena per diversi diverse applicazioni. È anche ambienti possibile personalizzarli. Vengono rilevate Rileva i movimenti automaticamente le modifiche alla sospetti all’interno scena (ad esempio i movimenti) dell’area di ed è...
- Page 230 Introduzione Contenuto Introduzione Funzioni ..................... 4 Contenuto ..................6 Lettura di questo manuale ..............8 Precauzioni operative ................ 9 Nomi delle parti ................12 Connessione/installazione Installazione rapida ................14 Collegamento al sistema ..............16 Montaggio della lente ..............18 Connessione ..................19 Montaggio della videocamera ............
- Page 231 Introduzione Impostazioni dettagliate Valori predefiniti dei file scena ............33 Impostazione area Motion Detect ............ 35 Impostazione Nome scena/Titolo videocamera ....... 37 Regolazione del bilanciamento del bianco manuale ....... 39 Uscita del segnale dell’interruttore bianco e nero/colore ....40 Controllo del segnale dell’interruttore bianco e nero/colore dall’esterno ...................
-
Page 232: Lettura Di Questo Manuale
Grazie per aver acquistato questo prodotto. Prima dell’uso, leggere le presenti “ISTRUZIONI” e il materiale informativo accluso per assicurarsi di utilizzare il prodotto in modo corretto. Le istruzioni in questo manuale fanno riferimento ai modelli TK-C9510E/ TK-C9511EG. Lettura di questo manuale Lettura di questo manuale Convenzioni e simboli : Indica le precauzioni operative. -
Page 233: Precauzioni Operative
Introduzione Precauzioni operative Conservazione e luogo d’uso Non installare la videocamera nei seguenti luoghi. In luoghi esposti a pioggia o umidità. In luoghi in cui siano presenti vapore o olio, come le cucine. Quando la temperatura ambiente è superiore o inferiore all’intervallo di temperature consentito (da -10 f a 50 f). - Page 234 Introduzione Precauzioni operative (continua) Clausola di esonero della responsabilità La funzione di rilevamento del movimento non è in grado di impedire il furto o l’incendio. I sottoscritti non accettano alcuna responsabilità per eventuali danni. I sottoscritti non saranno responsabili di eventuali disagi o disturbi che potrebbero derivare da una possibile violazione della privacy risultante dalle riprese effettuate con il presente prodotto.
- Page 235 Introduzione Quando il [WHITE BALANCE] di questa videocamera è impostato su “ATW-N” o “ATW-W”, la tonalità del colore potrebbe variare leggermente dal colore effettivo a seconda delle condizioni del soggetto. Ciò è dovuto al principio del circuito del bilanciamento del bianco di autorilevamento e non si tratta di un guasto.
-
Page 236: Nomi Delle Parti
Introduzione Nomi delle parti Vista anteriore/superiore/laterale POWER IRIS A Anello di regolazione della focalizzazione posteriore B Montaggio lente C [POWER] Indicatore di alimentazione D [IRIS] Terminale iride E Viti di blocco della staffa per il montaggio della videocamera (x2, M2,6 x 6 mm) F Foro di prevenzione della rotazione G Foro della vite di montaggio della videocamera (1/4-20UNC) H Staffa di montaggio della videocamera... - Page 237 Introduzione Posteriore INT/VL TK-C9511EG A [VIDEO OUT] Terminale di uscita del segnale video B [SYNC IN] Terminale di ingresso del segnale di sincronizzazione C Cavo di alimentazione 220 V CA - 240 V CA (TK-C9511EG) D Terminale di ingresso dell’alimentazione 24 V CA, 12 V CC (TK- C9510E) E Connettori di controllo del segnale [TX+ E, TX- F, RX+ G, RX- H] (conformi a RS-485)
-
Page 238: Connessione/Installazione
(ad es. sensore) POWER IRIS Collegamento a unità telecomando, ecc. Alla fornitura di alimentazione 24 V CA o 12 V CC (TK-C9510E) Montaggio della videocamera (A pag. 22) MAX. 6 mm 2 mm POWER IRIS M3 x 6 mm... - Page 239 Connessione/installazione Impostazioni dell’interruttore Regolazione della focalizzazione (A pag. 24) posteriore (A pag. 26) Impostazioni di menu (A pag. 32) Completamento Alimentazione TeleComando I-15...
-
Page 240: Collegamento Al Sistema
Connessione/installazione Collegamento al sistema Schema di collegamento Cavo della fornitura di alimentazione CAMERA 1 Cavo del MACHINE ID : 1 segnale di Schermo del menu Cavo del segnale video controllo RX TERM : OFF (Interruttore) CAMERA 2 MACHINE ID : 2 Schermo del menu RX TERM : OFF (Interruttore) - Page 241 Connessione/installazione Impostazioni di collegamento Connessione del cavo del segnale di controllo sulla videocamera (posteriore) Memo Collegare correttamente i cavi in modo tale che i segni A, B, C, D sui terminali della videocamera TO CAMERA DATA I / O RX+ RX- TX+ TX- COM 9/1 10/2 11/3 12/4 13/5 14/6 15/7 16/8 COM AUTO ALARM...
-
Page 242: Montaggio Della Lente
Se la spina del cavo della lente è diverso, connetterla con una Memo spina a quattro poli. Per ulteriori dettagli in merito alla spina a quattro poli, consultare il proprio rivenditore JVC. (Cod. articolo: SCV2859-001) Spina a 4 poli Numero polo... -
Page 243: Connessione
(TK-C9511EG) (A pag. 21) Alla fornitura di alimentazione 24 V CA o 12 V CC Collegamento a unità (TK-C9510E) telecomando, ecc. (A pag. 20) (A pag. 19) Collegamento segnale di controllo Per i sistemi che utilizzano RM-P2580, effettuare il collegamento utilizzando un cavo del segnale di controllo. - Page 244 Quando si fornisce alimentazione alla videocamera, l’indicatore di alimentazione [POWER] sul pannello laterale si accende. 24 V CA o 12 V CC (TK-C9510E) Per evitare errori di connessione o una disconnessione del cavo, utilizzare una piastra di appoggio per collegarsi al terminale. La seguente tabella mostra le distanze di connessione quando si utilizza un VVF a due conduttori (cavo isolato in vinile e foderati di vinile).
-
Page 245: Ingresso Allarme
Connessione/installazione da 220 V CA a 240 CA (TK-C9511EG) Quando si utilizza la presente videocamera, installarla accanto alla presa in modo da poterla scollegare immediatamente. Collegamento del segnale di allarme Per ulteriori dettagli sulle impostazioni fare riferimento a [AUX FUNCTION]. L’impostazione predefinita è... -
Page 246: Montaggio Della Videocamera
Connessione/installazione Montaggio della videocamera Quando si monta la videocamera su un fissatore, pan/tilt, ecc., usare il foro della vite di montaggio della videocamera situato sulla staffa di montaggio della videocamera. (Lunghezza della vite: 7 mm o meno) Viti di blocco della staffa per il montaggio della videocamera (x2, M2,6 x 6) Foro della vite di montaggio della videocamera... - Page 247 Connessione/installazione 6 mm Cavo anticaduta M3 x 6 mm 2 mm Quando si monta la videocamera al soffitto, indossare occhiali di Nota sicurezza per proteggere gli occhi dall’eventuale caduta di oggetti. Montaggio della staffa di montaggio della videocamera sulla parte superiore della videocamera La staffa di montaggio della videocamera è...
-
Page 248: Impostazione/Regolazione
Impostazione/regolazione Impostazioni dell’interruttore A [LLlINT/VL] Interruttore di selezione del sistema sincrono Per impostare il sistema sincrono della videocamera. : Impostare su questa opzione quando si regola la sincronizzazione verticale della videocamera in base alla frequenza di alimentazione commerciale. INT/VL : Impostare su questa opzione durante la sincronizzazione interna (INT) o esterna (V). - Page 249 Impostazione/regolazione C [RX TERM OFFlON] Interruttore ON/OFF terminale RX Per scegliere se applicare la terminazione a un valore di resistenza di 110 K tra i connettori del segnale di controllo RX+ e RX-. : Non termina. : Termina. (Impostazione predefinita: ON) Il sistema di cui fa parte questa videocamera utilizza un Memo sistema M.DROP (Multi DROP, RS-485), come un RM-...
-
Page 250: Regolazione Della Focalizzazione Posteriore
Impostazione/regolazione Regolazione della focalizzazione posteriore Prima della spedizione, questa videocamera è stata regolata per garantire un funzionamento ottimale; è comunque necessaria una nuova regolazione quando si utilizza una lente zoom o quando l’anello di focalizzazione della lente è sfocato. Anello di regolazione della focalizzazione posteriore Anello di focalizzazione della lente... - Page 251 Impostazione/regolazione Con una lente zoom Se l’immagine è sfocata durante lo zoom (telefoto - grandangolare), regolare la videocamera nella maniera seguente. 1 Allentare la vite di fissaggio della focalizzazione posteriore girandola in senso antiorario con un cacciavite +. 2 Riprendere una forma fine sul soggetto o altrove. 3 Ingrandire fino alla posizione massima della telefoto e girare l’anello di focalizzazione della lente per regolare la messa a fuoco.
-
Page 252: Fine-Tuning Della Focalizzazione
Impostazione/regolazione Fine-tuning della focalizzazione Quando si regola la focalizzazione della lente iride automatica, utilizzare la modalità di regolazione della focalizzazione (Focus Adjust) per facilitare la focalizzazione: l’iride si apre e si riduce la profondità del campo. (Leggere anche il manuale delle istruzioni della lente.) 1 Premere e tenere premuto il tasto croce Su. -
Page 253: Regolazione Del Bilanciamento Del Bianco Automatico
Impostazione/regolazione Regolazione del bilanciamento del bianco automatico Ciascuna sorgente luminosa ha la propria temperatura del colore. Pertanto, quando l’illuminazione della sorgente luminosa principale viene modificata, regolare di nuovo il bilanciamento del bianco. Effettuare la regolazione del bilanciamento del bianco per ciascun file scena. 1 Premere il pulsante [MENU]. -
Page 254: Impostazioni Di Menu
Impostazioni di menu Struttura dello schermo del menu MENU SCENE FILE SCENE NAME SCENE NAME EDIT COPY INITIALIZE BASIC SETTINGS MONITOR TYPE WHITE BALANCE W.BAL CONTROL AGC GAIN SENSE UP CAM. TITLE EDIT CAMERA TITLE EDIT SHUTTER/WIDE-D BLC EDIT ALC SETTINGS ALC SETTINGS DAY/NIGHT DAY/NIGHT... - Page 255 Impostazioni di menu MOTION DETECT DETECT LEVEL AREA EDIT DETECT EDIT TITLE SIZE TITLE COLOUR ALARM TIME DEMONSTRATION DETECT DEMONSTRATION MAINTENANCE Non visualizzato durante l’impostazione del menu utilizzando un telecomando. REVERSE MODE V.PHASE COMMUNICATION (JCCP) COMMUNICATION COMMUNICATION (PELCO) CCD SPOT CORRECTION CCD SPOT CORRECTION FACTORY SETTINGS FACTORY SETTINGS...
-
Page 256: Impostazione Del Menu
Impostazioni di menu Impostazione del menu 1 Premere il pulsante MENU. 2 Spostare il tasto freccia in su/giù per allineare il cursore (E) con la voce da impostare. 3 Spostare il tasto freccia a destra/sinistra per cambiare l’impostazione. Quando un’impostazione è stata cambiata, appare un contrassegno (Z) di modifica. -
Page 257: Impostazioni Dettagliate
Impostazioni dettagliate Valori predefiniti dei file scena Selezionare un’impostazione tra “SCENE A” e “SCENE H” a seconda delle condizioni di sorveglianza. È possibile personalizzare tutti i file scena. (A pag. 30) Inoltre, è possibile cambiare il file scena da impostare tramite un ingresso esterno. - Page 258 Impostazioni dettagliate Valori predefiniti dei file scena (continua) SCENE FILE SCENE NAME Condizione di sorveglianza SCENE F WIDE-D Adatto per la sorveglianza di scene quali gli ingressi o le scene retroilluminate, in cui vi è un misto di soggetti luminosi e scuri. SCENE G M.DET Impostazione che attiva la funzione...
-
Page 259: Impostazione Area Motion Detect
Impostazioni dettagliate Impostazione area Motion Detect Per l’impostazione dell’area in cui è attiva la funzione Motion Detect, la quale emette segnali di allarme quando vi sono movimenti nell’immagine del video. Quando [AUX FUNCTION] è impostato su “OUT:ALARM”, i segnali di allarme vengono emessi dal terminale AUX posteriore. - Page 260 La funzione di rilevamento del movimento non è in grado di Nota impedire il furto e l’incendio. Potrebbe non funzionare adeguatamente a seconda delle condizioni del soggetto e delle impostazioni. JVC non è responsabile di eventuali incidenti o danni risultati da tale situazione. I-36...
-
Page 261: Impostazione Nome Scena/Titolo Videocamera
Impostazioni dettagliate Impostazione Nome scena/Titolo videocamera È possibile cambiare il nome di un file scena (fino a otto caratteri). È possibile aggiungere un titolo alla videocamera (fino a 24 caratteri). Modifica del nome del file scena (SCENE NAME) "Valori predefiniti dei file scena" (A pag. 33) 1 Nello schermo [MENU] selezionare [SCENE FILE] e spostare il tasto a croce a sinistra/destra per selezionare il file scena per il quale si desidera specificare un nome. - Page 262 Impostazioni dettagliate Impostazione Nome scena/Titolo videocamera (continua) Impostazione di [CAMERA TITLE] 1 Selezionare la voce [BASIC SETTINGS] sullo schermo [MENU], quindi premere il pulsante [SET]. Appare lo schermo [BASIC SETTINGS]. 2 Spostare il tasto freccia a su/giù per selezionare [CAMERA TITLE EDIT] e premere il pulsante [SET].
-
Page 263: Regolazione Del Bilanciamento Del Bianco Manuale
Impostazioni dettagliate Regolazione del bilanciamento del bianco manuale Il bilanciamento del bianco di questa videocamera può essere impostato in modo da regolarsi automaticamente a seconda del soggetto. Quando la regolazione automatica dà come risultato uno schermo rossastro, ad esempio, regolare il bilanciamento del bianco in modo manuale. -
Page 264: Uscita Del Segnale Dell'interruttore Bianco E Nero/Colore
Impostazioni dettagliate Uscita del segnale dell’interruttore bianco e nero/colore Lo stato del terminale AUX posteriore può essere cambiato con l’interruttore colore/bianco e nero. Questo è attivo quando [AUX FUNCTION] è impostato su “OUT:B&W”. Impostazione di [AUX FUNCTION] su “OUT:B&W” 1 Selezionare la voce [AUX FUNCTION] sullo schermo [MENU], quindi premere il pulsante [SET]. - Page 265 Impostazioni dettagliate Impostazione di [DAY/NIGHT] su “AUTO” 1 Selezionare la voce [BASIC SETTINGS] sullo schermo [MENU], quindi premere il pulsante [SET]. Appare lo schermo [BASIC SETTINGS]. 2 Spostare il tasto freccia in su/giù per selezionare [DAY/NIGHT]. 3 Spostare il tasto freccia a destra/sinistra per impostare su “AUTO”.
-
Page 266: Controllo Del Segnale Dell'interruttore Bianco E Nero/Colore Dall'esterno
Per ulteriori dettagli in merito ai dispositivi da collegare, consultare il proprio rivenditore JVC. Illuminazione a infrarossi, ecc. Sensore o interruttore Dispositivo di controllo esterno Il file scena è... - Page 267 Impostazioni dettagliate Commutazione tra l’impostazione video giorno/notte utilizzando la funzione file scena Esempio: Commutazione a SCENE D quando l’ingresso AUX è in stato Produzione AUX FUNCTION : IN : SCENE D IN POLARITY : MAKE Ingresso AUX: Stato Interruzione Esempio di impostazione Giorno SCENE NAME : CASINO : MID DAY/NIGHT...
-
Page 268: Impostazione Della Maschera Privacy
Impostazioni dettagliate Impostazione della maschera privacy 1 Selezionare la voce [PRIVACY MASK] sullo schermo [MENU], quindi premere il pulsante [SET]. Appare lo schermo [PRIVACY MASK]. 2 Spostare verso l’alto/il basso il tasto a croce per selezionare [MASK No.*], spostare a sinistra/destra il tasto a croce per selezionare “ON”, quindi premere il pulsante [SET]. -
Page 269: Impostazione Dell'area Fotometria Blc
Impostazioni dettagliate Impostazione dell’area fotometria BLC Per impostare l’area di fotometria per la compensazione del controluce. È possibile effettuare l’impostazione su due tipi di schermo, [EDIT1] e [EDIT2]. 1 Selezionare la voce [BLC] sullo schermo [BASIC SETTINGS], quindi selezionare [EDIT1]. 2 Premere il pulsante [SET]. -
Page 270: Risoluzione Dei Problemi
Altro Risoluzione dei problemi Errore operativo Pagina di Stato Azione riferimento Controllare l’indicatore di A pag. 20 alimentazione sulla videocamera e se il cavo coassiale è collegato in modo corretto. Controllare che la luminosità e il contrasto del monitor siano impostati adeguatamente. - Page 271 Altro Pagina di Stato Azione riferimento Controllare che il cavo A pag. 19 video sia collegato Impossibile correttamente. commutare tra ingresso/uscita Controllare che la voce AUX. [AUX FUNCTION] sia impostata correttamente. Premere verticalmente Non è possibile verso il basso il pulsante riconoscere [SET].
- Page 272 Altro Risoluzione dei problemi (continua) Visualizzazioni dell’errore Pagina di Messaggio di errore Azione riferimento Non vi è bianco a sufficienza A pag. 29 nel soggetto, oppure A pag. 39 l’impostazione della temperatura del colore non è AWC ERROR: NG adeguata. Riempire OBJECT interamente lo schermo con un oggetto bianco e regolare...
-
Page 273: Caratteristiche Tecniche
0,003 lx (Standard, 25 %, F1,2, AGC HIGH) Montaggio lente : Montaggio CS Alimentazione : 24 V CA 50 Hz/60 Hz, 12 V CC (TK-C9510E) 220 V CA - 240 V CA 50 Hz/60 Hz (TK-C9511EG) Lunghezza del : 1900 mm (TK-C9511EG) - Page 274 I-50...
- Page 275 COLOUR VIDEO CAMERA ИHСТРУКЦИR ПО ЭКСПЛУАТАЦИИ TK-C9510E TK-C9511EG...
-
Page 276: Меры Предосторожности
Меры предосторожности Камеру следует подключить к источнику напряжения 12 В ● постоянного тока или 24 В переменного тока. (TK-C9510E только) Источник напряжения 24 В переменного тока и 12 В ● постоянного тока должен соответсвовать следущим требованиям: только изолированное питание. (TK-C9510E только) - Page 277 методику. По всем вопросам установки, пожалуйста, обращайтесь к своему дилеру. Этикетка с номинальными характеристиками находится на камере. ● JVC не несет никакой ответственности за выплату компенсации, ● если вы уроните камеру по причине непрочной установки в результате невыполнения предусмотренных инструкций.
- Page 278 Введение Функции Эта камера использует 0,5- дюймовую ПЗС-матрицу, которая распознает цвет при минимальном освещении в 0,025 люкс (F1.2, 25 %). A стр. 49 Создает устойчивое Оснащена большим динамическим качество изображения диапазоном. Корректирует темные и белые области в результате значительной разницы в яркости на объекте.
- Page 279 Введение Доступны восемь файлов сцен. Каждый файл Поддерживает сцены имеет фабричные регистрацию файлов сцен настройки для различных для различных сред приложений. Они могут быть изменены. Изменения сцены, например движения Распознает внутри определенной подозрительные области автоматически движения в настроенной распознаются, и может области...
- Page 280 Введение Особенности Введение Функции .................... 4 Содержание ..................6 Как читать это руководство ............. 8 Меры предосторожности при работе ..........9 Названия деталей ................12 Подключение/монтаж Быстрый монтаж ................14 Подключение системы ..............16 Установка объектива ..............18 Подключение .................. 19 Крепление...
- Page 281 Введение Подробные настройки Показатели файлов сцен по умолчанию ........33 Настройка области распознания движения ......... 35 Настройка названия сцены/названия камеры ......37 Ручное регулирование баланса белого ........39 Выходной сигнал черно-белого/цветного переключателя ..40 Внешнее управление сигналом черно-белого/цветного переключателя ................42 Настройка...
-
Page 282: Введение
ограничениях функций, использования и так далее. : Обозначает справочную страницу или пункт. Содержание руководства Авторские права на данное руководство принадлежат компании JVC. Данное руководство не может быть воспроизведено, целиком или частично, без предварительного согласия компании. Названия товаров других компаний, упоминаемые в данном... -
Page 283: Меры Предосторожности При Работе
Введение Меры предосторожности при работе Место хранения и эксплуатации Не устанавливайте камеру в следующих местах. В местах, подверженных воздействию дождя или влаги. В местах с повышенным содержанием пара или масла, например, на кухне. В местах, в которых окружающая температура поднимается выше или опускается... - Page 284 Введение Меры предосторожности при работе (продолжение) Ограничение ответственности Функция обнаружения движения не является средством предотвращения хищения или пожара. Мы не несем ответственность за любые возможные повреждения. Мы не несем никакой ответственности за возможные неудобства и неприятности, вызванные нарушением неприкосновенности личной жизни...
- Page 285 Введение Когда для [WHITE BALANCE] камеры установлен параметр „ATW-N“ или „ATW-W“, цветовой тон некоторых объектов может слегка отличаться от фактического цвета в зависимости от условий объекта. Это происходит из-за принципа действия цепи автоматической регулировки баланса белого и не является признаком неисправности. При...
-
Page 286: Названия Деталей
Введение Названия деталей Перед/верх/сторона POWER IRIS A Кольцо настройки заднего фокуса B Крепление объектива C Индикатор питания [POWER] D Гнездо диафрагмы [IRIS] E Крепящие винты монтажного кронштейна камеры (2 шт., M2,6 x 6 мм) F Отверстие ограничения вращения G Отверстия для крепежного винта камеры (1/4-20UNC) H Монтажный... - Page 287 B Входной терминал синхронизации сигнала [SYNC IN] C Кабель питания 220-240 В переменного тока (TK-C9511EG) D Входной терминал питания, 24 В переменного тока, 12 В постоянного тока (TK-C9510E) E Разъемы управляющего сигнала (совместимые с RS-485) [TX+ E, TX- F, RX+ G, RX- H] F Разъемы...
-
Page 288: Подключение/Монтаж
Подключение/монтаж Быстрый монтаж П . 19) У а а а . 18) а П ( а POWER IRIS а П а а К 220-240 В а (TK-C9510E) К а . 22) Makc. POWER IRIS M3 x 6 R-14... - Page 289 Подключение/монтаж Па а а На а а а . 24) . 26) На За . 32) И а а а R-15...
-
Page 290: Подключение Системы
Подключение/монтаж Подключение системы Схема подключения Ка а ВИДЕОКАМЕРА 1 Ка а MACHINE ID : 1 а (Э а Ка а а а а RX TERM : OFF а ВИДЕОКАМЕРА 2 MACHINE ID : 2 (Э а RX TERM : OFF а... - Page 291 Подключение/монтаж Параметры подключения Подключение кабеля управляющего сигнала на камере (задняя панель) Заметки Подключите кабели таким образом, чтобы отметки A, B, C, D на терминалах камеры совпадали с такими же TO CAMERA DATA I / O UNIT CAMERA SERIAL-1 SERIAL-2 RX+ RX- TX+ TX- COM 9/1 10/2 11/3 12/4 13/5 14/6 15/7 16/8 COM AUTO ALARM...
-
Page 292: Установка Объектива
Чтобы использовать объективы для C-монтажа, требуется адаптер для C- монтажа. Для получения дополнительной информации об адаптере для C- монтажа обратитесь к представителю компании JVC. Запрещается использовать объективы, размер которых превышает (a) (см. рис. ниже), так как это может привести к повреждению внутренних деталей камеры и не... -
Page 293: Подключение
К а 12 В а 24 В а П а (TK-C9510E) а . 20) . 19) Подключение управляющего сигнала Для систем, использующих RM-P2580, осуществите подключение с помощью кабеля управляющего сигнала. Рекомендуется использовать четырехжильную (две пары) витую пару с диаметром проводника как минимум 0,65 мм и характеристическим... - Page 294 Подключение источника питания После подачи питания к камере загорится индикатор питания [POWER] на боковой панели. 24 В переменного тока или 12 В постоянного тока (TK-C9510E) Во избежание неправильного подключения или отсоединения кабеля для подключения к гнезду используйте пластину с лепестком. В приведенной ниже таблице отображена информация о длине...
- Page 295 Подключение/монтаж 220-240 В переменного тока (TK-C9511EG) При использовании камеры установите ее вблизи розетки для обеспечения возможности быстрого отключения питания. Подключение сигнала тревоги Для получения более подробной информации о настройках см. [AUX FUNCTION]. По умолчанию установлен вход сигнала тревоги. ([IN:ALARM]) Вход сигнала тревоги Подключите...
-
Page 296: Крепление Камеры
Подключение/монтаж Крепление камеры При установке камеры на держателе, блоке для панорамирования/наклона и т. п. необходимо использовать отверстие для крепежного винта, расположенное на монтажном кронштейне. (Длина винта: 7 мм или менее) К а а а ., M2,6 x 6) О а а (1/4-20UNC) Makc. - Page 297 Подключение/монтаж П а M3 x 6 При установке камеры на потолке используйте защитные очки для продолжение защиты глаз от падающих объектов. Установка монтажного кронштейна камеры на ее верхней части Перед отправкой на заводе-изготовителе монтажный кронштейн устанавливается на нижней части камеры, однако его также можно установить на верхней части. При...
-
Page 298: Настройка/Регулировка Параметры Переключателей
Настройка/регулировка Параметры переключателей A Переключатель выбора системы синхронизации [LLlINT/VL] Для настройки системы синхронизации камеры. : Этот параметр устанавливается при регулировании вертикальной синхронизации камеры в соответствии с частотой подаваемого питания. INT/VL : Этот параметр устанавливается при внутренней синхронизации (INT) или внешней синхронизации (V). (Настройка... - Page 299 Настройка/регулировка C Переключатель ВКЛ./ВЫКЛ. терминала RX [RX TERM OFFlON] Для установки того, нужно ли применять прекращение с показателем сопротивления в 110 K между разъемами управляющего сигнала RX+ и RX-. : Не прекращает. : Прекращает. (Настройка по умолчанию: ON) Если система, включая данную камеру, использует Заметки...
-
Page 300: Настройка Заднего Фокуса
Настройка/регулировка Настройка заднего фокуса Для камеры установлен оптимальный угол обзора на заводе- изготовителе, однако при использовании объектива с трансфокатором или при расфокусировке кольца фокуса объектива требуется выполнение повторной настройки. К а а а К а а За За а а (М2) О... - Page 301 Настройка/регулировка С объективом с трансфокатором Если при трансфокации изображение выходит за пределы фокуса (телефото – широкий угол), выполните следующие действия для настройки камеры. 1 Ослабьте зажимной винт заднего фокуса, повернув его против часовой стрелки при помощи крестообразной отвертки. 2 Выполните съемку каких-нибудь мелких частей объекта и в стороне...
-
Page 302: Точная Настройка Фокуса
Настройка/регулировка Точная настройка фокуса При настройке фокуса объектива с автоматической ирисовой диафрагмой используйте режим настройки фокуса для облегчения фокусировки, так как при этом диафрагма открывается и уменьшается глубина поля. (См. также руководство по эксплуатации объектива.) 1 Нажмите и удерживайте Вверх на крестообразной кнопке. Режим... -
Page 303: Настройка Автоматического Баланса Белого
Настройка/регулировка Настройка автоматического баланса белого Каждый источник света обладает собственной цветовой температурой. Поэтому, когда освещение основного источника света изменяется, повторно настройте баланс белого. Осуществляйте настройку баланса белого для каждого файла сцены. 1 Нажмите кнопку [MENU]. 2 Выберите сцену, для которой необходимо отрегулировать баланс белого цвета. Выберите... -
Page 304: Настройки Меню
Настройки меню Структура экрана меню MENU SCENE FILE SCENE NAME SCENE NAME EDIT COPY INITIALIZE BASIC SETTINGS MONITOR TYPE WHITE BALANCE W.BAL CONTROL AGC GAIN SENSE UP CAM. TITLE EDIT CAMERA TITLE EDIT SHUTTER/WIDE-D BLC EDIT ALC SETTINGS ALC SETTINGS DAY/NIGHT DAY/NIGHT VIDEO SETTINGS... - Page 305 Настройки меню MOTION DETECT DETECT LEVEL DETECT EDIT AREA EDIT TITLE SIZE TITLE COLOUR ALARM TIME DEMONSTRATION DETECT DEMONSTRATION MAINTENANCE Н а а а а а а REVERSE MODE V.PHASE COMMUNICATION (JCCP) COMMUNICATION COMMUNICATION (PELCO) CCD SPOT CORRECTION CCD SPOT CORRECTION FACTORY SETTINGS FACTORY SETTINGS PRIVACY MASK...
-
Page 306: Настройка Меню
Настройки меню Настройка меню 1 Нажмите кнопку MENU. 2 Передвиньте крестообразную кнопку вверх/вниз, чтобы поравнять курсор (E) с пунктом, который нужно настроить. 3 Передвиньте крестообразную кнопку влево/вправо, чтобы изменить настройку. После установки нового значения появится отметка изменения (Z). 4 Для выхода из настройки нажмите кнопку [MENU]. Поместите... -
Page 307: Показатели Файлов Сцен По Умолчанию
Подробные настройки Показатели файлов сцен по умолчанию Выберите настройку между „SCENE A“ и „SCENE H“ в зависимости от условий наблюдения. Все файлы сцен могут быть изменены. (A стр. 30) Вы также можете переключить файл сцены на установленный с помощью внешнего входа. (A стр. 42) SCENE FILE SCENE NAME Условия... - Page 308 Подробные настройки Показатели файлов сцен по умолчанию (продолжение) SCENE FILE SCENE NAME Условия наблюдения SCENE F WIDE-D Подходит для наблюдения за такими сценами, как входы, или сценами на освещенном фоне, с сочетанием темных и ярких объектов. SCENE G M.DET Эта установка активирует функцию распознания...
-
Page 309: Настройка Области Распознания Движения
Подробные настройки Настройка области распознания движения Для настройки области, в которой срабатывает функция обнаружения движения, выдающая предупредительный сигнал в случае появления движения в видеоизображении. Когда [AUX FUNCTION] установлена на „OUT:ALARM“, передача предупредительного сигнала осуществляется из гнезда AUX. При необходимости осуществляйте обнаружение движения Заметки... - Page 310 Функция обнаружения движения не является средством продолжение предотвращения хищения или пожара. Она может не работать должным образом, в зависимости от условий объекта и настроек. Компания JVC не несет ответственности за какие-либо несчастные случаи или повреждения, возникшие в результате этого. R-36...
-
Page 311: Настройка Названия Сцены/Названия Камеры
Подробные настройки Настройка названия сцены/названия камеры Вы можете изменить название файла сцены (до 8 символов). Вы можете добавить название камеры (до 24 символов). Изменение названия файла сцены (SCENE NAME) "Показатели файлов сцен по умолчанию" (A стр. 33) 1 На экране [MENU] выберите [SCENE FILE] и передвиньте крестообразную... - Page 312 Подробные настройки Настройка названия сцены/названия камеры (продолжение) Настройка [CAMERA TITLE] 1 Выберите пункт [BASIC SETTINGS] на экране [MENU] и нажмите кнопку [SET]. Появится экран [BASIC SETTINGS]. 2 Передвиньте крестообразную кнопку вверх/вниз, чтобы выбрать [CAMERA TITLE EDIT], и нажмите кнопку [SET]. Появится...
-
Page 313: Ручное Регулирование Баланса Белого
Подробные настройки Ручное регулирование баланса белого Регулировка баланса белого камеры может выполняться автоматически в соответствии с освещением объекта. Когда автоматическая регулировка приводит к отображению, например, красноватого экрана, попробуйте настроить баланс белого вручную. 1 Выберите пункт [BASIC SETTINGS] на экране [MENU] и нажмите... -
Page 314: Выходной Сигнал Черно-Белого/Цветного Переключателя
Подробные настройки Выходной сигнал черно-белого/цветного переключателя Состояние заднего гнезда AUX может быть изменено с помощью цветного/черно-белого переключателя. Это активировано, когда [AUX FUNCTION] установлена на „OUT:B&W“. Установка [AUX FUNCTION] на „OUT:B&W“ 1 Выберите пункт [AUX FUNCTION] на экране [MENU] и нажмите кнопку [SET]. Появится... - Page 315 Подробные настройки Установка [DAY/NIGHT] на „AUTO“ 1 Выберите пункт [BASIC SETTINGS] на экране [MENU] и нажмите кнопку [SET]. Появится экран [BASIC SETTINGS]. 2 Передвиньте крестообразную кнопку вверх/вниз, чтобы выбрать [DAY/NIGHT]. 3 Передвиньте крестообразную кнопку влево/вправо, чтобы установить на „AUTO“. MENU BASIC SETTINGS (A:GENERAL) SCENE FILE..
-
Page 316: Внешнее Управление Сигналом Черно-Белого/Цветного Переключателя
использован для переключения изображения на камере с цветного на черно-белое и обратно, а также активации одновременной работы освещения, такого, как свет ближнего инфракрасного диапазона. Для получения дополнительной информации об устройствах, которые можно подключить, обратитесь к представителю компании JVC. О а а а а а Да... - Page 317 Подробные настройки Переключение между видеонастройками день/ночь с помощью функции файла сцены Пример: переключение на SCENE D, когда вход AUX находится в состоянии создания AUX FUNCTION : IN : SCENE D IN POLARITY : MAKE В AUX: а П а SCENE NAME : CASINO : MID DAY/NIGHT : COLOUR...
-
Page 318: Настройка Скрывающей Маски
Подробные настройки Настройка скрывающей маски 1 Выберите пункт [PRIVACY MASK] на экране [MENU] и нажмите кнопку [SET]. Появится экран [PRIVACY MASK]. 2 Нажимайте крестообразную кнопку вверх/вниз, чтобы выбрать [MASK No.*], затем влево/вправо, чтобы выбрать „ON“, после чего нажмите кнопку [SET]. Появится... -
Page 319: Настройка Зоны Фотометрии Blc
Подробные настройки Настройка зоны фотометрии BLC Для настройки фотометрической области для компенсации задней подсветки. Вы можете осуществить настройки на двух видах экранов, [EDIT1] и [EDIT2]. 1 Выберите пункт [BLC] на экране [BASIC SETTINGS] и выберите [EDIT1]. 2 Нажмите кнопку [SET]. Появится... -
Page 320: Поиск И Устранение Неисправностей
Прочие сведения Поиск и устранение неисправностей Ошибка при эксплуатации Страница Состояние Меры по исправлению для справок Проверьте индикатор A стр. 20 питания камеры, а также подключен ли должным образом коаксиальный кабель. Проверьте, настроены ли должным образом яркость и контраст монитора. A стр. - Page 321 Прочие сведения Страница для Состояние Меры по исправлению справок Проверьте, правильно ли A стр. 19 Не удается подключен видеокабель. переключиться Проверьте, правильно ли между входом/ настроен пункт [AUX выходом AUX. FUNCTION]. Работа кнопки Нажимайте кнопку [SET] [SET] не вертикально вниз. Если распознается...
- Page 322 Прочие сведения Поиск и устранение неисправностей (продолжение) Сообщения об ошибках Сообщение об Страница Меры по исправлению ошибке для справок В объекте A стр. 29 недостаточно белого, A стр. 39 или настройка цветовой температуры AWC ERROR: неверна. Полностью NG OBJECT заполните экран белым объектом...
-
Page 323: Технические Характеристики
0,003 люкс (стандартный, 25 %, F1,2, AGC HIGH) Крепление объектива : Крепление CS Источник питания : 24 В переменного тока, 50 Гц/60 Гц, 12 В постоянного тока (TK-C9510E) 220-240 В переменного тока, 50 Гц/60 Гц (TK-C9511EG) Длина кабеля питания : 1900 мм (TK-C9511EG) Потребление... - Page 324 2010 Victor Company of Japan, Limited LST1119-001A...