Table des Matières
Publicité
Les langues disponibles
Les langues disponibles
Liens rapides
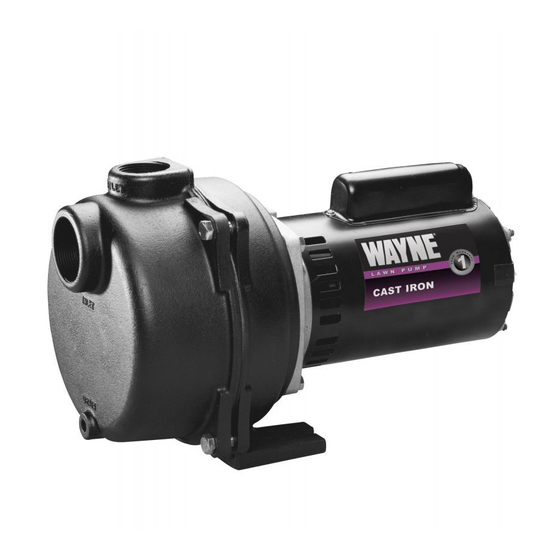
Operating Instructions and Parts Manual
Please read and save these instructions. Read carefully before attempting to assemble, install, operate or maintain
the product described. Protect yourself and others by observing all safety information. Failure to comply with
instructions could result in personal injury and/or property damage! Retain instructions for future reference.
Description
This pump is a high capacity, centrifugal
pump suitable for lawn sprinkling or other
applications where large quantities of
water are required. Flammable liquids
such as gasoline, chemicals or corrosive
liquids should NEVER be used with this
pump. Use to pump clear water ONLY.
Safety Guidelines
This manual contains information that is
very important to know and understand.
This information is provided for SAFETY
and to PREVENT
EQUIPMENT PROBLEMS. To help
recognize this information, observe the
following symbols.
DANGER indicates
an imminently
hazardous situation which, if NOT
avoided, WILL result in death or serious
injury.
WARNING indicates
a potentially
hazardous situation which, if NOT
avoided, COULD result in death or
serious injury.
CAUTION indicates
a potentially
hazardous situation which, if NOT
avoided, MAY result in minor or
moderate injury.
NOTICE indicates
important
information, that if NOT followed, MAY
cause damage to equipment.
General Safety
Information
CALIFORNIA PROPOSITION 65
This product or its
power cord may
contain chemicals, including lead, known
to the State of California to cause cancer
and birth defects or other reproductive
harm. Wash hands after handling.
GENERAL SAFETY INFORMATION
© 2014, WAYNE/Scott Fetzer Company.
Lawn Sprinkler
Pump
1. Read these rules and instructions carefully.
Failure to follow these
instructions COULD cause
serious bodily injury and/or
property damage.
non-submersible.
water. Do NOT pump flammable
or explosive fluids such as
gasoline, fuel oil, kerosene,
etc. Do NOT use in a flammable
and/or explosive atmosphere. Personal
injury and/or property damage WILL result.
salt water, brine, laundry discharge
or any other application which may
contain caustic chemicals and/or
foreign materials. Pump damage COULD
occur if used in these applications and
will void warranty.
must be performed by a
qualified electrician. The
pump must be installed in
compliance with all local and
national codes.
2. Connect this product to a grounded
circuit equipped with a ground fault
circuit interruptor (GFCI) device.
3. Before installing this product, have the
electrical circuit checked by an
electrician to ensure proper grounding.
4. BE CERTAIN the pump power source
is disconnected before installing,
servicing, or maintaining
the pump.
5. Check motor voltage
setting on motor end plate
and make sure the line
voltage of the electrical current supply
is correct (see figure 5 on page 3).
6. Be sure the water source and piping is
clear of sand, dirt and scale. Debris
WILL clog pump and WILL void
REMINDER: Keep your dated proof of purchase for warranty purposes!
Attach it to this manual or file it for safekeeping.
For parts, product & service information
visit www.waynepumps.com
7. Failure to protect pump and piping
MANUAL
8. Do NOT run pump dry. Follow priming
Risk of electrical
shock. This pump is
Pump
automatic resetting thermal protector
only clear
and may restart unexpectedly. Protector
tripping is an indication of motor
overheating because of operating pump
at low heads (low discharge restriction),
excessively high or low voltage,
inadequate wiring, incorrect motor
connections, excessive surrounding air
This pump is NOT
temperature, inadequate ventilation,
designed to handle
and/or defective motor or pump.
Installation
Protect pump from the elements by
installing in a basement, garage, tool shed
or pump house. Install the pump so the
All
center line of the pump is as close as
wiring
possible to the water level. Keep
installation area clear to provide access
for service and maintenance. Protect the
pump against flooding and excess
moisture.
Make sure the pump has adequate
ventilation. The surrounding temperature
should not exceed 100°F (38°C) or
nuisance tripping of the motor may occur.
PUMP PIPING INSTALLATION
Use new pipe for best results. Galvanized
or plastic pipe can be used. When using
galvanized pipe, provide independent
supports for both suction and discharge
piping near the pump to avoid strain on
the pump. Minimize use of elbows and
fittings to reduce friction loss. Refer to the
friction loss chart (on page 4) for specific
information.
Increase diameter of suction or discharge
piping if length is over 50 feet.
SUCTION PIPING
WLS Series
warranty.
from freezing COULD cause severe
damage and WILL void the warranty.
instructions.
Pump motor is
equipped with an
3202
04
-001 9/15
Publicité
Table des Matières
Dépannage

Manuels Connexes pour Wayne WLS Serie


Sommaire des Matières pour Wayne WLS Serie
- Page 1 WILL clog pump and WILL void REMINDER: Keep your dated proof of purchase for warranty purposes! Attach it to this manual or file it for safekeeping. For parts, product & service information © 2014, WAYNE/Scott Fetzer Company. 3202 -001 9/15 visit www.waynepumps.com...
- Page 2 Operating Instructions and Parts Manual WLS Series Installation As an alternative, an in-line check valve can (Continued) TO PUMP be used with a driven well (See Figure 4). Install foot valve or It may be necessary to supply the pump strainer screen over WELL with multiple well points to maintain the...
-
Page 3: Electrical Connections
WLS Series Operating Instructions and Parts Manual parts. Disconnect power sources before around the inlet pipe to prevent the entrapment of swimmers. touching internal parts. See Figure 6 for appropriate wiring locations. Electrical Connections Operation Connect the pump to a separate electrical NEVER run the circuit with a dedicated circuit breaker. - Page 4 WLS Series Operating Instructions and Parts Manual WIRING CHART - RECOMMENDED WIRE AND FUSE SIZES Distance in Feet From Motor to Supply Dual Element Model Volts Amps Fuse 250V (AWG Wire Size) WLS75 15.0 WLS100 15.0 WLS150 1-1/2 18.0 WLS200 11.5 psi Friction Loss in 100 Feet of Plastic Pipe* Pipe...
-
Page 5: Troubleshooting Chart
WLS Series Operating Instructions and Parts Manual Troubleshooting Chart Symptom Possible Cause(s) Corrective Action(s) Motor will not run 1. Disconnect switch is off 1. Be sure switch is on 2. Fuse is blown or circuit breaker 2. Replace fuse tripped 3. - Page 6 For Replacement Parts or Technical Assistance, call 1-800-237-0987 Please provide following information: Address parts correspondence to: - Model number WAYNE Water Systems - Serial number (if any) 101 Production Drive - Part description and number as shown in parts list Harrison, OH 45030 U.S.A.
- Page 7 WLS Series Operating Instructions and Parts Manual Notes www.waynepumps.com...
- Page 8 In no event, whether as a result of breach of contract warranty, tort (in clud ing negligence) or otherwise, shall WAYNE or its sup- pliers be liable for any special, consequential, incidental or penal damages including, but not limited to loss of profit or revenues, loss of use of the products or any associated equipment, damage to associated equip ment, cost of capital, cost of substitute products, facilities, services or replacement power, downtime costs, or claims of buyer’s cus tom ers for such damages.
- Page 9 5. Vérifier le réglage de tension de devrait pas dépasser 38°C (100°F). INSTALLATION DE LA TUYAUTERIE MÉMENTO : Gardez votre preuve datée d‘achat à fin de la garantie ! © 2014, WAYNE/Scott Fetzer Company. 3202 -001 9/15 9 Fr...
-
Page 10: Installation (Suite)
Série WLS Instructions d’Utilisation et Manuel de Pièces de Rechange Installation BRANCHEMENT À LA SOURCE bouchon mâle en haut du joint de (Suite) D’EAU puits est recommandé. Pour un meilleur résultat, utiliser des La hauteur d’aspiration verticale PUITS FICHÉ nouveaux tuyaux galvanisés ou en maximum de la pompe au niveau d’eau plastique. -
Page 11: Installation Pour Puits Creusés, Réservoirs, Lacs Et Sources
Instructions d’Utilisation et Manuel de Pièces de Rechange Série WLS Installation baigneurs et les plaisanciers. Installez (Suite) un écran autour du tuyau d'admission pompe. Consulter un plombier pour éviter de piéger les nageurs. professionnel pour les matériaux et les instructions de montage convenables. Raccordements Des joints ou des raccords qui fuient Électriques... -
Page 12: Fonctionnement
Instructions d’Utilisation et Manuel de Pièces de Rechange Série WLS ouvertures et des pièces rotatives. NE JAMAIS faire fonctionner la Couper les sources de courant avant de pompe si le décharge est fermé ou toucher les pièces intérieures. Se reporter obstrué. -
Page 13: Guide De Dépannage
Série WLS Instructions d’Utilisation et Manuel de Pièces de Rechange Guide De Dépannage Symptôme Cause(s) Possible(s) Mesure Corrective(s) Le moteur ne 1. Le sectionneur n’est pas en marche 1. S’assurer que le sectionneur est en marche fonctionne pas 2. Fusible sauté 3. - Page 14 Pour Pièces de Rechange ou L'assistance Technique, Composer 1-800-237-0987 S’il vous plaît fournir l’information suivante: Correspondance: - Numéro de Modèle Wayne Water Systems - Numéro de Série (si présent) 101 Production Drive - Description et numéro de la pièce Harrison, OH 45030 U.S.A.
- Page 15 Série WLS Instructions d’Utilisation et Manuel de Pièces de Rechange Notes 15 Fr...
-
Page 16: Garantie Limitée
Garantie Limitée Pour un an à compter de la date d’achat, WAYNE Water Systems (“WAYNE”) vas réparer ou remplacer, à son option, pour l’acheteur originel n’importe quelle pièce ou pièces de ces Pompes De Puisard ou Pompes À Eau (“Produit”) déterminées défectueuses, par WAYNE, en matière ou en fabrication. - Page 17 (consulte la figura 5 en la RECORDATORIO: ¡Guarde su comprobante de compra con fecha para fines de la garantía! Adjúntela a este manual o archívela en lugar seguro. © 2014, WAYNE/Scott Fetzer Company. 3202 -001 9/15 17 Sp...
- Page 18 Manual de Instrucciones y Lista de Repuestos Serie WLS Instalación cuando vaya a llenar de agua la bomba POZOS EXCAVADOS (Continuación) para cebarla. • Excave varios pies por debajo del constantemente. nivel de agua freática. CONEXION A LA FUENTE DE AGUA INSTALACION DE LAS TUBERIAS NOTA: Puede instalar una válvula de pie La altura máxima de succión entre la...
-
Page 19: Cables De Conexión
Manual de Instrucciones y Lista de Repuestos Serie WLS Instalación (Continuación) Proteja la tubería del daño causado Quizás sea necesario conectar la bomba por nadadores y remeros. Instale una al pozo en varios puntos para mantener rejilla alrededor de la entrada de la su alta capacidad de flujo. -
Page 20: Para Cebar La Bomba
Serie WLS Manual de Instrucciones y Lista de Repuestos Funcionamiento Mantenimiento NUNCA use la El motor de la bomba debe mantenerse bomba en seco. El bien ventilado. Los cojinetes del motor hacerlo podría dañar los sellos. Llene vienen de fábrica lubricados de por vida. la bomba de agua antes de encenderla. -
Page 21: Diagnóstico De Averías
Manual de Instrucciones y Lista de Repuestos Serie WLS Diagnóstico de Averías Problema Posible(s) Causa(s) Acción a Tomar(s) El motor no 1. El interruptor está en “off” (apagado) 1. Cerciórese de que el interruptor esté en “ON” (encendido) funciona 2. El fusible está quemado 3. - Page 22 Cercano a su Domicilio Sírvase suministrarnos la siguiente información: Puede escribirnos a: -Número del modelo Wayne Water Systems -Número de Serie (de haberlo) 101 Production Drive -Descripción y número del repuesto según la lista de repuestos Harrison, OH 45030 U.S.A.
- Page 23 Manual de Instrucciones y Lista de Repuestos Serie WLS Notas 23 Sp...
-
Page 24: Garantía Limitada
Garantía Limitada Durante un año a partir de la fecha de compra del comprador original, la compañía WAYNE Water Systems ("WAYNE") reparará o re emplazará, según lo decida, cualquier pieza de esta bomba de desagüe o bomba de agua que se encuentre defectuosa debido a materiales usados o procesos de manofactura.