
Manuels Connexes pour Shimano Steps EP800 Série


Sommaire des Matières pour Shimano Steps EP800 Série
- Page 1 UM-7HC0B-000 Sistema de alimentación eléctrica total SHIMANO Manual del usuario Instrucciones originales...
-
Page 3: Table Des Matières
Información importante de seguridad................. 2 NOTA ......................4 Inspecciones regulares antes de utilizar la bicicleta ........... 5 Estructura del folleto ..................6 Características de SHIMANO STEPS ..............7 Modo de asistencia y personalización ..............7 Personalización de la comodidad de conducción ...............8 Preparación ....................8 Guía rápida ....................9... -
Page 4: Aviso Importante
AVISO IMPORTANTE Información importante de seguridad • Póngase en contacto con el punto de venta o con un distribuidor para solicitar información en relación con la PELIGRO instalación, el ajuste y la sustitución de los productos no incluidos en el manual del usuario. Hay disponible un Manejo de la batería manual del distribuidor para mecánicos de ciclismo profesionales y especializados en nuestro sitio web... -
Page 5: Precauciones De Seguridad
Precauciones de seguridad • No utilice la batería si está agrietada o si detecta cualquier otro daño externo. De lo contrario, podría • Asegúrese de retirar la batería y el cable de carga antes explotar, sobrecalentarse o causar problemas de de tender el cableado o de conectar las piezas a la funcionamiento. -
Page 6: Nota
Manejo de la batería NOTA • Cuando transporte una bicicleta eléctrica en un coche, Precauciones de seguridad retire la batería de la bicicleta y coloque la bicicleta sobre • Si se producen fallos de funcionamiento u otros una superficie estable en el coche. problemas, póngase en contacto con el punto de venta. -
Page 7: Inspecciones Regulares Antes De Utilizar La Bicicleta
Conexión y comunicación con un Inspecciones regulares antes de smartphone o una tableta utilizar la bicicleta Se pueden personalizar componentes individuales o el sistema, y actualizar el firmware, utilizando E-TUBE Antes de utilizar la bicicleta, compruebe los siguientes PROJECT para smartphones/tabletas después de conectar la elementos. -
Page 8: Estructura Del Folleto
Estructura del folleto Los manuales del usuario de SHIMANO STEPS están divididos en varios folletos tal y como se describe a continuación. Lea este manual del usuario detenidamente antes de usar el producto y siga sus instrucciones para una utilización correcta. -
Page 9: Características De Shimano Steps
Características de SHIMANO STEPS • Reivindicando la silueta de la bicicleta El ligero diseño compacto de la unidad de transmisión reduce el ruido de funcionamiento y contribuye a un pedaleo más ligero en el que no se aprecia la presencia de un motor. Asimismo, gracias al factor Q más reducido, se ha mejorado la comodidad de conducción y es más similar a una bicicleta tradicional. -
Page 10: Personalización De La Comodidad De Conducción
La batería puede utilizarse después de cargarla con el cargador designado. No olvide cargarla antes de utilizarla. La batería puede utilizarse cuando se enciende el LED que incorpora. Lea el manual del usuario de la batería especial y las piezas SHIMANO STEPS para saber cómo cargar y manejar la batería. -
Page 11: Guía Rápida
En función de la bicicleta de asistencia utilizada, es posible que la batería, ciclocomputador y unidad del selector instalados difieran de los aquí enumerados. Consulte el “Manual del usuario de la batería especial y las piezas SHIMANO STEPS” y el “Manual del usuario del ciclocomputador SHIMANO STEPS”. - Page 12 Encienda la alimentación. Para apagar la alimentación, repita este procedimiento. Ejemplo de batería de tipo externo Ejemplo de batería de tipo integrado * En función de la bicicleta de asistencia, es posible que la ubicación del botón de alimentación difiera de la mostrada en la ilustración.
- Page 13 Seleccione el modo de asistencia. * Al encender la alimentación, el modo de asistencia se restablecerá a [OFF] independientemente del modo de asistencia seleccionado antes de apagar la alimentación. Ciclocomputador Pulse los interruptores X e Y. Pantalla del modo de asistencia [OFF] [ECO] [PISTA]/[NORMAL]...
-
Page 14: Caminar Y Empujar La Bicicleta Con Facilidad (Asistencia Al Caminar)
„ Caminar y empujar la bicicleta con facilidad (Asistencia al caminar) SHIMANO STEPS tiene una función en la que la asistencia sigue funcionando aunque usted esté caminando mientras empuja la bicicleta de asistencia. • Dependiendo de la región en la que se encuentre, es posible que no pueda utilizar esta función por motivos legales. En dicho caso, las funciones aquí... - Page 15 NOTA La asistencia al caminar funciona a un máximo de 6 km/h. Tenga cuidado ya que la bicicleta empezará a moverse en cuanto pulse el botón. • Durante el cambio de marchas electrónico, la posición de la marcha actual controla el nivel de asistencia y la velocidad de la asistencia al caminar.
-
Page 16: Cambio De Marchas Manual Y Automático
„ Cambio de marchas manual y automático Dependiendo de la bicicleta eléctrica utilizada, podrá alternar entre el cambio de marchas automático y manual. • Cambio de marchas automático: cambia la marcha automáticamente en función de las condiciones de conducción. • Cambio de marchas manual: se refiere al cambio de marchas electrónico estándar. Las marchas se cambian por medio del selector del cambio. -
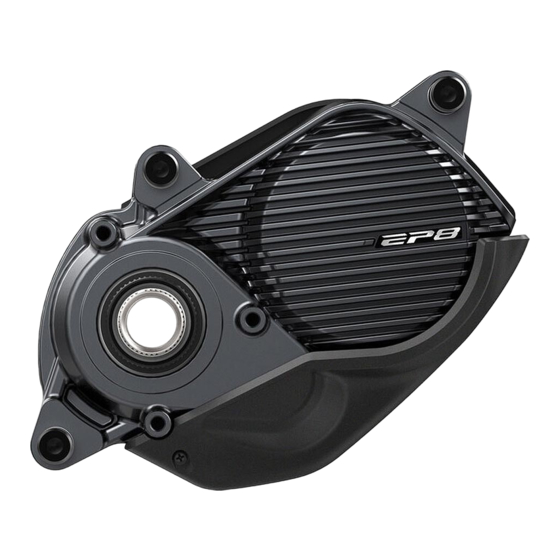
Page 17: Nombres De Las Piezas
Nombres de las piezas... - Page 18 Batería de tipo externo Soporte de la batería Tapa de la unidad de transmisión (lado Unidad de transmisión izquierdo e inferior) Brazo de biela Unidad del plato Sensor de velocidad Unidad del cambio Disco de freno Unidad del selector (interruptor de asistencia) Unidad del selector (selector del cambio) o Ciclocomputador o empalme [A] maneta de cambio...
-
Page 19: Especificaciones
Rango de temperatura de Lea el manual del usuario funcionamiento: durante Capacidad nominal de 0-40 °C de la batería especial y las carga piezas SHIMANO STEPS. Temperatura de de -20-70 °C Tensión nominal 36 V CC almacenamiento Temperatura de Tipo de unidad de -20-60 °C... -
Page 20: Solución De Problemas
• Señales acústicas y mensajes de error en el ciclocomputador • Indicaciones de error de los LED de la batería Realice los procedimientos adecuados después de consultar el “Manual del usuario del ciclocomputador SHIMANO STEPS” y el “Manual del usuario de la batería especial y las piezas SHIMANO STEPS”. - Page 21 Síntoma Causa/Posibilidad Solución La distancia recorrida puede ser más corta dependiendo de las condiciones de la Compruebe la carga de la batería. Si la carretera, la posición de la marcha y el tiempo batería está casi agotada, recárguela. total de uso de la luz. Las características de la batería se reducirán Esto no indica ningún problema.
- Page 22 Tenga en cuenta que las especificaciones están sujetas a cambios por mejoras sin previo aviso. (Spanish)
- Page 23 DM-EP800-01 (English) Dealer's Manual ROAD Trekking City Touring/ URBAN SPORT E-BIKE Comfort Bike EP800 Series DU-EP800 FC-M8150 FC-EM900 FC-EM600 SM-CRE80 SM-CRE80-B SM-CRE80-12 SM-CRE80-12-B SM-CRE80-12-SB SM-CRE61 EW-SS300 EW-SS301 DC-EP800-A DC-EP800-B DC-EP800-G...
- Page 24 CONTENTS CONTENTS .................2 IMPORTANT NOTICE ..............4 TO ENSURE SAFETY ..............5 LIST OF TOOLS TO BE USED ............12 INSTALLING ELECTRICAL PARTS ..........13 Names of parts ..................13 • External mount type ......................13 • Integrated mount type ......................14 Overall wiring diagram ................15 Specifications ..................16 Electric wires ..................16 •...
- Page 25 Installing the drive unit cover .............33 • Affixing the thermal hazard label ..................34 Installing the chainring unit and crank arms ........34 Installing the arm covers ..............39 Measuring and adjusting the chain tension ........41 • Manual adjustment ........................ 42 • Measuring and adjusting using the chain tension measurement tool ....... 42 CONNECTION AND COMMUNICATION WITH DEVICES ...45 MAINTENANCE ................46 Replacing the chainring unit ...............46...
-
Page 26: Important Notice
IMPORTANT NOTICE IMPORTANT NOTICE • This dealer's manual is intended primarily for use by professional bicycle mechanics. Users who are not professionally trained for bicycle assembly should not attempt to install the components themselves using the dealer's manuals. If any part of the information on the manual is unclear to you, do not proceed with the installation. -
Page 27: To Ensure Safety
TO ENSURE SAFETY TO ENSURE SAFETY DANGER Be sure to also inform users of the following: „ Handling the battery • Do not deform, modify, disassemble, or apply solder directly to the battery. Doing so may cause leakage, overheating, bursting, or ignition. •... -
Page 28: Lithium-Ion Battery
TO ENSURE SAFETY • Be sufficiently familiar with how to start the power assisted bicycle before riding on busy streets. You may start the bicycle unexpectedly, which may result in an accident. • Confirm that the light works before riding. •... - Page 29 TO ENSURE SAFETY „ For installation to the bicycle, and maintenance: • Be sure to remove the battery and charging cable before wiring or attaching parts to the bicycle. Failure to do so may cause an electric shock. • Clean the chain with an appropriate chain cleaner regularly. Intervals between maintenance depend on the use and riding circumstances.
- Page 30 TO ENSURE SAFETY NOTICE Be sure to also inform users of the following: • If any malfunction or trouble occurs, consult the place of purchase. • Be sure to attach dummy plugs to any unused E-TUBE ports. • For installation and adjustment of the product, consult the place of purchase. •...
- Page 31 TO ENSURE SAFETY • The number written on the key of the battery mount is necessary when purchasing a spare key. Store it carefully. • Use a damp, well wrung out cloth, when cleaning the battery and plastic cover. • For any questions regarding methods of installation and maintenance, please contact your place of purchase.
- Page 32 TO ENSURE SAFETY Booklet structure „ User's manual SHIMANO STEPS series user's manuals are split among several booklets, as described below. The latest manuals are available on our website (https://si.shimano.com). Name Details This is the basic manual for the SHIMANO STEPS series. It contains the following content.
- Page 33 TO ENSURE SAFETY Name Details This is the basic manual for the SHIMANO STEPS series. • Overall wiring diagram • Overall flow of operations for installing the SHIMANO SHIMANO STEPS Dealer's Manual (this STEPS components to an assist bicycle document) •...
-
Page 34: List Of Tools To Be Used
LIST OF TOOLS TO BE USED LIST OF TOOLS TO BE USED The following tools are needed for installation/removal, adjustment, and maintenance purposes. Component Location used/screw Tool type Electric wire Plug TL-EW02 / TL-EW300 Speed sensor mounting 4 mm hexagon wrench / screw hexalobular [#25] Speed sensor... -
Page 35: Installing Electrical Parts
INSTALLING ELECTRICAL PARTS Names of parts INSTALLING ELECTRICAL PARTS Names of parts External mount type External type battery*1 Battery mount Drive unit cover (left side and bottom Drive unit side) Crank arm Chainring unit Speed sensor*2 Shifting unit*3 Disc brake rotor Switch unit (assist switch) Switch unit (shifting switch) or shifting Cycle computer or junction [A]... -
Page 36: Integrated Mount Type
INSTALLING ELECTRICAL PARTS Names of parts Integrated mount type Built-in type battery*1 Drive unit cover (left side and bottom Drive unit side) Crank arm Chainring unit Speed sensor*2 Shifting unit*3 Disc brake rotor Switch unit (assist switch) Switch unit (shifting switch) or shifting Cycle computer or junction [A] lever Electric wire... -
Page 37: Overall Wiring Diagram
INSTALLING ELECTRICAL PARTS Overall wiring diagram Overall wiring diagram TECH TIPS • The maximum electric wire length between components is 1,600 mm. Ensure that the total length is 1,600 mm or less when connecting via a junction [B] or conversion adapter. -
Page 38: Specifications
INSTALLING ELECTRICAL PARTS Specifications Specifications Operating temperature range: Battery type -10 - 50°C Lithium-ion battery Discharging Refer to the “SHIMANO Operating STEPS Special Battery temperature range: Nominal capacity 0 - 40°C and Parts User's Charging Manual.” Storage temperature Rated voltage -20 - 70°C 36 V DC Storage temperature... -
Page 39: Intended Purpose
INSTALLING ELECTRICAL PARTS Electric wires Product name Intended purpose EW-SD300 type EW-SD50 type EW-CL300-S Binding the wiring and the (for shift outer casing) Cord clip brake outer casing / brake EW-CL300-M Y70H98040 hose together (for brake outer casing and brake hose) Supporting / protecting Cord cover the electric wire (external... -
Page 40: Conversion Adapter
INSTALLING ELECTRICAL PARTS Electric wires Conversion adapter A conversion adapter (EW-AD305) is required to connect the EW-SD50 to a component with an E-TUBE port for the EW-SD300. Conversion adapter (EW-AD305) Electric wire (EW-SD300) Electric wire (EW-SD50) Connecting / disconnecting the electric wire Be sure to use the SHIMANO original tool to remove and insert electric wires. - Page 41 INSTALLING ELECTRICAL PARTS Electric wires With alignment tab on plug Groove Guide Alignment tab Insert the plug on the electric wire into the E-TUBE port. Push it straight in until you feel it click into place. Plug E-TUBE port ` Removing the electric wire (EW-SD300) Remove the electric wire.
- Page 42 INSTALLING ELECTRICAL PARTS Electric wires (2) Disconnect the electric wire from the E-TUBE port. * As shown in the figure, use part (A) of the TL-EW300 as leverage for support and move it like a lever, then disconnect it. TECH TIPS •...
- Page 43 INSTALLING ELECTRICAL PARTS Electric wires Set the plug of the electric wire to the TL-EW02. If there is an alignment tab on the plug of the electric wire, set it aligned with the groove on the SHIMANO original tool. Without alignment tab on plug With alignment tab on plug Insert the plug on the electric wire into the E-TUBE port.
-
Page 44: Installing Cockpit Peripheral Components
EW02 straight up and disconnect the electric wire. Installing cockpit peripheral components Refer to the “SHIMANO STEPS Cycle Computer and Switch Unit Parts Dealer's Manual.” Installing the battery mount and parts Refer to the “SHIMANO STEPS Special Battery and Battery Charger Parts Dealer's Manual.”... - Page 45 INSTALLING ELECTRICAL PARTS Installing the speed sensor (2) Temporarily install the mounting screw. Magnet unit Speed sensor (Temporary) Spoke Mounting screw Install the speed sensor. Check that the clearance between the speed sensor and magnet unit is from 3 to 17 mm. Clearance between speed sensor and magnet unit...
-
Page 46: Type Designed Exclusively For Use With Disc Brakes
INSTALLING ELECTRICAL PARTS Installing the speed sensor Clearance between speed sensor Clearance between speed sensor and magnet unit is 3 to 17 mm and magnet unit exceeds 17 mm Spacer Toothed washer 1.5 - 2 N·m Speed sensor mounting screw (length 16 mm) 1.5 - 2 N·m Speed sensor mounting screw... - Page 47 INSTALLING ELECTRICAL PARTS Installing the speed sensor • The disc brake rotor with magnet unit is the internal spline type. Install it using the TL-LR15 SHIMANO original tool. Install the speed sensor to the frame. 0.6 N·m Speed sensor mounting screw Set the electric wire from the speed sensor along the chainstay to the frame, and wire it to the drive unit.
-
Page 48: Installing The Drive Unit And Peripheral Parts
INSTALLING THE DRIVE UNIT AND PERIPHERAL PARTS Installing the drive unit INSTALLING THE DRIVE UNIT AND PERIPHERAL PARTS Use the following procedure to install the drive unit and peripheral parts. (1) Installing the drive unit (2) Wiring to the drive unit (3) Installing the drive unit cover (4) Installing the chainring unit and crank arms TECH TIPS... - Page 49 INSTALLING THE DRIVE UNIT AND PERIPHERAL PARTS Installing the drive unit (3) Tighten the mounting screw on the left side of the frame. Mounting hole Right side Front 10 - 12.5 N·m Drive unit mounting screw (M8) Left side 10 - 12.5 N·m Drive unit mounting screw (M8) Drive unit Rear...
-
Page 50: Connecting The Power Cord
INSTALLING THE DRIVE UNIT AND PERIPHERAL PARTS Connecting the power cord Connecting the power cord Connection method Connect the power cord. Align the Δ marking on the drive unit's power port with the arrow marking on the tip of the power cord, then insert the power cord until you feel a click. * Check that it is securely connected. -
Page 51: Removal Method
INSTALLING THE DRIVE UNIT AND PERIPHERAL PARTS Connecting cockpit peripheral parts and electronic gear shifting components Removal method Remove the power cord. Hold the groove on the plug and slide the tip of the plug to pull it out, as shown in the figure. -
Page 52: Connecting The Speed Sensor
INSTALLING THE DRIVE UNIT AND PERIPHERAL PARTS Connecting the speed sensor Connect the electric wire to the drive unit's E-TUBE port. E-TUBE port Electric wire NOTICE • Be sure to attach dummy plugs to any unused E-TUBE ports. Connecting the speed sensor Connect the speed sensor's electric wire to the drive unit's terminal block. -
Page 53: Connecting The Light Cables
INSTALLING THE DRIVE UNIT AND PERIPHERAL PARTS Connecting the light cables Connect the electric wire to the drive unit's speed sensor port. Speed sensor port Speed sensor electric wire Connecting the light cables Connect the wires connected to the front and rear lights to the drive unit. - Page 54 INSTALLING THE DRIVE UNIT AND PERIPHERAL PARTS Connecting the light cables Loosen the mounting screws. Mounting screw Connect the light cables to the light connection terminals, then tighten the mounting screws. Light connection terminals 0.6 N·m Mounting screw...
-
Page 55: Installing The Drive Unit Cover
INSTALLING THE DRIVE UNIT AND PERIPHERAL PARTS Installing the drive unit cover Installing the drive unit cover • The appearance of the drive unit cover differs depending on the model, but the installation method is the same. • When also using a drive unit cover from another company, refer to the manual for the frame. Install the left cover. -
Page 56: Affixing The Thermal Hazard Label
INSTALLING THE DRIVE UNIT AND PERIPHERAL PARTS Installing the chainring unit and crank arms Affixing the thermal hazard label A thermal hazard label is affixed to the position shown in the figure on the guard (DC-EP800-G: SHIMANO drive unit cover). For bicycles that use custom covers from another company, refer to the position shown in the figure to affix the thermal hazard label included with the DU-EP800 to a visible location around the motor fins. - Page 57 INSTALLING THE DRIVE UNIT AND PERIPHERAL PARTS Installing the chainring unit and crank arms (3) Tighten the cap. Left crank arm (1) Cross-section Stopper plate 0.7 - 1.5 N·m Wide part Wide part Secure the left crank arm. (1) Press the stopper plate in. * Check that the plate pin is firmly set.
- Page 58 Cross-section Outward Bicycle side • When installing the chain device, refer to the “SHIMANO STEPS Chain Device Dealer's Manual” before installing the chainring using the following procedures. • When installing the chain device, special mounting screws for magnesium products are required. Make sure to use the mounting screws included with the...
- Page 59 INSTALLING THE DRIVE UNIT AND PERIPHERAL PARTS Installing the chainring unit and crank arms Set the chainring unit. Set with the spline on the chainring unit aligned with the chainring unit installation spline on the axle. Chainring unit Axle Chainring unit installation spline Set the chain.
- Page 60 INSTALLING THE DRIVE UNIT AND PERIPHERAL PARTS Installing the chainring unit and crank arms (2) Tighten the lock ring while firmly pressing the left crank. 35 - 45 N·m Lock ring TECH TIPS • An impact wrench cannot be used. Set the right crank arm and tighten the cap.
-
Page 61: Installing The Arm Covers
INSTALLING THE DRIVE UNIT AND PERIPHERAL PARTS Installing the arm covers (2) Tighten the clamp screw. 12 - 14 N·m Clamp screw (x 2) Cross-section Stopper plate Plate pin NOTICE • Set the stopper plate in the correct direction as shown in figure. Cross-section Bicycle side Outward... - Page 62 INSTALLING THE DRIVE UNIT AND PERIPHERAL PARTS Installing the arm covers Set the arm covers to the left and right sides of the chainring. Install so that the hooks catch the spider arm on the chainring. Hook Arm cover...
-
Page 63: Measuring And Adjusting The Chain Tension
INSTALLING THE DRIVE UNIT AND PERIPHERAL PARTS Measuring and adjusting the chain tension Tighten the two mounting screws from the left and right. For internal geared hub models, proceed to “Measuring and adjusting the chain tension.” 0.8 N·m 0.8 N·m Mounting screw Mounting screw Measuring and adjusting the chain tension... -
Page 64: Manual Adjustment
INSTALLING THE DRIVE UNIT AND PERIPHERAL PARTS Measuring and adjusting the chain tension Manual adjustment Check and adjust the chain tension. Pull the upper side of the chain up and down with a force of approximately 10 N (1 kgf), roughly in the middle between the drive unit axle and rear wheel axle. - Page 65 INSTALLING THE DRIVE UNIT AND PERIPHERAL PARTS Measuring and adjusting the chain tension (2) Push TL-DUE60 down, and make it touch the chainring and rear sprocket. Protrusion part Adjust the chain tension so that the protrusion part of TL-DUE60 does not stick out from the top of the frame.
- Page 66 INSTALLING THE DRIVE UNIT AND PERIPHERAL PARTS Measuring and adjusting the chain tension (2) Push TL-DUE60 up, and make it touch the chainring and rear sprocket. Protrusion part Adjust the chain tension so that the head shaped part of the protrusion part of TL-DUE60 is not hidden by the frame.
-
Page 67: Connection And Communication With Devices
Connecting the bicycle to a device allows you to configure the system, update firmware, and more. Refer to the “SHIMANO STEPS Cycle Computer User's Manual” and the “SHIMANO STEPS Special Cycle Computer and Switch Unit Parts Dealer's Manual” as well. -
Page 68: Maintenance
MAINTENANCE Replacing the chainring unit MAINTENANCE Replacing the chainring unit When replacing the chainring unit, make sure that the chain is attached. Refer to “Installing the chainring unit and crank arms” for detailed instructions. Remove the left and right crank arms. Remove the lock ring (left screw). -
Page 69: Replacing The Chain Guard
MAINTENANCE Replacing the chain guard Remove the chainring, then replace it with a new chainring. The 4 chainring mounting screws should be tightened uniformly over the course of multiple times. “INSIDE” or model name mark 12 - 14 N·m Chainring mounting bolt Chainring mounting 4 arm adapter... -
Page 70: Replacing The Arm Cover
MAINTENANCE Replacing the arm cover Remove the chain guard then replace it with a new chain guard. Chain guard (inward) *Only for double chain guard 0.7 N·m Mounting bolt Chain guard (outward) Chainring unit Replacing the arm cover The arm cover can be replaced with the chainring unit attached to the drive unit. Refer to “Installing the arm covers.”... - Page 71 Please note: specifications are subject to change for improvement without notice. (English) © Jul. 2020 by SHIMANO INC. ITP...
- Page 72 UM-7HC0B-000 STEPS (SHIMANO Total Electric Power System) Mode d'emploi Notice d'origine...
- Page 74 Informations importantes concernant la sécurité ............2 REMARQUE ....................4 Inspections régulières avant d'utiliser le vélo ............. 5 Structure de la brochure ................6 Caractéristiques du SHIMANO STEPS ...............7 Mode d'assistance et personnalisation .............7 Personnalisation du confort de pilotage ..................8 Précautions ....................8 Guide rapide ....................9...
-
Page 75: Mise En Garde Importante
MISE EN GARDE IMPORTANTE Informations importantes concernant la sécurité • Contactez le lieu d'achat ou un distributeur pour toute information concernant l'installation, le réglage et le DANGER remplacement des produits non mentionnés dans le présent mode d'emploi. Un manuel du revendeur à Manipulation de la batterie l'attention des mécaniciens vélo professionnels et expérimentés peut être consulté... -
Page 76: Précautions De Sécurité
Précautions de sécurité • N'utilisez pas la batterie si elle présente des signes d'éraflures ou si elle est endommagée. Sinon, celle-ci • Veillez à retirer la batterie et le câble de charge avant de risque de prendre feu, de surchauffer ou de présenter des câbler ou de fixer les pièces sur le vélo. -
Page 77: Remarque
Manipulation de la batterie REMARQUE • Lorsque vous transportez un vélo à assistance électrique Précautions de sécurité dans une voiture, retirez la batterie du vélo et placez • Si des dysfonctionnements ou d'autres problèmes celui-ci sur une surface stable dans la voiture. apparaissent, contactez le magasin où... -
Page 78: Entretien Et Maintenance
Entretien et maintenance • Est-ce que les éléments sont fixés correctement et exempts de dommages ? • Le numéro qui se trouve sur la clé de fixation de la • Est-ce que les éléments sont fixés correctement au cadre, batterie est nécessaire pour acheter des clés de rechange. au cintre, à... -
Page 79: Structure De La Brochure
Cette brochure décrit comment utiliser les vélos à assistance équipés d'un guidon de course et qui sont contrôlés à l'aide d'une manette à double commande. Cette brochure doit être lue en parallèle du mode d'emploi SHIMANO STEPS. • Mode d'emploi de la batterie spéciale et des pièces SHIMANO STEPS Voici son contenu. -
Page 80: Caractéristiques Du Shimano Steps
Caractéristiques du SHIMANO STEPS • Poursuite de la ressemblance avec un vélo Le design léger et compact de l'unité motrice réduit le bruit de fonctionnement et facilite le pédalage de sorte que vous ne sentez pas la présence du moteur. De plus, avec la réduction du facteur Q, le confort de conduite est amélioré et ressemble plus à... -
Page 81: Personnalisation Du Confort De Pilotage
Assurez-vous de la charger avant de l'utiliser. La batterie est prête à être utilisée lorsque son témoin DEL s'allume. Veuillez lire le mode d'emploi de la batterie spéciale et des pièces SHIMANO STEPS pour la façon de charger la batterie. -
Page 82: Guide Rapide
En fonction du vélo à assistance utilisé, la batterie installée, le compteur et l'unité de la manette peuvent différer de ceux repris ici. Reportez-vous également au « mode d'emploi de la batterie spéciale et des pièces SHIMANO STEPS » et au « mode d'emploi du compteur SHIMANO STEPS ». - Page 83 Activez l'alimentation du vélo. Pour mettre le vélo hors tension, répétez cette procédure. Exemple de batterie de type externe Exemple de batterie de type intégrée * En fonction du vélo à assistance, l'emplacement du bouton de mise en marche peut être différent de celui illustré.
- Page 84 Sélectionnez le mode d'assistance. * Si vous mettez le vélo sous tension, le mode d'assistance est réinitialisé à [OFF], indépendamment du mode d'assistance que vous aviez sélectionné avant de le mettre hors tension. Compteur Appuyez sur le contacteur X et Y. Affichage du mode d'assistance [OFF] [ECO]...
-
Page 85: Marcher En Poussant Son Vélo Plus Facilement (Assistance À La Marche)
„ Marcher en poussant son vélo plus facilement (assistance à la marche) Le SHIMANO STEPS dispose d'une fonction dans laquelle l'assistance fonctionne même si vous marchez et poussez le vélo à assistance. • En fonction de la région d'utilisation, vous pouvez ne pas être autorisé à l'utiliser à cause des règlements propres à cette région. - Page 86 REMARQUE L'assistance à la marche fonctionne jusqu'à une vitesse de 6 km/h maximum. Soyez prudent car le vélo commence à bouger simplement en appuyant sur le bouton. • Si vous utilisez un système de changement de vitesse électronique, l'assistance lors de l'assistance à la marche et la vitesse sont contrôlées par la vitesse engagée.
-
Page 87: Exemple D'affichage En Mode De Changement De Vitesse Manuel
„ Changement de vitesse manuel et automatique En fonction du vélo à assistance utilisé, vous pouvez avoir la possibilité de permuter entre le changement de vitesse manuel et automatique. • Le changement de vitesse automatique : change automatiquement les vitesses en fonction des conditions de conduite. •... -
Page 88: Noms Des Pièces
Noms des pièces... - Page 89 Batterie de type externe Fixation de la batterie Cache de l'unité motrice (côté gauche et côté Unité motrice inférieur) Manivelle Unité des plateaux Capteur de vitesse Unité de changement de vitesse Disque de frein à disque Unité de la manette (contacteur d'assistance) Unité...
-
Page 90: Spécifications
Plage de températures de d'emploi de la batterie fonctionnement : 0-40 °C Capacité nominale spéciale et des pièces pendant la charge SHIMANO STEPS. Température de stockage -20-70 °C Tension nominale 36 V CC Température de stockage -20-60 °C Type d'unité motrice... -
Page 91: Dépannage
• Bips sonores et messages d'erreur sur le compteur • Indications de dysfonctionnement du témoin DEL de la batterie Réalisez les actions appropriées après vous être référé au « mode d'emploi du compteur SHIMANO STEPS » et au « mode d'emploi de la batterie spéciale et des pièces SHIMANO STEPS ». -
Page 92: Éclairages
Symptôme Cause/Éventualité Solution La distance parcourue se raccourcit en fonction des conditions de route, de la vitesse Vérifiez la charge de la batterie. Si la batterie engagée et selon que l'éclairage est allumé ou est presque déchargée, rechargez-la. non. Les caractéristiques de la batterie sont Cela ne signifie pas qu'il y a un problème. - Page 93 Remarque : les spécifications peuvent être modifiées sans préavis. (French)
- Page 94 UM-7HC0B-000 SHIMANO Total Electric Power System Gebrauchsanweisung Originalbetriebsanleitung...
- Page 96 WICHTIGER HINWEIS ..................2 Wichtige Sicherheitsinformationen ................2 HINWEIS......................4 Regelmäßige Inspektionen vor dem Fahren ..............5 Aufbau der Broschüren ..................6 SHIMANO STEPS Eigenschaften ..............7 Unterstützungsmodus und individuelle Anpassung ...........7 Individuelle Anpassung des Fahrkomforts ................8 Vorbereitung ....................8 Kurzanleitung ....................9 Hilfe beim Schieben des Fahrrads (Schiebe-Unterstützung) ............12 Automatische und manuelle Schaltung ..................
-
Page 97: Wichtiger Hinweis
WICHTIGER HINWEIS Wichtige Sicherheitsinformationen • Wenden Sie sich für zusätzliche Informationen zur Installation, Einstellung und zum Austausch jener GEFAHR Produkte, die nicht in der Gebrauchsanweisung aufgeführt sind, an die Verkaufsstelle oder an eine Handhabung des Akkus Vertretung. Eine Händlerbetriebsanleitung für professionelle und erfahrene Fahrradmechaniker ist auf •... - Page 98 und Fußwegen fahren. Das plötzliche Starten des • Wenn der Akku auch 2 Stunden nach der angegebenen Fahrrads kann zu Unfällen führen. Ladezeit noch nicht vollständig aufgeladen ist, ziehen Sie sofort den Netzstecker aus der Steckdose und wenden Sie • Vergewissern Sie sich, bevor Sie losfahren, dass das Licht sich bitte an die Verkaufsstelle.
-
Page 99: Hinweis
Handhabung des Akkus - Entfernen Sie den Akku nicht während des Ladevorgangs aus der Akkuhalterung. • Setzen Sie den Akku nicht direkter Sonneneinstrahlung - Fahren Sie das Rad nicht mit angeschlossenem aus. Lassen Sie den Akku an heißen Tagen nicht in einem Ladegerät. -
Page 100: Regelmäßige Inspektionen Vor Dem Fahren
Verbindung und Kommunikation mit Regelmäßige Inspektionen vor Smartphone oder Tablet dem Fahren Mit E-TUBE PROJECT für Smartphones/Tablets lassen sich Arbeiten wie die individuelle Anpassung einzelner Vor dem Fahren müssen die folgenden Punkte kontrolliert Komponenten oder des gesamten Systems sowie das Update werden. -
Page 101: Aufbau Der Broschüren
- Ablesen der Akku-LEDs beim Ladevorgang oder während einer Fehlermeldung und Handhabung von Fehlermeldungen • Gebrauchsanweisung des SHIMANO STEPS Fahrradcomputers Sie enthält Informationen zum SHIMANO STEPS Fahrradcomputer. Lesen Sie hier nach, um zu erfahren, wie Sie das Display ablesen und die Einstellungen konfigurieren. -
Page 102: Shimano Steps Eigenschaften
SHIMANO STEPS Eigenschaften • Ähnlichkeit mit normalem Fahrrad Das leichte kompakte Design der Antriebseinheit reduziert das Betriebsgeräusch und erleichtert das Treten, so dass Sie den Motor nicht einmal spüren. Darüber hinaus wurde aufgrund der Kürzung des Q-Faktors der Fahrkomfort verbessert und ähnelt nun mehr einem Fahrrad. -
Page 103: Individuelle Anpassung Des Fahrkomforts
Der Akku kann nach dem Laden mit dem dafür vorgesehenen Ladegerät verwendet werden. Den Akku unbedingt vor der Verwendung laden. Der Akku ist bereit zur Verwendung, sobald die an ihm befindliche LED aufleuchtet. Bitte lesen Sie die SHIMANO STEPS Gebrauchsanweisung für Spezialakkus und Komponenten hinsichtlich des Ladens und der Handhabung des Akkus. -
Page 104: Kurzanleitung
Je nach verwendetem E-Bike kann sich der montierte Akku, der Fahrradcomputer und die Schaltereinheit von dem hier Genannten unterscheiden. Bitte schauen Sie in der „SHIMANO STEPS Gebrauchsanweisung für Spezialakkus und Komponenten“ nach sowie in der „SHIMANO STEPS Gebrauchsanweisung für Fahrradcomputer“. - Page 105 Schalten Sie den Strom EIN. Wiederholen Sie diesen Vorgang, um den Strom AUSzuschalten. Beispiel für externen Akku Beispiel für integrierten Akku * Abhängig von dem E-Bike kann sich die Einschalttaste an einer anderen Stelle als in der Abbildung gezeigt befinden.
- Page 106 Wählen Sie den Unterstützungsmodus aus. * Wenn Sie den Strom EINschalten, wird der Unterstützungsmodus auf [AUS] zurückgesetzt, unabhängig von dem Unterstützungsmodus, den Sie vor dem letzten AUSschalten ausgewählt hatten. Fahrradcomputer Drücken Sie die Schalter X und Y. Display Unterstützungsmodus [AUS] [ECO] [TRAIL] / [NORMAL] [BOOST] / [HOCH]...
-
Page 107: Hilfe Beim Schieben Des Fahrrads (Schiebe-Unterstützung)
„ Hilfe beim Schieben des Fahrrads (Schiebe-Unterstützung) SHIMANO STEPS verfügt über eine Funktion, bei der die Unterstützungsfunktion selbst beim Schieben des E-Bikes aktiv ist. • Abhängig von der Nutzungsregion können Sie diese aufgrund der regionalen Gesetzgebung ggf. nicht nutzen. In diesem Fall ist der hier beschriebene Betrieb deaktiviert. - Page 108 HINWEIS Die Schiebe-Unterstützung läuft mit einer Maximalgeschwindigkeit von 6 km/h. Seien Sie vorsichtig, da das Fahrrad sich durch den Tastenbetrieb in Bewegung setzt. • Bei elektronischer Gangschaltung werden der Unterstützungsgrad der Schiebe-Unterstützung und die Geschwindigkeit durch die aktuelle Gangstufe festgelegt. Schiebe-Unterstützungsmodus verlassen.
-
Page 109: Automatische Und Manuelle Schaltung
„ Automatische und manuelle Schaltung Abhängig vom verwendeten E-Bike können Sie gegebenenfalls zwischen automatischer und manueller Schaltung wechseln. • Automatische Schaltung: Wechselt automatisch die Gänge basierend auf den Fahrbedingungen. • Manuelle Gangschaltung: Dabei handelt es sich um die elektronische Standard-Schaltung. Die Gänge werden durch Betätigen des Gangschalters gewechselt. -
Page 110: Bezeichnung Der Komponenten
Bezeichnung der Komponenten... - Page 111 Externer Akku Akkuhalterung Abdeckung der Antriebseinheit (links und Antriebseinheit unten) Kurbel Kettenblatteinheit Geschwindigkeitssensor Gangschaltung Bremsscheibe Schaltereinheit (Unterstützungsschalter) Schaltereinheit (Gangschalter) oder Schalthebel Fahrradcomputer oder Kontaktstelle (A) Stromkabel Kettenführung Integrierter Akku Akkuladegerät Je nach E-Bike wird der Akku ggf. an einer anderen Position montiert als in der Abbildung gezeigt. Die Akkuhalterung des integrierten Akkus ist im Rahmen befestigt.
-
Page 112: Spezifikationen
Spezifikationen Betriebstemperaturbereich: -10 - 50 °C Akkutyp Lithium-Ionen-Akku Beim Entladen Lesen Sie die SHIMANO Betriebstemperaturbereich: STEPS Gebrauchsanweisung Nennleistung 0 - 40 °C Beim Laden für Spezialakkus und Komponenten. Lagertemperatur -20 - 70 °C Nennspannung 36 V DC Lagertemperatur (Akku) -20 - 60 °C Antriebseinheit-Typ Mitteneinbau Ladespannung... -
Page 113: Fehlersuche
• Signaltöne und Fehlermeldungen des Fahrradcomputers • Akku LED Fehleranzeige Bitte führen Sie die jeweilig angemessenen Maßnahmen durch, nachdem Sie in der „SHIMANO STEPS Gebrauchsanweisung für Fahrradcomputer“ sowie in der „SHIMANO STEPS Gebrauchsanweisung für Spezialakkus und Komponenten“ nachgelesen haben. „ Funktion der Motorunterstützung Symptom Ursache / Möglichkeit... -
Page 114: Sonstige
Symptom Ursache / Möglichkeit Abhilfemaßnahme Die Reichweite kann je nach Prüfen Sie den Akku-Ladezustand. Wenn Straßenbedingungen, des eingelegten Gangs der Akku fast leer ist, laden Sie ihn erneut und der gesamten Lichtnutzungszeit kürzer auf. werden. Die Eigenschaften des Akkus verschlechtern Dies ist kein Anzeichen für ein Problem. - Page 115 Bitte beachten: Änderungen im Interesse der technischen Weiterentwicklung bleiben jederzeit vorbehalten. (German)
- Page 116 UM-7HC0B-000 Sistema di alimentazione elettrica totale SHIMANO Manuale d'uso Istruzioni originali...
- Page 118 Informazioni importanti per la sicurezza ..............2 NOTA ......................4 Ispezioni regolari da effettuare prima di utilizzare la bicicletta ......... 5 Struttura dell’opuscolo ..................6 Caratteristiche di SHIMANO STEPS ..............7 Modalità di servoassistenza e personalizzazione ..........7 Personalizzazione del comfort di guida ...................8 Preparazione ....................8 Guida rapida ....................9...
-
Page 119: Avviso Importante
AVVISO IMPORTANTE Informazioni importanti per la sicurezza • Per informazioni sull'installazione, sulla regolazione e sulla sostituzione dei prodotti che non dovessero essere PERICOLO presenti nel manuale d'uso, contattare il punto vendita o un rivenditore. Un manuale del rivenditore, destinato a Manipolazione della batteria meccanici di biciclette esperti, è... -
Page 120: Precauzioni Per La Sicurezza
avere familiarità con le caratteristiche di avvio della caso contrario potrebbe surriscaldarsi, esplodere o bicicletta. In caso di partenza improvvisa della bicicletta, incendiarsi. Fare riferimento al manuale d'uso del infatti, potrebbero verificarsi incidenti. caricabatterie per il tempo di carica stabilito. •... -
Page 121: Nota
• Prima di collegare la batteria, verificare che non vi sia NOTA acqua raccolta nell’area in cui viene collegata la batteria (connettore) e che non sia sporca. Precauzioni per la sicurezza • Si raccomanda di utilizzare una batteria SHIMANO • In caso di malfunzionamenti o altri problemi, rivolgersi al originale. -
Page 122: Ispezioni Regolari Da Effettuare Prima Di Utilizzare La Bicicletta
• Non usare diluenti o altri solventi per la pulizia dei prodotti. Tali sostanze potrebbero danneggiare le superfici. • Si consiglia di lavare periodicamente le corone con un prodotto detergente neutro. Anche la pulizia della catena con un prodotto detergente neutro e la sua lubrificazione possono rivelarsi efficaci per aumentare la durata delle corone e della catena. -
Page 123: Struttura Dell'opuscolo
Questo opuscolo descrive il funzionamento delle biciclette servoassistite dotate di un manubrio da corsa e che sono controllate utilizzando una leva a doppio controllo. Deve essere letto unitamente al Manuale d'uso di SHIMANO STEPS. • Manuale d’uso della batteria speciale e delle parti di SHIMANO STEPS Contiene quanto segue. -
Page 124: Caratteristiche Di Shimano Steps
Caratteristiche di SHIMANO STEPS • Approfondimento dell'aspetto della bicicletta Il design leggero e compatto dell'unità di trasmissione riduce il rumore di funzionamento e rende la pedalata più leggera in modo da non far percepire l'esistenza di un motore. Inoltre, grazie all'accorciamento del fattore Q, il comfort di guida è... -
Page 125: Personalizzazione Del Comfort Di Guida
Caricare sempre la batteria prima dell’uso. La batteria può essere utilizzata quando il LED della batteria si accende. Leggere il manuale d’uso della batteria speciale e delle parti di SHIMANO STEPS per le modalità di manipolazione e carica della batteria. -
Page 126: Guida Rapida
A seconda della bicicletta servoassistita utilizzata, la batteria, il ciclocomputer e il gruppo interruttore installati possono differire da quanto indicato qui. Consultare il “Manuale d’uso della batteria speciale e delle parti di SHIMANO STEPS” nonché il “Manuale d'uso del ciclocomputer di SHIMANO STEPS”. - Page 127 Accendere l'alimentazione. Per spegnere l'alimentazione, ripetere la procedura. Esempio di batteria di tipo esterno Esempio di batteria di tipo incorporato * A seconda della bicicletta servoassistita, la posizione del pulsante di accensione può essere diversa da quella mostrata in figura.
- Page 128 Selezionare la modalità di servoassistenza. * Se l’alimentazione è accesa, la modalità di servoassistenza è ripristinata su [OFF] a prescindere dalla modalità di servoassistenza selezionata prima di spegnere l’alimentazione. Ciclocomputer Premere gli interruttori X e Y. Display modalità di servoassistenza [OFF] [ECO] [TRAIL] / [NORMAL]...
-
Page 129: Facilitare La Camminata E La Spinta Della Bicicletta (Servoassistenza Walk)
„ Facilitare la camminata e la spinta della bicicletta (servoassistenza Walk) SHIMANO STEPS possiede una funzione di servoassistenza che funziona anche quando si cammina e si spinge la bicicletta servoassistita. • A seconda della regione di utilizzo, potrebbe non essere possibile utilizzarla a causa delle leggi in vigore nella regione. In questo caso, le operazioni qui descritte sono disabilitate. - Page 130 NOTA La servoassistenza Walk funziona fino a un massimo di 6 km/h. Fare attenzione perché la bicicletta inizia a muoversi semplicemente attraverso i pulsanti. • Durante il cambio rapporti elettronico, la servoassistenza della servoassistenza Walk e la velocità sono controllati dal rapporto selezionato. Uscire dalla modalità...
-
Page 131: Cambio Rapporti Automatico E Manuale
„ Cambio rapporti automatico e manuale In base alla bicicletta servoassistita utilizzata, potrebbe essere possibile passare dal cambio rapporti automatico a quello manuale e viceversa. • Cambio rapporti automatico: consente di cambiare automaticamente il rapporto in base alle condizioni del percorso. •... -
Page 132: Nomi Dei Componenti
Nomi dei componenti... - Page 133 Batteria di tipo esterno Supporto batteria Copertura dell’unità di trasmissione (lato Unità di trasmissione sinistro e lato inferiore) Pedivella Unità corona Sensore velocità Unità cambio Gruppo interruttore (interruttore Rotore del freno a disco servoassistenza) Gruppo interruttore (interruttore cambio) o leva Ciclocomputer o giunzione (A) cambio Cavo elettrico...
-
Page 134: Specifiche
Specifiche Intervallo temperatura di funzionamento: durante -10 - 50°C Tipo di batteria Batteria agli ioni di litio lo scaricamento Leggere il manuale d’uso Intervallo temperatura di della batteria speciale e funzionamento: durante 0 - 40°C Capacità nominale delle parti di SHIMANO la carica STEPS. -
Page 135: Guida Alla Soluzione Dei Problemi
• Bip e messaggi di errore sul ciclocomputer • Indicazioni di errore del LED batteria Eseguire le azioni appropriate dopo aver consultato il “Manuale d'uso del ciclocomputer di SHIMANO STEPS” e il “Manuale d’uso della batteria speciale e delle parti di SHIMANO STEPS”. -
Page 136: Fanali
Sintomo Causa/possibilità Soluzione La distanza percorso potrebbe abbreviarsi a causa delle condizioni stradali, del rapporto Verificare la carica della batteria. Se la selezionato e della durata complessiva di batteria è quasi esaurita, ricaricarla. accensione delle luci. In condizioni invernali le prestazioni della Questo non evidenzia un problema. - Page 137 N.B.: le specifiche sono soggette a modifica senza preavviso, in caso di migliorie. (Italian)
- Page 138 UM-7HC0B-000 Compleet elektrisch voedingssysteem van SHIMANO Gebruikershandleiding Originele instructies...
- Page 140 BELANGRIJKE MEDEDELING ................2 Belangrijke veiligheidsinformatie ..............2 NOTITIE .......................4 Regelmatige controles voordat u gaat fietsen ............5 Handleidingenstructuur .................6 Kenmerken van de SHIMANO STEPS ..............7 Bekrachtigingsmodus en aanpassingen ............7 Aanpassingen en rijcomfort ....................8 Voorbereiding ....................8 Snelstartgids ....................9 Lopen met de fiets aan de hand vereenvoudigen (loopondersteuning) ........12 Automatisch en handmatig schakelen ...................
-
Page 141: Belangrijke Mededeling
BELANGRIJKE MEDEDELING Belangrijke veiligheidsinformatie • Neem contact op met het verkooppunt of een verdeler GEVAAR voor informatie over de montage, afstelling en vervanging van de producten die niet terug te vinden Omgaan met de accu zijn in de gebruikershandleiding. Een dealerhandleiding •... - Page 142 Veiligheidsmaatregelen • Gebruik de accu niet als deze duidelijk zichtbaar is bekrast of als de buitenzijde andere schade vertoont. • Verwijder de accu en laadkabel voordat u de bedrading Doet u dat wel, dan kan de accu barsten of oververhit aansluit of onderdelen op de fiets monteert.
-
Page 143: Notitie
• Het gebruik van een originele SHIMANO-accu wordt NOTITIE aanbevolen. Als u een accu van een andere fabrikant gebruikt, moet u de gebruikershandleiding nauwkeurig Veiligheidsmaatregelen doorlezen voor het gebruik. • Neem contact op met de plaats van aankoop als er Over gebruikte accu's storingen of andere problemen optreden. -
Page 144: Regelmatige Controles Voordat U Gaat Fietsen
• Gebruik geen verdunner of andere oplosmiddelen om de producten te reinigen. Dergelijke materialen kunnen de oppervlakken beschadigen. • Was de kettingbladen regelmatig met een neutraal schoonmaakmiddel. De ketting reinigen met een neutraal schoonmaakmiddel en de ketting smeren zijn effectieve manieren om de gebruiksduur van de kettingbladen en de ketting te verlengen. -
Page 145: Handleidingenstructuur
De nieuwste gebruikershandleidingen zijn beschikbaar op onze website (https://si.shimano.com). • SHIMANO STEPS-gebruikershandleiding (dit document) Dit is de basisgebruikershandleiding voor SHIMANO STEPS. Deze handleiding bevat de volgende inhoud. - Snelstartgids SHIMANO STEPS - Bediening van elektrisch ondersteunde fietsen met een recht stuur, zoals stads-, trekking- of MTB-fietsen - Probleemoplossing •... -
Page 146: Kenmerken Van De Shimano Steps
Kenmerken van de SHIMANO STEPS • Gelijkenis met de fiets als doel Het lichte, compacte ontwerp van de aandrijfeenheid zorgt voor een verminderd geluidsniveau en verlicht het trappen, zodat het voor de gebruiker aanvoelt alsof er geen motor aanwezig is. Door de verkorting van de Q-factor is het rijcomfort bovendien verbeterd en voelt het rijden meer aan als fietsen. -
Page 147: Voorbereiding
Zorg dat u deze oplaadt voor gebruik. De accu kan worden gebruikt wanneer de LED op de accu gaat branden. Raadpleeg de SHIMANO STEPS-gebruikershandleiding voor speciale accu en onderdelen voor informatie over het opladen van en het omgaan met de accu. -
Page 148: Snelstartgids
Snelstartgids Dit onderdeel biedt uitleg over het omgaan met een elektrische fiets waarop SHIMANO STEPS is gemonteerd. Afhankelijk van de gebruikte elektrische fiets, kan de gemonteerde accu, fietscomputer en schakelaareenheid verschillen van wat hier wordt vermeld. Raadpleeg eveneens de “SHIMANO STEPS-gebruikershandleiding voor speciale accu en onderdelen” en de “SHIMANO STEPS- gebruikershandleiding voor fietscomputer”. - Page 149 Zet de voeding AAN. Herhaal deze procedure om de voeding UIT te schakelen. Voorbeeld van accu van extern type Voorbeeld van accu van ingebouwd type * Naargelang de elektrische fiets, kan de locatie van de aan-uitknop verschillen van de locatie die in de afbeelding wordt getoond.
- Page 150 Selecteer de bekrachtigingsmodus. * Als u de voeding inschakelt, wordt de bekrachtigingsmodus gereset naar [UIT], ongeacht welke bekrachtigingsmodus u geselecteerd had voordat u de voeding voor het laatst hebt uitgeschakeld. Fietscomputer Druk op de X- en Y-schakelaar. Display bekrachtigingsmodus [UIT] [ECO] [TRAIL] / [NORMAL] [BOOST] / [HIGH]...
- Page 151 „ Lopen met de fiets aan de hand vereenvoudigen (loopondersteuning) SHIMANO STEPS heeft een functie waarbij de bekrachtiging ook werkt wanneer u loopt met de elektrische fiets aan de hand. • Afhankelijk van de regio waar de fiets wordt gebruikt, kunt u dit mogelijk niet gebruiken omwille van de wetgeving van die regio.
- Page 152 NOTITIE Loopondersteuning werkt met een maximum van 6 km/u. Wees voorzichtig, want de fiets begint al te bewegen enkel door de knoppen te bedienen. • Tijdens het elektronisch schakelen worden de loopondersteuning en snelheid geregeld door de huidige versnellingsstand. Verlaat de loopondersteuningsmodus. Druk op de knop (X-knop) aan de bovenzijde van de bekrachtigingsschakelaar (linkerzijde van de handgreep).
- Page 153 „ Automatisch en handmatig schakelen Naargelang de gebruikte elektrisch ondersteunde fiets, is het mogelijk dat u kunt wisselen tussen automatisch en handmatig schakelen. • Automatisch schakelen: schakelt automatisch op basis van de rijomstandigheden. • Handmatig schakelen: dit verwijst naar standaard elektronisch schakelen. Er wordt geschakeld met behulp van de versnellingsschakelaar.
-
Page 154: Namen Van Onderdelen
Namen van onderdelen... - Page 155 Accu van extern type Accuhouder Afdekking van aandrijfeenheid (linkerzijde en Aandrijfeenheid onderzijde) Crankarm Kettingbladeenheid Snelheidssensor Schakelaareenheid Remschijf Schakelaareenheid (bekrachtigingsschakelaar) Schakelaareenheid (versnellingsschakelaar) of Fietscomputer of aansluitblok [A] schakelversteller Elektrische kabel Kettinghouder Accu van ingebouwd type Acculader Naargelang de elektrische fiets, kan de accu op een andere plaats worden gemonteerd dan de plaats die in de afbeelding wordt aangegeven.
-
Page 156: Specificaties
Specificaties Bedrijfstemperatuurbereik: -10 - 50 °C Accutype Lithium-ion accu tijdens ontladen Raadpleeg de SHIMANO Bedrijfstemperatuurbereik: STEPS speciale accu en Nominale capaciteit 0 - 40 °C tijdens opladen onderdelen gebruikershandleiding. Opslagtemperatuur -20 - 70 °C Nominale spanning 36 V DC Opslagtemperatuur (accu) -20 - 60 °C Type aandrijfeenheid In het midden... -
Page 157: Probleemoplossing
De volgende meldingen worden gegeven wanneer de elektrische fiets een storing ondervindt. • Pieptoon en foutmeldingen op de fietscomputer • LED-foutindicaties accu Raadpleeg de “SHIMANO STEPS-gebruikershandleiding voor fietscomputer” en de “SHIMANO STEPS-gebruikershandleiding voor speciale accu en onderdelen” en voer vervolgens de gepaste acties uit. „ Bekrachtigingsfunctie... - Page 158 Symptoom Mogelijke oorzaak Oplossing De afgelegde afstand kan korter worden afhankelijk van de omstandigheden op de Controleer de acculading. Laad de accu op weg, de versnellingsstand en de totale indien deze bijna leeg is. lichtgebruikstijd. De accu presteert minder bij winterweer. Dit duidt niet op een probleem.
- Page 159 Let op: specificaties kunnen zonder voorafgaande kennisgeving gewijzigd worden. (Dutch)
-
Page 160: Manual Do Usuário
UM-7HC0B-000 Sistema de força elétrica total SHIMANO Manual do usuário Instruções originais... - Page 162 Informação importante sobre a segurança ..............2 NOTA ......................4 Inspeções regulares antes de utilizar a bicicleta ............5 Estrutura do Livreto ..................6 Características do SHIMANO STEPS ..............7 Modo de assistência e personalização ..............7 Personalização do conforto na utilização da bicicleta ..............8 Preparação ....................8 Guia rápido ....................9...
- Page 163 AVISO IMPORTANTE Informação importante sobre a segurança • Para informações adicionais sobre a instalação, o ajuste e a substituição dos produtos que não estão no manual do PERIGO usuário, contate o local de compra ou um distribuidor. No nosso site (https://si.shimano.com) está disponível um Manuseando a bateria manual do revendedor para mecânicos de bicicletas profissionais e experientes.
-
Page 164: Precauções De Segurança
Precauções de segurança • Os intervalos de temperatura de operação da bateria estão descritos abaixo. Não use a bateria em • Certifique-se de remover a bateria e o cabo de carga antes temperaturas fora desses intervalos. Se a bateria for de ligar ou fixar peças à... -
Page 165: Cuidado E Manutenção
• Recomendamos a utilização de uma bateria original NOTA SHIMANO. Caso utilize uma bateria de outro fabricante, certifique-se de ler atentamente as instruções de serviço Precauções de segurança antes da utilização. • Se algum mau funcionamento ou outros problemas Sobre baterias usadas ocorrerem, entre em contato com o local de compra. - Page 166 • Você deve lavar periodicamente as coroas com um detergente neutro. Além disso, lavar a corrente com um detergente neutro e lubrificá-la pode ser um meio eficaz para prolongar a vida útil das coroas e da corrente. • Use um pano umedecido, bem torcido, para limpar a bateria e a tampa de plástico.
- Page 167 Este livreto descreve como operar bicicletas com assistência que usam guidão curvo e são controladas usando manete de controle duplo. Esta seção deve ser lida em conjunto com o manual do usuário da SHIMANO STEPS. • Manual do usuário da bateria especial e peças da SHIMANO STEPS Traz o seguinte conteúdo.
- Page 168 Características do SHIMANO STEPS • Em busca da sensação de uma bicicleta O design leve e compacto da unidade acionadora reduz o ruído da operação e deixa os pedais mais leves para que você não perceba a existência de um motor. Além disso, devido ao encurtamento do fator Q, o conforto ao pedalar foi aprimorado e a sensação é...
- Page 169 A bateria pode ser usada depois de devidamente carregada com o carregador designado. Certifique-se de carregar a bateria antes da utilização. A bateria pode ser utilizada quando o LED na bateria acende. Leia o manual do usuário da bateria especial e peças SHIMANO STEPS para saber como carregar a manusear a bateria.
- Page 170 Dependendo da bicicleta com assistência utilizada, a bateria instalada, o ciclocomputador e a unidade do botão podem ser diferentes das que estão listadas aqui. Veja o "manual do usuário de peças e da bateria especial SHIMANO STEPS" e também o "manual do usuário do ciclocomputador SHIMANO STEPS".
- Page 171 LIGUE a alimentação. Para DESLIGAR a alimentação, repita este procedimento. Exemplo de bateria do tipo externo Exemplo de bateria do tipo embutido * De acordo de com a bicicleta com assistência, o local do botão da força pode diferir daquele mostrado na ilustração.
- Page 172 Selecione modo de assistência. * Se você LIGAR a força, o modo de assistência será redefinido para [OFF], independentemente do modo de assistência que você selecionou antes de DESLIGAR pela última vez. Ciclocomputador Pressione o botão X e Y. Exibição do modo de assistência [OFF] [ECO] [TRAIL] / [NORMAL]...
- Page 173 „ Faz com que caminhar empurrando a bicicleta seja mais fácil (assistência na caminhada) SHIMANO STEPS possui uma função em que a assistência funciona mesmo quando você está caminhando e empurrando a bicicleta com assistência. • Dependendo da região de utilização, você pode ser impedido de usá-la em decorrência das leis locais. Nesse caso, as funções aqui descritas serão desabilitadas.
- Page 174 NOTA A assistência na caminhada pode operar por até, no máximo, 6 km/h. Tome cuidado pois a bicicleta começa a se mover apenas pela operação dos botões. • Durante a troca de marchas eletrônica, a assistência da assistência na caminhada e a velocidade são controladas pela posição da marcha atual.
-
Page 175: Troca De Marchas Manual E Automática
„ Troca de marchas manual e automática Dependendo da bicicleta com assistência usada, você poderá alternar entre a troca de marchas manual e automática. • Troca de marchas automática: troca as marchas automaticamente com base nas condições de uso. • Troca de marchas manual: esta é a troca de marchas eletrônica padrão. As marchas são trocadas operando-se o botão de troca de marchas. - Page 176 Nomes das peças...
- Page 177 Bateria do tipo externo Suporte de bateria Tampa da unidade acionadora (lado esquerdo e Unidade acionadora lado inferior) Braço do pedivela Unidade da coroa Sensor de velocidade Unidade de troca da marchas Rotor do freio a disco Unidade do botão (botão de assistência) Unidade do botão (botão de troca de marchas) Ciclocomputador ou junção [A] ou manete de troca de marchas...
-
Page 178: Especificações
Intervalo de temperatura Leia o manual do usuário da de funcionamento: 0-40 °C Capacidade nominal bateria especial e peças durante o carregamento SHIMANO STEPS. Temperatura de -20-70 °C Tensão nominal 36 V CC armazenamento Temperatura de -20-60 °C Tipo de unidade acionadora... -
Page 179: Diagnóstico De Falhas
• Sons de beep e mensagens de erro no ciclocomputador • Indicações de erro do LED da bateria Realize os procedimentos adequados depois de ver o "manual do usuário do ciclocomputador SHIMANO STEPS" e também o "manual do usuário da bateria e peças especiais SHIMANO STEPS". - Page 180 Sintoma Causa / Possibilidade Solução A distância de viagem pode ser reduzida conforme as condições da estrada, a Verifique a carga da bateria. Se a bateria posição da marcha e o tempo total de uso estiver quase descarregada, carregue-a. da iluminação. As características da bateria diminuirão Isso não é...
- Page 181 Note: as especificações estão sujeitas a alteração para fins de melhoramento sem aviso prévio. (Portuguese)