Publicité
Les langues disponibles
Les langues disponibles
Liens rapides
Before you begin installation, your vehicle must have Landing Pads installed.
TO BEGIN:
Landing Pads are vehicle specific pads and are purchased separately.
Install your Landing Pads before continuing with these instructions.
1033015D-1/12
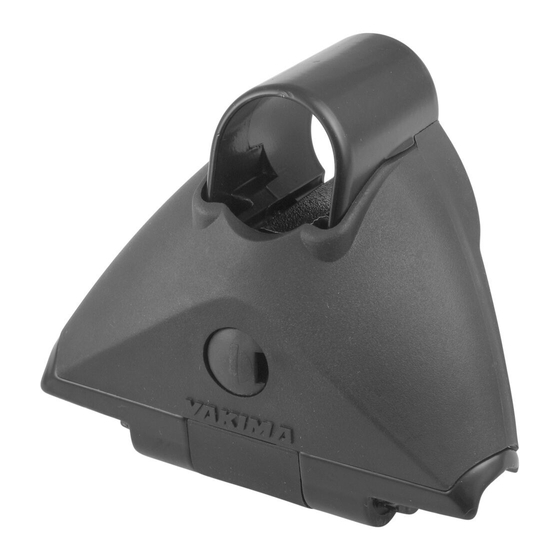
Control Towers
These instructions are
also applicable for
Control Towers sold
in pairs.
IMPORTANT WARNING!
IT IS CRITICAL THAT ALL YAKIMA
RACKS AND ACCESSORIES BE
PROPERLY AND SECURELY
ATTACHED TO YOUR VEHICLE.
IMPROPER ATTACHMENT COULD
RESULT IN AN AUTOMOBILE
ACCIDENT, AND COULD CAUSE
SERIOUS BODILY INJURY OR
DEATH TO YOU OR TO OTHERS.
YOU ARE RESPONSIBLE FOR
SECURING THE RACKS AND
ACCESSORIES TO YOUR CAR,
CHECKING THE ATTACHMENTS
PRIOR TO USE, AND
PERIODICALLY INSPECTING THE
PRODUCTS FOR ADJUSTMENT,
WEAR, AND DAMAGE.
THEREFORE, YOU MUST READ
AND UNDERSTAND ALL OF THE
INSTRUCTIONS AND CAUTIONS
SUPPLIED WITH YOUR YAKIMA
PRODUCT PRIOR TO
INSTALLATION OR USE. IF YOU DO
NOT UNDERSTAND ALL OF THE
INSTRUCTIONS AND CAUTIONS,
OR IF YOU HAVE NO
MECHANICAL EXPERIENCE AND
ARE NOT THOROUGHLY FAMILIAR
WITH THE INSTALLATION
PROCEDURES, YOU SHOULD
HAVE THE PRODUCT INSTALLED
BY A PROFESSIONAL INSTALLER
SUCH AS A QUALIFIED GARAGE
OR AUTO BODY SHOP.
Part #1033015 Rev.D
Publicité

Manuels Connexes pour Yakima 8890027


Sommaire des Matières pour Yakima 8890027
- Page 1 Control Towers IMPORTANT WARNING! IT IS CRITICAL THAT ALL YAKIMA RACKS AND ACCESSORIES BE Before you begin installation, your vehicle must have Landing Pads installed. PROPERLY AND SECURELY ATTACHED TO YOUR VEHICLE. IMPROPER ATTACHMENT COULD RESULT IN AN AUTOMOBILE These instructions are...
- Page 2 To open cover, pry Slide two towers onto Using the wrench provided, and pull forward. each crossbar. Do not loosen towers. tighten. Be careful to keep the bars horizontal; the loose towers could slide from the bar and fall. Push end caps onto the ends of the crossbars.
- Page 3 • Measure equal distances OPENING YOUR HATCH. from front towers. LOAD LOCATION: On some vehicles, hatch The distance between the Yakima interference with accessories crossbars is determined by the FOR EASE OF LOADING, CONSIDER is unavoidable. accessories you wish to carry.
- Page 4 MAXIMUM WEIGHT IS SPECIFIC Limited Lifetime Warranty REMOVE YOUR TO YOUR CAR To obtain a copy of this YAKIMA RACK AND Refer to your Yakima Dealer, or warranty, go online to ACCESSORIES online at yakima.com. www.yakima.com or email us at BEFORE ENTERING yakwarranty@yakima.com...
-
Page 5: Pour Commencer
VOUS DEVEZ DONC LIRE ATTENTIVEMENT TOUTES LES INSTRUCTIONS ET TOUS LES AVERTISSEMENTS ACCOMPAGNANT VOTRE PRODUIT YAKIMA AVANT DE L’INSTALLER ET DE L’UTILISER. SI VOUS NE COMPRENEZ PAS TOUTES LES INSTRUCTIONS ET TOUS LES AVERTISSEMENTS, OU SI VOUS N’AVEZ PAS DE COMPÉTENCES EN MÉCANIQUE... - Page 6 Pour ouvrir le capot, écarter les Enfiler deux pieds À l’aide de la clé fournie, côtés et tirer vers soi. sur chaque barre desserrer les pieds. transversale. Ne pas serrer. Faire attention de garder les barres à l’horizontale: n’étant pas serrés, les pieds pourraient tomber. Enfoncer les bouchons d’extrémité...
- Page 7 CHARGE, AVANT D’ACHEVER l’écartement nécessaire en fonction de vos accessoires. L’INSTALLATION. (Consulter le dépositaire YAKIMA ou le site www.yakima.com) Serrer complètement les vis En poussant vers le bas, finir de Fermer les capots en les rabattant hexagonales en passant la clé...
-
Page 8: Avant De Prendre La Route
EST SPÉCIFIQUE AU VÉHICULE. copie de cette garantie, aller en BAGAGES ET LES On peut la trouver chez le ligne à www.yakima.com <http:// dépositaire Yakima ou sur le site ACCESSOIRES www.yakima.com/> www.yakima.com. ou nous envoyer un courriel à YAKIMA AVANT DE yakwarranty@yakima.com... -
Page 9: Para Comenzar
DESGASTE Y POSIBLES DAÑOS. POR ELLO DEBE LEER Y COMPRENDER TODAS LAS INSTRUCCIONES Y ADVERTENCIAS QUE VIENEN CON LOS PRODUCTOS YAKIMA ANTES DE INSTALARLOS O USARLOS. SI NO ENTIENDE TODAS LAS INSTRUCCIONES Y ADVERTENCIAS, O NO TIENE EXPERIENCIA EN MECÁNICA O NO ESTÁ... - Page 10 Con la llave proporcionada, Deslice dos soportes Para abrir la cubierta, separe y afloje los soportes. en cada travesaño. No empuje hacia adelante. ajuste. Mantenga los travesaños horizontales; los soportes flojos pueden deslizarse y caer. Introduzca los casquetes de extremo en los extremos de los travesaños.
- Page 11 UBICACIÓN MÁS CONVENIENTE travesaños figura la separación que ANTES DE COMPLETAR LA requieren sus accesorios. INSTALACIÓN. (Consulte a su concesionario Yakima o visite el sitio www.yakima.com) Ajuste completamente los tornillos Empuje hacia abajo y ajuste Cierre las cubiertas con fuerza.
- Page 12 EL PESO MAXIMO “mientras dure el romance” de DEPENDE DE SU VEHÍCULO QUITE SU PARRILLA YAKIMA. Para obtener una copia de esta garantía, y está indicado en la Lista de Y ACCESORIOS compatibilidad con su visítenos en...