Table des Matières
Publicité
Les langues disponibles
Les langues disponibles
Liens rapides
Owner's Manual
IMPORTANT SAFETY
INSTRUCTIONS
READ AND SAVE THESE
SAFETY INSTRUCTIONS
BEFORE USING THIS FAN
When using electrical appliances, basic
precautions should always be followed to
reduce the risk of fire, electric shock, and
injury to persons, including the following:
1. Use this fan only as described in this
manual. Other use not recommended as it
may cause fire, electric shock or injury to
persons.
2. This product is intended for household use
ONLY and not for commercial, industrial or
outdoor use.
3. To protect against electric shock, do not
place fan in window, immerse unit, plug
or cord in water or spray with liquids.
4. This appliance has a polarized plug (one
blade is wider than the other). To reduce
the risk of shock, this plug is intended to
fit only one way in a polarized outlet. If the
plug does not fitfully in the outlet, reverse
the plug. If it still does not fit, contact a
qualified electrician. Do not attempt to
defeat this safety feature.
5. Close supervision is necessary when any
appliance is used by or near children.
The Honeywell trademark is used by Kaz, Inc. under license from Honeywell International Inc.
Honeywell International Inc. makes no representation or warranties with respect to this product.
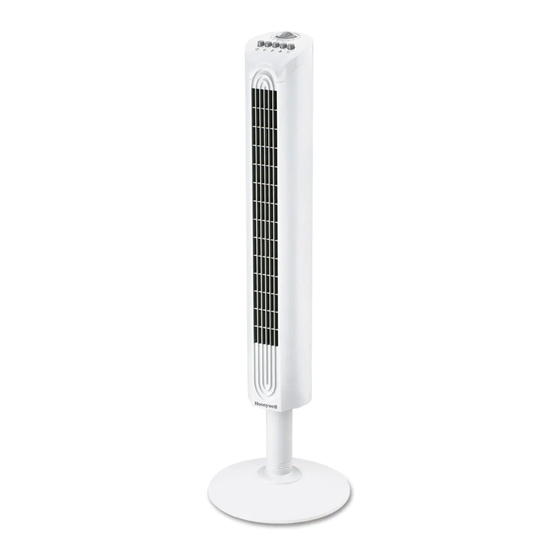
TOWER FAN
Model DY-012 Series
Model HY-013 Series
Model HY-023 Series
6. Turn the fan OFF and unplug the fan from
the outlet when not in use, when moving
the fan from one location to another and
before cleaning.
7. To disconnect the fan, first turn the unit
OFF, grip the plug and pull it from the wall
outlet. Never pull the plug by the cord.
8 Do not operate the fan in the presence of
explosive and/or flammable fumes.
9. Do not place the fan or any parts near
an open flame, cooking or other heating
appliance.
10. Do not operate the fan with a damaged
cord or plug or if the product malfunctions
is dropped or damaged in any manner
(see warranty).
11. Avoid contact with moving fan parts.
12. The use of attachments not recommended
by the manufacturer may be hazardous.
13. Place the fan on a dry level surface.
14. Do not hang or mount fan on a wall or
ceiling.
15. Do not operate if the fan housing is
damaged.
16. A loose fit between the AC outlet
(receptacle) and plug may cause over
heating and a distortion of the plug.
Contact a qualified electrician to replace
loose or worn outlet.
WARNING: To Reduce The Risk of Fire or
Electric Shock, Do Not Use This Fan With
Any Solid-State Speed Control Device.
,
Publicité
Table des Matières

Manuels Connexes pour Honeywell DY-012 Série


Sommaire des Matières pour Honeywell DY-012 Série
- Page 1 4. This appliance has a polarized plug (one 16. A loose fit between the AC outlet blade is wider than the other). To reduce (receptacle) and plug may cause over the risk of shock, this plug is intended to heating and a distortion of the plug. fit only one way in a polarized outlet. If the plug does not fitfully in the outlet, reverse Contact a qualified electrician to replace the plug. If it still does not fit, contact a loose or worn outlet. qualified electrician. Do not attempt to WARNING: To Reduce The Risk of Fire or defeat this safety feature. Electric Shock, Do Not Use This Fan With 5. Close supervision is necessary when any Any Solid-State Speed Control Device. appliance is used by or near children. The Honeywell trademark is used by Kaz, Inc. under license from Honeywell International Inc. Honeywell International Inc. makes no representation or warranties with respect to this product.
-
Page 2: Base Assembly
DY-012 SERIES ASSEMBLY INSTRUCTIONS NOTE: Remove all contents from the box being careful not to discard Fig. 1 the manual and hardware needed for assembly. A phillips head screw driver ( ) is required for assembly and is not included with the fan purchase. A. Base Assembly • Gently turn the fan upside down. • Place the power cord through the recessed channel located in the center of the rear base assembly (Fig 1). • Align the rear and front base assembly and firmly snap together by pushing the 4 round extrusion into the adjacent circles of the Fig. 2 connecting pieces (Fig 2). B. Securing the Tower Fan to the Base • Using the 3 (M5 x 12) screws and phillips head screw driver ( secure the base into the bottom portion of the fan housing by aligning the 3 screw holes on the base with the 3 screw holes on the bottom of the fan housing (Fig 3). • Gently pull any slack out of the power cord and place the cord securely in the power cord Fig. 3 Fig. 4 holding bracket (Fig. 4). -
Page 3: Pedestal Assembly
HY-013 AND HY-023 SERIES ASSEMBLY INSTRUCTIONS NOTE: Remove all contents from the box being careful not to discard the manual and hardware needed for assembly. A phillips head screw driver ( ) is required for assembly and is not included with the fan purchase. A. Pedestal Assembly Fig. 7 • Place the power cord through the center of the front and rear pedestal assemblies with the screw hole openings facing towards the fan. • Align the front and rear pedestal assembly and firmly snap together (Fig 7). B. Securing the Tower Fan to the Pedestal • Gently turn fan upside down. • Line up the 3 screw holes on the pedestal with the 3 screw holes on the bottom of the fan housing. Use the 3 (M5 x 12) Fig. 8 screws included in the box and a phillips head s crew driver ( ) to secure the pedestal to the fan housing (Fig. 8). C. - Page 4 HY-013 SERIES OPERATION INSTRUCTIONS • Be sure your fan is in the OFF position by pressing the Fig. 13 off button. ( ) • Place the fan on a level and dry surface. • Plug the power cord into a polarized 120 Volt AC wall outlet. • To operate, press the appropriate speed control option: High ( Medium ( ), or Low ( ) (Fig. 13). • To activate or disengage the fan oscillation, press the oscillation button. ( ) (Fig 14). • Operate the automatic shut-off timer feature by turning the timer knob to the desired setting of 10 to 120 minutes (Fig 15). • To turn on the fan after automatic shut-off, turn the Fig. 14 Fig. 15 knob counterclockwise to the ON position. • To turn the fan off press the Off button once. ( HY-023 SERIES OPERATION INSTRUCTIONS • Be sure your fan is in the OFF position by pressing the Fig. 16 off button. ( ) • Place the fan on a level and dry surface.
-
Page 5: Cleaning And Storage
HY-023 SERIES OPERATION INSTRUCTIONS (CONTINUED) Fig. 18 • Activate the Timer feature by pressing the Timer button ( (Fig 18). Choose from 1, 2, 4 and 8 hour settings by performing the following functions: • 1 hour: Press the Timer button (icon) once. • 2 hour: Press the Timer button twice. • 4 hour: Press the Timer button a third time. • 8 hour: Press the Timer button a fourth time. Press the Timer button a fifth time to turn the Timer feature off. • To turn the fan off after use, press the Power button ( ) once. CLEANING AND STORAGE • Unplug the fan before cleaning. • Use only a soft, damp cloth to gently wipe the outside surface of the fan. • DO NOT immerse the fan in water and never allow water to drip into the motor housing. • DO NOT use gasoline, paint thinner or other chemicals to clean the fan. • Gently wipe the grilles with a cloth. To clean between the grilles we recommend using a pipe cleaner, flexible dustwand, vacuum cleaner or compressed air to gently remove dust. DO NOT IMMERSE THE FAN IN WATER AND NEVER ALLOW WATER TO DRIP INTO THE MOTOR HOUSING. DO NOT USE GASOLINE, PAINT THINNER,OR OTHER CHEMICALS TO CLEAN THE FAN. - Page 6 1 YEAR LIMITED WARRANTY You should first read all instructions before C. This warranty does not cover damage resulting attempting to use this product. from any unauthorized attempts to repair or from any use not in accordance with the A. This 1 year limited warranty applies to instruction manual. repair or replacement of product found to be D. Return defective product to Kaz, Incorporated defective in material or workmanship. This warranty does not apply to damage resulting with a brief description of the problem. Include from commercial, abusive, unreasonable use proof of purchase and a $10 US/$15.50 CAN or supplemental damage. Defects that are check or money order for handling, return the result of normal wear and tear will not be packing and shipping charges. Please include considered manufacturing defects under this your name, address and a daytime phone warranty. number. KAZ IS NOT LIABLE FOR INCIDENTAL You must prepay shipping charges.
-
Page 7: Importantes Instructions De Sécurité
Communiquer avec un électricien pour faire sur l’appareil. remplacer les prises de courant lâches ou usées. 4. Ce produit est équipé d’une fiche polarisée (fiche MISE EN GARDE : Afin de réduire le risque dont l’une des lames est plus large que l’autre). d’incendie ou de choc électrique, éviter Afin de réduire le risque de choc électrique, d’utiliser une commande de vitesse cette fiche ne peut être insérée que d’une seule transistorisée avec le ventilateur. manière dans une prise de courant polarisée. Si la fiche ne pénètre pas complètement dans La marque de commerce Honeywell est utilisée par Kaz, Inc. avec l’autorisation de Honeywell International, Inc. Honeywell International Inc. ne fait aucune assertion et n’offre aucune garantie en ce qui concerne ce produit. - Page 8 DIRECTIVES D’ASSEMBLAGE POUR LA SÉRIE DY-012 REMARQUE : Sortir tout ce qui se trouve à l’intérieur de la boîte Fig. 1 en prenant soin de ne pas jeter le manuel et le matériel nécessaire à l’assemblage. Un tournevis à tête étoilée ( ) est requis pour l’assemblage de l’appareil; il n’est pas inclus avec l’achat du ventilateur. A. Assemblage de la base • Tourner avec précaution le ventilateur à l’envers. • Insérer le cordon d’alimentation dans la rainure située au centre de la pièce arrière de l’assemblage de la base (Fig. 1). • Aligner les parties avant et arrière de l’assemblage de la base et les emboîter fermement l’une dans l’autre en poussant les 4 Fig. 2 protubérances rondes dans les cercles adjacents des pièces de fixation (Fig. 2). B. Fixation du ventilateur vertical à la base • À l’aide des 3 vis (M5 x 12) et d’un tournevis à tête étoilée ( ), fixer solidement la base à la partie inférieure du boîtier du ventilateur en alignant les 3 trous de vis de la base et les 3 trous de vis sous le boîtier du ventilateur (Fig. 3).
- Page 9 DIRECTIVES D’ASSEMBLAGE POUR LA SÉRIE HY-013 ET HY-023 REMARQUE : Sortir tout ce qui se trouve à l’intérieur de la boîte en prenant soin de ne pas jeter le manuel et le matériel nécessaire à l’assemblage. Un tournevis à tête étoilée ( ) est requis pour l’assemblage de l’appareil; il n’est pas inclus avec l’achat du ventilateur. Fig. 7 A. Assemblage du socle • Placer le cordon d’alimentation au centre des pièces avant et arrière de l’assemblage du socle, les ouvertures pour les trous de vis face au ventilateur. • Aligner les pièces avant et arrière de l’assemblage du socle, puis les emboîter fermement l’une dans l’autre (Fig. 7). B. Fixation du ventilateur vertical au socle • Tourner avec précaution le ventilateur à l’envers. • Aligner les 3 trous de vis du socle et les 3 trous de vis sous le boîtier du ventilateur. Utiliser les 3 vis (M5 x 12) incluses dans la boîte et un Fig. 8 tournevis à tête étoilée ( ) pour fixer solidement le socle au boîtier du ventilateur (Fig. 8). C. Assemblage de la base • Placer le ventilateur à l’envers, puis insérer le cordon d’alimentation dans la rainure située au centre de la pièce arrière de l’assemblage de la base (Fig. 9).
- Page 10 INSTRUCTIONS DE FONCTIONNEMENT POUR LA SÉRIE HY-013 • S’assurer que le ventilateur est hors tension en appuyant sur le bouton Fig. 13 d’arrêt ( ) . • Placer le ventilateur sur une surface sèche et bien horizontale. • Brancher le cordon d’alimentation dans une prise de courant polarisée de 120 volts c.a. • Pour faire fonctionner le ventilateur, appuyer sur le bouton de vitesse approprié : élevée ( ), moyenne ( ) ou basse ( ) (Fig. 13). • Pour activer ou désactiver l’oscillation du ventilateur, appuyer sur le bouton d’oscillation ( ) (Fig 14). • Pour activer la minuterie d’arrêt automatique, tourner le bouton de la minuterie jusqu’au réglage désiré, soit entre 10 et 120 minutes (Fig. 15). Fig. 14 Fig. 15 • Pour remettre en marche le ventilateur après qu’il s’est éteint automatiquement, tourner le bouton dans le sens antihoraire, jusqu’à la position de marche. • Pour arrêter le ventilateur, appuyer une fois sur le bouton d’arrêt ( INSTRUCTIONS DE FONCTIONNEMENT POUR LA SÉRIE HY-023...
- Page 11 INSTRUCTIONS DE FONCTIONNEMENT POUR LA SÉRIE HY-023 (CONTINUED) • Activate the Timer feature by pressing the Timer button ( Fig. 18 (Fig 18). Choose from 1, 2, 4 and 8 hour settings by performing the following functions: • 1 hour: Press the Timer button (icon) once. • 2 hour: Press the Timer button twice. • 4 hour: Press the Timer button a third time. • 8 hour: Press the Timer button a fourth time. Press the Timer button a fifth time to turn the Timer feature off. • To turn the fan off after use, press the Power button ( ) once. NETTOYAGE ET ENTREPOSAGE • Débrancher le ventilateur avant de le nettoyer. • N’utiliser qu’un linge doux et humide pour nettoyer délicatement la surface externe du ventilateur. • ÉVITER de plonger le ventilateur dans l’eau ou de laisser de l’eau s’infiltrer dans le boîtier du moteur. • ÉVITER d’utiliser de l’essence, du diluant pour peintures ou un autre produit chimique pour nettoyer le ventilateur. • Essuyer délicatement les grilles avec un linge. Pour nettoyer entre les grilles, utiliser un cure-pipe, un plumeau flexible, un aspirateur ou de l’air comprimé pour enlever délicatement la poussière. ÉVITER DE PLONGER LE VENTILATEUR DANS L’EAU OU DE LAISSER DE L’EAU S’INFILTRER DANS LE BOÎTIER DU MOTEUR.
-
Page 12: Garantie Limitée De 1 An
GARANTIE LIMITÉE DE 1 AN Prière de lire toutes les instructions avant de C. Cette garantie ne couvre pas les dommages tenter d’utiliser ce produit. découlant des tentatives de réparation non autorisées ou de toute utilisation non conforme A. Cette garantie limitée de 1 an s’applique à la au présent manuel. réparation ou au remplacement d’un produit comportant un vice de matière ou de main- D. Retourner tout produit défectueux à Kaz, d’oeuvre. Cette garantie ne s’applique pas Inc., accompagné d’une brève description du aux dégâts découlant d’un usage commercial, problème. Inclure une preuve d’achat et un abusif ou déraisonnable, ni aux dégâts chèque ou un mandat de poste de 10,00 $ supplémentaires. Les défaillances résultant US/15,50 $ Can. pour les frais de manutention, de l’usure normale ne sont pas considérées d’emballage de retour et d’expédition. Prière comme des vices de fabrication en vertu de la d’indiquer nom, adresse et numéro de présente garantie. -
Page 13: Manual Del Usario
16. Una mala conexión entre la toma de sobre el aparato. corriente CA y el enchufe puede provocar recalentamiento y la consecuente 4. Este producto está dotado de un enchufe deformación del enchufe. Llame a un polarizado (el enchufe tiene una patilla electricista profesional para que cambie la más ancha que otra). Para minimizar el toma de corriente defectuosa. riesgo de choque eléctrico, sólo hay una forma de introducir el enchufe en la toma ADVERTENCIA: Para reducir el riesgo de de corriente polarizada. Si el enchufe no incendio o choque eléctrico, NO USE este entra completamente en la toma, gírelo. Si ventilador con ningún dispositivo de control aún así no logra introducir el enchufe en la de velocidad transistorizado. La marca registrada Honeywell es utilizada por Kaz, Inc. bajo licencia de Honeywell International Inc. Honeywell International Inc. no hace ninguna declaración o garantía con respecto a este producto. - Page 14 INSTRUCCIONES DE ENSAMBLAJE DE LA SERIE DY-012 NOTA: Remueva todo el contenido de la caja. Conserve el manual Fig. 1 y las herramientas necesarias para el ensamblaje. Necesitará un destornillador estrella ( ) para el ensamblaje. Éste no viene incluido con el ventilador. A. Ensamblaje de la Base • Voltee cuidadosamente el ventilador de arriba hacia abajo. • Coloque el cable de alimentación eléctrica a través del canal encastrado ubicado en el centro de la base posterior (Fig. 1). • Alinee las partes posterior y delantera de la base y únalas empujando firmemente las cuatro extrusiones redondas dentro de los círculos Fig. 2 adyacentes de las piezas de conexión (Fig. 2). B. Asegurando el Ventilador a la Base • Utilice tres (3) tornillos M5 x 12 y un destornillador estrella ( ) para asegurar la base en la parte inferior del cajetín del ventilador. Alinee los tres orificios en la base con los tres orificios en la parte inferior del cajetín del ventilador (Fig. 3). • Tire suavemente el cable de alimentación eléctrica y colóquelo firmemente dentro de su Fig.
- Page 15 INSTRUCCIONES DE ENSAMBLAJE DE LA SERIE HY-013 NOTA: Remueva todo el contenido de la caja. Conserve el manual Fig. 7 y las herramientas necesarias para el ensamblaje. Necesitará un destornillador estrella ( ) para el ensamblaje. Éste no viene incluido con el ventilador. A. Ensamblaje del Pedestal • Coloque el cable de alimentación eléctrica a través del centro de las partes delantera y posterior del pedestal. Los orificios de los tornillos deben apuntar en dirección del ventilador. • Alinee las partes delantera y posterior del pedestal y únalas empujando firmemente (Fig. 7). Fig. 8 B. Asegurando el Ventilador al Pedestal • Voltee cuidadosamente el ventilador de arriba hacia abajo. • Alinee los tres orificios en el pedestal con los tres orificios en la parte inferior del cajetín del ventilador. Utilice los tres (3) tornillos (M5 x 12) incluidos en la caja y un destornillador estrella ( ) para asegurar el pedestal al cajetín del ventilador (Fig. 8). C. Ensamblaje de la Base • Voltee cuidadosamente el ventilador de arriba hacia abajo. Coloque el cable de alimentación eléctrica a través del canal...
- Page 16 INSTRUCCIONES DE OPERACIÓN DE LA SERIE HY-013 • Asegúrese que el ventilador esté en posición OFF; pulse el botón OFF Fig. 13 ) . • Coloque el ventilador en una superficie plana y seca. • Enchufe el cable de alimentación eléctrica en un tomacorriente polarizado de 120 Voltios c.a. • Para ponerlo en marcha, pulse el botón de control de velocidad adecuado: alta ( ), media ( ), o baja ( ) (Fig. 13) • Para activar o desactivar el modo Oscilación, pulse el botón de oscilación ( ) (Fig 14). • Active el dispositivo automático de cierre del temporizador girando la Fig. 14 Fig. 15 perilla para programar el tiempo desead (entre 10 y 120 minutos) (Fig. 15). • Si desea encender nuevamente el ventilador, gire el botón hacia la izquierda a la posición ON. • Para apagar el ventilador, pulse una vez el botón OFF ( INSTRUCCIONES DE OPERACIÓN DE LA SERIE HY-023...
-
Page 17: Limpieza Y Almacenamiento
INSTRUCCIONES DE OPERACIÓN DE LA SERIE HY-023 (CONTINUED) • Activate the Timer feature by pressing the Timer button ( Fig. 18 (Fig 18). Choose from 1, 2, 4 and 8 hour settings by performing the following functions: • 1 hour: Press the Timer button (icon) once. • 2 hour: Press the Timer button twice. • 4 hour: Press the Timer button a third time. • 8 hour: Press the Timer button a fourth time. Press the Timer button a fifth time to turn the Timer feature off. • To turn the fan off after use, press the Power button ( ) once. LIMPIEZA Y ALMACENAMIENTO • Desenchufe el ventilador antes de proceder a limpiarlo. • Para limpiar la superficie exterior del ventilador, utilice únicamente un lienzo suave humedecido. • NO sumerja el ventilador en el agua. No permita que el agua se infiltre en el cajetín del motor. • NO utilice gasolina, disolventes de pintura ni otros productos químicos para limpiar el ventilador. • Limpie suavemente las rejillas con un lienzo. Para limpiar entre las rejillas y remover el polvo, recomendamos utilizar un limpiatubos, un desempolvador flexible, una spiradora o presión de aire. NO SUMERJA EL VENTILADOR EN EL AGUA. NO PERMITA QUE EL AGUA SE INFILTRE EN EL CAJETÍN DEL MOTOR. -
Page 18: Garantía Limitada De 1 Año
GARANTÍA LIMITADA DE 1 AÑO Antes de usar este producto, por favor lea C. Esta garantía no cubre los daños ocasionados completamente las intrucciones. por tentativas de reparación no autorizadas o por todo uso que no esté en concordancia con A. La presente garantía limitada de 1 año cubre el presente. la reparación o remplazo del producto si éste presenta un defecto de fábrica o de mano de D. Para devolver un producto defectuoso a KAZ, obra. Esta garantía excluye todo daño resultante Incorporated, adjunte una breve descripción del del uso comercial, abusivo o inadecuado problema e incluya la prueba de compra y un del producto, o de daños asociados. Las cheque o giro postal de US$10.00 o CAN$15.50 defectos resultantes del desgaste normal no se para cubrir los gastos de manutención, consideran defectos de fábrica en virtud de la embalaje y reenvío. Sírvase indicar su nombre, presente garantía. dirección y un número de teléfono donde se le pueda ubicar durante el día. KAZ NO SERÁ...