Table des Matières
Publicité
Les langues disponibles
Les langues disponibles
Liens rapides
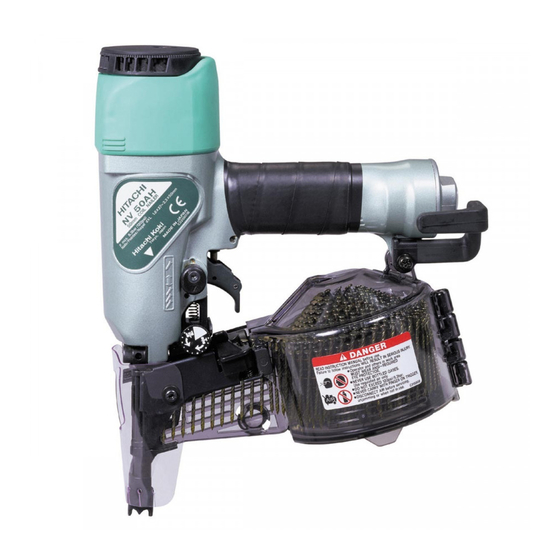
COIL NAILER
COIL NAGLER
CLOUEUR POUR COILS
CHIODATRICE A BOBINA
TROMMELSPIJKERAPPARAAT
CLAVADORA PARA COILS
NV 50AH
Read through carefully and understand these instructions before use.
Diese Anleitung vor Benutzung des Werkzeugs sorgfältig durchlesen und verstehen.
Lire soigneusement et bien assimiler ces instructions avant usage.
Leggete attentamente queste istruzioni prima dell'utilizzo.
Deze gebruiksaanwijzing s.v.p. voor gebruik zorgvuldig doorlezen.
Leer cuidadosamente y comprender estas instrucciones antes del uso.
Handling instructions
Bedienungsanleitung
Mode d'emploi
Istruzioni per l'uso
Gebruiksaanwijzing
Instrucciones de manejo
Publicité
Table des Matières

Manuels Connexes pour Hitachi Koki NV 50AH


Sommaire des Matières pour Hitachi Koki NV 50AH
- Page 1 CLOUEUR POUR COILS CHIODATRICE A BOBINA TROMMELSPIJKERAPPARAAT CLAVADORA PARA COILS NV 50AH Read through carefully and understand these instructions before use. Diese Anleitung vor Benutzung des Werkzeugs sorgfältig durchlesen und verstehen. Lire soigneusement et bien assimiler ces instructions avant usage.
-
Page 18: Avertissements Generaux
Français AVERTISSEMENTS GENERAUX PRECAUTIONS A PRENDRE LORS DE L’USAGE DU CLOUEUR Utilisez l’outil électrique en respectant la sécurité et pour les usages corrects. La manutention en sécurité est garantie par un N’utilisez pas l’outil électrique pour des usages usage correcte. autres que ceux qui sont spécifiés dans ce mode Cet appareil a été... - Page 19 Français contrôlez les points suivants sans charger le cloueur. 18. Il est dangereux de clouer simultanément sur les Si le cloueur produit le même bruit que lorsque vous deux côtés d’un mur. enfoncez un clou, ceci indique qu’il fonctionne mal Il faut absolument éviter de clouer en même temps et qu’il doit être inspecté...
- Page 20 Français produite dans le système d’approvisionnement d’air SELECTION DES CLOUS comprimé, à savoir celui des deux chiffres qui est le plus élevé. Choisissez un clou parmi ceux de la fig. Des clous qui 2. Veillez à la sécurité. n’apparaissent pas sur cette figure ne peuvent être utilisés ATTENTION: dans cet appareil.
- Page 21 Français Réglez la position du support de clou en fonction de la Abaisser le porte-clou sur le côté du magasin, puis longueur du clou. (Fig. 2) refermer le couvercle après avoir vérifié que les clous sont complètement chargés dans le magasin. REMARQUE: Ajustez la plaque de pression avant de charger les clous, sinon, les clous peuvent se coincer.
-
Page 22: Comment Utiliser Le Cloueur
Français ATTENTION: Pour éviter tout fonctionnement inopiné, ne jamais toucher la gâchette ni mettre l’extrémité supérieure du levier-poussoir sur un établi ou sur le plancher. Par ailleurs, ne jamais orienter la sortie des clous vers des personnes. Position Levier de commande un coup à... -
Page 23: Inspection Et Manutention
Français ATTENTION: est réglée en changeant la pression de l’air. Le faire Soyez prudents en clouant les bords. Lors du clouage tout en bougeant le régleur. Si vous utilisez une continu, un clou risque d’être dévié et de dépasser le pression d’air trop élevée ne correspondant pas à... - Page 24 Français Bouton Guide de clouage Tournevis à tête tendue Fig. 17 Clous (2) Ouvrez le guidage de clous et enlevez la poussière, etc. (voir Fig. 18). Appliquez le lubrifiant sur la rainure Fig. 15 de glissage de l’alimenteur de clous et du goujon. Contrôlez l’arrêt de clou (A) et (B) en les poussant clou (3) Coupez la partie défectueuse du fil qui lie les clous à...
-
Page 25: Compresseur
Français 6. Inspection du magasin LUBRIFIANTS AUTORISES Nettoyer le magasin. Enlever la saleté ou les copeaux de bois qui ont pu s’accumuler dans le magasin. 7. Rangement TYPE Quand on ne se sert pas de la cloueuse pendant une Huile recommandée SHELL TONNA durée prolongée, enduire les pièces en acier d’une fine couche de graisse pour éviter qu’elles ne rouillent. - Page 51 1 M5 × 10 949-819 61 878-884 944-260 62 880-673 881-841 63 878-888 881-840 64 880-671 881-835 65 949-429 1 M4 881-838 66 881-853 4 M5 × 20 1 D1.6 × 12 949-757 67 878-222 881-879 68 881-848 881-839 69 881-845 10 881-851 70 872-645 11 877-699...
- Page 52 Representative office in Europe Hitachi Power Tools Europe GmbH 28. 11. 2003 Siemensring 34, 47877 Willich 1, F. R. Germany Head office in Japan Hitachi Koki Co., Ltd. K. Kato Shinagawa Intercity Tower A, 15-1, Konan 2-chome, Board Director Minato-ku, Tokyo, Japan Hitachi Koki Co., Ltd.