Table des Matières

Publicité

Les langues disponibles
  • FR

Les langues disponibles

  • FRANÇAIS, page 48

Liens rapides

BLU-RAY DISC PLAYER
LECTEUR BLU-RAY DISC
BD-S671
OWNER'S MANUAL
MODE D'EMPLOI
BEDIENUNGSANLEITUNG
BRUKSANVISNING
MANUALE DI ISTRUZIONI
MANUAL DE INSTRUCCIONES
GEBRUIKSAANWIJZING
USB
G

Publicité

Table des Matières
loading

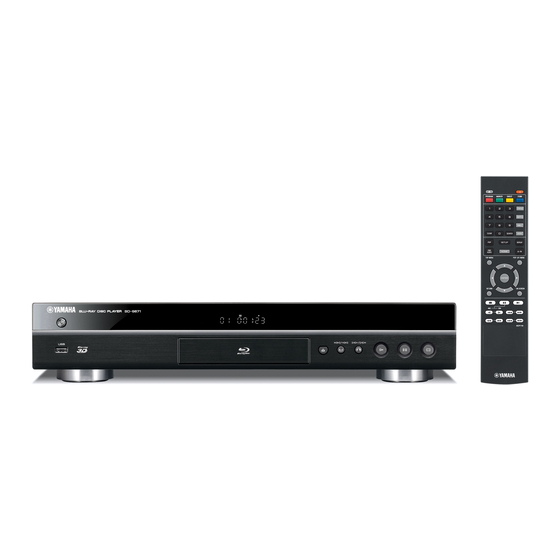
Sommaire des Matières pour Yamaha BD-S671

  • Page 1 BLU-RAY DISC PLAYER LECTEUR BLU-RAY DISC BD-S671 OWNER’S MANUAL MODE D’EMPLOI BEDIENUNGSANLEITUNG BRUKSANVISNING MANUALE DI ISTRUZIONI MANUAL DE INSTRUCCIONES GEBRUIKSAANWIJZING...
  • Page 2: Mains Plug

    VAROITUS Muiden kuin tässä esitettyjen toimintojen säädön tai Important notes for users in the asetusten muutto saattaa altistaa vaaralliselle säteilylle tai U.K. muille vaarallisille toiminnoille. Mains plug Advarsel: Usynlig laserstråling ved åbning når This apparatus is fitted with an approved 13 Amp sikkerhedsafbrydere er ude af funktion.
  • Page 3 CAUTION Use of controls or adjustments or performance of CAUTION: INVISIBLE LASER RADIATION WHEN OPEN. procedures other than those specified herein may result DO NOT STARE INTO BEAM. in hazardous radiation exposure. DANGER: INVISIBLE LASER RADIATION WHEN OPEN. AVERTISSEMENT AVOID DIRECT EXPOSURE TO THE BEAM. L’utilisation de commandes et l’emploi de réglages ou de méthodes autres que ceux décrits ci-dessous, peuvent entraîner une exposition à...
  • Page 4 Yamaha will not be held responsible for any damage resulting from use of this unit with a voltage other than specified. DANGER 13 To prevent damage by lightning, keep the power cable This unit emits visible laser radiation when open.
  • Page 5: Table Des Matières

    CONTENTS 1. INTRODUCTION 4. SETTINGS WHAT YOU CAN DO WITH THIS PLAYER..2 SETUP MENU ............ 27 SUPPLIED PARTS ..........2 Example of SETUP menu operation......29 General Setting.............. 30 ABOUT DISCS AND FILES......... 3 Display Setting.............. 32 Types of discs/files that can be used with this player..3 Audio Setting ..............
  • Page 6: Introduction

    INTRODUCTION WHAT YOU CAN DO WITH THIS PLAYER Easy setting for language, resolution, screen aspect ratio p. 18 You can perform language and TV settings. p. 23 Play back commercially-released Blu-ray™/DVD/CD discs In addition to Blu-ray Discs™ (BD discs), this Player also supports playback of a variety of other discs.
  • Page 7: About Discs And Files

    ABOUT DISCS AND FILES ■ Types of discs/files that can be Region management information used with this player Destination BD-Video DVD-Video Australia Region code “B” or Region number “4” – 12 cm (5”) and 8 cm (3”) discs can be played back in “ALL”...
  • Page 8: Loading A Disc

    The use of these discs can damage the lens. the side to play back. – Request the nearest service center approved by Yamaha to clean the lens. ■ Notice for watching 3D video images – Some people may experience discomfort (such as...
  • Page 9: Controls And Functions

    CONTROLS AND FUNCTIONS ■ Front panel 1 p (On/Standby) (Search backward/Skip backward): Press to skip backward, and press and hold to search 2 USB port (p. 16) backward. 3 Front panel display (Search forward/Skip forward): 4 Disc tray (p. 4) Press to skip forward, and press and hold to search forward.
  • Page 10: Remote Control

    CONTROLS AND FUNCTIONS ■ Remote control 1 Infrared signal transmitter: Outputs infrared signal. Aim this window to the remote control sensor (p. 9). Note 2 MARKER VIDEO : Sets Bookmark (p. 25) at – will appear on the top left corner of the screen when the pressed button is not available.
  • Page 11 CONTROLS AND FUNCTIONS F SUBTITLE : Changes subtitle VIDEO languages (p. 42) if available . You can also select this item from On Screen menu (p. 23). G ANGLE : Changes the camera angle if video is recorded with multiple angles. The Angle Mark ( ) is displayed on the screen when this function is available.
  • Page 12 CONTROLS AND FUNCTIONS L TOP MENU : Displays the top menu screen (p. 42) if the disc contains a menu. Select the desired item using 5/a /2/3 and ENTER. Note PROGRAM MARKER DIGEST ZOOM – Specific operations may be different depending on STATUS the disc.
  • Page 13: Loading The Batteries In The Remote Control

    ID function You can change the remote control ID to prevent unwanted operation of the other Yamaha player such as DVD player. If you have changed the remote control ID, make sure that you select the same ID for the main unit.
  • Page 14: Connection

    CONNECTION INTRODUCTION TO CONNECTIONS Find the corresponding connection method on your video/audio equipment. We recommend that you use the HDMI terminal which provides high quality digital audio and video on a single connection. If you use the other terminals/jacks, connect the video first. Then connect the audio. Connect video and audio to AV receiver with HDMI cable.
  • Page 15 Video and audio connection to AV receiver HDMI (p. 12) Video connection Audio connection to AV receiver to TV Connect audio to AV A’ HDMI (p. 12) COAXIAL (p. 14) receiver. to AV receiver OPTICAL (p. 14) COMPONENT (p. 13) L/R (p.
  • Page 16: Hdmi Connection

    HDMI CONNECTION ■ Connecting to the HDMI terminal – You can enjoy high quality digital picture and sound through the HDMI terminal. – Firmly connect an HDMI cable (commercially available) to the HDMI terminals. – See page 35 for information on the audio/video output formats. –...
  • Page 17: Video Connections

    VIDEO CONNECTIONS ■ Connecting to the component/video jack – You can enjoy accurate color reproduction and high quality images through the component jacks. – Firmly connect a component video cable (commercially available) or a video pin cable to the COMPONENT jacks/ VIDEO jack.
  • Page 18: Audio Connections

    AUDIO CONNECTIONS ■ Connecting to the digital audio jack/terminal – You can connect audio equipment or the TV to the COAXIAL jack/OPTICAL terminal. – Firmly connect a Coaxial digital audio cable (commercially available) or optical cable (commercially available) to the coaxial digital audio jack or optical digital audio terminal. –...
  • Page 19: Connecting To The Audio Jacks

    AUDIO CONNECTIONS ■ Connecting to the audio jacks – You can connect audio equipment or the TV to the AUDIO OUT L/R jacks. – Firmly connect an Audio/Video cable (supplied) to the AUDIO OUT L/R jack. – See page 35 for information on the audio output formats. Caution! Do not connect the power cable of this Player until all connections are completed.
  • Page 20: Network And Usb Connection

    OPTICAL VIDEO extension cable may prevent the Player from performing correctly. Note To USB To NETWORK – Yamaha cannot guarantee that all brands’ Terminal terminal USB memory devices will operate with this Player. USB memory device (commercially available) Network cable...
  • Page 21: Other Connections

    REMOTE CONTROL (OUT) jack of this Player. CONTROL (OUT/IN) jacks. ■ Connecting the power cable – If your AV receiver is a Yamaha product and has the capability to transmit SCENE control signals, you – After all connections are completed, plug the can control the Player with the SCENE function.
  • Page 22: Playback

    PLAYBACK INITIAL WIZARD/EASY SETUP ■ Setting with the Initial Wizard/ 4 Press 5/a to select the screen aspect ratio, then press ENTER. For details on setting items, see “TV Screen” Easy Setup (p. 32). Initial Wizard/Easy Setup allows you to set language, Easy Setup is completed.
  • Page 23: Home/Media Menu

    HOME/MEDIA MENU HOME and MEDIA menus allow you to browse and play multi-media files on data discs, USB memory devices and Common operations for playing back your network. files in a selected folder Example: Selecting a movie file on a USB memory Note device –...
  • Page 24 HOME/MEDIA MENU 4 Select the Photo, Music, Video or AVCHD folder you Hint want to play back, then press ENTER. To return to the parent folder, press 2 or select – To enjoy slide show with music, press HOME to return to the HOME menu screen while music is played back, and select photo file.
  • Page 25: Using Network Content

    HOME/MEDIA MENU ■ Using network content This Player is a DLNA certified digital media player. You can manage photo, music and video contents stored on DLNA servers on your home network. About DLNA DLNA (Digital Living Network Alliance) provides easy sharing of digital media through network in the home, and you can enjoy digital contents stored on your DLNA- server-software-installed PC or other DLNA compatible...
  • Page 26: Using Network Services

    – Some content may only be available for specific countries and may be presented in specific languages. – Yamaha does not represent or warrant that content services will continue to be provided or available for a particular period of time, and any such warranty, express or implied, is disclaimed.
  • Page 27: Advanced Playback Operation

    ADVANCED PLAYBACK OPERATION This chapter explains playback of commercially available BD and DVD discs, CDs, and recorded DVD-RW/R discs. – Normal – Shuffle CH (chapter) Note – Shuffle TT (title) – Shuffle All – For the basic playback operation, see page 6. –...
  • Page 28: Status Menu

    ADVANCED PLAYBACK OPERATION ■ Status menu MUSIC This shows various settings, such as subtitles, angle Example: Icons when playing music file settings and the title/chapter/track number currently played back. To display status menu, press STATUS. Status menu contains following menus. VIDEO Example: Icons when playing BD (Playback status)
  • Page 29: Using Bookmark

    ADVANCED PLAYBACK OPERATION ■ Using Bookmark 2 Press ENTER to program playback order. VIDEO For audio disc, press 5/a to select a desired track then This allows you to set Bookmark at the specified point of press ENTER. the video. After Bookmark is set, you can move to the For DVD-Video disc, select a desired title (shown as point you set using this function.
  • Page 30: Enjoying Bonusview™ And Bd-Live

    – Some time may be required for the data to load (read/write). Notes – Yamaha cannot guarantee that all brands’ USB memory devices will operate with this Player. – Do not use a USB extension cable when connecting a USB memory device to the USB port of the player.
  • Page 31: Settings

    SETTINGS SETUP MENU The SETUP menu enables various audio/visual settings and adjustments for functions using the remote control unit. Menu/Submenu Item Function Page System Screen Saver Sets screen saver on/off. Disc Auto Playback Sets this Player to start disc playback automatically. HDMI Control Sets this Player to receive control signal from the remote control of your TV/AV receiver.
  • Page 32 SETUP MENU Menu/Submenu Item Function Page 3D Output Selects 3D or 2D videos. TV Screen Sets the screen aspect ratio of the connected TV, and adjust the video output. Resolution Selects the resolution of output video. Display Setting TV System Selects the TV System from NTSC/PAL/Multi.
  • Page 33: Example Of Setup Menu Operation

    SETUP MENU ■ Example of SETUP menu 3. Select a menu item. operation Press 5/a to select Parental Control, then press You need to call up the SETUP menu screen to perform ENTER or cursor 3. settings for this Player. The following is the explanation for basic operations of the SETUP menu.
  • Page 34: General Setting

    ■ General Setting Network Control You can set control via Ethernet to on/off. This player The default settings are marked with “ ”. employs Yamaha Network Control protocol (YNC). On, Off System Screen Saver Notes You can set the screen saver to on/off.
  • Page 35 SETUP MENU Language Security Change Password You can select the language for On Screen Display which You can set the password for changing the Parental is the messages or menu displayed on the screen such as Control Level and Country Code. Refer to “Parental SETUP menu.
  • Page 36: Display Setting

    SETUP MENU ■ Display Setting Network The default settings are marked with “ ”. Internet Connection Set this item to Enable when you use BD-Live (p. 26), DLNA (p. 21) and software upgrade from the network (p. 37). 3D Output Enable , Disable You can select 3D or 2D video output from this Player.
  • Page 37 SETUP MENU Resolution Lip Sync You can select the video output resolution from Auto, You can set/adjust the Lip Sync (p. 42) function. Auto* This Player adjusts the Lip Sync function 480i/576i, 480p/576p, 720p, 1080i, and 1080p. When set automatically. to Auto, resolution is set to the maximum resolution according to the connected TV.
  • Page 38: Audio Setting

    SETUP MENU ■ Audio Setting Post Process The default settings are marked with “ ”. Up Mix Audio Output You can multi-channelize the 2-channel audio signal. To multi-channelize, select NEO6, then select Cinema or Coaxial/Optical Music mode. You can select the output mode of COAXIAL jack and , NEO6 OPTICAL terminal.
  • Page 39: About The Audio Output Formats

    SETUP MENU ■ About the audio output formats HDMI COAXIAL/OPTICAL MIXED 2CH Source format Bitstream Reencode Bitstream Reencode PCM 2ch PCM 2ch PCM 2ch PCM 5.1ch PCM 5.1ch PCM 2ch PCM 7.1ch PCM 7.1ch PCM 2ch PCM up to Dolby Digital Dolby Digital Dolby Digital Dolby Digital PCM 2ch...
  • Page 40: About The Video Output Formats

    SETUP MENU ■ About the video output formats When TV System is set to NTSC 1080p Resolution Auto 480i/576i 480p/576p 720p 1080i 24Hz Others Playback BD 1080p 24 Hz HDMI 720p 60 Hz 1080i 60 Hz 1080p 60 Hz others 1080p 60 Hz Playback commercially-...
  • Page 41: Software Upgrade

    We recommend upgrading the software of this Player with software upgrade so that this Player is operated based on the latest software. To check for the availability of a software upgrade, visit http://download.yamaha.com/downloads/service/top/ ?site=europe.yamaha.com&language=en Hint – Software upgrade is automatically started after loading the disc which contains upgrade file package.
  • Page 42: Additional Information

    Refer to the table below when this Player does not function properly. If the problem you are experiencing is not listed below or if the instruction below does not help, turn off this Player, disconnect the power cable, and contact the nearest authorized Yamaha dealer or service center. ■ Power...
  • Page 43: Picture

    TROUBLESHOOTING ■ Picture Problem Possible causes and solutions No picture. – Make sure that the cables are connected correctly. (p. 10) – Make sure that the connected TV or the AV receiver is set to the correct input. (p. 10) –...
  • Page 44: Network

    TROUBLESHOOTING ■ Network Problem Possible causes and solutions Cannot connect to the Internet. – Connect the Network cable properly. – Turn on the connected equipment, such as broadband router or modem. – Connect the broadband router and/or modem properly. – Set the proper value(s) in the network setting. Check “Network”. (p. 32) Cannot download BD-Live contents.
  • Page 45: Glossary

    GLOSSARY AVCHD DivX® AVCHD is a new format (standard) for high definition DivX® is a popular media technology created by DivX, video cameras that can be used to record and play high- Inc. DivX® media files contain highly compressed resolution HD images. video with high visual quality that maintains a relatively BD-Live™...
  • Page 46: Specifications

    SPECIFICATIONS Linear PCM Sound Pan Scan (PS 4:3) Linear PCM is a signal recording format used for Audio A screen size that cuts off the sides of the image to allow CDs and on some DVD and Blu-ray discs. The sound on viewing of wide-screen (16:9) material on a connected Audio CDs is recorded at 44.1 kHz with 16 bits.
  • Page 47: Copyright

    SPECIFICATIONS ■ Copyright ABOUT DIVX VIDEO: DivX® is a digital video format created by DivX, Inc. This is an official DivX Certified® device that plays DivX – Audio-visual material may consist of copyrighted video. Visit divx.com for more information and software tools to works which must not be recorded without the convert your files into DivX video.
  • Page 48: Caractéristiques Du Laser

    1 Pour utiliser l’appareil au mieux de ses possibilités, lisez 14 Ne tentez pas de modifier ni de réparer l’appareil. Consultez attentivement ce mode d’emploi. Conservez-le le service Yamaha compétent pour toute réparation qui serait soigneusement pour référence. requise. Le coffret de l’appareil ne doit jamais être ouvert, 2 Installez cet appareil dans un endroit frais, bien aéré, sec et...
  • Page 49 TABLE DES MATIÈRES 1. INTRODUCTION 4. PARAMÈTRES POSSIBILITÉS OFFERTES PAR CE LECTEUR 2 MENU SETUP ............ 27 ACCESSOIRES FOURNIS ........2 Exemple d’utilisation du menu SETUP ......29 Réglages Généraux ............30 À PROPOS DES DISQUES ET DES FICHIERS . 3 Paramètres vidéo ............
  • Page 50: Introduction

    INTRODUCTION POSSIBILITÉS OFFERTES PAR CE LECTEUR Réglage de la langue, de la résolution et du format d’image p. 18 Ce lecteur permet de définir la langue qui convient et les paramètres relatifs au téléviseur. p. 23 Lecture de disques Blu-ray™/DVD/CD en vente dans le commerce Outre les disques Blu-ray™...
  • Page 51: À Propos Des Disques Et Des Fichiers

    À PROPOS DES DISQUES ET DES FICHIERS ■ Types de disques/fichiers Informations sur la gestion des régions utilisables avec ce lecteur Destination BD Vidéo DVD vidéo Australie Code de région Numéro de région – Ce lecteur accepte les disques de 12 cm et de 8 cm. «...
  • Page 52: Chargement D'un Disque

    – N’utilisez jamais de disque de nettoyage en vente dans le commerce. L’utilisation de ces disques peut endommager la lentille. – Confiez le nettoyage de la lentille au SAV agréé par Yamaha le plus proche. ■ Précautions concernant le visionnage d'images vidéo 3D Remarques –...
  • Page 53: Commandes Et Fonctions

    COMMANDES ET FONCTIONS ■ Panneau avant 1 p (Mise sous tension/Mise en veille) (Recherche arrière/Saut arrière) : Exercer une simple pression pour un saut arrière ou 2 Port USB (p. 16) maintenir enfoncé pour une recherche vers l’arrière. 3 Afficheur du panneau avant (Recherche avant/Saut avant) : 4 Plateau de disque (p.
  • Page 54: Télécommande

    COMMANDES ET FONCTIONS ■ Télécommande 1 Émetteur de signaux infrarouges : Envoie des signaux infrarouges. Dirigez l’émetteur de la télécommande vers le capteur de l’appareil de destination (p. 9). Remarque 2 MARKER VIDEO : Permet de définir un – Le symbole apparaît dans le coin supérieur Signet (p.
  • Page 55 COMMANDES ET FONCTIONS F SUBTITLE : Permet de VIDEO Remarque changer la langue des sous-titres (p. 42) lorsque cela est possible. Vous pouvez également sélectionner cette – Les conditions d’exécution de cette fonction sont fonction à partir du menu à l’écran (p. 23). liées aux spécifications du disque.
  • Page 56 COMMANDES ET FONCTIONS L TOP MENU : Affiche l’écran du menu principal (p. 42) si le disque contient un menu. Sélectionnez l’option voulue à l’aide des touches 5/a /2/3 et ENTER. PROGRAM MARKER DIGEST ZOOM Remarque – Étant donné que certaines opérations varient en STATUS fonction du disque, conformez-vous aux instructions SUBTITLE...
  • Page 57: Insertion Des Piles Dans La Télécommande

    Q ON SCREEN : Affiche le menu à l’écran (p. 23). Fonction ID Vous pouvez changer l’ID de la télécommande pour empêcher le contrôle de l’autre lecteur Yamaha, tel que le lecteur DVD. Si vous avez changé l’ID de la télécommande n’oubliez pas de sélectionner le même ID Remarques pour l’appareil principal.
  • Page 58: Raccordements

    RACCORDEMENTS PRÉSENTATION DES RACCORDEMENTS Déterminez le mode de raccordement qui convient pour votre appareil vidéo/audio. Nous vous conseillons d’utiliser la borne HDMI, car celle-ci garantit un signal audio et vidéo numérique de haute qualité via une seule connexion. Si vous utilisez d’autres bornes/connecteurs, effectuez les raccordements vidéo avant les raccordements audio.
  • Page 59 Raccordement vidéo et audio à l’ampli-tuner AV HDMI (p. 12) Raccordement vidéo Raccordement audio à l’ampli-tuner AV au téléviseur Effectuez la connexion A’ HDMI (p. 12) COAXIAL (p. 14) audio à l’ampli-tuner AV. à l’ampli-tuner AV OPTICAL (p. 14) COMPONENT (p. 13) L/R (p.
  • Page 60: Connexion Hdmi

    CONNEXION HDMI ■ Raccordement à la borne HDMI – La borne HDMI offre une image et un son numériques de qualité supérieure. – Reliez fermement chaque extrémité du câble HDMI (disponible dans le commerce) aux bornes HDMI appropriées. – Reportez-vous à la page 35 pour en savoir plus sur les formats de sortie audio/vidéo disponibles. –...
  • Page 61: Connexions Vidéo

    CONNEXIONS VIDÉO ■ Raccordement aux connecteurs composante/vidéo – Les connecteurs composante vous offriront une image de qualité supérieure et une reproduction fidèle des couleurs. – Reliez fermement chaque extrémité d’un câble vidéo composante (en vente dans le commerce) ou d’un câble RCA vidéo aux connecteurs COMPONENT ou au connecteur VIDEO.
  • Page 62: Raccordement Au Connecteur Ou À La Borne Audio Numérique

    CONNEXIONS AUDIO ■ Raccordement au connecteur ou à la borne audio numérique – Vous pouvez raccorder votre équipement audio ou le téléviseur au connecteur COAXIAL ou à la borne OPTICAL. – Reliez fermement chaque extrémité d’un câble audio numérique coaxial ou d’un câble optique (tous deux en vente dans le commerce) aux connecteurs audio numériques coaxiaux ou aux bornes audio numériques optiques appropriés.
  • Page 63: Raccordement Aux Connecteurs Audio

    CONNEXIONS AUDIO ■ Raccordement aux connecteurs audio – Vous pouvez raccorder votre équipement audio ou le téléviseur aux connecteurs de sortie audio droite et gauche (AUDIO OUT L/R) de ce lecteur. – Reliez fermement l’extrémité du câble audio/vidéo (fourni) aux connecteurs AUDIO OUT L/R. –...
  • Page 64: Connexion Réseau Et Usb

    Vers la Vers la borne Remarque borne USB NETWORK – Yamaha ne saurait garantir que ce lecteur fonctionne avec toutes les marques de Clé USB clés USB. (en vente dans le commerce) Câble réseau (en vente dans le commerce)
  • Page 65: Autres Connexions

    REMOTE CONTROL CONTROL (OUT) de ce lecteur. (OUT/IN) appropriés. ■ Branchement du cordon – Si votre ampli-tuner AV est un produit Yamaha et peut transmettre des signaux de commande SCENE, d’alimentation vous pouvez commander le lecteur à l’aide de la fonction SCENE.
  • Page 66: Lecture

    LECTURE WIZARD INITIAL/INSTALLATION FACILE ■ Préconfiguration à l’aide de 4 Appuyez sur 5/a pour choisir le format d’image, puis appuyez sur ENTER. Pour plus de détails à ce sujet, Wizard Initial/Installation facile reportez-vous à la section “Ecran TV” (p. 32). La fonction Wizard Initial/Installation facile permet de La procédure de préconfiguration (Installation facile) définir la langue, la résolution et le format d’image.
  • Page 67: Menu Home/Media

    MENU HOME/MEDIA Les menus HOME et MEDIA permettent de passer en revue et lire des fichiers multimédia sur des disques de Procédure de lecture des fichiers données, sur des clés USB ou sur votre réseau. dans un dossier donné Exemple : Sélection d’un fichier vidéo sur une clé USB Remarque –...
  • Page 68 MENU HOME/MEDIA 4 Sélectionnez le dossier qui vous intéresse (Photo, Astuce Musique, Vidéo ou AVCHD), puis appuyez sur ENTER. – Pour présenter un diaporama avec un fond sonore, Pour revenir au dossier parent, appuyez sur 2 ou commencez par écouter la musique qui vous sélectionnez intéresse, puis appuyez sur HOME pour revenir à...
  • Page 69: Utilisation D'un Contenu Du Réseau

    MENU HOME/MEDIA ■ Utilisation d’un contenu du réseau 4 Sélectionnez le fichier que vous avez l’intention de lire. Ce lecteur est un lecteur multimédia numérique certifié Remarques DLNA. Cela signifie que vous pouvez gérer tout contenu à – Les conditions de fonctionnement de votre réseau base de photos, musiques et vidéos stocké...
  • Page 70: Utilisation Des Services Réseau

    – Certains contenus pourraient être disponibles uniquement dans certains pays et dans certaines langues. – Yamaha ne garantit pas que ces services de contenus resteront offerts ou disponibles pour une durée définie, et toute garantie de ce type, explicite ou implicite, est exclue.
  • Page 71: Mode De Lecture Avancé

    MODE DE LECTURE AVANCÉ Cette section traite de la lecture des disques BD et DVD vendus dans le commerce, des CD, et des disques DVD- – Normal RW/R enregistrés. – Lecture Aléatoire CH (chapitre) – Lecture Aléatoire TT (titre) Remarque –...
  • Page 72: Menu D'état

    MODE DE LECTURE AVANCÉ ■ Menu d’état MUSIC Ce menu propose différents réglages, tels que les sous- Exemple : Icônes affichées lors de la lecture d’un fichier titres, l’angle de vue ou le numéro du titre, du chapitre, ou de musique de la piste en cours de lecture.
  • Page 73: Utilisation De La Fonction Signet

    MODE DE LECTURE AVANCÉ ■ Utilisation de la fonction 2 Appuyez sur ENTER pour programmer l’ordre de lecture. Dans le cas d’un disque audio, appuyez sur 5/a pour Signet VIDEO sélectionner chacune des pistes dans l’ordre où vous Vous pouvez repérer un point précis de la vidéo à l’aide souhaitez les lire, puis appuyez sur ENTER.
  • Page 74: Utilisation Des Fonctions Bonusview™ Et

    – Le chargement des données peut prendre un certain temps (lecture/écriture). Remarques – Yamaha ne saurait garantir que ce lecteur fonctionne avec toutes les marques de clés USB. – N’utilisez pas de rallonge USB pour raccorder une clé USB à la borne USB du lecteur. L’utilisation d’une rallonge USB peut entraîner un...
  • Page 75: Paramètres

    PARAMÈTRES MENU SETUP Le menu SETUP offre différents réglages audio/vidéo des fonctions au moyen de la télécommande. Menu/sous-menu Paramètre Description Page Système Economiseur Permet d’activer/désactiver l’économiseur d’écran. d’écran Lecture automatique Configure le lecteur afin de démarrer automatiquement la du disque lecture du disque.
  • Page 76 MENU SETUP Menu/sous-menu Paramètre Description Page Sortie 3D Permet de choisir le mode vidéo 3D ou 2D. Ecran TV Permet de régler le format d’écran du téléviseur raccordé ainsi que la sortie vidéo. Résolution Permet de sélectionner la résolution de la sortie vidéo. Paramètres vidéo Système TV...
  • Page 77: Exemple D'utilisation Du Menu Setup

    MENU SETUP ■ Exemple d’utilisation du menu 3. Sélectionnez une option de menu. SETUP Appuyez sur 5/a pour sélectionner Contrôle Les réglages du lecteur se font à partir de l’écran du menu Parental, puis appuyez sur ENTER ou 3. SETUP. Vous trouverez ci-dessous des explications sur les opérations de base du menu SETUP.
  • Page 78: Réglages Généraux

    ■ Réglages Généraux Pilotage réseau Permet d’activer/désactiver le contrôle par Ethernet. Ce Les réglages par défaut sont représentés par un « ». lecteur utilise le protocole Yamaha Network Control (YNC). Système Oui, Non Economiseur d’écran Ce paramètre permet d’activer ou de désactiver l’économiseur d’écran.
  • Page 79 MENU SETUP Remarque Langue – Certains disques ne sont pas compatibles avec cette Affichage à l’écran fonction. Vous avez la possibilité de sélectionner la langue des messages DivX(R) VOD DRM ou menus affichés à l’écran (menu SETUP, par exemple). Ce paramètre permet d’afficher le code d’enregistrement English Français Español Deutsch Italiano des films au format DivX(R).
  • Page 80: Paramètres Vidéo

    MENU SETUP ■ Paramètres vidéo Réseau Les réglages par défaut sont représentés par un « ». Connexion Internet N’oubliez pas d’activer la connexion Internet (en réglant ce paramètre sur Permettre) si vous comptez utiliser les fonctions Sortie 3D BD-Live (p. 26) et DLNA (p. 21) ou procéder à la mise à Permet de choisir le mode vidéo 3D ou 2D de ce lecteur.
  • Page 81 MENU SETUP Résolution Synchronisation audio/vidéo Ce paramètre vous donne le choix entre plusieurs résolutions Ce paramètre permet de définir/régler la fonction de sortie vidéo : Auto, 480i/576i, 480p/576p, 720p, 1080i et Synchronisation audio/vidéo (p. 42). 1080p. Si vous réglez ce paramètre sur Auto, le lecteur Auto* Ce lecteur règle automatiquement la fonction sélectionne automatiquement la résolution maximale en...
  • Page 82: Paramètres Audio

    MENU SETUP ■ Paramètres audio Configuration Haut-Parleur Les réglages par défaut sont représentés par un « ». Mixage en 2 canaux stéréo Sortie audio Vous pouvez sélectionner la méthode de mixage sur 2 canaux analogiques : Stéréo ou Gauche/Droite. Coaxial / Optique Gauche/ Choisissez ce réglage si l’appareil est raccordé...
  • Page 83: À Propos Des Formats De Sortie Audio

    MENU SETUP ■ À propos des formats de sortie audio HDMI COAXIAL/OPTIQUE MIXED 2CH Format de la source Bitstream Reencode Bitstream Reencode PCM 2 canaux PCM 2 canaux PCM 2 canaux PCM 5.1 canaux PCM 5.1 canaux PCM 2 canaux PCM 7.1 canaux PCM 7.1 canaux PCM 2 canaux...
  • Page 84: À Propos Des Formats De Sortie Vidéo

    MENU SETUP ■ À propos des formats de sortie vidéo Si Système TV est réglé sur NTSC 1080p Résolution Auto 480i/576i 480p/576p 720p 1080i 24Hz Autres Lecture d’un 1080p 24 Hz HDMI 720p 60 Hz 1080i 60 Hz 1080p 60 Hz Autres 1080p 60 Hz Lecture d’un...
  • Page 85: Mise À Niveau Logicielle

    Pour savoir si une nouvelle mise à niveau logicielle est disponible, rendez-vous sur le site Web suivant : http://download.yamaha.com/downloads/service/top/ ?site=europe.yamaha.com&language=en Astuce – La mise à niveau logicielle démarre automatiquement dès que vous chargez le disque contenant le fichier de mise à...
  • Page 86: Informations Complémentaires

    Reportez-vous au tableau suivant si ce lecteur ne fonctionne pas convenablement. Si l’anomalie constatée n’est pas mentionnée ou si les actions correctives suggérées sont sans effet, mettez le lecteur hors tension, débranchez le cordon d’alimentation et prenez contact avec un revendeur ou le service après-vente de Yamaha. ■ Alimentation...
  • Page 87: Image

    GUIDE DE DÉPANNAGE ■ Image Anomalies Causes possibles et solutions Absence d’image. – Assurez-vous que les câbles sont branchés correctement. (p. 10) – Assurez-vous que l’entrée sélectionnée sur le téléviseur ou l’ampli-tuner AV raccordé au lecteur est correcte. (p. 10) –...
  • Page 88: Réseau

    GUIDE DE DÉPANNAGE ■ Réseau Anomalies Causes possibles et solutions Impossible de se connecter à Internet. – Vérifiez si le câble réseau est raccordé correctement. – Vérifiez si l’équipement raccordé (routeur haut débit ou modem) est sous tension. – Assurez-vous que le routeur haut débit et/ou le modem est connecté correctement. –...
  • Page 89: Glossaire

    GLOSSAIRE AVCHD DivX® AVCHD désigne un nouveau format (norme) pour les DivX® est une technologie multimédia répandue caméras vidéo haute définition qui permet d’enregistrer développée par DivX, Inc. Les fichiers DivX® et de lire des images HD de haute résolution. contiennent des données vidéo à...
  • Page 90: Caractéristiques Techniques

    CARACTÉRISTIQUES TECHNIQUES Son PCM linéaire Pan Scan (PS 4:3) Le PCM linéaire est un format d’enregistrement des Format d’écran ayant pour effet de couper les côtés de signaux utilisé pour les CD audio et certains disques l’image pour regarder les contenus grand écran (16:9) DVD et Blu-ray.
  • Page 91: Droits D'auteur

    CARACTÉRISTIQUES TECHNIQUES ■ Droits d’auteur – DLNA et DLNA CERTIFIED sont des marques de commerce et/ou des marques de service de Digital – Le support audio-visuel peut être composé d’oeuvres Living Network Alliance. soumises à des droits d’auteur qui ne peuvent être –...
  • Page 92 Gerätes und/oder zu persönlichen Verletzungen kommen. darauf, nicht direkt in den Laserstrahl zu blicken. Wenn dieses Yamaha kann nicht verantwortlich gemacht werden für Schäden, Gerät an eine Netzdose angeschlossen ist, blicken Sie niemals in die auf die Verwendung dieses Gerätes mit einer anderen als der die Öffnung der Disc-Schublade oder in andere Öffnungen.
  • Page 93: Information About Software

    INHALT 1. EINLEITUNG 4. EINSTELLUNGEN VERWENDUNGSZWECK DES PLAYERS ..2 SETUP-MENÜ............ 27 LIEFERUMFANG..........2 Beispiel für die Bedienung des SETUP-Menüs.... 29 Allgemeine Einstellungen ..........30 INFO ZU DISKS UND DATEIEN ......3 Anzeige Einstellung ............32 Mit diesem Player kompatible Disks/Dateien ....3 Audio-Einstellungen .............
  • Page 94: Einleitung

    EINLEITUNG VERWENDUNGSZWECK DES PLAYERS Leichte Einstellung von Sprache, Auflösung, Bildseitenverhältnis S. 18 Sie können die Sprach- und Fernsehereinstellungen vornehmen. S. 23 Wiedergabe kommerziell veröffentlichter Blu-ray™/DVD/CD-Disks Zusätzlich zu Blu-ray Disks™ (BD-Disks) unterstützt dieser Player die Wiedergabe vieler weiterer Disks. S. 26 Wiedergabe von BONUSVIEW™, BD-Live™, usw.
  • Page 95: Info Zu Disks Und Dateien

    INFO ZU DISKS UND DATEIEN ■ Mit diesem Player kompatible Informationen zu den Regionalcodes Disks/Dateien Region BD-Video DVD-Video Australien Regionalcode „B“ Regionalcode „4“ – Mit diesem Player können 12-cm- und 8-cm-Disks oder „ALL“ oder „ALL“ wiedergegeben werden. Verwenden Sie keinen 8- cm-auf-12-cm-Adapter.
  • Page 96: Disk Einlegen

    – Bei beidseitig bespielten Disks wenden Sie die Reinigungsdisks. Der Gebrauch solcher Disks kann abzuspielende Seite nach unten. die Linse beschädigen. – Lassen Sie die Linse von der nächsten von Yamaha zugelassenen Kundendienststelle reinigen. ■ Hinweise zum Betrachten von 3D- Videobildern –...
  • Page 97: Bedienungselemente Und Deren Funktionen

    BEDIENUNGSELEMENTE UND DEREN FUNKTIONEN ■ Vorderseite 1 p (Einschalten/Bereitschaft) (Rücklauf/Suchrücklauf): Drücken für Rücklauf und gedrückt halten für 2 USB-Anschluss (S. 16) Suchrücklauf. 3 Frontdisplay (Vorlauf/Suchvorlauf): 4 Disklade (S. 4) Drücken für Vorlauf und gedrückt halten für Suchvorlauf. (Auswurf) (S. 4) (Wiedergabe) (Pause) (Stopp)
  • Page 98: Fernbedienung

    BEDIENUNGSELEMENTE UND DEREN FUNKTIONEN ■ Fernbedienung 1 Infrarotsender: Gibt ein Infrarotsignal aus. Zielen Sie damit auf den Fernbedienungssensor (S. 9). Hinweis 2 MARKER VIDEO : Setzt ein Lesezeichen (S. 25) an einem festgelegten Punkt in einem Film. – wird in der linken oberen Ecke des Bildschirms angezeigt, wenn die gedrückte Taste nicht verfügbar Nachdem Lesezeichen gesetzt wurde, können Sie mit ist.
  • Page 99 BEDIENUNGSELEMENTE UND DEREN FUNKTIONEN C ZOOM K A/B : Vergrößert/ : Gibt einen VIDEO PHOTO VIDEO MUSIC verkleinert. Mit jedem Drücken der Taste ändert sich bestimmten Teil wieder, der wiederholt werden soll. die Größe des Bildschirms (vergrößern/verkleinern: je 1 Drücken Sie A/B an der Stelle, wo Sie den drei Schritte).
  • Page 100 BEDIENUNGSELEMENTE UND DEREN FUNKTIONEN L TOP MENU : Zeigt das Top-Menü an (S. 42), wenn die Disk ein Menü enthält. Wählen Sie den gewünschten Punkt über 5/a /2/3 und ENTER. PROGRAM MARKER DIGEST ZOOM Hinweis STATUS – Bestimmte Bedienungen können sich je nach Disk unterscheiden.
  • Page 101: Batterien In Die Fernbedienung Einlegen

    POP-UP/MENU angezeigt. Q ON SCREEN: Zeigt das Bildschirmmenü an (S. 23). ID-Funktion Sie können die Fernbedienungs-ID ändern, um eine ungewollte Bedienung eines anderen Yamaha-Players, wie beispielsweise eines DVD-Players, zu vermeiden. Wenn Sie die Fernbedienungs-ID geändert haben, müssen Hinweise Sie sicherstellen, dass Sie die gleiche ID für das –...
  • Page 102: Anschlüsse

    ANSCHLÜSSE EINFÜHRUNG ZU DEN ANSCHLÜSSEN Machen Sie an Ihren Audio-/Videogeräten die entsprechenden Anschlüsse ausfindig. Wir empfehlen die Verwendung der HDMI- Buchse, mit der über eine einzige Verbindung eine hohe digitale Audio- und Videoqualität erreicht wird. Falls Sie die anderen Anschlüsse (Buchsen) verwenden, nehmen Sie zuerst die Videoverbindung vor. Anschließend folgt dann die Audioverbindung. Schließen Sie die Video- und Audio-Anschlüsse mittels HDMI- Kabel an den AV-Receiver an.
  • Page 103 Video- und Audio-Anschluss an AV-Receiver HDMI (S. 12) Videoanschluss Audio-Anschluss an AV-Receiver an TV Anschluss von Audio A’ HDMI (S. 12) COAXIAL (S. 14) an AV-Receiver. oder an AV-Receiver OPTICAL (S. 14) COMPONENT (S. 13) oder oder L/R (S. 15) VIDEO (S.
  • Page 104: Hdmi-Anschlüsse

    HDMI-ANSCHLÜSSE ■ Anschluss an die HDMI-Buchse – Über die HDMI-Buchse können Sie eine hohe digitale Bild- und Tonqualität genießen. – Verbinden Sie ein HDMI-Kabel (im Fachhandel erhältlich) fest mit der HDMI-Buchse. – Näheres über die Audio-/Video-Ausgangsformate finden Sie auf Seite 35. –...
  • Page 105: Video-Anschlüsse

    VIDEO-ANSCHLÜSSE ■ Anschluss an Component-/Video-Buchse – Der Anschluss über die Component-Buchsen ermöglicht eine besonders getreue Farbwiedergabe und hohe Bildqualität. – Schließen Sie ein Component-Video-Kabel (im Fachhandel erhältlich) oder ein Audio-/Video-Kabel fest an die COMPONENT-Buchsen/VIDEO-Buchse an. – Eine Übersicht der Videoausgangsformate finden Sie auf Seite 36. Vorsicht! Schließen Sie das Netzkabel des Players nicht an, bevor nicht alle anderen Anschlüsse vorgenommen wurden.
  • Page 106: Audio-Anschlüsse

    AUDIO-ANSCHLÜSSE ■ Anschluss an digitale Audiobuchse – Sie können ein Audiogerät oder einen Fernseher an die COAXIAL-Buchse/OPTICAL-Buchse anschließen. – Schließen Sie ein Koaxial-Digitalaudiokabel (im Fachhandel erhältlich) oder ein Lichtleiterkabel (im Fachhandel erhältlich) an die Koaxial-Digitalaudiobuchse oder die optische digitale Audiobuchse an. –...
  • Page 107: Anschluss An Die Audiobuchsen

    AUDIO-ANSCHLÜSSE ■ Anschluss an die Audiobuchsen – Sie können ein Audiogerät oder einen Fernseher an die AUDIO Ausgang L/R-Buchse anschließen. – Schließen Sie ein Audio-/Video-Kabel (im Lieferumfang enthalten) fest an die AUDIO Ausgang L/R-Buchse an. – Eine Übersicht der Audioausgangsformate finden Sie auf Seite 35. Vorsicht! Schließen Sie das Netzkabel des Players nicht an, bevor nicht alle anderen Anschlüsse vorgenommen wurden.
  • Page 108: Netzwerk- Und Usb-Anschluss

    Verwendung eines USB- Verlängerungskabels nicht gewährleistet. An USB- An NETWORK- Hinweis Anschluss Buchse – Yamaha kann nicht garantieren, dass die USB -Speichergeräte aller Marken mit USB-Speichergerät diesem Player verwendbar sind. (im Fachhandel erhältlich) Netzwerkkabel (im Fachhandel erhältlich) Hinweise Tipp –...
  • Page 109: Weitere Anschlüsse

    Bedienungsanleitung, die im Lieferumfang Anschluss an die REMOTE CONTROL-Buchsen des Yamaha-AV-Receivers enthalten ist. (OUT/IN) übertragen und empfangen werden. – Sie können ein Yamaha-Gerät (wie beispielsweise – Schließen Sie Mono-3,5-mm-Miniklinkenkabel (im einen CD-Player) mit SCENE-Funktion an die Fachhandel erhältlich) an die REMOTE REMOTE CONTROL-Buchse (OUT) dieses Players CONTROL-Buchsen (OUT/IN) an.
  • Page 110: Wiedergabe

    WIEDERGABE KONFIGURATIONSHILFE/EINFACHES KONFIGURATIONSMENÜ ■ Einstellungen über 4 Drücken Sie 5/a zur Wahl des Bildseitenverhältnisses und drücken Sie dann ENTER. Konfigurationshilfe/Einfaches Weitere Informationen dazu finden Sie unter „TV Konfigurationsmenü Bildschirm“ (S. 32). Über Konfigurationshilfe/Einfaches Konfigurationsmenü Einfaches Konfigurationsmenü ist abgeschlossen. ist die leichte Einstellung für die Sprache, die Auflösung und das Bildseitenverhältnis möglich.
  • Page 111: Home/Media-Menü

    HOME/MEDIA-MENÜ Über die Menüs HOME und MEDIA können Sie Multimediadateien auf Datendisks, USB-Speichergeräten Allgemeine Bedienungsschritte für die und im Netzwerk durchsuchen und wiedergeben. Wiedergabe von Dateien in einem ausgewählten Ordner Hinweis Beispiel: Auswahl einer Filmdatei auf einem USB- – Einzelheiten zu den abspielbaren Disks und Speichergerät Formaten finden Sie auf Seite 3.
  • Page 112 HOME/MEDIA-MENÜ 4 Wählen Sie den Foto-, Musik-, Video- oder AVCHD- Tipp Ordner aus, der wiedergegeben werden soll, und drücken Sie ENTER. – Um die Diashow mit Musikuntermalung zu Um zum übergeordneten Ordner zurückzukehren, betrachten, drücken Sie HOME, um zum HOME- drücken Sie 2 oder wählen Sie aus.
  • Page 113: Verwenden Von Netzwerkinhalten

    HOME/MEDIA-MENÜ ■ Verwenden von Netzwerkinhalten 4 Wählen Sie die Datei aus, die wiedergegeben werden soll. Diese Player ist ein DLNA-zertifizierter digitaler Medienplayer. Sie können Fotos, Musiktitel und Videos Hinweise verwalten, die auf DLNA-Servern in Ihrem Heimnetzwerk gespeichert sind. – Die Wiedergabe und Bedienungsqualität können vom Zustand des Heimnetzwerkes beeinträchtigt werden.
  • Page 114: Verwenden Von Netzwerkdiensten

    – Manche Inhalte stehen nur in bestimmten Ländern und/oder in bestimmten Sprachen zur Verfügung. – Yamaha ist nicht für Inhaltsdienste von Drittanbietern verantwortlich und gewährt keinerlei Garantie, dass deren Inhalte dauerhaft oder auch nur über eine bestimmte Zeitspanne hinweg zur Verfügung gestellt werden.
  • Page 115: Erweiterte Wiedergabebedienung

    ERWEITERTE WIEDERGABEBEDIENUNG In diesem Kapitel wird die Wiedergabe von im Fachhandel erhältlichen BD und DVD Disks, CDs und – Normal selbst aufgenommenen DVD-RW/R-Disks beschrieben. – Zufall CH (Kapitel) – Zufall TT (Titel) Hinweis – Zufallswiedergabe Alle – Zufalls-CH (Kapitel) – Informationen über die grundlegende Bedienung zur –...
  • Page 116: Status-Menü

    ERWEITERTE WIEDERGABEBEDIENUNG ■ Status-Menü MUSIC Hierüber werden unterschiedliche Einstellungen Beispiel: Symbole bei der Wiedergabe einer Musikdatei angezeigt, wie beispielsweise Untertitel, Blickwinkel und aktuell wiedergegebene Titel-/Kapitel-/Tracknummer. Um das Status-Menü aufzurufen, drücken Sie STATUS. Das Status-Menü enthält die folgenden Untermenüs. VIDEO Beispiel: Symbole bei Wiedergabe von BD (Wiedergabestatus) (Wiederholbetrieb): Zeigt den aktuellen Wiederholbetrieb an (S.
  • Page 117: Verwenden Von Lesezeichen

    ERWEITERTE WIEDERGABEBEDIENUNG ■ Verwenden von 2 Drücken Sie ENTER, um die Wiedergabereihenfolge zu programmieren. Lesezeichen VIDEO Bei einer Audio-Disk drücken Sie 5/a zur Wahl des Hierüber können Sie ein Lesezeichen am festgelegten gewünschten Tracks und drücken Sie dann ENTER. Punkt im Video setzen. Nachdem ein Lesezeichen gesetzt Bei einer DVD-Video-Disk wählen Sie den gewünschten wurde, können Sie zu dem Punkt springen, an dem diese Titel (angezeigt als TT) und das gewünschte Kapitel...
  • Page 118: Spaß Mit Bonusview™ Und Bd-Live

    Hauptbild Zweitbild – Das Laden (Lesen/Schreiben) der Daten kann eine Weile dauern. Hinweise – Yamaha kann nicht garantieren, dass USB- Speichergeräte aller Marken mit diesem Player verwendbar sind. – Verbinden Sie ein USB-Speichergerät nicht über ein USB-Verlängerungskabel mit dem USB-Anschluss des Players.
  • Page 119: Einstellungen

    EINSTELLUNGEN SETUP-MENÜ Im SETUP-Menü können Sie mit der Fernbedienung verschiedene Bild-, Ton und Funktionseinstellungen vornehmen. Menü/Untermenü Element Funktion Seite System Bilds.Schoner Aktiviert/deaktiviert den Bildschirmschoner. Disc Auto- Richtet diesen Player darauf ein, die Disk-Wiedergabe Wiedergabe automatisch zu starten. HDMI Steuerung Stellt diesen Player auf den Empfang von Steuersignalen von Allgemeine der Fernbedienung des TV-/AV-Receivers ein.
  • Page 120 SETUP-MENÜ Menü/Untermenü Element Funktion Seite 3D Ausgang Wählt zwischen 3D- und 2D-Videos aus. TV Bildschirm Stellt das Bildseitenverhältnis für den angeschlossenen Fernseher und den Videoausgang ein. Auflösung Wählt die Auflösung des Ausgabevideos aus. Anzeige Einstellung TV-System Wählt das TV-System aus NTSC/PAL/Multi. Farbraum Wählt Farbraum aus YCbCr 4:4:4/YCbCr 4:2:2/Full RGB/ RGB.
  • Page 121: Setup-Menü

    SETUP-MENÜ ■ Beispiel für die Bedienung des 3. Wählen Sie einen Menüpunkt aus. SETUP-Menüs Um Einstellungen für diesen Player vornehmen zu Drücken Sie 5/a , um Alterskontrolle auszuwählen, können, müssen Sie das SETUP-Menü aufrufen. und drücken Sie dann ENTER oder den Cursor 3. Nachstehend ist die grundlegende Bedienung des SETUP- Menüs erläutert.
  • Page 122: Allgemeine Einstellungen

    SETUP-MENÜ ■ Allgemeine Einstellungen Netzwerksterung Sie können die Kontrolle über das Ethernet aktiveren/ Die Werkseinstellungen sind mit einem Sternchen „ “ deaktivieren. Dieser Player nutzt das Protokoll Yamaha gekennzeichnet. Network Control (YNC). System Ein, Aus Bilds.Schoner Sie können den Bildschirmschoner aktivieren oder Hinweise deaktivieren.
  • Page 123 SETUP-MENÜ Last Memory Sprache Damit können Sie einstellen, ob dieser Player beim Schalten in den Bereitschaftsmodus oder beim Öffnen der Disklade die zuletzt wiedergegebene Position einer Disk Sie können die Sprache für die Bildschirmanzeige speichert. auswählen. Hierbei handelt es sich um die Meldungen , Aus oder die Menüs, die auf dem Bildschirm angezeigt werden, z.
  • Page 124: Anzeige Einstellung

    SETUP-MENÜ ■ Anzeige Einstellung Netzwerk Die Werkseinstellungen sind mit einem Sternchen „ “ gekennzeichnet. Internet Verbindung Aktivieren Sie diese Funktion, wenn Sie BD-Live (S. 26), DLNA (S. 21) und den Software-Upgrade aus dem Netzwerk nutzen (S. 37). 3D Ausgang Aktivieren , Deaktivieren Sie können zwischen 3D- oder 2D- Videoausgabe wählen.
  • Page 125 SETUP-MENÜ Auflösung Lip Sync Die Optionen für die Video-Ausgabeauflösung sind: Auto, Sie können die Funktion S. 42 einstellen/anpassen. 480i/576i, 480p/576p, 720p, 1080i und 1080p. Ist die Auto* Der Player passt die Funktion Lip Sync automatisch Option Auto eingerichtet, wird die Auflösung auf die für den angeschlossenen Fernseher maximale Option Manuell Sie können die Funktion Lip Sync manuell anpassen...
  • Page 126: Audio-Einstellungen

    SETUP-MENÜ ■ Audio-Einstellungen Lautsprechereinstellung Die Werkseinstellungen sind mit einem Sternchen „ “ gekennzeichnet. 2 Kanal Downmix Sie können aus Stereo oder Lt/Rt die Downmix-Methode Audio-Ausgang zu einem analogem 2-Kanal auswählen. Coaxial/Optical Lt/Rt Wählen Sie diese Option, wenn das Gerät an einen Dolby Pro Logic-Decoder angeschlossen ist.
  • Page 127: Übersicht Der Audioausgangsformate

    SETUP-MENÜ ■ Übersicht der Audioausgangsformate HDMI COAXIAL/OPTICAL MIXED 2CH Quellformat Bitstream Neuberechnen Bitstream Neuberechnen PCM-2ch PCM-2ch PCM-2ch PCM-5.1ch PCM-5.1ch PCM-2ch PCM-7.1ch PCM-7.1ch PCM-2ch PCM bis Dolby Digital Dolby Digital Dolby Digital Dolby Digital PCM-2ch Dolby Digital mit ZT oder 5.1ch Dolby Digital Plus Dolby Digital...
  • Page 128: Übersicht Der Videoausgangsformate

    SETUP-MENÜ ■ Übersicht der Videoausgangsformate Wenn das TV-System auf NTSC eingerichtet ist 1080p Auflösung Auto 480i/576i 480p/576p 720p 1080i 24 Hz Andere Wiedergabe 1080p 24 Hz HDMI Max. Max. Max. 720p 60 Hz 1080i 60 Hz 1080p 60 Hz Andere 1080p 60 Hz Wiedergabe von im...
  • Page 129: Software-Upgrade

    Speicher/dem Netzwerk enthalten sind. Upgrade aktualisieren, damit der Player mit der neuesten Software betrieben werden kann. Ob ein Software-Upgrade verfügbar ist, erfahren Sie auf der Seite: http://download.yamaha.com/downloads/service/top/ ?site=europe.yamaha.com&language=en Tipp – Die Software-Aktualisierung startet automatisch nach dem Laden einer Disk, die das Dateipaket für die Aktualisierung enthält.
  • Page 130: Zusätzliche Informationen

    Suchen Sie eine Lösung aus der unten angegebenen Tabelle, wenn dieser Player nicht richtig funktionieren sollte. Falls Ihr Problem hier nicht aufgeführt wird oder die vorgeschlagene Lösung keine Abhilfe schafft, schalten Sie diesen Player aus, ziehen Sie das Netzkabel ab und wenden Sie sich an den nächste Yamaha-Händler oder -Kundendienst. ■ Strom Problem Mögliche Ursache und Lösung...
  • Page 131: Bild

    FEHLERSUCHE ■ Bild Problem Mögliche Ursache und Lösung Kein Bild. – Vergewissern Sie sich, dass die Kabel korrekt angeschlossen sind. (S. 10) – Vergewissern Sie sich, dass der angeschlossene Fernseher oder AV-Receiver auf den korrekten Eingang eingestellt ist. (S. 10) –...
  • Page 132: Netzwerk

    FEHLERSUCHE ■ Netzwerk Problem Mögliche Ursache und Lösung Internet-Verbindung nicht herstellbar. – Schließen Sie das Netzwerkkabel richtig an. – Schalten Sie das angeschlossene Gerät, wie beispielsweise einen Breitband-Router oder ein Modem, ein. – Schließen Sie den Breitband-Router und/oder das Modem richtig an. –...
  • Page 133: Glossar

    GLOSSAR AVCHD Deep Color AVCHD ist ein neues Format (Standard) für HD- Deep Color bezieht sich auf den Einsatz Camcorder zur Aufzeichnung und Wiedergabe von unterschiedlicher Farbtiefen in der Anzeige, von den 24- hochauflösenden Videobildern. Bit-Tiefen früherer Versionen der HDMI-Spezifikation. BD-Live™...
  • Page 134: Technische Daten

    TECHNISCHE DATEN DTS-HD Master Audio Mac-Adresse DTS-HD Master Audio ist eine verlustfrei wirkende Die Mac-Adresse ist ein eindeutiger Wert, der einem Audio-Komprimiertechnik, die für die nächste Netzwerkgerät zu Identifikationszwecken zugeordnet Generation optischer Disk-Formate mit hoher wird. Auflösung entwickelt wurde. Pan Scan (PS 4:3) Ein Bildschirmformat, das die Seiten des Bilds HDMI HDMI (High-Definition Multimedia Interface) ist eine...
  • Page 135: Urheberrecht

    TECHNISCHE DATEN ■ Urheberrecht – YouTube und das YouTube-Logo sind Warenzeichen der Google. Inc. – Audiovisuelles Material kann urheberrechtlich – DLNA und DLNA CERTIFIED sind Warenzeichen geschützt sein und darf eventuell ohne Genehmigung und/oder Dienstleistungszeichen der Digital Living des Eigentümers der Urheberrechte nicht Network Alliance.
  • Page 136 Anslutning till en strömkälla med högre spänning än den öppna höljet eller försöka reparera apparaten. angivna kan orsaka brand, skador på enheten och/eller personskador. Yamaha åtar sig inget ansvar för skador FARA! beroende på att enheten används med en spänning utöver den Apparaten avger synlig laserstrålning i öppet läge.
  • Page 137: Information About Software

    INNEHÅLL 1. INTRODUKTION 4. INSTÄLLNINGAR VAD DU KAN GÖRA MED DENNA SPELARE .. 2 SETUP MENY ............ 27 MEDFÖLJANDE DELAR........2 Exempel på användning av SETUP-menyn....29 Allmänna inställningar..........30 OM SKIVOR OCH FILER ........3 Display inställningar ............. 32 Typer av skivor/filer som kan användas med Ljudinställning ..............
  • Page 138: Introduktion

    INTRODUKTION VAD DU KAN GÖRA MED DENNA SPELARE Enkel inställning för språk, upplösning, skärmformat s. 18 Du kan göra språk- och TV-inställningar. s. 23 Spela upp kommersiella Blu-ray/DVD/CD skivor Utöver Blu-ray-skivor™ (BD-skivor) kan spelaren även spela upp ett antal andra typer av skivor. s.
  • Page 139: Om Skivor Och Filer

    OM SKIVOR OCH FILER ■ Typer av skivor/filer som kan Information om regional hantering användas med denna spelare Destination BD-video DVD-video Australien Regionskod “B” Regionsnummer “4” – 12 cm och 8 cm skivor kan spelas upp med denna eller “ALL” eller “ALL”...
  • Page 140: Försiktighetsåtgärder Gällande Skivor

    – På en skiva som är inspelad på båda sidor ska sidan rengöringsskivor. Dessa skivor kan orsaka skador på du vill spela upp vara vänd nedåt. linsen. – Uppsök närmaste av Yamaha godkänd serviceverkstad för rengöring av linsen. ■ Att observera när du tittar på videobilder i 3D Kommentarer –...
  • Page 141: Kontroller Och Funktioner

    KONTROLLER OCH FUNKTIONER ■ Frontpanel 1 p (På/Standby) (Sök bakåt/Hoppa bakåt): Tryck på för att hoppa bakåt, och tryck på och håll för att söka 2 USB-port (s. 16) bakåt. 3 Frontpanelens display (Sök framåt/Hoppa framåt): 4 Skivfack (s. 4) Tryck på...
  • Page 142: Fjärrkontroll

    KONTROLLER OCH FUNKTIONER ■ Fjärrkontroll 1 Sändare infraröda signaler: Skickar en infraröd signal. Sikta detta fönster mot fjärrkontrollsensorn (s. Kommentar 2 MARKER VIDEO : Ställer in Bokmärke (s. – visas längst upp till vänster på skärmen när den tryckta knappen inte är tillgänglig. 25) vid en angiven plats i en film.
  • Page 143 KONTROLLER OCH FUNKTIONER E STATUS: Visar uppspelningsinformation (s. 24). F SUBTITLE VIDEO : Ändrar undertextspråk (s. 42) om tillgängligt. Du kan även välja detta objekt från menyn på skärmen (s. 23). G ANGLE : Ändrar kameravinkel om videon spelades in med flera vinklar. Kameravinkel ) visas på...
  • Page 144 KONTROLLER OCH FUNKTIONER L TOP MENU : Visar översta menyskärmen (s. 42) om skivan innehåller en skivmeny. Välj önskat objekt med 5/a /2/3 och ENTER. PROGRAM MARKER DIGEST ZOOM Kommentar STATUS – Specifika handlingar kan skilja sig från de som anges här beroende på...
  • Page 145: Isättning Av Batterier I Fjärrkontrollen

    Q ON SCREEN: Visar Skärmmenyn (s. 23). ID-funktion Du kan ändra fjärrkontrollens ID för att förhindra oönskad kontroll av den andra Yamaha-spelaren, t.ex. DVD- spelaren. Om du har ändrat fjärrkontrollens ID måste du kontrollera att du valt samma ID för huvudenheten.
  • Page 146: Anslutning

    ANSLUTNING INTRODUKTION TILL ANSLUTNINGAR Leta upp motsvarande anslutningsmetod på din video-/audioutrustning. Vi rekommenderar att HDMI-uttaget används, vilket ger ett högkvalitativt digitalt ljud och bild genom en enda anslutning. Om andra uttag/jack används bör video anslutas först. Anslut sedan ljudet. Anslut video och ljud till AV- mottagaren med HDMI-kabel.
  • Page 147 Video- och ljudanslutning till AV- mottagaren HDMI (s. 12) Videoanslutningar Ljudanslutning till AV-mottagare till TV Anslut ljud till AV- A’ HDMI (s. 12) COAXIAL (s. 14) mottagare. eller till AV-mottagare OPTICAL (s. 14) COMPONENT (s. 13) eller eller L/R (s. 15) VIDEO (s.
  • Page 148: Hdmi-Anslutning

    HDMI-ANSLUTNING ■ Anslutning till HDMI-uttaget – HDMI-uttaget sörjer för en hög bild- och ljudkvalitet för digitala signaler. – Anslut en HDMI-kabel (säljs separat) till HDMI-uttagen. – Se sida 35 för information angående format för ljud-/videoutmatning. – Använd HIGH SPEED HDMI-kablar med HDMI-logotypen (visas på bakre omslaget). Observera! Anslut inte spelarens strömkabel innan alla andra anslutningar har gjorts.
  • Page 149: Videoanslutningar

    VIDEOANSLUTNINGAR ■ Ansluta till komponent/video-uttaget – Bildåtergivning av hög kvalitet med naturtrogna färger kan erhållas via komponentvideoutgångarna. – Anslut en komponentvideokabel (säljs separat) eller en videokabel med stift till COMPONENT-uttagen/VIDEO- uttaget. – Se sida 36 för information angående format för videoutmatning. Observera! Anslut inte spelarens strömkabel innan alla andra anslutningar har gjorts.
  • Page 150: Ljudanslutningar

    LJUDANSLUTNINGAR ■ Ansluta till den digitala Ijudutgången/uttaget – Ljudutrustningen eller TV:n kan anslutas till COAXIAL-utgångarna/OPTICAL-uttaget. – Anslut en koaxial-ljudkabel (säljs separat) eller optisk kabel (säljs separat) till koaxial digital-uttaget eller det optiska digitala ljuduttaget. – Se sida 35 för information angående format för ljudutmatning. Observera! Anslut inte spelarens strömkabel innan alla andra anslutningar har gjorts.
  • Page 151: Anslutning Till Ljudutgångarna

    LJUDANSLUTNINGAR ■ Anslutning till ljudutgångarna – Ljudutrustningen eller TV:n kan anslutas till AUDIO OUT L/R-utgångarna. – Anslut en ljud-/videokabel (medföljer) till AUDIO OUT L/R-utgången. – Se sida 35 för information angående format för ljudutmatning. Observera! Anslut inte spelarens strömkabel innan alla andra anslutningar har gjorts. Denna spelare DIGITAL OUT VIDEO OUT...
  • Page 152: Anslutning Av Nätverk Och Usb

    USB-uttag. Om en USB- OPTICAL VIDEO förlängningskabel används kan spelaren hindras från att fungera korrekt. Kommentar Till USB- Till NETWORK- – Yamaha kan inte garantera att USB- uttag uttag minnesenheter av alla märken fungerar med denna spelare. USB-minnesenhet (säljs separat) Nätverkskabel Kommentarer (säljs separat)
  • Page 153: Andra Anslutningar

    AV-mottagare genom att ansluta till utgångarna REMOTE från Yamaha. CONTROL (OUT/IN). – Du kan ansluta en komponent från Yamaha (t.ex. en – Anslut enkanals 3,5 mm minikontaktkablar (säljs CD-spelare) som kan användas med SCENE- separat) till utgångarna REMOTE CONTROL funktionen till utgången REMOTE CONTROL...
  • Page 154: Uppspelning

    UPPSPELNING INSTALLATIONSGUIDE/EASY SETUP ■ Inställning med 4 Tryck på 5/a för att välja skärmformat och tryck sedan på ENTER. Information om inställningar finns i Installationsguide/ “TV Screen” (s. 32). Snabbinstallation Snabbinstallation har slutförts. Installationsguide/Snabbinstallation låter dig ställa in språk, upplösning och skärmformat på ett enkelt sätt. Skärmen Installationsguide visas när du aktiverar spelaren första gången efter inköp eller uppgradering.
  • Page 155: Home/Media Meny

    HOME/MEDIA MENY Med HOME- och MEDIA-menyerna kan du bläddra i och spela upp multimediafiler på dataskivor, USB- Vanliga åtgärder för uppspelning av minnesenheter och ditt nätverk. filer i en vald mapp Exempel: Välja en filmfil från en USB-minnesenhet Kommentar – Information om uppspelningsbara skivor och format Kommentar finns på...
  • Page 156 HOME/MEDIA MENY 4 Välj Foto-, Musik-, Video- eller AVCHD-mappen som Tips du vill spela upp och tryck sedan på ENTER. Återgå till den överordnade mappen genom att trycka – Upplev bildspel med musik genom att trycka på på 2 eller välja HOME för att återgå...
  • Page 157: Använda Nätverksinnehåll

    HOME/MEDIA MENY ■ Använda nätverksinnehåll 4 Välj filen som du vill spela upp. Denna spelare är en DLNA-certifierad digital Kommentarer mediaspelare. Du kan hantera foton, musik- och – Kvaliteten och funktionen av uppspelningen kan videoinnehåll som sparats på DLNA-servrar i ditt påverkas av ditt hemmanätverks tillstånd.
  • Page 158: Använda Nätverkstjänster

    – En del innehåll kan enbart vara tillgängligt för vissa länder och kan presenteras på vissa bestämda språk. – Yamaha kan inte garantera att tjänster kommer fortsätta att tillhandahållas eller vara tillgängliga för en given tidsperiod, och Yamaha frånsäger sig varje sådant garantianspråk, uttalat eller underförstått, SPELA UPP VIDEO FRÅN YouTube™...
  • Page 159: Avancerade Uppspelningsfunktioner

    AVANCERADE UPPSPELNINGSFUNKTIONER Detta kapitel förklarar uppspelning av kommersiellt tillgängliga BD- och DVD-skivor, CD och inspelade – Normal DVD-RW/R-skivor. – Shuffle CH (kapitel) – Shuffle TT (titel) Kommentar – Shuffle Alla – Random CH (kapitel) – Grundläggande uppspelningsfunktioner förklaras på – Random TT (titel) sida 6.
  • Page 160: Statusmeny

    AVANCERADE UPPSPELNINGSFUNKTIONER ■ Statusmeny MUSIC Detta visar olika inställningar, t.ex. undertexter, Exempel: Ikoner vid uppspelning av musikfiler vinkelinställningar och den titel/kapitel/spårnummer som spelas upp. Visa statusmenyn genom att trycka på STATUS. Statusmenyn innehåller följande menyer. VIDEO Exempel: Ikoner vid uppspelning av BD (Uppspelningsstatus) (Upprepningsläge): Visar aktuellt upprepningsläge (s.
  • Page 161: Använda Bokmärke

    AVANCERADE UPPSPELNINGSFUNKTIONER ■ Använda Bokmärke 2 Tryck på ENTER för att programmera VIDEO uppspelningsordningen. Med denna funktion kan du ställa in Bokmärke vid en För ljudskivor trycker du på 5/a för att välja ett angiven plats i videon. Efter Bokmärke har ställts in kan önskat spår och trycker sedan på...
  • Page 162: Uppleva Bonusview™ Och Bd-Live

    USB-minnesenhet. – Laddning (läsning/skrivning) av data kan ta en tid. Kommentarer – Yamaha kan inte garantera att USB-minnesenheter av alla märken går att använda med denna spelare. – Använd inte en USB-förlängningskabel vid anslutning av en USB-minnesenhet till spelarens USB-uttag.
  • Page 163: Setup Meny

    INSTÄLLNINGAR SETUP MENY SETUP-menyn tillåter att olika ljud-/bildinställningar och justeringar av funktioner utförs med hjälp av fjärrkontrollen. Meny/undermeny Objekt Funktion Sida System Skärmsläckare Aktiverar/avaktiverar skärmsläckaren. Automatisk Ställer in spelaren på att starta skivuppspelning automatiskt. skivuppspelning HDMI Control Ställer in spelaren för att ta emot kontrollsignalen från Allmänna fjärrkontrollen på...
  • Page 164 SETUP MENY Meny/undermeny Objekt Funktion Sida 3D uppspelning Väljer 3D- eller 2D-video. TV Screen Ställer in skärmformatet för den anslutna TV:n och justerar videoutmatningen. Upplösning Väljer upplösning för utmatad video. Display inställningar TVsystem Ställer in TVsystem på NTSC/PAL/Multi. Färgrymd Ställer in Färgrymd från YCbCr 4:4:4/YCbCr 4:2:2/Full RGB/RGB.
  • Page 165: Exempel På Användning Av Setup-Menyn

    SETUP MENY ■ Exempel på användning av 3. Välj en menypost. SETUP-menyn Tryck på 5/a för att välja Föräldrakontroll och Du måste öppna SETUP-menyskärmen för att utföra tryck sedan på ENTER eller 3. inställningarna på spelaren. Nedan förklaras de grundläggande manövreringarna för SETUP-menyn. STATUS SUBTITLE ANGLE...
  • Page 166: Allmänna Inställningar

    SETUP MENY ■ Allmänna inställningar Nätverkskontroll Du kan ställa in kontroll via Ethernet på på/av. Den här Standardinställningarna är markerade med “ ”. spelaren har YNC-protokollet (Yamaha Network Control). System På, Av Skärmsläckare Du kan ställa in skärmsläckaren på på/av.
  • Page 167 SETUP MENY Språk Säkerhet Ändra lösenord Du kan välja språket för visning på skärmen, d.v.s. Du kan ställa in ett lösenord för att ändra Föräldrakontroll- meddelanden eller menyn som visas på skärmen som nivån och Landskod. Se “Föräldrakontroll” (s. 31) och SETUP-menyn.
  • Page 168: Display Inställningar

    SETUP MENY ■ Display inställningar Nätverk Standardinställningarna är markerade med “ ”. Internetuppkoppling Ställ in detta objekt på Möjliggöra när du använder BD-Live (s. 26), DLNA (s. 21) och programvaru-uppgraderingar från 3D uppspelning nätverket (s. 37). Du kan välja videoutmatning i 3D eller 2D från denna Möjliggöra , Inaktivera spelare.
  • Page 169 SETUP MENY Upplösning Läppsynk Du kan välja videoutmatningsupplösningen från Auto, Du kan ställa in/justera läppsynkfunktionen (s. 42). Auto* Denna spelare justerar läppsynkfunktionen 480i/576i, 480p/576p, 720p, 1080i och 1080p. När du automatiskt. ställer in Auto ställs upplösningen in på det högsta värdet för den anslutna TV:n.
  • Page 170: Ljudinställning

    SETUP MENY ■ Ljudinställning Post Process Standardinställningarna är markerade med “ ”. Uppmixning Ljudutgång Du kan skapa flera kanaler utifrån den 2-kanaliga ljudsignalen. Om du vill skapa flera kanaler, väljer du Koaxial/Optisk NEO6 och sedan Cinema- eller Music-läge. Du kan välja utmatningsläge för COAXIAL-utgången och , NEO6 OPTICAL-uttaget.
  • Page 171: Angående Format För Ljudutmatning

    SETUP MENY ■ Angående format för ljudutmatning HDMI KOAXIAL/OPTISK MIXED 2CH Källformat Bitstream Reencode Bitstream Reencode PCM 2ch PCM 2ch PCM 2ch 2-kanals PCM 5.1ch PCM 5.1ch PCM 2ch 2-kanals PCM 7.1ch PCM 7.1ch PCM 2ch 2-kanals PCM upp till Dolby Digital Dolby Digital Dolby Digital Dolby Digital...
  • Page 172: Angående Format För Videoutmatning

    SETUP MENY ■ Angående format för videoutmatning När TVsystem ställs in på NTSC 1080p Upplösning Auto 480i/576i 480p/576p 720p 1080i 24 Hz Övrigt Uppspelning 1080p 24 Hz av BD HDMI 720p 60 Hz 1080i 60 Hz 1080p 60 Hz annat 1080p 60 Hz Uppspelning 480p...
  • Page 173: Programvaru-Uppgradering

    Kontrollera om det finns tillgängliga uppgraderingar genom att besöka http://download.yamaha.com/downloads/service/top/ ?site=europe.yamaha.com&language=en Tips – Programvaruutvärderingen startas automatiskt när en skiva satts i som innehåller ett uppgraderingspaket.
  • Page 174: Tilläggsinformation

    Vi hänvisar till tabellen nedan när spelaren inte fungerar korrekt. Om du upplever ett problem som inte finns beskrivet nedan eller om föreskrifterna nedan inte hjälper, stäng av spelaren, koppla ur strömkabeln och kontakta närmaste Yamaha-återförsäljare eller serviceverkstad. ■ Ström Problem Tänkbara orsaker och lösningar...
  • Page 175: Bild

    FELSÖKNING ■ Bild Problem Tänkbara orsaker och lösningar Ingen bild. – Kontrollera att alla kablar anslutits på rätt sätt. (s. 10) – Kontrollera att den anslutna TV:n eller AV-mottagaren är inställd på rätt ingångskälla. (s. 10) – Anslut denna spelare till TV:n via VIDEO-utgången (s. 13) med den medföljande videokabeln (stift).
  • Page 176: Nätverk

    FELSÖKNING ■ Nätverk Problem Tänkbara orsaker och lösningar Spelaren ansluter inte till Internet. – Anslut nätverkskabeln ordentligt. – Aktivera ansluten utrustning, som bredbandsrouter eller modem. – Anslut bredbandsroutern och/eller modemet ordentligt. – Ställ in korrekta värden i nätverksinställningen. Kontrollera “Nätverk”. (s. 32) Det går inte att ladda ned BD-Live- –...
  • Page 177: Ordlista

    ORDLISTA AVCHD DivX® AVCHD är ett nytt format (standard) för videokameror DivX® är en populär mediateknik som skapats av DivX, med hög upplösning som kan användas för att spela in Inc. DivX®-mediafiler innehåller mycket komprimerad och spela upp HD-bilder i hög upplösning. video med hög visuell kvalitet och en relativt liten BD-Live™...
  • Page 178: Specifikationer

    SPECIFIKATIONER Linear PCM Sound Pan Scan (PS 4:3) Linjär PCM är ett signalinspelningsformat som används Ett skärmformat som skär av sidorna på bilden för att för ljud-CD och vissa DVD- och Blu-ray-skivor. Ljudet tillåta visning av bredskärmsbilder (16:9) på en TV av på...
  • Page 179: Upphovsrätt

    SPECIFIKATIONER ■ Upphovsrätt – “DivX®, DivX Certified®, DivX Plus™ HD och tillhörande logotyper är registrerade varumärken – Audiovisuellt material kan bestå av som tillhör DivX, Inc. och som används under upphovsrättsskyddade verk som ej får spelas in utan licens.” upphovsrättsinnehavarens tillstånd. Upplys dig om –...
  • Page 180 è pericoloso e può causare incendi, guasti tecnica deve aprire la copertura o cercare di riparare questo e/o ferite. Yamaha non può venire considerata responsabile di dispositivo. danni risultanti dall’uso di quest’unità con un voltaggio superiore a quello prescritto.
  • Page 181 INDICE 1. INTRODUZIONE 4. IMPOSTAZIONI COSA È POSSIBILE FARE CON QUESTO MENU SETUP ............ 27 LETTORE............2 Esempio di funzionamento del menu SETUP....29 Impostazione Generale..........30 DOTAZIONE ............2 Impostazione Display............ 32 INFORMAZIONI SU DISCHI E FILE....3 Impostazione Audio ............34 Tipi di dischi/file utilizzabili con questo lettore.....
  • Page 182 INTRODUZIONE COSA È POSSIBILE FARE CON QUESTO LETTORE Facile impostazione di lingua, risoluzione, rapporto di aspetto p. 18 dello schermo Lingua e impostazioni TV personalizzabili dall’utente. Riproduzione dei dischi Blu-ray™/DVD/CD disponibili in p. 23 commercio Oltre ai dischi Blu-ray™ (dischi BD), questo lettore supporta anche la riproduzione di una varietà...
  • Page 183: Informazioni Su Dischi E File

    INFORMAZIONI SU DISCHI E FILE ■ Tipi di dischi/file utilizzabili con Informazioni sulla gestione della regione questo lettore Destinazione BD video DVD video Australia Codice regionale Numero regionale – In questo lettore è possibile riprodurre dischi da 12 “B” o “ALL” “4”...
  • Page 184: Caricamento Di Un Disco

    L’uso di questi dischi può danneggiare girare verso il basso il lato da riprodurre. la lente. – Rivolgersi al più vicino centro di assistenza Yamaha autorizzato per la pulizia della lente. ■ Avviso sulla visione di immagini video 3D Note –...
  • Page 185: Comandi E Funzioni

    COMANDI E FUNZIONI ■ Pannello anteriore 1 p (On/Standby) (Ricerca all’indietro/Precedente): Premere per passare alla traccia precedente e tenere 2 Porta USB (p. 16) premuto per la ricerca all’indietro. 3 Display del pannello anteriore (Ricerca in avanti/Successivo): 4 Vassoio del disco (p. 4) Premere per passare alla traccia successiva e tenere premuto per la ricerca in avanti.
  • Page 186 COMANDI E FUNZIONI ■ Telecomando 1 Trasmettitore a infrarossi: Fa uscire il segnale a infrarossi. Puntare questa finestra verso il sensore del telecomando (p. 9). Nota 2 MARKER VIDEO : Imposta il Bookmark – Quando il tasto premuto non è disponibile, viene visualizzato il simbolo nell’angolo in alto sinistro (p.
  • Page 187 COMANDI E FUNZIONI 3 Per annullare la sequenza ripetuta, premere A/B. C ZOOM : Ingrandisce/ VIDEO PHOTO “A-B” scompare e la sequenza ripetuta termina. rimpicciolisce. A ogni pressione del tasto le dimensioni dello schermo cambiano (ingrandimento/ Nota rimpicciolimento: 3 fasi ognuna). –...
  • Page 188 COMANDI E FUNZIONI L TOP MENU : Visualizza la schermata del menu principale (p. 42) se il disco contiene un menu. Selezionare la voce desiderata con 5/a /2/3 e ENTER. PROGRAM MARKER DIGEST ZOOM Nota STATUS – A seconda del disco le operazioni specifiche potrebbero essere diverse.
  • Page 189: Caricamento Delle Batterie Nel Telecomando

    Q ON SCREEN: Visualizza il menu a schermo (p. 23). Funzione ID È possibile cambiare l’ID del telecomando per prevenire l’azionamento indesiderato di altri lettori Yamaha, per esempio del lettore DVD. Se l’ID del telecomando è stato Note cambiato, verificare di aver selezionato lo stesso ID –...
  • Page 190: Collegamenti

    COLLEGAMENTI INTRODUZIONE AI COLLEGAMENTI Trovare il metodo di collegamento corrispondente sul proprio apparecchio audio/video. Si raccomanda di utilizzare il terminale HDMI che fornisce audio e video di alta qualità in un singolo collegamento. Se si utilizzano gli altri terminali/ prese, collegare prima il video. e procedere poi con il collegamento audio. Collegare video e audio al ricevitore AV con il cavo HDMI.
  • Page 191 Collegamento video e audio al ricevitore AV HDMI (p. 12) Collegamento video Collegamento audio al ricevitore AV al TV Collegare l’audio al A’ HDMI (p. 12) COAXIAL (p. 14) ricevitore AV. al ricevitore AV OPTICAL (p. 14) COMPONENT (p. 13) L/R (p.
  • Page 192: Collegamento Hdmi

    COLLEGAMENTO HDMI ■ Collegamento al terminale HDMI – È possibile apprezzare immagini e suoni digitali di elevata qualità tramite il terminale HDMI. – Collegare saldamente un cavo HDMI (disponibile in commercio) ai terminali HDMI. – Vedere pagina 35 per informazioni sui formati di uscita audio/video. –...
  • Page 193: Collegamenti Video

    COLLEGAMENTI VIDEO ■ Collegamento alla presa component/video – È possibile apprezzare una precisa riproduzione del colore e immagini di alta qualità tramite le prese component. – Collegare saldamente un cavo video component (disponibile in commercio) o un cavo con spinotti video alle prese COMPONENT o alla presa VIDEO.
  • Page 194: Collegamenti Audio

    COLLEGAMENTI AUDIO ■ Collegamento alla presa/terminale audio digitale – È possibile collegare apparecchiature audio o la TV alla presa COAXIAL/terminale OPTICAL. – Collegare saldamente un cavo audio digitale Coassiale (disponibile in commercio) o un cavo ottico (disponibile in commercio) alla presa audio digitale coassiale o al terminale audio digitale ottico. –...
  • Page 195: Collegamento Alle Prese Audio

    COLLEGAMENTI AUDIO ■ Collegamento alle prese audio – È possibile collegare apparecchiature audio o la TV alle prese AUDIO OUT L/R. – Collegare saldamente un cavo Audio/Video (in dotazione) alla presa AUDIO OUT L/R. – Vedere pagina 35 per informazioni sui formati di uscita audio. Attenzione! Non collegare il cavo di alimentazione di questo lettore fino a quando non sono stati completati tutti gli altri collegamenti.
  • Page 196: Rete E Collegamento Usb

    USB potrebbe impedire il corretto funzionamento del lettore. Al terminale Al terminale NETWORK Nota – Yamaha non può garantire che tutte le Dispositivo di archiviazione marche di dispositivi di archiviazione USB (disponibile in commercio) USB funzionino correttamente con il Cavo di rete lettore.
  • Page 197: Altri Collegamenti

    REMOTE CONTROL (OUT) di questo REMOTE CONTROL (OUT/IN). lettore. – Se il ricevitore AV è un prodotto Yamaha ed è in ■ Collegamento del cavo di grado di trasmettere segnali di comando SCENE, è possibile controllare il lettore con la funzione alimentazione SCENE.
  • Page 198: Riproduzione

    RIPRODUZIONE INITIAL WIZARD/INSTALLAZIONE RAPIDA ■ Impostazione con Initial Wizard/ 4 Premere 5/a per selezionare il rapporto di aspetto dello schermo, quindi premere ENTER. Per dettagli Installazione rapida sulle voci di impostazione, vedere “Teleschermo” Initial Wizard/Installazione rapida consente l’agevole (p. 32). impostazione di lingua, risoluzione e rapporto di aspetto Installazione rapida è...
  • Page 199: Menu Home/Media

    MENU HOME/MEDIA I menu HOME e MEDIA consentono di sfogliare e quindi riprodurre file multimediali presenti su data disc, Operazioni comuni per la riproduzione dispositivi di archiviazione USB e sulla propria rete. dei file in una cartella selezionata Esempio: Selezione del file di un filmato su un Nota dispositivo di archiviazione USB –...
  • Page 200 MENU HOME/MEDIA 4 Selezionare la cartella Foto, Musica, Video o AVCHD 6 Selezionare il file che si desidera riprodurre, quindi che si desidera riprodurre, quindi premere ENTER. premere ENTER. Per tornare alla cartella precedente, premere 2 o Quando viene selezionato un file video, parte la selezionare riproduzione.
  • Page 201: Uso Dei Contenuti Della Rete

    MENU HOME/MEDIA ■ Uso dei contenuti della rete Note Questo lettore è un lettore di supporti digitali certificati – La riproduzione e la qualità del funzionamento DLNA. È possibile gestire contenuti di foto, musica e potrebbero essere influenzate dalle condizioni della video archiviati su server DLNA nelle propria rete propria rete domestica.
  • Page 202: Uso Dei Servizi Di Rete

    – Alcuni contenuti potrebbero essere disponibili solamente per determinati paesi e presentati in determinate lingue. – Yamaha non dichiara né garantisce che i servizi di contenuti continueranno a essere forniti o disponibili per un determinato periodo di tempo e nega qualunque garanzia, esplicita o implicita, in tal senso.
  • Page 203: Funzionamento Di Riproduzione Avanzata

    FUNZIONAMENTO DI RIPRODUZIONE AVANZATA Questo capitolo spiega la modalità di riproduzione dei dischi BD e DVD disponibili in commercio, dei dischi CD – Normale e dei dischi DVD-RW/R registrati. – Shuffle CH (capitolo) – Shuffle TT (titolo) Nota – Shuffle All –...
  • Page 204: Menu Di Stato

    FUNZIONAMENTO DI RIPRODUZIONE AVANZATA ■ Menu di stato MUSIC Mostra varie impostazioni, quali l’impostazione dei Esempio: Le icone durante la riproduzione di file sottotitoli, dell’angolazione e il numero di titolo/capitolo/ musicali traccia in corso di riproduzione. Per visualizzare il menu di stato, premere STATUS.
  • Page 205: Uso Dei Bookmark

    FUNZIONAMENTO DI RIPRODUZIONE AVANZATA ■ Uso dei Bookmark 2 Premere ENTER per programmare l’ordine di VIDEO riproduzione. Questa funzione consente l’impostazione di un Bookmark Per i dischi audio, premere 5/a per selezionare una in uno specifico punto del video. Una volta impostato il traccia desiderata, quindi premere ENTER.
  • Page 206: Riproduzione Di Bonusview™ E Bd-Live

    Video principale Video secondario essere necessario del tempo. Note – Yamaha non può garantire che tutte le marche di dispositivi di archiviazione USB funzionino correttamente con il lettore. – Non utilizzare un cavo di prolunga USB quando si collega un dispositivo di archiviazione USB alla porta USB del lettore.
  • Page 207: Menu Setup

    IMPOSTAZIONI MENU SETUP Il Menu SETUP abilita varie impostazioni e regolazioni audio/visive per le funzioni utilizzando il telecomando. Menu/Menu secondario Voce Funzione Pagina Sistema Screen Saver Imposta l’attivazione/disattivazione dello screen saver. Auto Riproduzione Imposta la riproduzione automatica del disco al momento del disco suo inserimento nel lettore.
  • Page 208 MENU SETUP Menu/Menu secondario Voce Funzione Pagina Uscita 3D Seleziona i video 3D o 2D. Teleschermo Imposta il rapporto di aspetto dello schermo del TV collegato e regola l’uscita video. Risoluzione Seleziona la risoluzione dell’uscita video. Impostazione Display Sistema TV Seleziona il Sistema TV tra NTSC/PAL/Multi.
  • Page 209: Esempio Di Funzionamento Del Menu Setup

    MENU SETUP ■ Esempio di funzionamento del 3. Selezionare una voce del menu. menu SETUP Premere 5/a per selezionare Parental Control, È necessario richiamare la schermata menu SETUP per quindi premere ENTER o il tasto cursore 3. eseguire le regolazioni sul lettore. Quella che segue è la spiegazione per il funzionamento di base del menu SETUP.
  • Page 210: Impostazione Generale

    ■ Impostazione Generale Controllo Network È possibile impostare l’attivazione/disattivazione del Le impostazioni predefinite sono contrassegnate con “ ”. controllo via Ethernet. Il lettore utilizza il protocollo Yamaha Network Control (YNC). Sistema Acceso, Spento Screen Saver È possibile impostare l’attivazione/disattivazione dello Note screen saver.
  • Page 211 MENU SETUP Nota Lingua – Alcuni dischi non sono compatibili con questa funzione. È possibile selezionare la lingua dell’On Screen Display DivX(R) VOD DRM che rappresenta i messaggi o il menu visualizzati sullo schermo quali il menu SETUP. È possibile visualizzare il codice di registrazione per i video DivX(R).
  • Page 212: Impostazione Display

    MENU SETUP ■ Impostazione Display Rete Le impostazioni predefinite sono contrassegnate con “ ”. Connessione Internet Impostare questa voce per Attivare quando si utilizza BD- Live (p. 26), DLNA (p. 21) e l’aggiornamento del software Uscita 3D dalla rete (p. 37). È...
  • Page 213 MENU SETUP Risoluzione Lyp Sync È possibile impostare/regolare la funzione Lyp Sync (p. 42). È possibile selezionare la risoluzione di uscita video tra Auto* Questo lettore regola automaticamente la funzione Auto, 480i/576i, 480p/576p, 720p, 1080i e 1080p. Se Lyp Sync. impostata su Auto, la risoluzione viene impostata Manuale È...
  • Page 214: Impostazione Audio

    MENU SETUP ■ Impostazione Audio Impostazione diffusori Le impostazioni predefinite sono contrassegnate con “ ”. Downmix 2 canali Uscita audio È possibile selezionare il metodo di downmix analogico a 2 canali tra Stereo o Lt/Rt. Coassiale/Ottico Lt/Rt Selezionare questa voce se l’unità è collegata a un È...
  • Page 215: Informazioni Sui Formati Di Uscita Audio

    MENU SETUP ■ Informazioni sui formati di uscita audio HDMI COAXIAL/OPTICAL MIXED 2CH Formato sorgente Bitstream Ricodifica Bitstream Ricodifica PCM 2ch PCM 2ch PCM 2ch PCM 5.1ch PCM 5.1ch PCM 2ch PCM 7.1ch PCM 7.1ch PCM 2ch PCM fino a Dolby Digital Dolby Digital Dolby Digital Dolby Digital...
  • Page 216: Informazioni Sui Formati Di Uscita Video

    MENU SETUP ■ Informazioni sui formati di uscita video Se Sistema TV è impostato su NTSC 1080p Risoluzione Auto 480i/576i 480p/576p 720p 1080i 24Hz Altri Riproduzione 1080p 24 Hz HDMI 720p 60 Hz 1080i 60 Hz 1080p 60 Hz altri 1080p 60 Hz Riproduzione 480p...
  • Page 217: Aggiornamento Del Software

    Per verificare la disponibilità di aggiornamenti software, visitare http://download.yamaha.com/downloads/service/top/ ?site=europe.yamaha.com&language=en Suggerimento – L’aggiornamento del software viene avviato automaticamente dopo il caricamento del disco che contiene il pacchetto dei file di aggiornamento.
  • Page 218: Informazioni Aggiuntive

    Consultare la tabella qui di seguito nel caso il lettore non funzioni correttamente. Se il problema riscontrato non risultasse elencato qui di seguito o se le istruzioni fornite non fossero d’aiuto, spegnere il lettore, scollegare il cavo di alimentazione e contattare il più vicino rivenditore o centro di assistenza Yamaha autorizzato. ■ Alimentazione...
  • Page 219: Immagine

    RISOLUZIONE DEI PROBLEMI ■ Immagine Problema Possibili cause e soluzioni Nessuna immagine. – Accertarsi che i cavi siano stati collegati correttamente. (p. 10) – Accertarsi che la TV o il ricevitore AV collegato sia impostato sull’ingresso corretto. (p. – Collegare il lettore alla TV con la presa VIDEO (p. 13) utilizzando il cavo con spinotti video in dotazione.
  • Page 220: Rete

    RISOLUZIONE DEI PROBLEMI ■ Rete Problema Possibili cause e soluzioni Impossibile collegarsi a Internet. – Collegare correttamente il cavo di rete. – Accendere il dispositivo collegato, quale un router o un modem a banda larga. – Collegare correttamente il router e/o il modem a banda larga. –...
  • Page 221: Glossario

    GLOSSARIO AVCHD Deep Color AVCHD è un nuovo formato (standard) per le Deep Color si riferisce all’uso di varie profondità di videocamere ad alta definizione utilizzabile per colore nelle visualizzazioni, a partire dalle profondità a registrare e riprodurre immagini HD ad alta risoluzione. 24-bit nelle precedenti versioni delle specifiche HDMI.
  • Page 222: Dati Tecnici

    DATI TECNICI DTS-HD Master Audio Indirizzo Mac DTS-HD Master Audio è una nuova tecnologia di L’indirizzo Mac è un valore unico assegnato a un compressione audio lossless sviluppata per la nuova dispositivo in rete per scopi di identificazione. generazione di dischi ottici ad alta definizione. Pan Scan (PS 4:3) Dimensioni dello schermo che taglia i lati HDMI...
  • Page 223: Copyright

    DATI TECNICI ■ Copyright – “DivX®, DivX Certified®, DivX Plus™ HD e i loghi associati sono marchi registrati di DivX, Inc. e – Il materiale audiovisivo potrebbe consistere di lavori sono utilizzati con licenza.” soggetti a copyright che non devono essere registrati –...
  • Page 224 Yamaha no se hará realizadas por un técnico cualificado. responsable de ningún daño debido al uso de este aparato con una tensión diferente de la especificada.
  • Page 225 CONTENIDO 1. INTRODUCCIÓN 4. AJUSTES QUÉ PUEDE HACER CON ESTE MENÚ SETUP ............ 27 REPRODUCTOR ..........2 Ejemplo de funcionamiento del menú SETUP ..... 29 Configuración General..........30 PIEZAS INCLUIDAS..........2 Configuración de pantalla ..........32 INFORMACIÓN SOBRE DISCOS Y ARCHIVOS 3 Configuración de audio..........
  • Page 226: Introducción

    INTRODUCCIÓN QUÉ PUEDE HACER CON ESTE REPRODUCTOR Configuración sencilla de idioma, resolución, relación de aspecto pág. 18 de la pantalla Puede ajustar la configuración de idioma y TV. Reproducción de discos Blu-ray™/DVD/CD lanzados pág. 23 comercialmente Además de Blu-ray Discs™ (discos BD), este reproductor también admite la reproducción de otros discos diversos.
  • Page 227: Información Sobre Discos Y Archivos

    INFORMACIÓN SOBRE DISCOS Y ARCHIVOS ■ Tipos de discos/archivos que se Información de gestión de la región pueden utilizar con este reproductor Destino Vídeo BD Vídeo DVD Australia Código de región Número de región – En este reproductor se pueden reproducir discos de 12 “B”...
  • Page 228: Para Cargar Un Disco

    La utilización de esos discos podría dañar ponga boca abajo el lado que va a reproducir. la lente. – Solicite la limpieza de la lente en el centro de atención al cliente aprobado por Yamaha más cercano. ■ Aviso para ver imágenes de vídeo en 3D Notas –...
  • Page 229: Controles Y Funciones

    CONTROLES Y FUNCIONES ■ Panel delantero 1 p (Encendido/En espera) (Búsqueda hacia atrás/Salto hacia atrás): Pulse para saltar hacia atrás y mantenga 2 Puerto USB (pág. 16) pulsado para buscar hacia atrás. 3 Visor del panel delantero (Búsqueda hacia adelante/Salto 4 Bandeja portadiscos (pág.
  • Page 230: Mando A Distancia

    CONTROLES Y FUNCIONES ■ Mando a distancia 1 Transmisor de señales infrarrojas: Emite la señal infrarroja. Oriente esta ventana al sensor del mando a distancia (pág. 9). Nota 2 MARKER VIDEO : Establece un Marcador – En la esquina superior izquierda de la pantalla aparecerá...
  • Page 231 CONTROLES Y FUNCIONES B p: Enciende el reproductor o lo pone en modo de K A/B : Permite VIDEO MUSIC espera. reproducir una parte específica que desee repetir. C ZOOM : Ampliar/reducir VIDEO PHOTO 1 Pulse A/B en la escena donde desee establecer el zoom.
  • Page 232 CONTROLES Y FUNCIONES L TOP MENU : Muestra la pantalla de menú principal (pág. 42) si el disco contiene un menú. Seleccione el elemento deseado mediante 5/a /2/3 y ENTER. PROGRAM MARKER DIGEST ZOOM Nota STATUS – Las operaciones concretas pueden diferir dependiendo del disco.
  • Page 233: Instalación De Las Pilas En El Mando A Distancia

    (pág. 23). Función ID Puede modificar el ID del mando a distancia para evitar una utilización no deseada de otro reproductor Yamaha, como un reproductor de DVD. Si modifica el ID del Notas mando a distancia, seleccione el mismo ID para la unidad –...
  • Page 234: Conexiones

    CONEXIONES INTRODUCCIÓN A LAS CONEXIONES Encuentre el método de conexión que corresponde a su equipo de vídeo/audio. Le recomendamos que utilice el terminal HDMI que ofrece audio y vídeo digital de alta calidad en una única conexión. Si utiliza los demás terminales/conectores, conecte el vídeo en primer lugar.
  • Page 235 Conexión de audio y vídeo al receptor de A/V HDMI (pág. 12) Conexiones de audio para Conexiones para vídeo el receptor de A/V al televisor Conecte el audio al A’ HDMI (pág. 12) COAXIAL (pág. 14) receptor de AV. al receptor de A/V OPTICAL (pág.
  • Page 236: Hdmi Conexión

    HDMI CONEXIÓN ■ Conexión con el terminal HDMI – Puede disfrutar de imagen y sonido digital de alta calidad a través del terminal HDMI. – Conecte con firmeza un cable HDMI (de venta en el comercio) a los terminales HDMI. –...
  • Page 237: Conexiones De Vídeo

    CONEXIONES DE VÍDEO ■ Conexión a la toma de vídeo componente – Puede disfrutar de una reproducción de color precisa y de imágenes de alta calidad a través de las tomas de componente. – Conecte con firmeza un cable de vídeo componente (vendido en comercios) o un cable de clavijas de vídeo a la toma COMPONENT/toma de VIDEO.
  • Page 238: Conexiones De Audio

    CONEXIONES DE AUDIO ■ Conexión con el terminal/toma de audio digital – Puede conectar el equipo de audio o el televisor en la toma COAXIAL o el terminal OPTICAL. – Conecte con firmeza un cable de audio digital coaxial (de venta en el comercio) o un cable óptico (de venta en el comercio) a la toma de audio digital coaxial o al terminal de audio digital óptico.
  • Page 239: Conexión Con Las Tomas De Audio

    CONEXIONES DE AUDIO ■ Conexión con las tomas de audio – Puede conectar el equipo de audio o el televisor en las tomas AUDIO OUT L/R. – Conecte con firmeza un cable de audio/vídeo (suministrado) al terminal AUDIO OUT L/R. –...
  • Page 240: Conexión De Red Y Usb

    Al terminal NETWORK Nota Dispositivo de memoria USB – Yamaha no puede garantizar que todas (de venta en el comercio) las marcas de dispositivos de memoria Cable de red USB funcionen con este reproductor. (de venta en el comercio) Consejo –...
  • Page 241: Otras Conexiones

    SCENE a la toma REMOTE REMOTE CONTROL (OUT/IN). CONTROL (OUT) de este reproductor. – Si su receptor de AV es un producto Yamaha y tiene ■ Conexión del cable de la capacidad de transmitir señales de control SCENE, puede controlar el reproductor con la alimentación...
  • Page 242: Reproducción

    REPRODUCCIÓN ASISTENTE INICIAL/CONFIGURACIÓN SENCILLA ■ Configuración con el Asistente 4 Pulse 5/a para seleccionar la relación de aspecto de pantalla, a continuación pulse ENTER. Para más inicial/Configuración Sencilla detalles sobre la configuración de elementos, consulte Asistente inicial/Configuración Sencilla le permite “Pantalla de TV”...
  • Page 243: Menú Home/Media

    MENÚ HOME/MEDIA Los menús HOME y MEDIA le permiten examinar y reproducir archivos multimedia en discos de datos, Operaciones comunes para la dispositivos de memoria USB y su red. reproducción de archivos en una carpeta seleccionada Nota Ejemplo: Selección de un archivo de película en un –...
  • Page 244 MENÚ HOME/MEDIA 4 Seleccione la carpeta Foto, Música, Vídeo o AVCHD 6 Seleccione el archivo que desea reproducir, a que desea reproducir, a continuación pulse ENTER. continuación pulse ENTER. Para volver a la carpeta principal, pulse 2 o seleccione Cuando se selecciona un archivo de vídeo se inicia la reproducción.
  • Page 245: Uso Del Contenido De Red

    MENÚ HOME/MEDIA ■ Uso del contenido de red Notas Este reproductor es un reproductor multimedia digital – La calidad de funcionamiento y reproducción podría certificado para DLNA. Puede administrar contenido de verse afectada por las condiciones de la red fotos, música y vídeo almacenado en servidores DLNA en doméstica.
  • Page 246: Uso De Servicios De Red

    – Es posible que parte del contenido sólo esté disponible para países específicos y que se presente en idiomas específicos. – Yamaha no representa ni garantiza que los servicios de contenido se seguirán proporcionando o estarán disponibles durante un periodo de tiempo concreto, y se rechaza cualquier garantía de este tipo, ya sea expresa o implícita.
  • Page 247: Funcionamiento De Reproducción Avanzado

    FUNCIONAMIENTO DE REPRODUCCIÓN AVANZADO En este capítulo se explica la reproducción de discos BD y DVD de venta en el comercio, CD y discos DVD-RW/R – Normal grabados. – Shuffle CH (capítulo) – Shuffle TT (título) Nota – Shuffle All –...
  • Page 248: Menú De Estado

    FUNCIONAMIENTO DE REPRODUCCIÓN AVANZADO ■ Menú de estado MUSIC Muestra varios ajustes, cómo los subtítulos, el ángulo y el Ejemplo: Iconos cuando se reproduce un archivo de número de título/capítulo/pista reproducido actualmente. música Para mostrar el menú de estado, pulse STATUS. El menú de estado consta de los siguientes menús.
  • Page 249: Uso De Marcador

    FUNCIONAMIENTO DE REPRODUCCIÓN AVANZADO ■ Uso de Marcador 2 Pulse ENTER para programar el orden de VIDEO reproducción. Le permite establecer un Marcador en un punto Para un disco de audio, pulse 5/a para seleccionar especificado del vídeo. Después de establecer el una pista deseada y, a continuación, pulse ENTER.
  • Page 250: Disfrute De Bonusview™ Y Bd-Live

    Vídeo principal Vídeo secundario (lectura/escritura) los datos. Notas – Yamaha no puede garantizar que todas las marcas de dispositivos de memoria USB funcionen con este reproductor. – No utilice un cable de extensión USB cuando conecte un dispositivo de memoria USB al puerto USB del reproductor.
  • Page 251: Ajustes

    AJUSTES MENÚ SETUP El Menú SETUP permite realizar diversos ajustes y configuraciones audio/visuales en las funciones utilizando el mando a distancia. Menú/Submenú Elemento Función Página Sistema Protector de pantalla Activa/desactiva el protector de pantalla. Reproducción Ajusta el reproductor para que inicie automáticamente la Automática Disco reproducción del disco.
  • Page 252 MENÚ SETUP Menú/Submenú Elemento Función Página Salida 3D Selecciona vídeos en 3D o 2D. Pantalla de TV Ajusta la relación de aspecto de la pantalla del televisor conectado, y ajusta la salida de vídeo. Resolución Selecciona la resolución del vídeo de salida. Configuración de pantalla Sistema de TV...
  • Page 253: Ejemplo De Funcionamiento Del Menú Setup

    MENÚ SETUP ■ Ejemplo de funcionamiento del 3. Seleccione un elemento del menú. menú SETUP Pulse 5/a para seleccionar Control Paterno, a Debe llamar a la pantalla de menú SETUP para realizar continuación pulse ENTER o el cursor 3. los ajustes en el reproductor. A continuación se explican las operaciones básicas del menú...
  • Page 254: Configuración General

    ■ Configuración General Control de Red Puede activar el control a través de Ethernet. Este Los ajustes predeterminados están marcados con “ ”. reproductor utiliza el protocolo Yamaha Network Control (YNC). Sistema Protector de pantalla Activar, Desactivar Puede definir el protector de pantalla en activado o desactivado.
  • Page 255 MENÚ SETUP Idioma Seguridad Cambiar Contraseña Puede seleccionar el idioma de pantalla, es decir, el menú Puede ajustar la contraseña para cambiar el nivel de o los mensajes mostrados en pantalla como, por ejemplo, Control Paterno y Código de país. Consulte “Control el menú...
  • Page 256: Configuración De Pantalla

    MENÚ SETUP ■ Configuración de pantalla Los ajustes predeterminados están marcados con “ ”. Conexión a Internet Defina este elemento en Permitir cuando utilice BD-Live (pág. 26), DLNA (pág. 21) y actualice el software desde la red Salida 3D (pág. 37). Puede seleccionar salida de vídeo en 3D o 2D desde este Permitir , Desactivar...
  • Page 257 MENÚ SETUP Resolución Sincronismo de labios Puede seleccionar la resolución de salida de vídeo entre Puede definir o ajustar la función Sincronismo de labios Auto, 480i/576i, 480p/576p, 720p, 1080i y 1080p. Cuando (pág. 42). se define en Auto, la resolución se ajusta a la resolución Auto* Este reproductor ajusta la función Sincronismo de máxima según el televisor conectado.
  • Page 258: Configuración De Audio

    MENÚ SETUP ■ Configuración de audio Ajuste de altavoz Los ajustes predeterminados están marcados con “ ”. Mezcla descendente 2 Canales Salida de audio Puede seleccionar 2 canales analógico como método de mezcla descendente desde Estéreo o It/Dt. Coaxial/Óptica It/Dt Seleccione este elemento si la unidad está...
  • Page 259: Formatos De Salida De Audio

    MENÚ SETUP ■ Formatos de salida de audio HDMI COAXIAL/OPTICAL MIXED 2CH Formato de origen Bitstream Recodificar Bitstream Recodificar PCM 2 canales PCM 2 canales PCM 2 canales 2 canales PCM 5.1 canales PCM 5.1 canales PCM 2 canales 2 canales PCM 7.1 canales PCM 7.1 canales PCM 2 canales...
  • Page 260: Acerca De Los Formatos De Salida De Vídeo

    MENÚ SETUP ■ Acerca de los formatos de salida de vídeo Si Sistema de TV se define en NTSC 1080p Resolución Auto 480i/576i 480p/576p 720p 1080i 24 Hz Otros Reproducción 1080p 24 Hz de BD HDMI Máx. Máx. Máx. 720p 60 Hz 1080i 60 Hz 1080p 60 Hz otros...
  • Page 261: Actualización De Software

    Para comprobar la disponibilidad de una actualización de software, visite http://download.yamaha.com/downloads/service/top/ ?site=europe.yamaha.com&language=en Consejo – La actualización del software se inicia automáticamente tras cargar el disco que contiene el paquete de actualización.
  • Page 262: Información Adicional

    Consulte la tabla inferior cuando el equipo no funcione correctamente. Si el problema que usted tiene no aparece en la lista inferior o las instrucciones no le sirven de ayuda, apague este reproductor, desenchufe el cable de alimentación y póngase en contacto con un centro de servicio o concesionario Yamaha autorizado. ■ Alimentación...
  • Page 263: Imagen

    RESOLUCIÓN DE PROBLEMAS ■ Imagen Problema Causas posibles y soluciones No hay imagen. – Asegúrese de que los cables están correctamente conectados. (pág. 10) – Asegúrese de que el televisor o receptor de A/V conectado está ajustado a la entrada correcta.
  • Page 264: Red

    RESOLUCIÓN DE PROBLEMAS ■ Red Problema Causas posibles y soluciones No se puede conectar a Internet. – Conecte correctamente el cable de red. – Encienda el equipo conectado como, por ejemplo, un módem o enrutador de banda ancha. – Conecte correctamente el módem y/o el enrutador de banda ancha. –...
  • Page 265: Glosario

    GLOSARIO AVCHD DivX® AVCHD es un nuevo formato (estándar) para cámaras DivX® es una tecnología multimedia popular creada de vídeo de alta definición que se puede utilizar para por DivX, Inc. Los archivos multimedia DivX® grabar y reproducir imágenes de alta definición (HD). contienen vídeo muy comprimido con una alta calidad BD-Live™...
  • Page 266: Especificaciones

    ESPECIFICACIONES Buzón (LB 4:3) Dirección MAC Un tamaño de pantalla con barras negras en las partes La dirección MAC es un valor único asignado a un superior e inferior de la imagen para permitir la dispositivo de red para fines identificativos. visualización de material en pantalla ancha (16:9) en un Panorámico (PS 4:3) Un tamaño de pantalla que recorta los costados de la...
  • Page 267: Propiedad Intelectual

    ESPECIFICACIONES ■ Propiedad intelectual – “DivX®, DivX Certified®, DivX Plus™ HD y los logotipos asociados son marcas comerciales – El material audio-visual puede consistir de productos registradas de DivX, Inc. y se utilizan con licencia.” con propiedad intelectual que no se deben grabar sin –...
  • Page 268 14 Probeer niet zelf wijzigingen in dit toestel aan te brengen of later nog eens iets in kunt opzoeken. het te repareren. Neem contact op met erkend Yamaha 2 Installeer dit toestel op een goed geventileerde, koele, droge servicepersoneel wanneer u vermoedt dat het toestel reparatie en schone plek —...
  • Page 269 INHOUDSOPGAVE 1. INLEIDING 4. INSTELLINGEN WAT KUNT U DOEN MET DEZE SPELER..2 SETUP-MENU............ 27 BIJGELEVERDE ONDERDELEN ....... 2 Voorbeeld van de werking van het SETUP-menu ..29 Instellingen Algemeen ..........30 OVER SCHIJVEN EN BESTANDEN....3 Display Setting.............. 32 Schijf-/bestandstypes die u met deze speler kunt Audio Setting ..............
  • Page 270: Inleiding

    INLEIDING WAT KUNT U DOEN MET DEZE SPELER Eenvoudige instelling van taal, resolutie, beeldverhouding p. 18 U kunt taal- en tv-instellingen doorvoeren. p. 23 In de handel verkrijgbare Blu-ray™/DVD/CD schijven afspelen Naast Blu-ray Discs™ (BD schijven) kunt u met deze spelerook verschillende andere types schijven afspelen.
  • Page 271: Over Schijven En Bestanden

    OVER SCHIJVEN EN BESTANDEN ■ Schijf-/bestandstypes die u met Regiobeheerinformatie deze speler kunt gebruiken Bestemming BD-Video DVD-Video Australië Regiocode “B” of Regionummer “4” of – Schijven van 12 cm en 8 cm kunnen met deze speler “ALLEN” “ALLEN” worden afgespeeld. Gebruik geen 8 naar 12 cm- adapter.
  • Page 272: Een Schijf Laden

    – Neem contact op met het dichtstbijzijnde servicecentrum goedgekeurd door Yamaha om de lens te laten schoonmaken. ■ Melding voor het bekijken van 3D- videobeelden Opmerkingen –...
  • Page 273: Bediening En Functies

    BEDIENING EN FUNCTIES ■ Voorpaneel 1 p (Aan/Stand-by) (Achterwaarts zoeken/Achterwaarts overslaan): Druk op deze knop om achterwaarts over 2 USB-poort (p. 16) te slaan en houd deze ingedrukt om terug te zoeken. 3 Display voorpaneel (Voorwaarts zoeken/Voorwaarts 4 Schijflade (p. 4) overslaan): Druk op deze knop om voorwaarts over te slaan en (Uitwerpen) (p.
  • Page 274: Afstandsbediening

    BEDIENING EN FUNCTIES ■ Afstandsbediening 1 Infraroodzender: verstuurt infraroodsignalen. Richt dit venster op de sensor van de afstandsbediening (p. Opmerking 2 MARKER VIDEO : stelt Bookmark (p. 25) op – wordt in de linkerbovenhoek van het scherm weergegeven als de ingedrukte knop niet een specifiek punt van een film in.
  • Page 275 BEDIENING EN FUNCTIES C ZOOM K A/B : zoomt in/uit. Elke : speelt een VIDEO PHOTO VIDEO MUSIC keer dat u de toets indrukt, verandert het formaat van bepaalt deel dat u wilt herhalen opnieuw af. het scherm (inzoomen/uitzoomen: elk met 3 stappen). 1 Druk op A/B bij de scène waar u het beginpunt wilt instellen.
  • Page 276 BEDIENING EN FUNCTIES L TOP MENU : geeft het hoofdmenuscherm weer (p. 42) als de schijf een menu bevat. Selecteer het gewenste item met 5/a /2/3 en ENTER. PROGRAM MARKER DIGEST ZOOM Opmerking STATUS – Afhankelijk van de schijf kunnen specifieke handelingen verschillend zijn.
  • Page 277: De Batterijen In De Afstandsbediening Plaatsen

    ID-functie U kunt het ID van de afstandsbediening wijzigen om ongewenste bediening te voorkomen van een andere Yamaha-speler, zoals een DVD-speler. Als u het ID van Opmerkingen de afstandsbediening gewijzigd hebt, dient u ervoor te – Stel de afstandsbediening niet bloot aan schokken, zorgen dat u hetzelfde ID selecteert voor het water of vocht.
  • Page 278: Aansluitingen

    AANSLUITINGEN INLEIDING TOT DE AANSLUITINGEN Zoek de corresponderende aansluitmethode op uw video/audio-apparatuur. Wij raden aan dat u de HDMI-aansluiting gebruikt die digitale audio en video van hoge kwaliteit biedt via één enkele aansluiting. Als u gebruik maakt van de andere aansluitingen, sluit dan de video eerst aan. Maak daarna de audioverbindingen. Sluit video en audio aan op de AV- ontvanger met een HDMI-kabel.
  • Page 279 Video- en audioaansluiting op AV-ontvanger HDMI (p. 12) Videoaansluiting Audioaansluiting op AV-ontvanger naar tv Sluit audio aan op A’ HDMI (p. 12) COAXIAL (p. 14) AV-ontvanger. naar AV-ontvanger OPTICAL (p. 14) COMPONENT (p. 13) L/R (p. 15) VIDEO (p. 13) Video- en audioaansluiting op tv A’...
  • Page 280: Hdmiaansluitingen

    HDMIAANSLUITINGEN ■ Gebruik van de HDMI-aansluiting – Via de HDMI-aansluiting kunt u genieten van digitale beelden en geluid van hoge kwaliteit. – Sluit een HDMI-kabel (los verkrijgbaar) stevig aan op de HDMI-aansluitingen. – Zie pagina 35 voor informatie over audio/video-uitgangsformaten. –...
  • Page 281: Videoaansluitingen

    VIDEOAANSLUITINGEN ■ Gebruik van de component-/videoaansluiting – Via de componentaansluitingen kunt u genieten van een nauwkeurige kleurweergave en beelden van hoge kwaliteit. – Sluit een componentvideokabel (los verkrijgbaar) of een videokabel stevig aan op de COMPONENT-aansluitingen/ VIDEO-aansluiting. – Zie pagina 36 voor informatie over de video-uitgangsformaten. Opgelet! Verbind het netsnoer van deze speler pas als alle aansluitingen gemaakt zijn.
  • Page 282: Audioaansluitingen

    AUDIOAANSLUITINGEN ■ Gebruik van de digitale audioaansluiting – U kunt audioapparatuur of de tv aansluiten op de COAXIAL-aansluiting/OPTICAL-aansluiting. – Sluit een coaxiale digitale audiokabel (los verkrijgbaar) of een optische kabel (los verkrijgbaar) stevig aan op de coaxiale digitale audioaansluiting of de optische digitale audioaansluiting. –...
  • Page 283: Gebruik Van De Audioaansluitingen

    AUDIOAANSLUITINGEN ■ Gebruik van de audioaansluitingen – U kunt audioapparatuur of de tv op de AUDIO OUT L/R-bussen aansluiten. – Sluit op de AUDIO OUT L/R-bus stevig een audio-/videokabel (meegeleverd) aan. – Zie pagina 35 voor informatie over audio-uitgangsformaten. Opgelet! Verbind het netsnoer van deze speler pas als alle aansluitingen gemaakt zijn.
  • Page 284: Netwerk- En Usb-Aansluiting

    OPTICAL VIDEO een USB-verlengkabel is het mogelijk dat de speler niet juist functioneert. Opmerking Naar USB- Naar NETWORK- – Yamaha kan niet garanderen dat de USB- aansluiting aansluiting geheugens van alle merken functioneren met deze speler. USB-geheugen (los verkrijgbaar) Netwerkkabel...
  • Page 285: Overige Aansluitingen

    AV-ontvanger voor meer informatie over de ontvangen door aan te sluiten op de REMOTE SCENE-functie. CONTROL (OUT/IN)-aansluitingen. – U kunt een Yamaha-component (zoals een CD- – Sluit monaurale 3,5 mm-ministekkerkabels (los speler) die de SCENE-functie ondersteunt, verkrijgbaar) stevig aan op de REMOTE CONTROL aansluiten op de REMOTE CONTROL (OUT)- (OUT/IN)-aansluitingen.
  • Page 286: Afspelen

    AFSPELEN INITIËLE WIZARD/SNELINSTELLING ■ Instellingen doorvoeren met 4 Druk op 5/a om de beeldverhouding te selecteren en druk vervolgens ENTER. Zie “TV Scherm” (p. 32) Initiële Wizard/Snelinstelling voor meer informatie over instelitems. Met Initiële Wizard/Snelinstelling kunt u eenvoudig de Snelinstelling is voltooid. taal, resolutie en beeldverhouding instellen.
  • Page 287: Home/Media-Menu

    HOME/MEDIA-MENU Met het HOME- en MEDIA-menu kunt u door multimediabestanden op gegevensschijven, USB- Basishandelingen voor het afspelen geheugens en uw netwerk bladeren en deze afspelen. van bestanden in een gekozen map Voorbeeld: Een filmbestand selecteren op een USB- Opmerking geheugen –...
  • Page 288 HOME/MEDIA-MENU 4 Selecteer de map met foto's, muziek, video's of AVCHD die u wilt afspelen en druk vervolgens op ENTER. Om terug te keren naar de hoofdmap, drukt u op 2 of – Om te genieten van een diavoorstelling met muziek, selecteert u drukt u op HOME om terug te keren naar het HOME-menuscherm terwijl er muziek wordt...
  • Page 289: Netwerkinhoud Gebruiken

    HOME/MEDIA-MENU ■ Netwerkinhoud gebruiken 4 Selecteer het bestand dat u wilt afspelen. Deze speler is een digitale mediaspeler met DLNA- Opmerkingen certificatie. U kunt foto-, muziek- en video-inhoud die – De afspeel- en bedieningskwaliteit kunnen beïnvloed opgeslagen is op een DLNA-server beheren op uw worden door de gesteldheid van uw thuisnetwerk.
  • Page 290: Netwerkservices Gebruiken

    – Sommige inhoud kan alleen voor specifieke landen beschikbaar zijn en kan mogelijk in specifieke talen worden gepresenteerd. – Yamaha representeert of garandeert niet dat inhoudservices gedurende een bepaalde tijdsperiode geleverd of beschikbaar zijn en op een dergelijke garantie, nadrukkelijk of geïmpliceerd, kan geen aanspraak worden gemaakt.
  • Page 291: Geavanceerd Afspelen

    GEAVANCEERD AFSPELEN In dit hoofdstuk vindt u meer informatie over het afspelen van in de handel verkrijgbare BD- en DVD-schijven, CD's – Normaal en opgenomen DVD-RW/R-schijven. – Shuffle CH (hoofdstuk) – Shuffle TT (titel) Opmerking – Shuffle All – Random CH (hoofdstuk) –...
  • Page 292: Statusmenu

    GEAVANCEERD AFSPELEN ■ Statusmenu MUSIC Hier worden verschillende instellingen weergegeven, Voorbeeld: Pictogrammen bij het afspelen van een zoals ondertiteling, camerahoek en de titel/het hoofdstuk/ muziekbestand het nummer van de track die wordt afgespeeld. Om het statusmenu weer te geven, drukt u op STATUS. Het statusmenu bevat de volgende menu's.
  • Page 293: Programma Afspelen

    GEAVANCEERD AFSPELEN ■ Gebruiken 2 Druk op ENTER om de afspeelvolgorde te programmeren. Bookmark VIDEO Druk voor een audioschijf op 5/a om een gewenste Hiermee kunt u een Bookmark invoegen op een bepaald track te selecteren en druk vervolgens op ENTER. punt in een video.
  • Page 294: Genieten Van Bonusview™ En Bd-Live

    (lezen/schrijven). Primaire video Secundaire video Opmerkingen – Yamaha kan niet garanderen dat de USB-geheugens van alle merken met deze speler functioneren. – Gebruik geen USB-verlengkabel bij het aansluiten van een USB-geheugen op de USB-poort van de speler. Bij gebruik van een USB-verlengkabel is het mogelijk dat de speler niet juist functioneert.
  • Page 295 INSTELLINGEN SETUP-MENU Met het SETUP-menu kunt u met behulp van de afstandsbediening diverse geluids-/beeldinstellingen doorvoeren voor de functies. Menu/Submenu Item Functie Pagina Systeem Screensaver De screensaver in-/uitschakelen. Schijf Automatisch Instellen dat de speler discs automatisch begint af te spelen. afspelen HDMI Control Stelt deze speler in om het bedieningssignaal van de Instellingen...
  • Page 296 SETUP-MENU Menu/Submenu Item Functie Pagina 3D Uitgang Selecteert 3D- of 2D-video's. TV Scherm Hier kunt u de beeldverhouding van de aangesloten TV instellen en de video-uitgang afstellen. Resolutie Selecteert de resolutie van de uitgevoerde video. Display Setting TV-systeem Voor het selecteren van het TV-systeem uit NTSC/PAL/ Multi.
  • Page 297: Setup-Menu

    SETUP-MENU ■ Voorbeeld van de werking van het 3. Selecteer een menu-item. SETUP-menu Druk op 5/a om Kinderbeveiliging te selecteren en U moet het SETUP-menuscherm oproepen om de druk vervolgens op ENTER of 3. instellingen voor deze speler door te voeren. Hieronder volgt de uitleg voor de basisbediening van het SETUP-menu.
  • Page 298: Instellingen Algemeen

    ■ Instellingen Algemeen Netwerk Instellingen U kunt bediening via ethernet instellen op aan/uit. Deze De standaardinstellingen zijn aangegeven met “ ”". speler maakt gebruik van het protocol Yamaha Network Control (YNC). Systeem Aan, Uit Screensaver U kunt de screensaver in- of uitschakelen.
  • Page 299 SETUP-MENU DivX(R) VOD DRM Taal U kunt de registratiecode voor DivX(R)-video weergeven. Veiligheid U kunt de schermtaal selecteren die wordt gebruikt voor de meldingen of menu's die worden weergegeven op het Wachtwoord wijzigen scherm, zoals het SETUP-menu. U kunt het wachtwoord instellen voor het wijzigen van het niveau voor Kinderbeveiliging en de Landcode.
  • Page 300: Display Setting

    SETUP-MENU ■ Display Setting Netwerk De standaardinstellingen zijn aangegeven met “ ”". Internetverbinding Stel dit item in op In staat stellen wanneer u BD-Live (p. 26), DLNA (p. 21) en software-upgrade van het netwerk (p. 37) 3D Uitgang gebruikt. U kunt van deze speler 3D- of 2D-video-uitvoer In staat stellen , Uitschakelen selecteren.
  • Page 301 SETUP-MENU Resolutie Lip Sync U kunt de functie Lip Sync (p. 42) instellen/aanpassen. U kunt de uitgevoerde videoresolutie selecteren uit Auto, Auto* Deze speler stelt de functie Lip Sync automatisch af. 480i/576i, 480p/576p, 720p, 1080i en 1080p. Wanneer Auto ingesteld is, wordt de resolutie ingesteld op de Handm.
  • Page 302: Audio Setting

    SETUP-MENU ■ Audio Setting Luidsprekerinstellingen De standaardinstellingen zijn aangegeven met “ ”". 2ch Downmix Audio Output U kunt de down-mixmethode instellen op 2-kanaals analoog met Stereo of Lt/Rt. Coaxial / Optical Lt/Rt Selecteer dit item als dit toestel aangesloten is op een U kunt de uitvoermodus voor de COAXIAL-aansluiting Dolby Pro Logic-decoder.
  • Page 303: Over De Audio-Uitgangsformaten

    SETUP-MENU ■ Over de audio-uitgangsformaten HDMI COAXIAL/OPTICAL MIXED 2CH Bronformaat Bitstream Reencode Bitstream Reencode PCM 2-k PCM 2-k PCM 2-k PCM 5,1-k PCM 5,1k PCM 2-k PCM 7,1-k PCM 7,1-k PCM 2-k Dolby Digital Dolby Digital PCM tot 5,1-k Dolby Digital Dolby Digital PCM 2-k Dolby Digital met SA...
  • Page 304: Over De Video-Uitgangsformaten

    SETUP-MENU ■ Over de video-uitgangsformaten Wanneer TV-systeem ingesteld is op NTSC 1080p Resolutie Auto 480i/576i 480p/576p 720p 1080i 24 Hz Overige BD afspelen 1080p 24 Hz HDMI Max. Max. Max. 720p 60 Hz 1080i 60 Hz 1080p 60 Hz overige 1080p 60 Hz In de handel verkrijgbare...
  • Page 305: Software-Upgrade

    Om na te gaan of er een software-upgrade beschikbaar is, gaat u naar http://download.yamaha.com/downloads/service/top/ ?site=europe.yamaha.com&language=en – De software-upgrade wordt automatisch gestart na het laden van de disc die het pakket met upgradebestanden bevat.
  • Page 306: Aanvullende Informatie

    Raadpleeg de tabel hieronder wanneer de speler niet naar behoren functioneert. Als het probleem niet hieronder vermeld staat of als de aanwijzingen het probleem niet verhelpen, schakelt u de speler uit, haalt u de stekker uit het stopcontact en neemt u contact op met uw dichtstbijzijnde Yamaha-dealer of -servicecentrum. ■ Stroom...
  • Page 307: Beeld

    VERHELPEN VAN STORINGEN ■ Beeld Probleem Mogelijke oorzaken en oplossingen Geen beeld. – Controleer of de kabels juist zijn aangesloten. (p. 10) – Controleer of de juiste ingang op de aangesloten tv of de AV-ontvanger is gekozen. (p. – Sluit deze speler aan op de tv via de VIDEO-aansluiting (p. 13) met de bijgeleverde videokabel.
  • Page 308: Netwerk

    VERHELPEN VAN STORINGEN ■ Netwerk Probleem Mogelijke oorzaken en oplossingen Kan geen verbinding met internet – Sluit de netwerkkabel correct aan. maken. – Schakel de aangesloten apparatuur zoals een breedbandrouter of modem in. – Sluit de breedbandrouter en/of modem juist aan. –...
  • Page 309: Woordenlijst

    WOORDENLIJST AVCHD DivX® AVCHD is een nieuw formaat (standaard) voor HD- DivX® is een populaire mediatechnologie ontwikkeld videocamera's dat gebruikt kan worden voor het door DivX, Inc. DivX®-mediabestanden bevatten sterk opnemen en afspelen van hoge resolutie HD-beelden. gecomprimeerde beelden met een hoogwaardige BD-Live™...
  • Page 310: Specificaties

    SPECIFICATIES Lineair PCM-geluid Pan Scan (PS 4:3) Lineaire PCM is een signaalopnameformaat dat gebruikt Een beeldformaat waarbij de zijkanten van het beeld wordt voor Audio-CD's en voor sommige DVD-discs en zijn afgesneden om breedbeeldmateriaal (16:9) op een Blu-ray-discs. Het geluid op Audio-CD's wordt aangesloten normale 4:3-tv te kunnen weergeven.
  • Page 311: Auteursrechten

    SPECIFICATIES ■ Auteursrechten – DLNA en DLNA CERTIFIED zijn handelsmerken en/of servicemerken van Digital Living Network – Audiovisueel materiaal kan bestaan uit materiaal met Alliance. auteursrecht dat niet mag worden opgenomen zonder – “DivX®, DivX Certified®, DivX Plus™ HD en toestemming van de eigenaar van het auteursrecht.
  • Page 312: Information About Software

    Information about software This product uses the following software. For information (copyright, etc) about each software, read the original sentences stated below. ■ About Linux, Busybox, SquashFS, LIRC, U-boot These requirements apply to the modified work as a whole. If identifiable sections of that work are not derived from the Program, and can be reasonably considered GNU GENERAL PUBLIC LICENSE independent and separate works in themselves, then this License, and its terms, do not...
  • Page 313 This section is intended to make thoroughly clear what is believed to be a consequence <signature of Ty Coon>, 1 April 1989 of the rest of this License. Ty Coon, President of Vice 8. If the distribution and/or use of the Program is restricted in certain countries either This General Public License does not permit incorporating your program into by patents or by copyrighted interfaces, the original copyright holder who places proprietary programs.
  • Page 314 GNU LESSER GENERAL PUBLIC LICENSE If distribution of object code is made by offering access to copy from a designated place, then offering equivalent access to copy the source code from the same place TERMS AND CONDITIONS FOR COPYING, DISTRIBUTION AND satisfies the requirement to distribute the source code, even though third parties are not MODIFICATION compelled to copy the source along with the object code.
  • Page 315 9. You are not required to accept this License, since you have not signed it. However, If you develop a new library, and you want it to be of the greatest possible use to the nothing else grants you permission to modify or distribute the Library or its public, we recommend making it free software that everyone can redistribute and derivative works.
  • Page 316 Original SSLeay License o We don’t promise that this software works. However, we will be interested in any kind of bug reports. (‘as is’ distribution) Copyright (C) 1995-1998 Eric Young (eay@cryptsoft.com) All rights reserved. o You can use this software for whatever you want, in parts or full form, without This package is an SSL implementation written by Eric Young (eay@cryptsoft.com).
  • Page 317 ■ About Expat This package contains C software to implement JPEG image encoding, decoding, and transcoding. JPEG (pronounced “jay-peg”) is a standardized compression method for Copyright (C) 1998, 1999, 2000 Thai Open Source Software Center Ltd full-color and gray-scale images. and Clark Cooper This software implements JPEG baseline, extended-sequential, and progressive compression processes.
  • Page 318 Communications of the ACM, April 1991 (vol. 34 no. 4), pp. 30-44. FILE FORMAT WARS The ISO JPEG standards committee actually promotes different formats like JPEG- (Adjacent articles in that issue discuss MPEG motion picture compression, applications 2000 or JPEG-XR which are incompatible with original DCT-based JPEG and which of JPEG, and related topics.) If you don’t have the CACM issue handy, a PostScript file are based on faulty technologies.
  • Page 319 Greg Roelofs 1.0.1. 1.1. “Contributor” means each entity that creates or contributes to the creation of Tom Tanner Modifications. libpng versions 0.5, May 1995, through 0.88, January 1996, are Copyright (C) 1995, 1.2. “Contributor Version” means the combination of the Original Code, prior 1996 Guy Eric Schalnat, Group 42, Inc.
  • Page 320 Any Modification created by You will be provided to the Initial Developer in Source 7 DISCLAIMER OF WARRANTY. Code form and are subject to the terms of the License. COVERED CODE IS PROVIDED UNDER THIS LICENSE ON AN “AS IS” BASIS, 3.3.
  • Page 321 Software distributed under the License is distributed on an “AS IS” basis, WITHOUT Permission is hereby granted, free of charge, to any person obtaining a copy of the fonts WARRANTY OF ANY KIND, either express or implied. See the License for the accompanying this license (“Fonts”) and associated documentation files (the “Font specific language governing rights and limitations under the License.
  • Page 322 (http://www.yamaha-hifi.com/ or http://www.yamaha-uk.com/ for U.K. resident). The product is guaranteed to be free from defects in workmanship or materials for a period of two years from the date of the original purchase. Yamaha undertakes, subject to the conditions listed below, to have the faulty product or any part(s) repaired, or replaced at Yamaha’s discretion, without any charge for parts or labour.
  • Page 323: Garantie Limitée Pour L'espace Économique Européen Et La Suisse

    Royaume-Uni). Yamaha garantit votre produit contre tout défaut de fabrication, pièces et main d’oeuvre, pour une durée de 2 ans à compter de la première date de vente au détail. Yamaha s’engage, dans les conditions décrites ci-après, à procéder à la réparation du produit défectueux (ou d’un quelconque de ses composants) ou à...
  • Page 324 Begrenzte Garantie für den Europäischen Wirtschaftsraum (EWR) und die Schweiz Herzlichen Dank, dass Sie sich für ein Yamaha Produkt entschieden haben. In dem unwahrscheinlichen Fall, dass die Garantie für das Yamaha-Produkt in Anspruch genommen werden muss, wenden Sie sich bitte an den Händler, bei dem es gekauft wurde. Sollten Sie auf Schwierigkeiten stoßen, wenden Sie sich bitte an die Yamaha Repräsentanz in Ihrem Land.
  • Page 325 Yamaha förbehåller sig rätten att byta ut en produkt mot en av liknande typ och/eller värde och skick, då en viss modell har upphört eller anses ekonomisk att reparera.
  • Page 326: Garanzia Limitata Per L'area Economica Europea (Aee) E La Svizzera

    (o sostituire, a discrezione esclusiva di Yamaha) il prodotto difettoso o qualsiasi sua parte senza alcun addebito per le parti o per il lavoro. Yamaha si riserva il diritto di sostituire un prodotto con uno di tipo, valore e/o condizione simile nel caso un modello particolare non sia più...
  • Page 327 Yamaha se compromete, sujeto a las condiciones listadas más abajo, a reparar el producto o cualquier pieza (o piezas) que tenga defectos, o a sustituirlo, a discreción de Yamaha, sin cobrar ningún honorario por las piezas o la mano de obra.
  • Page 328: Beperkte Garantie Voor De Europese Economische Ruimte En Zwitserland

    (5) Gebreken aan het systeem waarin het product wordt ingebouwd en/of onverenigbaarheid met derde producten. (6) Gebruik van een product dat in de Europese Economische Ruimte en/of Zwitserland werd ingevoerd, maar niet door Yamaha, en dat niet voldoet aan de technische of veiligheidsnormen van het land van gebruik en/of de standaardspecificaties van producten die door Yamaha in de Europese Economische Ruimte en/of Zwitserland worden verkocht.
  • Page 329 © 2011 Yamaha Corporation Printed in China BD-S671_G...

Table des Matières