BFT FAUNUS 600 Mode D'emploi
Table des Matières
Les langues disponibles
Les langues disponibles
Liens rapides
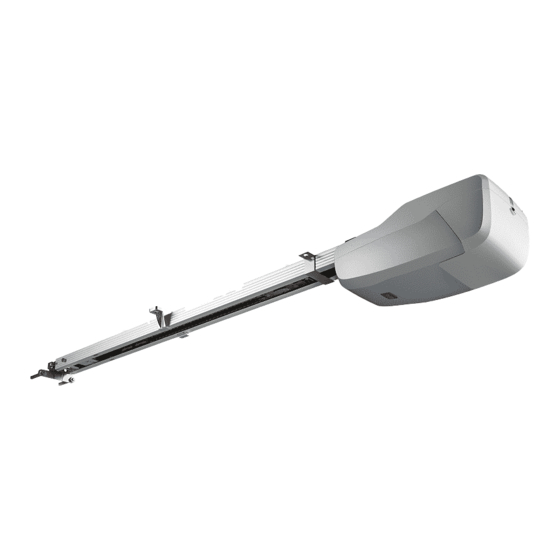
FAUNUS 600
KIT
AUTOMAZIONI PER PORTE SEZIONALI
AUTOMATION FOR SECTIONAL GARAGE DOORS
AUTOMATION POUR PORTES SECTIONALES
GARAGENTORANTRIEB FÜR SEKTIONALTORE
Attenzione! Leggere attentamente le "Avvertenze" all'interno! Caution! Read "Warnings" inside carefully!
Attention! Veuillez lire attentivement les Avertissements qui se trouvent à l'intérieur! Achtung! Bitte lesen Sie aufmerksam die „Hinweise" im Inneren!
Chapitres
Table des Matières

Manuels Connexes pour BFT FAUNUS 600


Sommaire des Matières pour BFT FAUNUS 600
- Page 1 FAUNUS 600 AUTOMAZIONI PER PORTE SEZIONALI AUTOMATION FOR SECTIONAL GARAGE DOORS AUTOMATION POUR PORTES SECTIONALES GARAGENTORANTRIEB FÜR SEKTIONALTORE Attenzione! Leggere attentamente le “Avvertenze” all’interno! Caution! Read “Warnings” inside carefully! Attention! Veuillez lire attentivement les Avertissements qui se trouvent à l’intérieur! Achtung! Bitte lesen Sie aufmerksam die „Hinweise“ im Inneren!
-
Page 39: Avertissements
Nous confirmons que ce produit FAUNUS kit est conforme aux prescriptions essentielles des directives européennes applicables (2006/95/CE, 2004/108/CE, 2006/42/CE, 99/05/CE)� Les déclarations de conformité peuvent être consultées sur le site www�bft-automation�com, dans la section de produit� Les instructions de montage et d'utilisation peuvent être consultées dans la section download�... - Page 40 ETRIER EN OMEGA (n.3) (n.2) RAIL EN TROIS PARTIES RONDELLE Ø8,4-17-1,6 CHEVILLE TYPE FISCHER S10 VIS BOIS M8X40 4,8 ZN VIS AVEC CARRE SOUS TETE M6X80 DOUILLE DENTEE VIS AUTOTARAUDEUSE 6,3X15 VIS TETE HEXAGONALE M8X20 ECROU M8 - FAUNUS 600 KIT...
-
Page 41: Dimensions
DIMENSIONS SCHEMA D’INSTALLATION Installation moteur sur plafond STANDARD Pas fourni 200 mm Installation moteur sur plafond avec hauteur SUPERIEURE (avec rallonge) Pas fourni 200 mm FAUNUS 600 KIT... -
Page 42: Installations Possibles Selon La Hauteur Du Plafond (H)
Lumière de courtoisie Lampe 24V~ 25W max, E14 Pile Modèle 23A 12V Température de fonctionnement -20°C / +60°C Portée 50 / 100 m Degré de protection IPX0 Poids tête moteur 5 kg Bruit <70dB(A) OUTILS NECESSAIRES - FAUNUS 600 KIT... -
Page 43: Verifications Preliminaires
- Vérifier la présence de butées de sécurité < 8 mm ou appliquer des protections en caoutchouc. - Si le vantail ouvre sur un espace public, il faut obligatoirement installer et essayer deux photocellules (nous conseillons leur présence DANS TOUS LES CAS). La hauteur du sol conseillée est 200 mm. FAUNUS 600 KIT... -
Page 44: Securite Pendant L'installation
ATTENTION: composer le rail correctement EN EVITANT LES EVENTUELS DENIVELES Déplacer le connecteur su milieu des deux premiers rails et soulever les ailettes comme le montre la figure. Répéter l'opération avec le deuxième connecteur. 10 mm - FAUNUS 600 KIT... -
Page 45: Montage Etrier Porte Rail Sur Mur
Fixer l'étrier porte rail de la façon indiquée en séquence: Ø10 Ø8 MONTAGE RAIL SUR ETRIER PORTE RAIL Après avoir installé l'étrier porte rail au mur, fixer le rail sur l'étrier de la façon indiquée par la figure: 10 mm FAUNUS 600 KIT... -
Page 46: Fixation Rail Au Plafond
FIXATION RAIL AU PLAFOND 1� Fixer le rail au plafond comme le montre la figure: Ø10 Ø8 ASSEMBLAGE BRAS ENTRAINEMENT: Ø8 MONTAGE ETRIER ANCRAGE SUR SECTIONNELLE: 10 mm ASSEMBLAGE ETRIER ANCRAGE AVEC BRAS ENTRAINEMENT: - FAUNUS 600 KIT... -
Page 47: Fixation Etrier Sas1-Sas2 (Pour Plafond Avec Hauteur Superieure)
- les vis, les chevilles et les rondelles de fixation des étriers au plafond se trouvent à l'intérieur du KIT OPERATEUR. ± L / 2 ± L / 2 SAS 1 SAS 2 SAS 2 SAS 1 VISSERIE KIT ETRIERS VISSERIE KIT OPERATEUR Ø10 Ø8 FAUNUS 600 KIT... -
Page 48: Branchement Sur Reseau Electrique
- Immobiliser les conducteurs à l’aide d’une fixation supplémentaire à proximité des bornes (par exemple, à l’aide d’un collier) afin de séparer nettement les parties sous tension des parties sous très faible tension de sécurité. ACTIVER ALIMENTATION - FAUNUS 600 KIT... -
Page 49: Reglage Des Fins De Course
ERROR! AUTOCONFIGURATION Attention: pendant l'autoconfiguration, la fonction anti-écrasement est désactivée. 1 2 3 4 5 6 7 8 9 10 RADIO RADIO RADIO RADIO DOWN DOWN DOWN DOWN Appuyer pendant 5 sec. AUTO AUTO CLOSE OPEN FAUNUS 600 KIT... -
Page 50: Memorisation De Télécommande
RADIO DOWN DOWN DOWN DOWN appuyer 1 fois ELIMINATION DES TÉLÉCOMMANDES RADIO RADIO RADIO ..DOWN DOWN DOWN appuyer pendant 10 s PHOTOCELLULE EN OPTION (pas fourni) DOWN CLIGNOTANT EN OPTION (pas fourni) - FAUNUS 600 KIT... -
Page 51: Schema Electrique
En fermeture Arrête la fermeture Aucun effet Arrête la fermeture inverse le mouvement en mouvement mouvement après ouvrant complètement le dégagement (*) Si le moteur intercepte un obstacle fixe, il exécute une manœuvre de dégagement. FAUNUS 600 KIT... -
Page 52: Verifications Finales Et Entretien
- Vérifier si les commandes fixes installées une hauteur minimum de 1,5 m ne sont pas accessibles au public et si elles sont visibles des portes mais éloignées des parties en mouvement. - Appliquer de façon permanente les étiquettes d'attention et de danger d'écrasement. - FAUNUS 600 KIT... -
Page 53: Mode D'emploi : Manœuvre Manuelle
25W max cées. Les bornes des batteries ne doivent pas être court-circuitées 23A 12V ou touchées avec les mains. Retirer et éliminer les batteries séparément conformément aux prescriptions des normes en vigueur. REMPLACEMENT D'UN FUSIBLE Fusible: 800 mAT FAUNUS 600 KIT... -
Page 54: Avertissements Pour L'utilisateur
AVERTISSEMENTS POUR L’UTILISATEUR ( I ) professionnel), conformément aux indications du monteur ou du fabricant de la porte. ATTENTION ! Importantes instructions de - Mettre hors tension avant d’accomplir les sécurité� Veuillez lire et suivre attentivement opérations de nettoyage extérieur. tous les avertissements et toutes les instructions - Veillez à... -
Page 55: Registre D'entretien
REGISTRE D’ENTRETIEN Emplacement : Moteur / actionnement : Propriétaire : Photocellules : Dimensions et poids : Radiocommande : Matériel (PVC, aluminium): Clignotant : Date d’installation : Autre : Date Description de l’intervention Nom et signature... - Page 74 - FAUNUS 600 KIT...
- Page 75 FAUNUS 600 KIT...