Table des Matières
Publicité
Les langues disponibles
Les langues disponibles
Liens rapides
ISTRUZIONI PER IL MONTAGGIO
taliano pag. 2
CON ASTE RIENTRANTI - I
BAUANLEITUNG
MIT TELESKOPSPIELERSTANGEN -
Deutsch Seite 10
ASSEMBLY INSTRUCTIONS
English page 18
WITH TELESCOPIC RODS -
GUIDE D'ASSEMBLAGE
Français page 26
AVEC BARRES TELESCOPIQUES -
Prodotto da: Garlando SpA Via Regione Piemonte, 32 Zona Ind. D1 15068 Pozzolo Formigaro (AL) ITALY
Nel ringraziarLa per l'acquisto del nostro prodotto, La preghiamo di leggere e
conservare questo manuale per ogni futuro utilizzo
Publicité
Table des Matières

Manuels Connexes pour Garlando Open Air

Sommaire des Matières pour Garlando Open Air
- Page 1 Français page 26 AVEC BARRES TELESCOPIQUES - Prodotto da: Garlando SpA Via Regione Piemonte, 32 Zona Ind. D1 15068 Pozzolo Formigaro (AL) ITALY Nel ringraziarLa per l'acquisto del nostro prodotto, La preghiamo di leggere e conservare questo manuale per ogni futuro utilizzo...
-
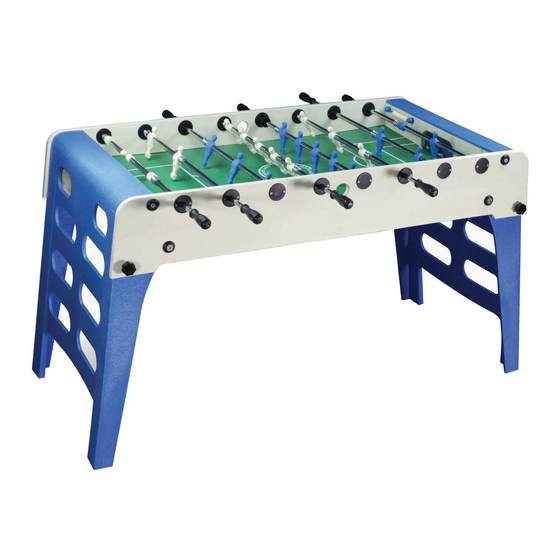
Page 2: Disimballo E Montaggio
ATTENZIONE Non adatto a bambini di età inferiore ai 36 mesi a causa della presenza di piccole palle e parti che possono provocare soffocamento. Leggere attentamente le avvertenze di sicurezza alle pagg. 7-8 DISIMBALLO E MONTAGGIO Importante: tenere lontani i bambini durante tutte le operazioni di montaggio. Per ragioni di sicurezza, si raccomanda fortemente di effettuare il montaggio del calciobalilla in non meno di due persone adulte. - Page 3 Montaggio delle gambe Montare il calciobalilla su una superficie piana. Si consiglia di proteggere sempre il pavimento collocando sotto il tavolo un foglio di cartone protettivo. E’ possibile utilizzare il cartone dell’imballo. Mantenendo il calciobalilla in posizione Avvitare e serrare i 4 bulloni filettati e portare il capovolta, aprire completamente le gambe.
- Page 4 Attenzione: Non installare e non fissare né boccole né manopole prima di avere posizionato tutte le aste. Consultare lo schema nella pagina precedente per accertarsi che le posizione delle aste sia corretta, prima di procedere al montaggio delle boccole. Inserire l’estremità dell’asta senza la flangia nel foro del mobile partendo dall’interno del campo di gioco. Inserire l’estremità...
- Page 5 Montaggio delle boccole ATTENZIONE ! Il marchio INT indica il lato del 2AN201-1 cuscinetto che deve essere Cuscinetto a sfera rivolto verso l’interno del campo gioco. Inserire il cuscinetto 2AN201-1 sull’asta dalla parte dove non c’è la flangia (il cuscinetto a sfera si installa solo sul lato manopola) facendolo scivolare finché...
- Page 6 Accoppiare le due semiflange interne codice 2AN201-24 appoggiandole sull’asta dalla parte interna del mobile e tenendole inclinate in modo che la protuberanza “A” si trovi davanti all’incavo “B”, quindi portarle in verticale esercitando una leggera pressione. Inserire le semiflange esterne codice 2AN201-2 sull’asta dal lato esterno del mobile. Fissare le flange con le viti codice 2A5- 3.5X25E utilizzando un cacciavite a croce.
-
Page 7: Come Piegare Le Gambe Al Calciobalilla
COME PIEGARE LE GAMBE AL CALCIOBALILLA ATTENZIONE !!! QUESTA OPERAZIONE DEVE ESSERE ESEGUITA DA DUE ADULTI. Appoggiare il calciobalilla in verticale contro un muro avendo cura di inserire sotto la parte a contatto con il pavimento un foglio di cartone o altro materiale di protezione per non rovinare il pavimento. Svitare i pomelli che bloccano la gamba in basso. -
Page 8: Guida All'utilizzo Sicuro
I calciobalilla Garlando della linea casa sono certificati a norma di legge come adatti all’uso da parte di bambini di età superiore ai 3 anni. La conformità ai requisiti delle Norme europee armonizzate sulla Sicurezza EN 71 –... -
Page 9: Cura E Manutenzione
Manutenzione aste e cuscinetti I cuscinetti a sfera Garlando non richiedono lubrificazione. Per migliorarne ulteriormente la scorrevolezza, si consiglia di usare esclusivamente uno spray al silicone di buona qualità: la proposta di Garlando è Slidy, con doppia azione lubrificante e protettiva. - Page 10 ACHTUNG! Spielzeug ist für Kleinkinder unter 3 Jahren Bälle und Bauteile könnten verschluckt oder eingeatmet werden. nicht geeignet. Die kleine Lesen Sie aufmerksam die Anleitung um eine sichere Nutzung Seiten 15-16 AUSPACKUNG UND MONTAGE Wichtig: entfernen Sie die Kinder während der Montage. Für Sicherheitsgründe sollte der Fußballtisch von wenigstens zwei erwachsenen Personen aufgebaut werden.
-
Page 11: Montage Der Beine
Montage der Beine Legen Sie den Tischkicker auf eine flache und ebene Unterlage. Sofern die Montage im Haus erfolgt, schützen Sie den Boden und die Tischkickeroberfläche mit einer Decke oder dem Transportkarton. Während der Tischkicker kopfüber liegt, klappen Sie Fixieren Sie die 4 Knopfe mit Gewinde. Drehen Sie die Beinkonstruktion vollständig bis zum Anschlag den Tischkicker nun vorsichtig um und stellen Sie auf. - Page 12 Achtung: Montieren Sie weder die Kugellager noch die Innen- und Aussenschalen bevor alle Stangen montiert sind.Überprüfen Sie die Skizze der Stangenmontage in der vorherigen Seite um sicherzustellen, dass alle Stangen sich in der korrekten Position befinden, bevor Sie die Kugellager montieren. Schieben Sie das Stangenende (mit der Seite ohne Kunststoff-Lager) von der Spielfläche aus durch die Bohrung im Korpus.
- Page 13 Montage der Kugellager ACHTUNG ! 2AN201-1 Kugellager Kugellagerseite gegen die Innenseite des Spielfeldes gewandt. Schieben Sie das Kugellager 2AN201-1 (von außen nach innen) auf die Stange bis dieses vollständig in der Korpusbohrung sitzt. Montieren Sie die Innen- und Aussenabdeckungen auf der Griffseite entsprechend der folgenden Abbildung. “A”...
- Page 14 Zum Zusammensetzen der zwei Halblagerabdeckungen 2AN201-24 stützen Sie sie schief auf der Stangen, so daß der Vorsprung “A” vor der Raste “B” ist, dann schieben Sie, mit einem leichten Drücken, die Halbabdeckung senkrecht. Verwenden Sie die Aussenabdeckung 2AN201-2 auf der Aussenseite des Korpus. Verwenden Sie die Schrauben 2A5-3.5X25E zur Fixierung der Innen- und Aussenabdeckungen.
- Page 15 WIE DIE BEINE DES FUßBALLTISCHES ZUSAMMENZUKLAPPEN ACHTUNG !!! DIESER VORGANG MUSS DURCH 2 ERWACHSENE AUSGEFÜHRT WERDEN. Wenn Sie den Tischkicker hochkant an eine Wand lehnen, legen Sie ein Stück Karton oder anderes Material auf den Boden um den Tischkicker vor Beschädigungen zu schützen. Schrauben Sie die Knöpfe der Unterbeine ab.
- Page 16 Die kleine Bälle und Bauteile könnten verschluckt oder eingeatmet werden. Die Kickertische der Firma Garlando für den privaten Gebrauch, sind gemäß der gesetzlich geltenden Normen zertifiziert und sind für Kinder die älter als 3 Jahre sind geeignet. Die Konformität zu den europäischen einheitlichen Normen zur Sicherheit EN 71 –...
-
Page 17: Pflege Und Vorbeugende Wartung
Die Garlando Kugellager bedürfen keiner gesonderten Schmierung. Um eine optimale Gleitfähigkeit zu gewährleisten, wird ausschließlich ein qualitativ hochwertiges Silikonspray empfohlen. Garlando empfiehlt: Slidy – inklusive einer optimalen Schutz- und Gleitfunktion. Bitte verwenden Sie keine pflanzlichen oder tierischen Schmiermittel. Diese können den Schmutz besonders anziehen und die Kugellager verstopfen. -
Page 18: Unpacking And Assembly
WARNING This product is not suitable for use by children under 3 years. Small balls and parts might be swallowed or inhaled. Carefully read the Guide for a safe use on page 23-24 UNPACKING AND ASSEMBLY Important: keep away the children during the assembly. For safety reasons it is strongly recommended the football-table assembly by at least two adults. -
Page 19: Leg Assembly
Leg Assembly Lay the football table on a flat and even surface. Indoors, protect your floors by placing a carton sheet under the table. You can use the packing carton. While keeping the table upside down, open the legs Tightly screw the 4 threaded bolts and bring the table on its feet. - Page 20 Warning: do not install nor screw bearing retainers or handles before you have set all bars. Check the Diagram of rod assembly provided in the previous page to make sure that the rods position is correct, before installing the ball bearings. Slide the rod end with no bearing retainer into the cabinet hole starting from inside the playfield.
- Page 21 Assembly of ball bearings WARNING ! 2AN201-1 Roller Bearing Side of the bearing that must look towards the playfield. Insert the roller bearing 2AN201-1 onto the bar at the handle side (no roller bearing must be installed at the telescopic side) by sliding it until it is inside the cabinet.
-
Page 22: Handle Assembly
Match the two half bearing retainers code 2AN201-24 by resting them on the bar while keeping them slanting so that the protruding part “A” is in front of the hollow part “B”, then bring them vertical by a slight pression. Insert the outer half bearing retainers code 2AN201-2 onto the bar at the outer cabinet Use the screws code 2A5-3.5X25E to fix the bearing retainers. - Page 23 HOW TO FOLD THE LEGS WARNING !!! THIS OPERATION MUST BE PERFORMED BY TWO ADULTS. Lean the football table vertical against a wall, taking care of sliding a carton sheet or other protection material below the part resting on the floor, to protect it from being scratched. Unscrew the bolts blocking the lower leg.
- Page 24 Small balls and parts might be swallowed or inhaled. Garlando freeplay football tables are certified as suitable to be used by children over 3 years of age. The compliance with the European Harmonized Rules of Safety EN 71 – as shown by the right of stamping the CE mark on the items –...
-
Page 25: Care And Maintenance
Bars and bearings Garlando roller bearings do not require any lubrication. However, should you wish to furtherly improve their smoothness, employ a good quality silicone spray, such as Garlando’s proposal Slidy, which has a lubricating and protective double action. Be careful not to use any vegetal or any other type of grease which may attract dirt and clog the roller bearings. -
Page 26: Deballage Et Assemblage
AVERTISSEMENT Produit non adapté aux enfants de moins de 36 mois, contenant de petites balles et parties qui peuvent provoquer étouffement. Lire attentivement le Guide pour l’emploi en sécurité à la page 31-32 DEBALLAGE ET ASSEMBLAGE Important: éloignez les enfants pendant toutes les opérations de montage Pour une complète sécurité, l’assemblage demande la présence de 2 adultes. -
Page 27: Installation Des Jambes
Installation des jambes Assemblez le babyfoot sur une surface unie. Pour protéjer votre plancher glissez une feuille de protection au dessous de la table. En gardant le meuble renversé, ouvrez les jambes Vissez complètement les 4 boulons filetés et au maximum. mettez votre babyfoot sur ses pieds. - Page 28 Attention: N’installez ni boucles ni poignées avant d’avoir placé toutes les barres. Voyez le diagramme à la page précédente pour vous assurez que la position des barres soit correcte, avant de procéder à l’assemblage des semi- couvertures. Glissez l’extrémité de la barre sans la couverture dans le trou du meuble commençant de l’intérieur du champ de jeu.
-
Page 29: Installation Des Coussinets
Installation des coussinets ATTENTION ! 2AN201-1 Roulement à billes Le côté du coussinet marquée par INT doit être tourné vers l’intérieur du terrain de jeu. Glissez le roulement code 2AN201-1 sur la barre du côté sans la couverture en plastique noire (le coussinet s’installe seulement sur le côté... -
Page 30: Installation Poignées
Joindre les deux semi-couvertures intérieures code 2AN201-24 en appuyant-les sur la barre les tenant inclinées, d’une façon que la protuberance “A” se trouve devant la cavité “B”, puis placez-les en vertical en faisant une légère pression. Insérez les semi-couvertures code 2AN201-2 sur la barre du côté extérieur du meuble. Emplyoyez les vis code 2A5-3.5X25E pour fixes les demi-couvertures. -
Page 31: Comment Plier Les Gambes
COMMENT PLIER LES GAMBES ATTENTION !!! CETTE OPERATION DOIT ETRE ACCOMPLIE PAR DEUX ADULTS Appuyez le babyfoot en position verticale contre une paroi ayant soin de glisser sous la partie à contact avec le plancher une feuille de carton ou d’autre matérial de protection pour ne pas gratter le plancher. Dévissez les boulons bloquant la jambe au bas. -
Page 32: Guide Pour L'emploi En Sécurité
étouffement. Les babyfoot Garlando pour particuliers sont certifiés comme idoines à l’emploi par les enfants âgés de plus de 3 ans. La conformité aux Normes européennes harmonisées sur la Sécurité EN 71 – attestée par la marque CE se trouvant sur l’emballage et sur ces instructions - garantisse que ce produit n’est pas dangereux. -
Page 33: Soin Et Nettoyage
être résistantes aux intempéries. Pour prévenir cela nous conseillons un usage fréquent du spray de protection des barres. N’oubliez pas de couvrir votre table avec la bâche de protection. La société Garlando ne garde aucune responsabilité au cas ces instructions ne soient pas observées. DEMOLITION ET TRAITEMENT DES SUBSTANCES NUISIBLES Ce babyfoot ne demande aucun soin particulier pour la démolition, n’ayant aucune partie contenant des matériaux...