Publicité

Les langues disponibles
  • FR

Les langues disponibles

Liens rapides

1
2
3
DISEGNI all'interno · DRAWINGS inside
DESSINS a l'interieur · ZEICHNUNGEN innen
DIBUJOS en el interior · Pисунки внутри руководства
Manuale d'installazione
CONSERVARE CON CURA
Installation manual
KEEP CAREFULLY
Notice d'installation
GARDEZ SOIGNEUSEMENT
Installations Anweisung
SORGFÄLTIG AUFBEWAHREN
Manual de instalación
CONSERVAR CON CUIDADO
êÛÍÓ‚Ó‰ÒÚ‚Ó ÔÓ ÛÒÚ‡ÌÓ‚ÍÂ
ïêÄçàíú ÅÖêÖÜçé

Publicité

Table des Matières
loading

Sommaire des Matières pour Jacuzzi Omega

  • Page 1 DISEGNI all’interno · DRAWINGS inside DESSINS a l’interieur · ZEICHNUNGEN innen DIBUJOS en el interior · Pисунки внутри руководства Manuale d’installazione CONSERVARE CON CURA Installation manual KEEP CAREFULLY Notice d’installation GARDEZ SOIGNEUSEMENT Installations Anweisung SORGFÄLTIG AUFBEWAHREN Manual de instalación CONSERVAR CON CUIDADO êÛÍÓ‚Ó‰ÒÚ‚Ó...
  • Page 2 • Italiano • English • Français • Deutsch • Español • êÛÒÒÍËÈ...
  • Page 3 (tranne quella indicata nel part.3a, che andrà applicata INFO come indicato). I box doccia Omega ( 1-1a, vista versione sinistra) vengono 4 part.1) Avvitare la ghiera sulla piletta ed eseguire una installati solamente ad angolo, su pareti finite e già rivestite, ma prova di tenuta idraulica.
  • Page 4 8 part.1-2) Controllare l’esatta corrispondenza tra il fo- 12 part.5) Dal retro, fissare la struttura al pannello con ro sul pannello e il distanziale “S”; se non si verifica tale condi- la vite indicata. zione, agire sulla vite e sull’asola del distanziale, fino a farlo combaciare con il foro del pannello (part.
  • Page 5 - (part.3) cavo circuito allarme - cassetta elettronica (optional) - (part.1-2): dall’interno, montare la squadretta “T”, che sarà Qualora l’immobile disponga di un circuito di chiamata/soccorso, fissata al piatto come indicato. questo può essere collegato al box doccia e comandato trami- te l’apposito tasto presente sul display.
  • Page 6: Sicurezza Elettrica

    Ω I box doccia mega Jacuzzi ® sono apparecchi sicuri, costruiti 26 part.1-2) Allentare le viti delle cerniere e verificare la nel rispetto delle norme EN 60335-1, EN 60335-2-105, EN perfetta chiusura dei magneti, nonché...
  • Page 7 Vengano cambiati o modificati componenti o parti dell’apparecchio rispetto allo stato di fornitura, facendo decadere la responsabilità del Costruttore. - L’apparecchio venga riparato da personale non autorizzato o u- sando parti di ricambio non originali della Jacuzzi Europe S.p.A...
  • Page 8 INFO 4 detail 1) Fasten the ring nut to the drainage column The Omega shower boxes ( 1-1a, left-hand version shown) and test for water tightness. are installed only in corners, on finished and covered walls with no skirting and/or protrusions.
  • Page 9 Hydraulic / electrical connections the spacer, until it matches up with the hole in the panel (de- Installation of the panel with the tap fixture tails A, B, C, and D). 9 detail1) In addition to the perpendicularity of the pan- Water connections el, also check that the spacer is in contact with the panel.
  • Page 10 help” device for about 15 seconds. The call indicator (bells, NB: check that the profile of the glass panel and the com- buzzers, lamps, etc.) can be powered either with 220/240V or pensator match perfectly (detail 4). low voltage, but with a maximum current absorption of 10A. 19) Fasten the glass panel to the shower tray as shown: The alarm connection must be carried out by using a cable with - (detail 1-2): from inside, attach bracket “T”, which must be...
  • Page 11: Electrical Safety

    (which Ω must be constant) between the lower side of the door and the mega Jacuzzi ® shower boxes are safe appliances, man- tray (by means of the plastic protections).
  • Page 12 If any components or parts of the appliance are altered in relation to the original state when supplied, releasing the Manufacturer from any liability. If the appliance is repaired by unauthorised personnel or if spare parts are used other than the original ones supplied by Jacuzzi Eu- rope S.p.A.
  • Page 13: Positionnement Des Compensateurs

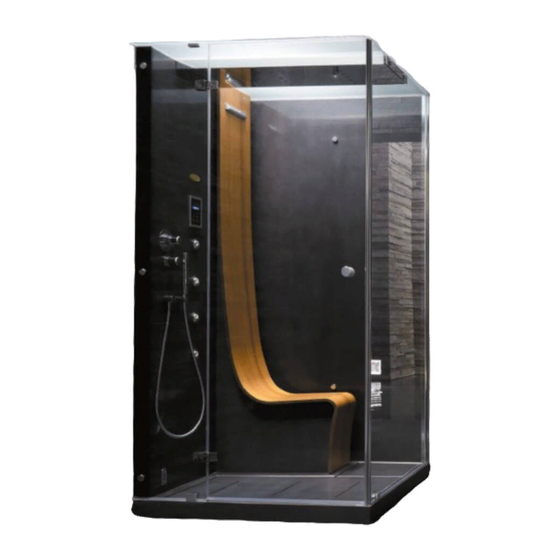
    (sauf celui indiqué au détail 3a, qui se- INFORMATIONS ra appliqué comme indiqué). Les cabines de douche Omega ( 1-1a, vue version gauche) 4 detail 1) Visser la bague sur la bonde et effectuer un sont uniquement installées en angle, sur des parois finies et re-...
  • Page 14: Installation De La Structure-Siège

    8 détail 1-2) Contrôler l'exacte correspondance entre le 12 détail 6) Fixer ultérieurement la structure avec les vis trou sur le panneau et l'entretoise “S” ; si cela ne se vérifie pas, et les rondelles indiquées. agir sur la vis et sur la fente de l'entretoise jusqu'à la faire co- ïncider avec le trou du panneau (détail A, B, C et D).
  • Page 15: Installation Du Panneau Équipé

    Dans le cas où l'habitation disposerait d'un circuit d'ap- - (détail 3-4) : de l'extérieur, monter le bloc “T2”, qui sera fixé pel/secours, celui-ci peut être raccordé à la cabine de douche de l'intérieur comme indiqué (détail 4), sans toutefois ser- et commandé...
  • Page 16: Sécurité Électrique

    (qui Ω doit être constante) entre le côté inférieur de la porte et le re- Les cabines de douche mega Jacuzzi ® sont des appareils sûrs, ceveur (moyennant les protections en plastique).
  • Page 17 ATTENTION Avant d'effectuer toute opération d'entretien, débrancher l'appareil de la ligne d'a- limentation. Jacuzzi Europe S.p.A. décline toute responsabilité dans les cas suivants : - Installation effectuée par un personnel non qualifié et/ou non autorisé et non agréé aux fins de cette installation.
  • Page 18 INFO die Teilstücke in ihren Sitze auf der Duschtasse unterbringen (außer dem im Det.3a gezeigten Stück, das wie gezeigt ein- Die Duschkabinen Omega ( 1-1a, linke Ausführung abge- gesetzt wird). bildet) werden nur in einer Ecke auf bereits fertigen und ver- kleideten Wänden, aber ohne Fußbodenleiste und/oder Vor-...
  • Page 19: Installation Des Sitzgestells

    8 Det.1-2) Die genaue Übereinstimmung der Bohrung auf 12 Det.6) Das Gestell zusätzlich mit den abgebildeten dem Paneel mit dem Distanzstück “S” prüfen; sollten sie nicht Schrauben und Unterlegscheiben befestigen. übereinstimmen, auf die Schraube und auf das Langloch des Elektro- und Wasseranschlüsse Distanzstücks einwirken, bis es mit der Öffnung des Paneels Installation des Paneels mit Armaturen identisch ist (Det.
  • Page 20: Installation Des Ausgestatteten Paneels

    die Duschkabine angeschlossen und mit der entsprechenden 18 Det.1) Im gezeigten Bereich Silikon auftragen. Taste auf dem Display ausgelöst werden. Im Innern des elektronische Schaltkastens, nahe der Kabel- 18 Det.2) Das “kurze” Echtglaselement zur Hand neh- klemme "Alarm" befinden sich 2 Klemmen, die mit "ALL" ge- men und auf der Unterseite die gezeigten Dichtungen anbringen.
  • Page 21: Installation Des Sitzes

    25 Det.1-2-3) Den Kunststoffschutz unter der Tür ein- Ω setzen und sie neben dem Echtglaselement “H” aufstellen, die Die Duschkabinen mega Jacuzzi ® sind sichere Geräte, die unter Scharniere der Tür in die des Echtglaselements einhängen und Berücksichtigung der Normen EN 60335-1, EN 60335-2-105, EN mit den Gewindezapfen befestigen.
  • Page 22 ACHTUNG Den Apparat immer von der Stromversor- gung abnehmen, bevor Wartungsarbeiten durchge- führt werden. JACUZZI EUROPE S.p.A. lehnt jede Verantwortung ab, falls: die Installation durch nicht qualifiziertes und/oder nicht für die In- stallation befugtes Personal vorgenommen wird. Die im Land, in dem das Gerät installiert wird, geltenden Richtli- nien bzw.
  • Page 23 (excepto la indicada en el det.3a, que se aplicará de la GENERALIDADES manera indicada). Las cabinas de ducha Omega ( 1-1a, vista versión izquier- 4 det.1) Enrosque el anillo la válvula de desagüe y rea- da) son solo para instalación en esquina, contra paredes aca- lice una prueba de estanqueidad hidráulica.
  • Page 24 8 det.1-2) Compruebe que el orificio del panel y el dis- 12 det.6) Fije después la estructura con los tornillos y las tanciador “S” coincidan exactamente; de no ser así, manipule el arandelas indicados. tornillo y la ranura del distanciador hasta que encaje con el ori- ficio del panel (det.
  • Page 25 botón de pantalla correspondiente. 18 det.1) Aplique silicona en la zona indicada. Dentro de la caja electrónica, cerca del prensacables “ALARMA”, hay 2 bornes marcados con “ALL”, que se corresponden con los 18 det.2) Extraiga el cristal “corto” y aplique las juntas in- contactos normalmente abiertos de un relé...
  • Page 26: Seguridad Eléctrica

    26 det.1-2) Afloje los tornillos de las bisagras y com- Ω pruebe que los imanes se cierren perfectamente, así como la dis- Las cabinas de ducha mega Jacuzzi ® son equipos seguros, fa- tancia (que debe ser constante) entre el lado inferior de la bricados según las normas EN 60335-1, EN 60335-2-105, EN...
  • Page 27 JACUZZI EUROPE S.p.A. declina toda responsabilidad en caso de que: - La instalación sea realizada por personal no cualificado y/o no facultado para efectuar la propia instalación.
  • Page 28 2 ‰ÂÚ.3-4) èÓÒΠÍÂÔÎÂÌËfl ÚÛ·ÍË Í ÒÓ‰ËÌÂÌ˲ ÒÎË‚‡, Ó·ÂÒÔ˜ËÚ¸ Â„Ó ÔÓıÓ‰ ˜ÂÂÁ ÔflÏÓÛ„ÓθÌÓ àÌÙÓχˆËfl ÓÚ‚ÂÒÚËÂ, ҉·ÌÌÓ ‚ ÔÓ‰‰ÓÌ (Ú‡ÍÊ ÒÏ. 3 ‰ÂÚ. 1); Á‡ÚÂÏ ÔÓÁˈËÓÌËÓ‚‡Ú¸ ‰Û¯Â‚ÓÈ ÔÓ‰‰ÓÌ Ì‡ ÔÓÎ. Ñۯ‚˚ ͇·ËÌ˚ Omega ( 1-1a, ‚ˉ ΂ÓÈ ÏÓ‰ÂÎË) Ó·˚˜ÌÓ ËÏÂ˛Ú Û„ÎÓ‚Û˛ ÛÒÚ‡ÌÓ‚ÍÛ...
  • Page 29 ìÒÚ‡Ìӂ͇ ̇ÒÚÂÌÌÓÈ Ô‡ÌÂÎË 11) èÓÒ‚ÂÎËÚ¸ ÔÓÙËθ Ô‡ÌÂÎË ÔË ÔÓÏÓ˘Ë, ‚ ͇˜ÂÒÚ‚Â ¯‡·ÎÓ̇, ÓÚ‚ÂÒÚËÈ Ì‡ ÍÓÏÔÂÌÒ‡ÚÓÂ. á‡ÚÂÏ 6 ‰ÂÚ.1) éÔ‰ÂÎËÚ¸ ÚÓ˜ÍÛ ÍÂÔÎÂÌËfl ‚ ÒÓÓÚ‚ÂÚÒÚ‚ËË ÔËÍÂÔËÚ¸ ÒÚÓÈÍÛ Í ÍÓÏÔÂÌÒ‡ÚÓÛ Ò Û͇Á‡ÌÌ˚ÏË ÓÚÏÂÚ͇ÏË; Á‡ÚÂÏ ÔÓÒ‚ÂÎËÚ¸ ÓÚ‚ÂÒÚË ‚ èêàåÖóÄçàÖ: å‡ÍÒËχθÌ˚È ‚˚ÒÚÛÔ, ‰ÓÔÛÒ͇ÂÏ˚È ÒÚÂÌÍÂ Ë ÛÒÚ‡ÌÓ‚ËÚ¸ ‚Í·‰˚¯. ÒÚÓÈÍÓÈ...
  • Page 30 ìÒÚ‡Ìӂ͇ Ó·ÓÛ‰Ó‚‡ÌÌÓÈ Ô‡ÌÂÎË ùÎÂÍÚ˘ÂÒÍË ÒÓ‰ËÌÂÌËfl ÇÌËχÌËÂ! í˘‡ÚÂθÌÓ ‚˚ÔÓÎÌflÚ¸ Û͇Á‡ÌËfl, 15 ‰ÂÚ.1) ç‡ÌÂÒÚË ÒËÎËÍÓÌ ‚ Û͇Á‡ÌÌÓ ÔÓÎÓÊÂÌËÂ. Ô˂‰fiÌÌ˚ ‚ „·‚ “ùÎÂÍÚ˘ÂÒ͇fl ·ÂÁÓÔ‡ÒÌÓÒÚ¸”. 15 ‰ÂÚ.2-3) á‡ÚÂÏ ‚ÒÚ‡‚ËÚ¸ Ó·ÓÛ‰Ó‚‡ÌÌÛ˛ Ô‡ÌÂθ - ëӷβ‰‡Ú¸ ÒËÏ‚ÓÎ˚ L: Ù‡Á‡; N: ÌÂÈÚ‡Î¸; : ÁÂÏÎfl. ‚ ͇̇‚ÍÛ ÒÚÛÍÚÛ˚-ÒˉÂ̸fl (‚ÂÚË͇θÌÛ˛), ‡ Ú‡ÍÊ - ëÌflÚ¸...
  • Page 31 èÓÁˈËÓÌËÓ‚‡Ú¸ Ô·ÒÚËÌÛ “P” Ò ‚̯ÌÂÈ ÒÚÓÓÌ˚, 26 ‰ÂÚ.1-2) éÒ··ËÚ¸ ‚ËÌÚ˚ ÔÂÚÎÂÈ Ë ÔÓ‚ÂËÚ¸ ÏÂÊ‰Û ÒÚÂÍÎÓÏ Ë ‚ËÌÚ‡ÏË. Ô‚ÓÒıÓ‰ÌÓ Á‡Í˚ÚË χ„ÌËÚÓ‚, ‡ Ú‡ÍÊ ‡ÒÒÚÓflÌË (ÍÓÚÓÓ ‰ÓÎÊÌÓ ·˚Ú¸ ÔÓÒÚÓflÌÌ˚Ï) ÏÂÊ‰Û ÌËÊÌÂÈ ÒÚÓÓÌÓÈ 20 ‰ÂÚ.3a-3b-3c) ìÒÚ‡ÌÓ‚ËÚ¸ ͇·ÂÎË ÓÒ‚Â˘ÂÌËfl ‚ ‰‚ÂË Ë ÔÓ‰‰ÓÌÓÏ (ÔÓÒ‰ÒÚ‚ÓÏ Ô·ÒÚËÍÓ‚˚ı Á‡˘ËÚ). ÓÚ‚ÂÒÚËÂ, ҉·ÌÌÓÂ...
  • Page 32 Ë ÒÔˆˇθÌ˚Ï Ì‡ˆËÓ̇θÌ˚Ï ÌÓχÏ. бот технического обслуживания. Должно быть предусмотрено специальное устрой- ство, являющееся составной частью фиксированной установки, монтированное в соответствии с дей- JACUZZI EUROPE S.p.A. Ì ÌÂÒfiÚ ÓÚ‚ÂÚÒÚ‚ÂÌÌÓÒÚ¸ ‚ ÒÎÛ˜‡Â ствующими нормативами, отсоединяющее оборудо- ÂÒÎË: вание от сети. ìÒÚ‡Ìӂ͇ ÓÒÛ˘ÂÒÚ‚ÎflÂÚÒfl ÌÂÍ‚‡ÎËÙˈËÓ‚‡ÌÌ˚Ï Ë/ËÎË...
  • Page 33 Ò‡‚ÌÂÌ˲ Ò Ëı ÒÓÒÚÓflÌËÂÏ ÔË ÔÓÒÚ‡‚ÍÂ, Ó·ÂÒÔ˜˂‡fl ÒÌflÚË ÓÚ‚ÂÚÒÚ‚ÂÌÌÓÒÚË Ò ËÁ„ÓÚÓ‚ËÚÂÎfl. êÂÏÓÌÚ Ó·ÓÛ‰Ó‚‡ÌËfl ÓÒÛ˘ÂÒÚ‚ÎflÂÚÒfl ̇‚ÚÓËÁÓ‚‡ÌÌ˚Ï ÔÂÒÓ̇ÎÓÏ, ËÎË ÔË ËÒÔÓθÁÓ‚‡ÌËË ÌÂÓË„Ë̇θÌ˚ı Á‡Ô‡ÒÌ˚ı ˜‡ÒÚÂÈ Jacuzzi Europe S.p.A é˜ËÒÚ͇ ÚÂÏÓÒÚ‡Ú˘ÂÒÍÓ„Ó Í·ԇ̇ íÂÏÓÒÚ‡Ú˘ÂÒÍËÈ ÍÎ‡Ô‡Ì ÓÒ̇˘fiÌ ÒÂÚ˜‡Ú˚ÏË ÙËθÚ‡ÏË ‰Îfl Û‰ÂÊË‚‡ÌËfl Ëϲ˘ËıÒfl Á‡„flÁÌÂÌËÈ. ëÓ ‚ÂÏÂÌÂÏ ˝ÚË ÙËθÚ˚ ÏÓ„ÛÚ ·˚Ú¸ Á‡„flÁÌÂÌ˚, ÔÓ˝ÚÓÏÛ...
  • Page 34 I dati e le caratteristiche non impegnano la Jacuzzi Europe S.p.A., che si riserva il diritto di apportare tutte le modifiche ritenute opportune senza obbligo di preavviso o di sostituzione The data and characteristics indicated do not oblige Jacuzzi Europe, who reserves the right to make the necessary changes they feel opportune without forewarning or substitution Les caractéristiques indiquées, n’engagent pas la Jacuzzi Europe, qui se réserve le droit d’apporter...
  • Page 35 Tel (93) 238 5031- (93) 238 4162 • Fax (93) 238 5032 - (93) 272 2149 www.jacuzzi.eu info-es@jacuzzi.it De gegevens en kenmerken zijn niet bindend voor Jacuzzi Europe S.p.A., die het recht behoudt alle noodzakelijk geachte veranderingen aan te brengen zonder tot voorafgaande kennisgeving of vervanging verplicht te zijn...

Table des Matières