Table des Matières
Publicité
Les langues disponibles
Les langues disponibles
Liens rapides
Publicité
Table des Matières

Manuels Connexes pour Cameo ZENIT W600 D SMD


Sommaire des Matières pour Cameo ZENIT W600 D SMD
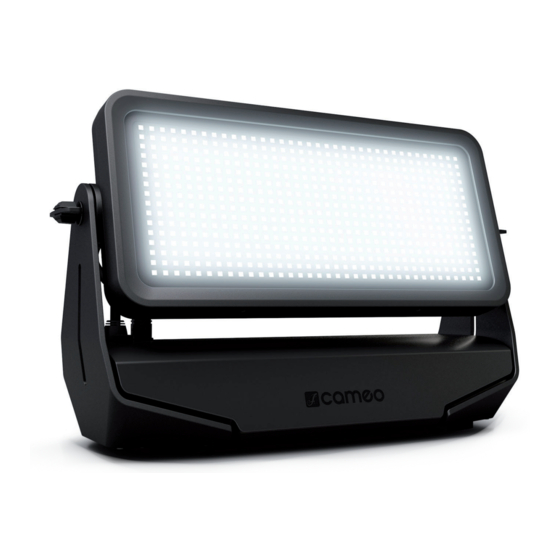
- Page 1 USER´S MANUAL BEDIENUNGSANLEITUNG MANUEL D´UTILISATION MANUAL DE USUARIO INSTRUKCJA OBSŁUGI MANUALE D´USO ZENIT W600 D SMD ® OUTDOOR SMD LED WASH LIGHT WITH SEGMENT CONTROL - DAYLIGHT VERSION CLZW600DSMD...
-
Page 2: Table Des Matières
CONTENTS / INHALTSVERZEICHNIS / CONTENU / CONTENIDO / TREŚĆ / CONTENUTO ENGLISH INFORMATION ON THIS USER MANUAL APPROPRIATE USE DEFINITIONS AND SYMBOL EXPLANATIONS SAFETY INSTRUCTIONS NOTES ON PORTABLE OUTDOOR DEVICES INCLUDED INTRODUCTION CONNECTIONS, OPERATING AND DISPLAY ELEMENTS OPERATION SET-UP AND INSTALLATION CARE, MAINTENANCE AND REPAIR OPTIONAL ACCESSORIES DMX TECHNOLOGY... - Page 3 CONTENTS / INHALTSVERZEICHNIS / CONTENU / CONTENIDO / TREŚĆ / CONTENUTO FRANÇAIS INFORMATIONS CONCERNANT LE PRÉSENT MANUEL UTILISATION CONFORME EXPLICATIONS DES TERMES ET DES SYMBOLES CONSIGNES DE SÉCURITÉ REMARQUES CONCERNANT LES APPAREILS D’EXTÉRIEUR MOBILES CONTENU DE LA LIVRAISON PRÉSENTATION RACCORDEMENTS, ÉLÉMENTS DE COMMANDE ET D’AFFICHAGE UTILISATION INSTALLATION ET MONTAGE ENTRETIEN, MAINTENANCE ET RÉPARATION...
- Page 4 CONTENTS / INHALTSVERZEICHNIS / CONTENU / CONTENIDO / TREŚĆ / CONTENUTO POLSKI INFORMACJE DOTYCZĄCE NINIEJSZEJ INSTRUKCJI OBSŁUGI UŻYTKOWANIE ZGODNE Z PRZEZNACZENIEM OBJAŚNIENIA TERMINÓW I SYMBOLI ZASADY BEZPIECZEŃSTWA UWAGI DOTYCZĄCE PRZENOŚNEGO SPRZĘTU ZEWNĘTRZNEGO ZAKRES DOSTAWY WPROWADZENIE PRZYŁĄCZA, ELEMENTY OBSŁUGI I WSKAŹNIKI OBSŁUGA USTAWIANIE I MONTAŻ...
- Page 5 CONTENTS / INHALTSVERZEICHNIS / CONTENU / CONTENIDO / TREŚĆ / CONTENUTO DMX CONTROL / DMX STEUERUNG / PILOTAGE DMX / CONTROL DMX / STEROWANIE DMX / CONTROLLO DMX PIXEL SEGMENTS / PIXEL SEGMENTE...
-
Page 6: Information On This User Manual
This device has been developed and manufactured to the highest quality standards to ensure many years of problem-free operation. Please read this manual carefully to be able to use your new Cameo product quickly and optimally. Further information about Cameo Light is available on our website CAMEOLIGHT.com. -
Page 7: Safety Instructions
This symbol identifies hazards that can cause electric shock. This symbol identifies danger points or hazardous situations. This symbol indicates hazards caused by hot surfaces. This symbol indicates hazards caused by intense light sources. This symbol indicates a device in which there are no user-replaceable parts. This symbol indicates additional information relating to use of the product. - Page 8 CAUTION: 1. Do not put the device into operation immediately if it has been exposed to extreme temperature fluctuations (for example, after transportation). Moisture and condensation can damage the device. Do not switch on the device until it has reached room temperature. 2.
- Page 9 CAUTION: 1. Moving components such as mounting brackets may become jammed. 2. In the case of devices with motor-driven components, there is a risk of injury due to the movement of the device. Sudden movement of the device can cause shock reactions.
- Page 10 4. A permanently installed lamp is installed in this lighting unit which must not be replaced by the user. In the event of a fault, please contact your sales partner. SIGNAL TRANSMISSION BY RADIO (e.g. W-DMX or audio radio systems): The quality and performance of wireless signal transmissions generally depends on the ambient conditions.
-
Page 11: Notes On Portable Outdoor Devices
With the package you purchased, you received: X Spotlight X Mains cable X 2 Omega brackets X User manual INTRODUCTION ZENIT W600 D SMD PROFESSIONAL OUTDOOR WASHLIGHT CLZW600DSMD... -
Page 12: Connections, Operating And Display Elements
Connection via supplied power cable (when not in use, always close with rubber sealing cap). POWER OUT IP65 power output socket with rubber sealing cap. Facilitates power supply to other CAMEO spotlights. Ensure that the total current consumption of all connected devices does not exceed the value specified on the device in amperes (A) (when not in use, always close with the rubber sealing cap). - Page 13 • As soon as the spotlight is connected is supplied with power, the following are displayed in suc- cession: "Welcome to Cameo", the model name and the software version. During the start-up process, the previously set operating mode is activated and the spotlight is ready for operation after a short time.
-
Page 14: Operation
currently programmed DMX address is displayed and the characters on the display will begin to flash. • The main display is activated automatically if there is no input in the space of approximately one minute. • Fast Access Feature: In order to simplify the menu guide, the device has an intelligent menu structure that allows direct access to previously selected menu items and submenu items. - Page 15 2. Pair a group of W-DMX™ devices to create a DMX universe with them. First decouple all devices that should form the group (Settings -> Wireless Setting -> Receive Reset). Then select a CLZW600 with a DMX controller via DMX cable and select "Transmit" in the settings (Settings ->...
- Page 18 SLAVE MODE CONFIGURATION Press MODE to access the main menu (--- Menu ---). Using UP and DOWN, select the menu item Slave (observe arrow) and confirm with ENTER. Connect the slave and the master units (same model, same software version) with a DMX cable and enable a standalone mode (Static, Pixel) on the master unit.
- Page 19 Display = Display Display is rotated by 180° (e.g. for overhead Reverse rotation installation) No rotation of the display Display Back- = Display permanently on light lighting Deactivation after approximately 1 minute of inactivity DMX Fail = Operating Hold last command is retained status when Blackout Activates blackout...
- Page 20 Mirror Pixel = Invert/mirror No reflection/inversion arrangement Invert Background -> Pattern, Pattern -> Back- of pixel ground segments Horizontal Mirror horizontally (function Vertical Mirror vertically only for DMX Horizontal + Mirror and invert horizontally operation) Invert Vertical + Mirror and invert vertically Invert = Adjust fan Auto...
- Page 21 SYSTEM INFORMATION (SYSTEM INFO) Press MODE to access the main menu (--- Menu ---). Using the arrow keys, select the menu item System Info (observe arrow) and confirm with ENTER. ---------------- Menu ---------------- DMX Address DMX Mode Stand Alone Slave Settings System Info Use the UP and DOWN controls to select the desired submenu item, and press ENTER to display...
-
Page 22: Set-Up And Installation
SET-UP AND INSTALLATION Thanks to its integrated plastic feet, the lamp can be positioned in a suitable location on a level surface. Mounting to a traverse is possible using an Omega bracket which is attached at the cen- tre of the device base (A) or else by means of two Omega bracket, which are mounted at the outer attachment positions (B). - Page 23 1. Housing surfaces must be cleaned with a clean, damp cloth. In doing so, ensure that no moisture can penetrate into the device. 2. Air inlets and outlets must be regularly cleaned to remove dust and soiling. If compressed air is used, care must be taken to ensure that damage to the device is prevented (e.g.
-
Page 24: Optional Accessories
CLEAN FAN The three fans on the back of the LED unit of the spotlight must be regularly checked and, if necessary, cleaned. Disconnect the spotlight from the power supply. Loosen the 4 socket screws holding the fan cover to the LED unit using a suitable tool. Remove the fan cover from the LED unit, clean the fans and check that the fans can rotate freely. -
Page 25: Dmx Technology
DMX TECHNOLOGY DMX-512 DMX (Digital Multiplex) is the name for a universal communication protocol for communication between corresponding devices and controllers. A DMX controller sends DMX data to the attached DMX device(s). The DMX data transmission is always a serial data stream which is sent from one connected device to the next via the DMX IN and DMX OUT sockets on any DMX-enabled device (XLR connectors), whereby the maximum number of devices may not exceed 32. - Page 26 DMX CABLE: When preparing your own leads, it is essential to follow the diagrams on this page. Do not connect the shielding of the cable to the ground pin of the connector, and make sure that the shield does not come into contact with the XLR connector housing. If the shield has contact to ground it may lead to system errors.
-
Page 27: Technical Data
TECHNICAL DATA Product number: CLZW600DSMD Product type: LED wash light Type: Outdoor spotlight Colour spectrum LED: Cool white (5700K) Number of LEDs: LED type: Single SMD LED PWM frequency: 800 Hz, 1200 Hz, 2000 Hz, 3600 Hz, 12 kHz, 25 kHz (adjustable) Beam angle: 104°... -
Page 28: Explanation Of Ip Protection Class
Minimum distance to 0.5 m illuminated surface: Minimum distance 0.3 m to normal flammable materials: Dimensions (W x H x D, 463 x 291 x 161 mm. without bracket): Weight (not including 11.9 kg accessories): Accessories supplied: 2 Omega brackets + power cable Optional accessories: Barndoor EXPLANATION OF IP PROTECTION CLASS... -
Page 29: Minimum Distance To Illuminated Surface
MINIMUM DISTANCE TO ILLUMINATED SURFACE This symbol with distance specification in metres (m) indicates the minimum 0.5 m distance between the light head and the illuminated surface. In this example the distance is 0.5 m. MINIMUM DISTANCE TO NORMALLY FLAMMABLE MATERIALS This symbol with distance specification in metres (m) indicates the minimum 0.3 m distance between the light head and normally flammable materials. -
Page 30: Manufacturer's Declarations
MANUFACTURER’S DECLARATIONS MANUFACTURER'S WARRANTY & LIMITATION OF LIABILITY Adam Hall GmbH, Adam-Hall-Str. 1, D-61267 Neu Anspach / E-mail Info@adamhall.com / +49 (0)6081 / 9419-0. Our current warranty conditions and limitation of liability can be found at: https://cdn-shop.adamhall.com/media/pdf/Manufacturers-Declarations-CAMEO_DE_EN_ES_ FR.pdf. Contact your sales partner for service. UKCA- CONFORMITY Hereby, Adam Hall Ltd. -
Page 31: Deutsch
Dieses Gerät wurde unter hohen Qualitätsanforderungen entwickelt und gefertigt, um viele Jahre einen reibungslosen Betrieb zu gewährleisten. Bitte lesen Sie diese Bedienungsanleitung sorgfäl- tig, damit Sie Ihr neues Produkt von Cameo Light schnell und optimal einsetzen können. Weitere Informationen über Cameo Light erhalten Sie auf unserer Website CAMEOLIGHT.COM. -
Page 32: Begriffs- Und Symbolerklärungen
BEGRIFFS- UND SYMBOLERKLÄRUNGEN 1. GEFAHR: Mit dem Wort GEFAHR, evtl. in Kombination mit einem Symbol, wird auf unmittelbar gefährliche Situationen oder Zustände für Leib und Leben hingewiesen. 2. WARNUNG: Mit dem Wort WARNUNG, evtl. in Kombination mit einem Symbol, wird auf potenti- ell gefährliche Situationen oder Zustände für Leib und Leben hingewiesen. - Page 33 WARNUNG: 1. Das Gerät darf nicht in Betrieb genommen werden, wenn es offensichtliche Beschädigungen aufweist. 2. Das Gerät darf nur im spannungsfreien Zustand installiert werden. 3. Wenn das Netzkabel des Geräts beschädigt ist, darf das Gerät nicht in Betrieb genommen werden. 4.
- Page 34 WARNUNG: 1. Verwenden Sie das Gerät nur in der vorgesehenen Art und Weise. 2. Betreiben Sie das Gerät nur mit dem vom Hersteller empfohlenen und vorgesehe- nen Zubehör. 3. Beachten Sie bei der Installation die für Ihr Land geltenden Sicherheitsvorschrif- ten.
- Page 35 ACHTUNG: 1. Installieren und betreiben Sie das Gerät nicht in der Nähe von Heizkörpern, Wärme speichern, Öfen oder sonstigen Wärmequellen. Sorgen Sie dafür, dass das Gerät immer so installiert ist, dass es ausreichend gekühlt wird und nicht überhitzen kann. 2. Platzieren Sie keine Zündquellen wie z.B. brennende Kerzen in der Nähe des Geräts.
- Page 36 SIGNALÜBERTRAGUNG PER FUNK (z.B. W-DMX oder Audio-Funksysteme): Die Qualität und Leistungsfähigkeit kabelloser Signalübertragungen ist generell abhängig von den Umgebungsbedingungen. Einfluss auf die Reichweite und Signalstabilität haben z.B.: Abschirmung (z.B. Mauerwerk, Metallbauten, Wasser) Hohes Funkaufkommen (z.B. starke W-LAN Netze) Interferenzen Elektromagnetische Strahlung (z.B. LED-Videowände, Dimmer) Alle Reichweitenangaben beziehen sich auf Freifeldanwendung mit Sichtkontakt ohne Störeinflüsse! Der Betrieb von Sendeanlagen unterliegt behördlichen Bestimmungen.
-
Page 37: Hinweise Für Ortsveränderliche Outdoor-Geräte
SIGNALÜBERTRAGUNG PER W-DMX WARNUNG: Generell darf kabellose DMX-Übertragung nicht für Anwendungen mit sicherheitsrelevanten Faktoren genutzt werden, die im Falle eines Versagens Perso- nen- oder Sachschäden zur Folge haben können. Dies gilt im Speziellen für bewegte Szenen- oder Traversenstrukturen, für DMX-ge- steuerte Motoren/Hebezeuge oder Hebevorrichtungen zum Betreiben von DMX- -betriebenen Bühnenliften, Hydrauliksystemen oder vergleichbaren beweglichen Komponenten. -
Page 38: Einführung
EINFÜHRUNG ZENIT W600 D SMD PROFESSIONAL OUTDOOR WASHLIGHT CLZW600DSMD STEUERUNGSFUNKTIONEN: 1-, 2-, 3-, 4-, 6-, 12-, 15-, 18-, 48-, 54-, 63-Kanal DMX-Steuerung Master / Slave Betrieb Standalone Funktion W-DMX™ EIGENSCHAFTEN: 576 Single SMD Daylight LEDs. IP65 Schutzart. DMX512. W-DMX™. 16-Bit Dimmer. 4 Dimmer- kurven. - Page 39 POWER OUT IP65 Netzausgangsbuchse mit Gummidichtkappe. Dient der Netzversorgung weiterer CAMEO Scheinwerfer. Achten Sie darauf, dass die gesamte Stromaufnahme aller angeschlossenen Geräte den auf dem Gerät in Ampere (A) angegebenen Wert nicht überschreitet (bei Nichtgebrauch stets mit der Gummidichtkappe verschließen).
- Page 40 ANMERKUNGEN • Sobald der Scheinwerfer mit Netzspannung versorgt wird, beginnt der Startvorgang und „Wel- come to Cameo“, die Modellbezeichnung und die Software-Version werden nacheinander im Display angezeigt. Während des Startvorgangs wird die zuvor eingestellte Betriebsart aktiviert und der Scheinwerfer ist nach kurzer Zeit betriebsbereit.
-
Page 41: Bedienung
BEDIENUNG DISPLAY HAUPTANZEIGE Die Hauptanzeige zeigt folgende Informationen: Aktuelle Betriebsart (im Beispiel DMX-Betriebsart mit Startadresse 001) und W-DMX™ Status. W-DMX™ Status DMX Address Aktuelle Betriebsart W-DMX™ 1. Zum Koppeln mit W-DMX™ kompatiblen Transmittern aktivieren Sie W-DMX™ in den Geräteeinstellungen (Settings -> Wireless Setting -> W-DMX On Off -> On) und setzen das W-DMX™-Modul zurück (Receive Reset ->... - Page 42 W-DMX™ STATUS W-DMX™ W-DMX™ W-DMX™ als W-DMX W-DMX™ als W-DMX™ W-DMX™ deaktiviert als receiver receiver aktiviert aktiviert und reveicer aktiviert und Übertra- und Übertra- aktiviert, und Gerät Gerät gekoppelt, und Gerät gungs-Modus gungs-Modus nicht gekoppelt gekoppelt, kein DMX-Signal gekoppelt, G3 aktiviert G4S aktiviert Transmitter DMX-Signal...
- Page 43 STAND-ALONE-BETRIEBSART EINSTELLEN Durch Drücken auf MODE gelangen Sie in das Hauptmenü (--- Menu ---). Mit Hilfe von UP und DOWN wählen Sie nun den Menüpunkt Stand Alone aus (Pfeil beachten) und bestätigen mit ENTER. Im Untermenü können Sie nun die Stand-Alone-Betriebsarten Static, Pixel und die Timer- -Funktion Timer mit UP und DOWN auswählen.
- Page 44 TIMER-FUNKTION (Timer) Die Timer-Funktion ermöglicht die zeitgesteuerte Kontrolle der Stand-Alone-Betriebsart Static in der Art, dass die Einblendzeit (Fade In) von 0 bis 60 Minuten, die Haltezeit (Dwell Time) von 1 bis 24 Stunden und die Ausblendzeit (Fade Out) von 0 bis 60 Minuten eingestellt werden kann. Die Zeitsteuerung startet direkt nach dem Aktivieren der Timer-Funktion in der zuvor aktivierten Stand-Alone-Betriebsart und bleibt auch erhalten, wenn der Scheinwerfer ausgeschaltet und wieder neu gestartet wird.
- Page 45 SYSTEMEINSTELLUNGEN (Settings) Durch Drücken auf MODE gelangen Sie in das Hauptmenü (--- Menu ---). Mit Hilfe von UP und DOWN wählen Sie nun den Menüpunkt Settings aus (Pfeil beachten) und bestätigen mit ENTER. ---------------- Menu ---------------- DMX Address DMX Mode Stand Alone Slave Settings...
- Page 46 DMX Fail = Betriebs- Hold letzter Befehl wird gehalten zustand bei DMX-Signal- Unterbre- Blackout aktiviert Blackout chung Full On Scheinwerfer wechselt auf Full On Stand Alone Scheinwerfer wechselt auf Betriebsart Stand Alone Dimmer = Dimmerkurve Linear Die Lichtintensität steigt linear mit dem DMX- Curve Wert an Exponential...
- Page 47 Mirror Pixel = Anordnung Keine Spiegelung / Invertierung der Pixel- Invert Background -> Pattern, segmente Pattern -> Background invertieren Horizontal Horizontal spiegeln / spiegeln Vertical Vertikal spiegeln (Funktion nur Horizontal + Horizontal spiegeln und invertieren für DMX- Invert -Betrieb) Vertical + Vertikal spiegeln und invertieren Invert = Lüfter-...
-
Page 48: Aufstellung Und Montage
SYSTEMINFORMATIONEN (System Info) Durch Drücken auf MODE gelangen Sie in das Hauptmenü (--- Menu ---). Mit Hilfe der Pfeiltasten wählen Sie nun den Menüpunkt System Info aus (Pfeil beachten) und bestätigen mit ENTER. ---------------- Menu ---------------- DMX Address DMX Mode Stand Alone Slave Settings... -
Page 49: Pflege, Wartung Und Reparatur
GEFAHR: Überkopfmontage erfordert umfassende Erfahrung, einschließlich der Berechnung der Grenzwerte für die Arbeitslast, des verwendeten Installationsmate- rials und der regelmäßigen Sicherheitsüberprüfung aller Installationsmaterialien und Scheinwerfer. Wenn Sie diese Qualifikationen nicht haben, versuchen Sie nicht, eine Installation selbst durchzuführen, sondern nutzen Sie die Hilfe von professionellen Unternehmen. - Page 50 1. Gehäuseoberflächen müssen mit einem sauberen, feuchten Tuch gereinigt werden. Dabei ist darauf zu achten, dass keine Feuchtigkeit in das Gerät eindringen kann. 2. Luft Ein- und Austrittsöffnungen müssen regelmäßig von Staub und Schmutz befreit werden. Im Fall des Einsatzes von Druckluft ist darauf zu achten, dass Beschädigungen am Gerät verhindert werden (z.B.
-
Page 51: Optionales Zubehör
LÜFTER REINIGEN Die drei Lüfter auf der Rückseite der LED-Einheit des Scheinwerfers müssen für eine einwandfreie Funktion regelmäßig kontrolliert und ggf. gereinigt werden. Nehmen Sie den Scheinwerfer vom Stromnetz. Lösen Sie die 4 Innensechskantschrauben, die den Lüfterdeckel an der LED-Einheit halten, mit einem geeigneten Werkzeug. -
Page 52: Dmx Technik
DMX TECHNIK DMX-512 DMX (Digital Multiplex) ist die Bezeichnung für ein universelles Über- tragungsprotokoll für die Kommunikation zwischen entsprechenden Geräten und Controllern. Ein DMX-Controller sendet DMX-Daten an das/die angeschlossene(n) DMX-Gerät(e). Die DMX-Datenübertra- gung erfolgt stets als serieller Datenstrom, der über die an jedem DMX-fähigen Gerät vorhandenen DMX IN- und DMX OUT-Anschlüsse (XLR-Steckverbinder) von einem angeschlossenen Gerät an das nächste weitergeleitet wird, wobei die maximale Anzahl der Geräte 32 nicht überschreiten darf. - Page 53 DMX-KABEL: Beachten Sie bei der Anfertigung eigener Kabel unbedingt die Abbildungen auf dieser Seite. Ver- binden Sie auf keinen Fall die Abschirmung des Kabels mit dem Massekontakt des Steckers, und achten Sie darauf, dass die Abschirmung nicht mit dem XLR-Steckergehäuse in Kontakt kommt. Hat die Abschirmung Massekontakt, kann dies zu Systemfehlern führen.
-
Page 54: Technische Daten
TECHNISCHE DATEN Artikelnummer: CLZW600DSMD Produktart: LED Wash Light Typ: Outdoor Scheinwerfer Farbspektrum LED: Kaltweiß (5700K) LED Anzahl: LED Typ: Single SMD LED PWM Frequenz: 800 Hz, 1200 Hz, 2000 Hz, 3600 Hz, 12 kHz, 25 kHz (einstellbar) Abstrahlwinkel: 104° (145° Field) Schnittstellen: 5-Pol XLR In und Out DMX-Modus:... -
Page 55: Erläuterungen Zur Ip-Schutzart
Minimaler Abstand zur 0,5 m beleuchteten Fläche: Minimaler Abstand zu 0,3 m normal entflammbaren Materialien: Abmessungen (B x H x T, 463 x 291 x 161 mm ohne Montagebügel): Gewicht (ohne Zubehör): 11,9 kg Zubehör im Lieferum- 2 Omega-Bügel + Netzkabel fang: Optional erhältliches Torklappe... -
Page 56: Mindestabstand Zur Beleuchteten Fläche
Die IP-Schutzart des Produkts finden Sie in den technischen Daten und als Aufdruck auf dem Gerät. MINDESTABSTAND ZUR BELEUCHTETEN FLÄCHE Dieses Symbol mit Entfernungsangabe in Metern (m) gibt den Mindestabstand des 0.5 m Leuchtkörpers zur beleuchteten Fläche an. In diesem Beispiel beträgt der Abstand 0,5 m. -
Page 57: Herstellererklärungen
HERSTELLERERKLÄRUNGEN HERSTELLERGARANTIE & HAFTUNGSBESCHRÄNKUNG Adam Hall GmbH, Adam-Hall-Str. 1, D-61267 Neu Anspach / E-Mail Info@adamhall.com / +49 (0)6081 / 9419-0. Unsere aktuellen Garantiebedingungen und Haftungsbeschränkung finden Sie unter: https://cdn-shop.adamhall.com/media/pdf/Manufacturers-Declarations-CAMEO_DE_EN_ES_ FR.pdf. Im Servicefall wenden Sie sich an Ihren Vertriebspartner. CE-KONFORMITÄT Hiermit erklärt die Adam Hall GmbH, dass dieses Produkt folgender Richtlinie entspricht (soweit zutreffend): Niederspannungsrichtlinie (2014/35/EU) EMV-Richtlinie (2014/30/EU) -
Page 58: Informations Concernant Le Présent Manuel
Cet appareil a été conçu et produit suivant des exigences de qualité très strictes pour fonctionner pendant de nombreuses années. Veuillez lire attentivement ce manuel d’utilisation pour pouvoir utiliser rapidement et de manière optimale votre nouveau produit Cameo Light. Vous trouverez de plus amples informations sur Cameo Light sur notre site Web CAMEOLIGHT.COM. -
Page 59: Consignes De Sécurité
Ce symbole indique un danger susceptible de provoquer une décharge électrique. Ce symbole indique une zone ou une situation dangereuses. Ce symbole indique des dangers liés à des surfaces chaudes. Ce symbole signale des dangers liés à des sources lumineuses intenses. Ce symbole indique que l’appareil ne contient aucune pièce remplaçable par l’utili- sateur. - Page 60 ATTENTION : 1. Ne mettez pas immédiatement l’appareil en service s’il a été exposé à d’impor- tantes variations de température (par exemple après le transport). L’humidité et la condensation risquent d’endommager l’appareil. Ne mettez l’appareil en marche que lorsqu’il est à température ambiante. 2.
- Page 61 AVERTISSEMENT : 1. Utilisez uniquement cet appareil conformément à l’usage prévu. 2. Utilisez uniquement cet appareil avec les accessoires recommandés et prévus par le fabricant. 3. Lors de l’installation, veillez à respecter les prescriptions de sécurité en vigueur dans votre pays. 4.
- Page 62 ATTENTION : 1. N’installez et n’utilisez pas cet appareil à proximité de radiateurs, d’accumu- lateurs thermiques, de fours ou d’autres sources de chaleur. Veillez à installer l’appareil de façon à assurer en permanence un refroidissement suffisant et à éviter une surchauffe. 2.
- Page 63 TRANSMISSION DE SIGNAUX PAR RADIO (par ex. W-DMX ou systèmes audio sans fil) : La qualité et la performance des transmissions de signaux sans fil dépendent généralement des conditions ambiantes. Les éléments suivants ont par exemple une influence sur la portée et la stabilité des signaux : Écrans (par ex.
-
Page 64: Remarques Concernant Les Appareils D'extérieur Mobiles
TRANSMISSION DE SIGNAL PAR W-DMX AVERTISSEMENT : en règle générale, la transmission DMX sans fil ne doit pas être utilisée pour des applications présentant des facteurs de sécurité susceptibles d’entraîner des dommages corporels ou matériels en cas de défaillance. Ceci s’applique en particulier aux structures de scènes ou de traverses mobiles, aux moteurs/dispositifs de levage commandés par DMX ou aux dispositifs de levage destinés au fonctionnement de monte-plateaux, de systèmes hydrauliques ou de composants mobiles similaires fonctionnant en mode DMX. -
Page 65: Présentation
PRÉSENTATION ZENIT W600 D SMD PROJECTEUR WASH PROFESSIONNEL D'EXTÉRIEUR CLZW600DSMD FONCTIONS DE PILOTAGE : Pilotage DMX sur 1, 2, 3, 4, 6, 12, 15-, 18-, 48, 54, 63 canaux Mode Master/Slave (maître/esclave) Fonction Standalone (mode autonome) W-DMX™ CARACTÉRISTIQUES : 576 LED single SMD Daylight. Indice de protection IP65. DMX512. W-DMX™. Dimmer 16 bits. - Page 66 Embase secteur de sortie IP65 avec cache en caoutchouc. Permet d’alimenter d’autres projecteu- rs CAMEO. S’assurer que la consommation totale de tous les appareils connectés ne dépasse pas la valeur en ampères (A) indiquée sur l’appareil (mettre systématiquement le cache étanche en caoutchouc si raccord non utilisé).
- Page 67 • Dès que le projecteur est alimenté en courant, la phase de démarrage se lance et « Welcome to Cameo », la désignation du modèle et la version du logiciel s’affichent successivement à l’écran. Pendant la phase de démarrage, le mode de fonctionnement préréglé s’active ; après quelques instants, le projecteur est prêt à...
-
Page 68: Utilisation
UTILISATION AFFICHAGE PRINCIPAL DE L’ÉCRAN L’écran principal affiche les informations suivantes : Mode de fonctionnement en cours (ici : mode DMX avec adresse de départ 001) et état W-DMX™. État W-DMX™ DMX Address Mode de fonctionnement en cours W-DMX™ 1. Pour connecter l’appareil à des transmetteurs compatibles W-DMX™, activez l’option W-D- MX™... - Page 69 ÉTAT W-DMX™ W-DMX™ W-DMX™ W-DMX™ activé W-DMX W-DMX™ activé W-DMX™ W-DMX™ désactivé activé comme comme récep- activé et appar- comme récep- et mode de et mode de récepteur, teur et appareil eil connecté, teur et appareil transmission G3 transmission non connecté connecté, pas de signal connecté,...
- Page 70 RÉGLAGE DU MODE DMX (DMX Mode) Appuyez sur MODE pour accéder au menu principal (--- Menu ---). Utilisez ensuite les touches UP et DOWN pour sélectionner l’option de menu DMX Mode (voir flèche) et appuyez sur ENTER pour confirmer. Le sous-menu permet de sélectionner le mode de fonctionnement DMX souhaité à l’aide des touches UP et DOWN .
- Page 71 MODE STATIQUE (Static) De façon similaire à un dispositif de commande DMX, le mode statique permet de régler les fonctions Dimmer et stroboscope (Strobe) directement sur l’appareil, avec des valeurs compri- ses entre 000 et 255. Il est ainsi possible de créer une scène personnalisée sans recourir à un contrôleur DMX supplémentaire.
- Page 72 Conformément à la procédure décrite au chapitre « RÉGLAGE DU MODE DE FONCTIONNEMENT STAND ALONE », sélectionnez l’option de menu Timer et confirmez la saisie en appuyant sur ENTER. Pour effectuer des réglages individuels, sélectionnez à présent « Fade In », « Dwell Time » ou « Fade Out » (voir flèche) et appuyez sur ENTER pour confirmer. Une fenêtre contenant trois chiffres s’affiche à...
- Page 73 PARAMÈTRES DU SYSTÈME (Settings) Appuyez sur MODE pour accéder au menu principal (--- Menu ---). Utilisez ensuite les touches UP et DOWN pour sélectionner l’option de menu Settings (voir flèche) et confirmez en appuyant sur ENTER. ---------------- Menu ---------------- DMX Address DMX Mode Stand Alone Slave...
- Page 74 DMX Fail = État de Hold Maintien de la dernière commande fonctionne- Blackout Active la fonction Blackout ment en cas Full On Le projecteur passe en mode Full On d’interruption Stand Alone Le projecteur passe en mode Stand Alone du signal Dimmer = Courbe de Linear...
- Page 75 Mirror Pixel = Inversion/ Pas de miroir/d’inversion miroir de dis- Invert Background -> Pattern, position des Pattern -> Background segments Horizontal Miroir horizontal de pixels Vertical Miroir vertical (fonction Horizontal + Miroir horizontal et inversion uniquement Invert en mode Vertical + Miroir vertical et inversion DMX) Invert...
- Page 76 INFORMATIONS SYSTÈME (System Info) Appuyez sur MODE pour accéder au menu principal (--- Menu ---). À l’aide des touches fléchées, sélectionnez ensuite l’option de menu System Info (voir flèche). Appuyez sur ENTER pour valider la sélection. ---------------- Menu ---------------- DMX Address DMX Mode Stand Alone Slave...
-
Page 77: Installation Et Montage
INSTALLATION ET MONTAGE Grâce aux pieds en plastique intégrés, le projecteur peut être placé à un endroit approprié sur une surface plane. Le montage sur une traverse s’effectue soit au moyen d’un oméga de fixation à installer au milieu de la base de l’appareil (A), soit au moyen de deux omégas de fixation à installer sur les emplacements de fixation externes (B). - Page 78 1. Les surfaces du boîtier doivent être nettoyées avec un chiffon propre et humide. Veillez à ce qu’aucune humidité ne pénètre dans l’appareil. 2. Les orifices d’entrée et de sortie d’air doivent être nettoyés régulièrement pour éliminer la poussière et les impuretés. En cas d’utilisation d’air comprimé, veillez à ce que l’appareil ne soit pas endommagé...
-
Page 79: Accessoires Disponibles En Option
NETTOYAGE DU VENTILATEUR Le bon fonctionnement des trois ventilateurs situés à l’arrière de l’unité à LED du projecteur doit être régulièrement contrôlé ; le cas échéant, les ventilateurs doivent être nettoyés. Débranchez le projecteur du secteur. À l’aide d’un outil approprié, dévissez les 4 vis à six pans creux qui main- tiennent le couvercle du ventilateur sur l’unité... -
Page 80: Technologie Dmx
TECHNOLOGIE DMX DMX-512 Le sigle DMX (Digital Multiplex) désigne un protocole de trans- mission universel destiné à la communication entre appareils et contrôleurs compatibles. Un contrôleur DMX envoie des données DMX à l’appareil/aux appareils DMX raccordé(s). La transmission de données DMX s’exécute systématiquement sous forme de flux de données en série, lequel est transmis d’un appareil raccordé... - Page 81 CÂBLES DMX : Si vous confectionnez vous-même vos câbles, respectez strictement les illustrations figurant sur cette page. Ne raccordez en aucun cas le blindage du câble au plot de masse du connecteur, et veillez à ce que le blindage n’entre pas en contact avec le boîtier du connecteur XLR. La mise à la masse du blindage peut entraîner une défaillance du système.
-
Page 82: Caractéristiques Techniques
CARACTÉRISTIQUES TECHNIQUES Référence : CLZW600DSMD Catégorie de produit : Projecteur wash à LED Type : Projecteur à usage extérieur Spectre de couleurs des Blanc froid (5 700 K) LED : Nombre de LED : Type de LED : Single SMD Fréquence du signal 800 Hz, 1 200 Hz, 2 000 Hz, 3 600 Hz, 12 kHz, 25 kHz (réglable) PWM de la LED : Angle de dispersion : 104°... -
Page 83: Explications Relatives À L'indice De Protection Ip
Refroidissement du Refroidi par ventilateur boîtier : Indice de protection : IP65 Inclinaison – rotation 158° (manuel) Position de fonctionne- libre ment : Distance minimale de la 0,5 m surface éclairée : Distance minimale des 0,3 m matériaux normalement inflammables : Dimensions (L x H x P, 463 x 291 x 161 mm sans étrier de monta- ge) : Poids (sans accesso- 11,9 kg... -
Page 84: Distance Minimale De La Surface Éclairée
3. Le second chiffre indique la protection contre l’eau : IPX0 Aucune protection IPX1 Protection contre les gouttes d’eau IPX2 Protection contre les chutes de gouttes d’eau lorsque l’appareil est incliné à 15° IPX3 Protection contre l’eau pulvérisée jusqu’à 60° par rapport à la verticale IPX4 Protection contre les projections d’eau de toutes directions IPX5... -
Page 85: Déclarations Du Fabricant
APPAREIL : 1. Cet appareil est soumis à la directive européenne sur les déchets d’équipements électriques et électroniques dans sa version actuelle. Directive DEEE Déchets d’équipements électriques et électroniques. Les appareils usagés ne doivent pas être jetés avec les ordures ménagères. L’appareil usagé doit être éliminé par une entreprise d’élimination des déchets agréée ou par un organisme communal de traitement des déchets. -
Page 86: Español
Lea atentamente el presente manual de in- strucciones con el fin de poder usar rápidamente y de forma óptima su nuevo producto de Cameo Light. Puede encontrar más información sobre Cameo Light en nuestro sitio web CAMEOLIGHT. -
Page 87: Términos Y Símbolos
TÉRMINOS Y SÍMBOLOS 1. PELIGRO: La palabra «PELIGRO», que puede ir acompañada de un símbolo, se utiliza para indicar situaciones o estados de peligro inminente para la vida o la integridad física. 2. ADVERTENCIA: La palabra «ADVERTENCIA», que puede ir acompañada de un símbolo, indica situaciones o estados potencialmente peligrosos para la vida o la integridad física de las perso- nas. - Page 88 ADVERTENCIA: 1. No utilizar el equipo si presenta daños evidentes. 2. El equipo solo se puede instalar estando sin tensión. 3. Si el cable de alimentación del equipo está dañado, el equipo no debe utilizarse. 4. Los cables de alimentación fijos solo pueden ser sustituidos por una persona cualificada.
- Page 89 ADVERTENCIA: 1. Utilizar el equipo únicamente de la forma prevista. 2. Utilizar el equipo solo con los accesorios previstos y recomendados por el fabri- cante. 3. Durante la instalación, hay que tener en cuenta los reglamentos de seguridad vigentes en su país. 4.
- Page 90 ATENCIÓN: 1. No instalar ni poner a funcionar el equipo cerca de radiadores, acumuladores tér- micos, hornos u otras fuentes de calor. Asegurarse de que el equipo siempre esté instalado de modo que reciba suficiente refrigeración y no pueda sobrecalentarse. 2.
- Page 91 TRANSMISIÓN DE SEÑALES POR RADIO (por ejemplo, W-DMX o sistemas de audio inalámbricos): La calidad y el rendimiento de las transmisiones inalámbricas de señales dependen, por lo general, de las condiciones ambientales. Elementos que influyen en el alcance y la estabilidad de la señal: barreras (p.
-
Page 92: Indicaciones Para Equipos Portátiles De Exterior
TRANSMISIÓN DE LA SEÑAL POR W-DMX ADVERTENCIA: En general, la transmisión DMX inalámbrica no se puede utilizar para aplicaciones con factores relevantes para la seguridad que puedan provocar daños personales o materiales en caso de fallo. Esto afecta especialmente a las estructuras móviles para escenarios o truss, a los motores/elevadores controlados por DMX o a los dispositivos de elevación para el manejo de torres elevadoras, sistemas hidráulicos o componentes móviles similares accionados por DMX. -
Page 93: Introducción
INTRODUCCIÓN WASHER ZENIT W600 D SMD PROFESIONAL PARA EXTERIORES CLZW600DSMD MODOS DE CONTROL: Control DMX de 1, 2, 3, 4, 6, 12, 15, 18, 48, 54, 63 canales Modo maestro/esclavo Funcionamiento autónomo W-DMX™ CARACTERÍSTICAS: 576 LED Single SMD Daylight. Clase de protección IP65. DMX512. W-DMX™. Atenuador de 16 bits. - Page 94 Toma de salida de alimentación IP65 con tapa de sellado de goma. Sirve para alimentar otros focos CAMEO. Asegúrese de que el consumo de corriente total de todos los dispositivos conecta- dos no supere el valor indicado en amperios (A) sobre el dispositivo (mientras no se vaya a usar, mantenerla siempre cerrada con la tapa de sellado de goma).
- Page 95 «Welcome to Cameo» (Bienvenidos a Cameo), así como la denominación de modelo y la versión del software. Durante el proceso de arranque se activa el modo operativo ajustado previamente y el foco está listo para funcionar al cabo de poco tiempo.
-
Page 96: Funcionamiento
FUNCIONAMIENTO PANTALLA PRINCIPAL La pantalla principal muestra la siguiente información: modo operativo actual (en el ejemplo, modo operativo DMX con dirección inicial 001) y estado W-DMX™. Estado W-DMX™ DMX Address Modo operativo actual W-DMX™ 1. Para un acoplamiento con transmisores compatibles con W-DMX™, active W-DMX™ en la configuración del dispositivo (Settings ->... - Page 97 ESTADO W-DMX™ W-DMX™ W-DMX™ W-DMX™ W-DMX W-DMX™ W-DMX™ W-DMX™ y desactivado, activado como activado como activado y activado como y modo de modo de trans- receptor, receptor y equi- equipo acoplado, receptor y equi- transferencia G3 ferencia G4S no acoplado po acoplado, sin señal DMX po acoplado,...
- Page 98 CONFIGURAR EL MODO OPERATIVO DMX (DMX Mode) Pulsando MODE accederá al menú principal (--- Menu ---). Ahora, utilice los botones UP y DOWN para seleccionar la opción del menú DMX Mode (indicada por la flecha) y confirme la selección con ENTER. A continuación, en el submenú podrá seleccionar el modo operativo DMX deseado con los botones UP y DOWN .
- Page 99 MODO ESTÁTICO (Static) De forma similar a la configuración con un equipo de control DMX, el modo Estático permite configurar las funciones Atenuador (Dimmer) y Estrobo (Strobe) directamente en el dispositivo, se- leccionando valores entre 000 y 255. De esa forma, se podrá crear una escena personalizada sin necesidad de un equipo de control DMX adicional.
- Page 100 FUNCIÓN DE TEMPORIZADOR (Timer) La función de temporizador permite el control por tiempo del modo operativo autónomo Static ajustando el tiempo de aparición (Fade In) de 0 a 60 minutos, el tiempo de permanencia (Dwell Time) de 1 a 24 horas y el tiempo de desaparición (Fade Out) de 0 a 60 minutos. El control de tiempo comienza en cuanto se activa la función de temporizador en el modo operativo autónomo previamente activado y se mantiene aunque el foco se apague y vuelva a encender.
- Page 101 CONFIGURACIÓN DEL SISTEMA (Settings) Pulsando MODE accederá al menú principal (--- Menu ---). Ahora, utilice los botones UP y DOWN para seleccionar la opción del menú Settings (indicada por la flecha) y confirme la selección con ENTER. ---------------- Menu ---------------- DMX Address DMX Mode Stand Alone...
- Page 102 Dimmer = Curva de Linear La intensidad luminosa aumentará de forma Curve atenuación lineal con el valor DMX Exponential La intensidad luminosa permite un ajuste fino en el rango inferior de valores DMX y un ajuste aproximado en el rango superior de valores Logarithmic La intensidad luminosa podrá...
- Page 103 Mirror Pixel = Invertir/re- Sin reflejo/inversión flejar la dis- Invert Background -> Pattern, posición de Pattern -> Background los segmen- Horizontal Reflejar horizontalmente tos de píxeles Vertical Reflejar verticalmente (función solo Horizontal + Reflejar horizontalmente e invertir para modo Invert DMX) Vertical + Reflejar verticalmente e invertir...
-
Page 104: Instalación Y Montaje
INFORMACIÓN DEL SISTEMA (System Info) Pulsando MODE accederá al menú principal (--- Menu ---). Ahora, utilice los botones de flechas para seleccionar la opción del menú System Info (indicada por la flecha) y confirme la selección con ENTER. ---------------- Menu ---------------- DMX Address DMX Mode Stand Alone... -
Page 105: Cuidado, Mantenimiento Y Reparación
El ajuste de la dirección de dispersión de la unidad LED es independiente de la base del equipo y se realiza con las palomillas laterales. PELIGRO: El montaje en altura requiere mucha experiencia, incluido el cálculo de los valores límite de la carga de trabajo, el material de instalación utilizado y las comprobaciones de seguridad periódicas de todos los materiales de instalación y focos. - Page 106 1. Limpiar las superficies de la carcasa con un paño limpio y húmedo. Asegurarse de que no pueda penetrar humedad en el equipo. 2. Limpiar periódicamente las aberturas de entrada y salida de aire para evitar que se acumule polvo y suciedad. Si se va a utilizar aire comprimido, hay que asegurarse de que el equipo no sufra daños (p.
-
Page 107: Accesorios Opcionales
LIMPIEZA DE LOS VENTILADORES Es necesario comprobar periódicamente los tres ventiladores de la parte trasera de la unidad LED del foco para que funcionen de forma correcta y, en caso necesario, limpiarlos. Desconecte el foco de la red eléctrica. Utilice una herramienta adecuada para aflojar los 4 tornillos Allen que fi- jan la tapa de los ventiladores a la unidad LED. -
Page 108: Tecnología Dmx
TECNOLOGÍA DMX DMX-512 DMX (Digital Multiplex) es la denominación de un protocolo de trans- ferencia universal para la comunicación entre los dispositivos y sus controladores. Un controlador DMX envía datos DMX al dispositivo o dispositivos DMX conectados. La transferencia de datos DMX se efectúa siempre como un flujo de datos en serie que se transmite a las conexiones de entrada y salida DMX (conectores XLR) de cada equipo compatible con DMX desde un equipo conectado al siguiente, con un límite máximo de 32 equipos. - Page 109 CABLES DMX: Al confeccionar sus propios cables, es indispensable que tenga en cuenta las imágenes incluidas en esta página. En ningún caso conecte el apantallamiento del cable con el contacto de masa del conector y compruebe que el apantallamiento del cable tampoco entre en contacto con la carcasa del conector XLR.
-
Page 110: Datos Técnicos
DATOS TÉCNICOS Número de artículo: CLZW600DSMD Clase de producto: Washer LED Tipo: Foco para exteriores Espectro cromático del Blanco frío (5700 K) LED: Cantidad de LED: Tipo de LED: Single SMD Frecuencia de la mo- 800 Hz, 1200 Hz, 2000 Hz, 3600 Hz, 12 kHz, 25 kHz (ajustable) dulación por ancho de pulsos (PWM) del LED: Ángulo de dispersión:... -
Page 111: Explicación Sobre La Clase De Protección Ip
Temperatura ambiente de -15 °C a +40 °C (en funcionamiento): Material de la carcasa: Aluminio de fundición Color de la carcasa: Negro Refrigeración de la Refrigerado por ventiladores carcasa: Clase de protección: IP65 Giro vertical 158° (manual) Posición de funciona- Aleatoria miento: Distancia mínima con... -
Page 112: Distancia Mínima Con Respecto A La Superficie Iluminada
3. El segundo número indica la protección contra el agua: IPX0 Sin protección IPX1 Protección contra goteo de agua IPX2 Protección contra la caída de gotas de agua cuando el equipo está inclinado hasta 15° IPX3 Protección contra la caída de agua pulverizada hasta 60° en vertical IPX4 Protección contra salpicaduras de agua por todos los lados IPX5... -
Page 113: Declaraciones Del Fabricante
EQUIPO: 1. Este equipo está sujeto a la Directiva europea sobre residuos de aparatos eléctricos y electrónicos, en su versión actual. Directiva RAEE sobre residuos de aparatos eléctricos y electrónicos. Los equipos usados no se tiran junto con la ba- sura doméstica. -
Page 114: Informacje Dotyczące Niniejszej Instrukcji Obsługi
Urządzenie to zostało zaprojektowane i wyprodukowane zgodnie z wysokimi standardami jakości, tak by działało bezawaryjnie przez wiele lat. Należy uważnie przeczytać niniejszą instrukcję obsłu- gi, aby móc jak najszybciej rozpocząć prawidłową eksploatację nowego urządzenia marki Cameo Light. Więcej informacji o marce Cameo Light można znaleźć na stronie CAMEOLIGHT.COM. -
Page 115: Objaśnienia Terminów I Symboli
OBJAŚNIENIA TERMINÓW I SYMBOLI 1. NIEBEZPIECZEŃSTWO: Słowo NIEBEZPIECZEŃSTWO, ewentualnie w połączeniu z symbolem, wskazuje na bezpośrednie niebezpieczne sytuacje lub stany zagrożenia dla życia i zdrowia. 2. OSTRZEŻENIE: Słowo OSTRZEŻENIE, ewentualnie w połączeniu z symbolem, wskazuje na potencjalnie niebezpieczne sytuacje lub stany zagrażające zdrowiu lub życiu. 3. - Page 116 OSTRZEŻENIE: 1. Urządzenia nie wolno uruchamiać, gdy jest ono w widoczny sposób uszkodzone. 2. Urządzenie można instalować wyłącznie w stanie beznapięciowym. 3. Jeśli przewód zasilający urządzenia jest uszkodzony, nie wolno uruchamiać urządzenia. 4. Podłączone na stałe przewody zasilające mogą być wymieniane tylko przez wyk- walifikowaną...
- Page 117 OSTRZEŻENIE: 1. Używać urządzenia tylko zgodnie z przeznaczeniem. 2. Używać urządzenia wyłącznie z akcesoriami zalecanymi i przewidzianymi przez producenta. 3. Podczas instalacji przestrzegać krajowych przepisów bezpieczeństwa. 4. Po podłączeniu urządzenia należy sprawdzić wszystkie trasy kablowe, aby uni- knąć szkód lub wypadków spowodowanych np. przez potknięcie. 5.
- Page 118 UWAGA: 1. Nie instalować ani nie eksploatować urządzenia w pobliżu grzejników, akumula- torów ciepła, pieców ani innych źródeł ciepła. Upewnić się, że urządzenie zawsze jest instalowane w taki sposób, aby zapewnić wystarczające chłodzenie i nie dopuścić do przegrzania. 2. W pobliżu urządzenia nie wolno umieszczać źródeł zapłonu, takich jak płonące świece.
- Page 119 TRANSMISJA SYGNAŁÓW DROGĄ RADIOWĄ (np. W-DMX lub radiowe syste- my audio): Jakość i wydajność transmisji bezprzewodowej zależą głównie od warunków oto- czenia. Na zasięg i stabilność sygnału mają wpływ m.in.: Ekranowanie (np. mury, konstrukcje metalowe, woda) Wysokie poziomy emisji fal radiowych (np. silne sieci Wi-Fi) Zakłócenia Promieniowanie elektromagnetyczne (np.
-
Page 120: Uwagi Dotyczące Przenośnego Sprzętu Zewnętrznego
TRANSMISJA SYGNAŁÓW W W-DMX OSTRZEŻENIE: Ogólnie rzecz biorąc, bezprzewodowa transmisja DMX nie może być stosowana, gdy występują czynniki wpływające na bezpieczeństwo, które w przypadku awarii mogą spowodować obrażenia osób lub szkody materialne. Dotyczy to w szczególności ruchomych konstrukcji scenicznych lub kratownic, sil- ników/podnośników sterowanych przez DMX lub urządzeń... -
Page 121: Wprowadzenie
WPROWADZENIE ZENIT W600 D SMD PROFESSIONAL OUTDOOR WASHLIGHT CLZW600DSMD FUNKCJE STEROWANIA: Sterowanie DMX 1-, 2-, 3-, 4-, 6-, 12-, 15-, 18-, 48-, 54-, 63-kanałowe Tryb pracy master/slave Funkcja standalone W-DMX™ CHARAKTERYSTYKA: 576 diod LED Single SMD Daylight. Stopień ochrony IP65. DMX512. W-DMX™. Ściemniacz 16-bitowy. - Page 122 POWER OUT Gniazdo wyjściowe IP65 z gumową zaślepką. Źródło zasilania dodatkowych reflektorów CAMEO. Całkowity pobór prądu wszystkich podłączonych urządzeń nie może przekroczyć wartości w amperach (A) podanej na urządzeniu (nieużywane gniazdo zawsze zamykać gumową zaślepką). DMX IN Męskie 5-pinowe gniazdo XLR IP65 do podłączania sterownika DMX (np. pulpitu DMX; nieużywa- ne gniazdo zawsze zabezpieczać...
- Page 123 • Gdy reflektor jest zasilany napięciem sieciowym, rozpoczyna się procedura uruchamiania, a na wyświetlaczu pojawia się kolejno napis „Welcome to Cameo”, nazwa modelu oraz wersja oprogramowania. Podczas procesu uruchamiania włączany jest uprzednio wybrany tryb pracy, a po krótkim czasie reflektor jest gotowy do działania.
-
Page 124: Obsługa
OBSŁUGA EKRAN GŁÓWNY WYŚWIETLACZA Ekran główny zawiera następujące informacje: Bieżący tryb pracy (w przykładzie tryb pracy DMX z adresem startowym 001) i statusem W-DMX™. Status W-DMX™ DMX Address Aktualny tryb pracy W-DMX™ 1. Aby sparować urządzenie z transmiterami obsługującymi standard W-DMX™, aktywować tryb W-DMX™... - Page 125 STATUS W-DMX™ W-DMX™ W-DMX™ W-DMX™ W-DMX W-DMX™ W-DMX™ i tryb W-DMX™ i tryb nieaktywne aktywne jako aktywne jako aktywne i aktywne jako transmisji G3 transmisji G4S odbiornik, odbiornik i urządzenie odbiornik i aktywne aktywne niesparowane urządzenie jest sparowane, urządzenie jest strzałka w górę...
- Page 126 USTAWIANIE TRYBU PRACY STANDALONE Naciśnięcie przycisku MODE spowoduje przejście do głównego menu (--- Menu ---). Przyciska- mi UP i DOWN wybierz opcję Stand Alone (zgodnie ze strzałką) i potwierdź wybór przyciskiem ENTER. W podmenu można wybrać tryb standalone Static, Pixel oraz funkcję timera Timer za pomocą...
- Page 127 FUNKCJA TIMERA (Timer) Funkcja timera umożliwia sterowanie czasowe trybu standalone Static w taki sposób, że czas wyświetlania (Fade In) można ustawić w zakresie od 0 sekund do 60 minut, czas trzymania (Dwell Time) od 1 do 24 godzin oraz czas wygaszania (Fade Out) również od 0 sekund do 60 minut. Ste- rowanie czasowe rozpoczyna się...
- Page 128 USTAWIENIA SYSTEMU (Settings) Naciśnięcie przycisku MODE spowoduje przejście do głównego menu (--- Menu ---). Przyciskami UP i DOWN wybierz opcję Settings (zgodnie ze strzałką) i potwierdź wybór przyciskiem ENTER. ---------------- Menu ---------------- DMX Address DMX Mode Stand Alone Slave Settings System Info Następnie w menu ustawień...
- Page 129 Dimmer = krzywa regu- Linear Natężenie światła wzrasta liniowo wraz ze Curve lacji ściemni- wzrostem wartości DMX acza Exponential Natężenie światła można ustawić precyzyjnie w dolnym zakresie wartości DMX oraz zgrub- nie w górnym zakresie wartości DMX Logarithmic Natężenie światła można ustawić zgrubnie w dolnym zakresie wartości DMX oraz precyzy- jnie w górnym zakresie wartości DMX S-Curve...
- Page 130 = dopasowanie Auto automatyczna regulacja mocy wentylatora sterowania Max Intensity maksymalna moc wentylatora dla maksymal- wentylatorem nej jasności Low Noise bardzo cichy wentylator przy zredukowanej jasności Factory Reset = Przywracanie Reset Now! Zresetuj do ustawienia fabrycznego: ustawień ENTER -> „Reset Now!” -> ENTER Naciśnij fabrycznych przycisk „MODE”, aby anulować.
-
Page 131: Ustawianie I Montaż
INFORMACJE O SYSTEMIE (System Info) Naciśnięcie przycisku MODE spowoduje przejście do głównego menu (--- Menu ---). Przyciskami ze strzałkami wybierz opcję System Info (zgodnie ze strzałką) i potwierdź wybór przyciskiem ENTER. ---------------- Menu ---------------- DMX Address DMX Mode Stand Alone Slave Settings System Info... -
Page 132: Czyszczenie, Konserwacja I Naprawy
NIEBEZPIECZEŃSTWO:Montaż na wysokości wymaga dużego doświadczenia w zakresie obliczania limitów obciążenia, stosowanych materiałów instalacyjnych oraz okresowych przeglądów bezpieczeństwa wszystkich materiałów instalacyjnych i reflektorów. Użytkownik bez odpowiednich kwalifikacji nie powinien wykonywać instalacji samodzielnie, lecz skorzystać z pomocy profesjonalnych firm. Istnieje ryzyko, że nieprawidłowo zamontowane i niezabezpieczone urządzenia poluzują się i spadną. - Page 133 1. Powierzchnie obudowy należy czyścić czystą, wilgotną ściereczką. Należy przy tym uważać, aby do urządzenia nie dostała się wilgoć. 2. Otwory wlotowe i wylotowe powietrza muszą być regularnie czyszczone z pyłu i brudu. W przypadku zastosowania sprężonego powietrza należy uważać, aby nie dopuścić do uszko- dzenia urządzenia (np.
-
Page 134: Opcjonalne Akcesoria
CZYSZCZENIE WENTYLATORA Trzy wentylatory z tyłu modułu LED reflektora muszą być regularnie kontrolowane w celu za- pewnienia prawidłowego działania. W razie potrzeby należy je wyczyścić. Odłączyć reflektor od źródła zasilania. Odkręcić 4 śruby imbusowe mocujące pokrywę wentylatora do modułu LED za pomocą... -
Page 135: Technika Dmx
TECHNIKA DMX DMX-512 DMX (Digital Multiplex) to uniwersalny protokół transmisji umożliwi- ający komunikację między urządzeniami i sterownikami. Sterownik DMX wysyła dane w standardzie DMX do podłączonych urządzeń pracujących w standardzie DMX. Transmisja danych DMX odbywa się zawsze w postaci szeregowego strumienia danych, który jest przekazywany z jednego podłączonego urządzenia do drugiego za pośrednictwem złączy DMX IN i DMX OUT (złącza wtykowe XLR) na każdym urządzeniu obsługującym DMX. - Page 136 KABLE DMX: Lutując własne kable, należy bezwzględnie przestrzegać poniższych rysunków. Nigdy nie podłączaj ekranu kabla do masy wtyku i nie dopuszczaj do kontaktu ekranu z obudową wtyku XLR. W razie kontaktu ekranu z masą mogą wystąpić błędy w systemie. SCHEMAT PODŁĄCZENIA WTYKÓW: Kabel DMX z 3-pinowymi wtykami XLR: Kabel DMX z 5-pinowymi wtykami XLR (pin 4 i 5 nie są...
-
Page 137: Dane Techniczne
DANE TECHNICZNE Numer artykułu: CLZW600DSMD Rodzaj produktu: Reflektor LED Wash Light Typ: Reflektor zewnętrzny Widmo kolorów LED: Zimna biel (5700 K) Liczba diod LED: Typ diod LED: Pojedynczy SMD Częstotliwość PWM 800 Hz, 1200 Hz, 2000 Hz, 3600 Hz, 12 kHz, 25 kHz (regulowana) diody LED: Kąt rozwarcia wiązki 104°... -
Page 138: Objaśnienia Dotyczące Stopnia Ochrony Ip
Stopień ochrony: IP65 Obrót w pionie 158° (ręcznie) Położenie robocze: dowolne Minimalna odległość od 0,5 m oświetlanej powierzchni: Minimalna odległość od 0,3 m normalnie łatwopalnych materiałów: Wymiary (szer. x wys. x 463 x 291 x 161 mm gł., bez uchwytu monta- żowego): Masa (bez akcesoriów): 11,9 kg... -
Page 139: Minimalna Odległość Od Powierzchni Oświetlonej
Stopień ochrony IP produktu można znaleźć w danych technicznych lub na nadruku na urządzeniu. MINIMALNA ODLEGŁOŚĆ OD POWIERZCHNI OŚWIETLONEJ Ten symbol z informacją o odległości w metrach (m) wskazuje minimalną odle- 0,5 m głość iluminatora od powierzchni oświetlanej. W tym przykładzie odległość wynosi 0,5 m. -
Page 140: Deklaracje Producenta
DEKLARACJE PRODUCENTA GWARANCJA PRODUCENTA I OGRANICZENIE ODPOWIEDZIALNOŚCI Adam Hall GmbH, Adam-Hall-Str. 1, D-61267 Neu Anspach / e-mail Info@adamhall.com / +49 (0)6081 / 9419-0. Nasze aktualne warunki gwarancji oraz informację o ograniczeniu odpowiedzialności można znaleźć na stronie internetowej: https://cdn-shop.adamhall.com/media/pdf/Manufacturers-Declarations-CAMEO_DE_EN_ES_ FR.pdf. W sprawie serwisu należy skontaktować się z dystrybutorem. ZGODNOŚĆ... -
Page 141: Italiano
Questo dispositivo è stato sviluppato e prodotto secondo elevati standard qualitativi per garantirne il regolare funzionamento per molti anni. Leggete attentamente questo manuale d'uso per utilizza- re al meglio il nuovo prodotto Cameo Light. Per maggiori informazioni su Cameo Light, consultate il nostro sito web CAMEOLIGHT.COM. -
Page 142: Spiegazione Di Concetti E Simboli
SPIEGAZIONE DI CONCETTI E SIMBOLI 1. PERICOLO: La parola PERICOLO, eventualmente abbinata a un simbolo, indica situazioni o condizioni immediatamente pericolose per l'incolumità fisica e personale. 2. AVVERTENZA: La parola AVVERTENZA, eventualmente abbinata a un simbolo, indica situazioni o condizioni potenzialmente pericolose per l'incolumità delle persone. 3. - Page 143 AVVERTENZA: 1. Non utilizzare il dispositivo se presenta evidenti danni. 2. Il dispositivo deve essere installato solo in assenza di tensione. 3. Se il cavo di alimentazione del dispositivo è danneggiato, quest'ultimo non deve essere utilizzato. 4. I cavi di alimentazione collegati in modo permanente devono essere sostituiti solo da personale qualificato.
- Page 144 AVVERTENZA: 1. Utilizzare il dispositivo unicamente nelle modalità previste. 2. Azionare il dispositivo esclusivamente con gli accessori consigliati e previsti dal produttore. 3. Durante l'installazione, osservare le normative sulla sicurezza in vigore nel proprio paese. 4. Una volta collegato il dispositivo, verificare tutti i cavi per evitare danni o incidenti, ad esempio per inciampo.
- Page 145 ATTENZIONE: 1. Non installare né azionare il dispositivo in prossimità di radiatori, accumulatori termici, stufe o altre fonti di calore. Accertarsi che il dispositivo sia sempre instal- lato in modo che venga raffreddato a sufficienza e non possa surriscaldarsi. 2. Non posizionare fonti di ignizione, come candele accese, nelle vicinanze del dispositivo.
- Page 146 TRASMISSIONE DEL SEGNALE VIA RADIO (ad es. W-DMX o sistemi audio): La qualità e le prestazioni della trasmissione wireless del segnale dipendono in genere dalle condizioni ambientali. Influenza sulla portata e sulla stabilità del segnale, ad es.: Schermatura (ad es. muratura, strutture in metallo, acqua) Elevata presenza di onde radio (ad es.
-
Page 147: Avvertenze Per Dispositivi Portatili Per Esterni
TRASFERIMENTO DEL SEGNALE TRAMITE W-DMX AVVERTENZA:In generale, la trasmissione DMX senza fili non deve essere utilizzata per applicazioni con fattori di sicurezza che possono causare danni a persone o cose in caso di guasto. Ciò vale in particolare per scene mobili o traverse, per motori/sollevatori controllati da DMX o per il funzionamento di ascensori da palcoscenico azionati da DMX, siste- mi idraulici o componenti mobili analoghi. -
Page 148: Introduzione
INTRODUZIONE ZENIT W 600 D SMD PROFESSIONAL OUTDOOR WASHLIGHT CLZW600DSMD FUNZIONI DI CONTROLLO: Controllo DMX a 1, 2, 3, 4, 6, 12, 15, 18, 48, 54, 63 canali Funzionamento master / slave Funzione stand-alone W-DMX™ CARATTERISTICHE: 576 LED Daylight SMD singoli. Grado di protezione IP65. DMX512 W-DMX™. Dimmer a 16 bit. 4 curve dimmer. - Page 149 Presa di uscita IP65 con tappo ermetico in gomma. Serve per l'alimentazione di altri proiettori CAMEO. Tenere presente che la corrente assorbita complessiva di tutti i dispositivi collegati non deve superare il valore riportato in ampere (A) sul dispositivo (in caso di mancato utilizzo, chiudere sempre con tappo ermetico in gomma).
- Page 150 • Non appena il proiettore viene alimentato con tensione di rete, inizia la procedura di avvio e sul display compare "Welcome to Cameo"; la denominazione del modello e la versione del software vengono visualizzati in successione. Durante la procedura di avvio viene attivata la modalità di funzionamento impostata in precedenza e il proiettore è...
-
Page 151: Utilizzo
UTILIZZO SCHERMATA PRINCIPALE DEL DISPLAY La schermata principale visualizza le seguenti informazioni: Modalità di funzionamento attuale (nell'esempio, modalità di funzionamento DMX con indirizzo di avvio 001) e stato W-DMXTM. Stato W-DMX™ DMX Address Modalità di funzionamento attuale W-DMX™ 1. Per l'accoppiamento con i trasmettitori compatibili con W-DMX™, attivare W-DMX™ nelle impostazioni del dispositivo (Settings ->... - Page 152 STATO W-DMX™ W-DMX™ W-DMX™ W-DMX™ W-DMX attivato W-DMX™ W-DMX™ e W-DMX™ e disattivato attivato come attivato come e dispositivo attivato come modalità di modalità di ricevitore, ricevitore e accoppiato, ricevitore e trasmissione G3 trasmissione non accoppiato dispositivo nessun segnale dispositivo attivati G4S attivati accoppiato,...
- Page 153 IMPOSTAZIONE DELLA MODALITÀ DI FUNZIONAMENTO STAND-ALONE Premendo MODE si accede al menu principale (--- Menu ---). Con i tasti UP e DOWN, seleziona- re la voce di menu Stand Alone(prestare attenzione alla freccia) e confermare con ENTER. Nel sottomenu è ora possibile selezionare le modalità di funzionamento stand-alone Static, Pixel e la funzione timer Timer con i tasti UP e DOWN.
- Page 154 FUNZIONE TIMER (Timer) Con la funzione “Timer” è possibile controllare il tempo della modalità di funzionamento Static in modo tale da impostare il tempo di accensione (Fade In) da 0 a 60 minuti, il tempo di sospensione (Dwell Time) da 1 a 24 ore e il tempo di spegnimento (Fade Out) da 0 a 60 minuti. Il controllo del tempo si avvia subito dopo l’attivazione della funzione “Timer”...
- Page 155 IMPOSTAZIONI DI SISTEMA (Settings) Premendo MODE si accede al menu principale (--- Menu ---). Con UP e DOWN selezionare ora la voce di menu Settings (v. freccia) e confermare con ENTER ---------------- Menu ---------------- DMX Address DMX Mode Stand Alone Slave Settings System Info Si accede così...
- Page 156 Dimmer = Curva del Linear L'intensità della luce cresce in maniera lineare Curve dimmer con il valore DMX Exponential L'intensità della luce può essere impostata in maniera più precisa nell'intervallo di valori DMX inferiore e grossolanamente in quello superiore Logarithmic L'intensità...
- Page 157 Mirror Pixel = Invertire/ Nessuna riflessione / inversione riprodurre la Invert Background -> Pattern, disposizione Pattern -> Background dei segmenti Orizzontale Riflettere orizzontalmente pixel (funzi- Verticale Riflettere in verticale one solo per Orizzontale + Riflettere orizzontalmente e invertire il funziona- Inversione mento DMX) Verticale +...
-
Page 158: Installazione E Montaggio
INFORMAZIONI DI SISTEMA (System Info) Premendo MODE si accede al menu principale (--- Menu ---). Con i tasti freccia, selezionare la voce di menu System Info (prestare attenzione alla freccia) e confermare con ENTER. ---------------- Menu ---------------- DMX Address DMX Mode Stand Alone Slave Settings... -
Page 159: Cura, Manutenzione E Riparazione
PERICOLO:Il montaggio sopratesta richiede una vasta esperienza, incluso il calcolo dei valori limite del carico di lavoro, il materiale di installazione utilizzato e la verifica periodica della sicurezza di tutti i materiali di installazione e dei proiettori. Se non si dispone di queste qualifiche, non tentare di effettuare da soli l'installazione, ma ricorrere all'ausilio di aziende professionali. - Page 160 1. Le superfici dell'alloggiamento devono essere pulite con un panno umido pulito. Assicurarsi che l'umidità non penetri all'interno del dispositivo. 2. Le aperture di entrata e uscita dell'aria devono essere pulite regolarmente, rimuovendo polvere e sporcizia. In caso di utilizzo di aria compressa, prestare attenzione a non dan- neggiare il dispositivo (ad es.
-
Page 161: Accessori Opzionali
PULIRE LA VENTOLA I tre ventilatori sul retro dell'unità LED del proiettore devono essere controllati regolarmente ed eventualmente puliti. Scollegare il proiettore dalla rete elettrica. Con l'ausilio di un utensile adatto, allentare le 4 viti a brugola che fissano il coperchio della ventola all'unità LED. Rimuovere il coper- chio della ventola dall'unità... -
Page 162: Tecnologia Dmx
TECNOLOGIA DMX DMX-512 DMX (Digital Multiplex) è la sigla di un protocollo di trasmissione uni- versale per la comunicazione tra dispositivi e controller. Un controller DMX invia dati DMX ai dispositivi DMX collegati. I dati DMX sono sempre trasmessi come flusso di dati seriale che viene inoltrato da un dispositivo collegato al successivo attraverso le connessioni (con- nettori XLR) DMX IN e DMX OUT presenti per ogni dispositivo DMX compatibile, per un massimo di 32 dispositivi. - Page 163 CAVO DMX: In caso di cavi di propria realizzazione, procedere secondo le figure di questa pagina. Non collegare mai la schermatura del cavo con il contatto di massa del connettore e assicurarsi che la schermatura non entri in contatto con l'involucro del connettore XLR. Se la schermatura ha un contatto di massa possono verificarsi errori di sistema.
-
Page 164: Dati Tecnici
DATI TECNICI Codice articolo: CLZW600DSMD Tipologia di prodotto: Wash Light a LED Tipo: Proiettori da esterni Spettro cromatico LED: Bianco freddo (5700 K) Numero di LED: Tipo di LED: Single SMD Frequenza LED PWM: 800Hz, 1200Hz, 2000Hz, 3600Hz, 12kHz, 25 kHz (regolabile) Angolo di emissione: 104°... -
Page 165: Spiegazioni Sulla Protezione Ip
Carico d'esercizio: a discrezione Distanza minima dalla 0,5 m superficie illuminata: Distanza minima da 0,3 m materiali normalmente infiammabili: Ingombro (L x H x P, 463 x 291 x 161 mm senza staffe di montag- gio): Peso (senza accessori): 11,9 kg Accessori forniti in 2 staffe a omega + cavo di alimentazione dotazione:... -
Page 166: Distanza Minima Dalla Superficie Illuminata
3. Il secondo codice indica la protezione dall'acqua: IPX0 Nessuna protezione IPX1 Protezione contro la caduta di gocce d'acqua IPX2 Protezione contro la caduta di gocce d'acqua quando l'apparecchio è inclinato fino a 15° IPX3 Protezione contro la caduta di spruzzi d'acqua fino a 60° rispetto alla verticale IPX4 Protezione contro gli spruzzi d'acqua su tutti i lati IPX5... -
Page 167: Dichiarazioni Del Produttore
DISPOSITIVO 1. Questo dispositivo è soggetto alla Direttiva europea sui rifiuti di apparecchiature elettriche ed elettroniche e successive modifiche. Direttiva RAEE sui rifiuti di apparecchiature elettriche ed elettroniche. I dispositivi usati non devono essere smaltiti con i rifiuti domestici. Il dispositivo usato deve essere smaltito tramite un'azienda di smaltimento autorizzata o presso un centro di smaltimento comu- nale. - Page 168 DMX CONTROL / DMX STEUERUNG / PILOTAGE DMX / CONTROL DMX / STEROWANIE DMX / CONTROLLO DMX Function Values Dimmer 0% to 100% Strobe open Strobe closed Pulse Random, slow -> fast Ramp up Random, slow -> fast Ramp down Random, slow ->...
- Page 169 16bit Function Values Dimmer 000 - 0% to 100% Dimmer fine 000 - 255 0% to 100% 000 - 005 Strobe open 006 - 010 Strobe closed 011 - 033 Pulse Random, slow -> fast 034 - 056 Ramp up Random, slow -> fast Multifunctional 057 - 079 Ramp down Random, slow ->...
- Page 170 000 - 057 no function 058 - 059 Pixel Mirroring Off (hold 3s) 060 - 061 Pixel Mirroring Vertical (hold 3s) 062 - 063 Pixel Mirroring Horizontal (hold 3s) 064 - 065 Pixel Mirroring Vertical + Horizontal (hold 3s) 066 - 077 no function 078 - 079 Dimmer Response LED (hold 1,5s) 080 - 081 Dimmer Response Halogen (hold 1,5s) 082 - 085 No function...
- Page 171 48CH 12CH (48 Seg- (12 Seg- ments) ments) Function Values Pixel Pixel Control Control 8bit Dimmer 000 - 255 0% to 100% Dimmer fine 000 - 255 0% to 100% 000 - 005 Strobe open 006 - 010 Strobe closed 011 - 033 Pulse Random, slow ->...
- Page 172 63CH 15CH Full Full Access Pattern Function Values Pixel Group 16 Bit Control & Pattern Dimmer 000 - 255 0% to 100% Dimmer Dimmer fine 000 - 255 0% to 100% 000 - 005 Strobe open 006 - 010 Strobe closed Pulse Random, slow 011 - 033 ->...
- Page 173 000 - 005 Pattern off Pattern 6-98 dynamic / 128- 006 - 255 234 static 000 - 005 Effect Pattern Stop Effect Pattern Speed, 006 - 126 Speed Dyna- fast > slow, forward mic Pattern 127 - 127 Stop Effect Pattern Speed, 128 - 255 slow >...
- Page 174 005 no function 006 - 063 Linear Dimmer Curve Exponential Dimmer 064 - 127 Dimmer Dimmer Curve Curve Curve Logarithmic Dimmer 128 - 191 Curve 192 - 255 S-Curve Dimmer Curve 057 no function Pixel Mirroring Off (hold Pixel Mirroring Vertical (hold 3s) Pixel Mirroring Horizontal (hold 3s)
- Page 175 18CH 54CH Segments) Segments) Function Values Pixel Pixel Control & Control & Master Dim Master Dim Dimmer 000 - 255 0% to 100% Dimmer fine 000 - 255 0% to 100% Multifunctional 000 - 005 Strobe open Strobe 006 - 010 Strobe closed 011 - 033 Pulse Random, slow ->...
- Page 176 000 - 057 no function 058 - 059 Pixel Mirroring Off (hold 3s) Pixel Mirroring Vertical 060 - 061 (hold 3s) Pixel Mirroring Horizontal 062 - 063 (hold 3s) Pixel Mirroring Vertical + 064 - 065 Horizontal (hold 3s) 066 - 077 no function Dimmer Response LED 078 - 079 (hold 1,5s)
- Page 177 EN: (1*) After the adjustments have been made, set the value to 000 to avoid disturbance by endless function call. DE: (1*) Nachdem die Einstellungen vorgenommen wurden, stellen Sie den Wert auf 000 ein, um Störungen durch endlosen Funktions- aufruf zu vermeiden. FR: (1*) Une fois les ajustements effectués, réglez la valeur sur 000 pour éviter les perturbations par appel de fonction sans fin.
- Page 180 CAMEOLIGHT.COM Adam Hall GmbH | Adam-Hall-Str. 1 | 61267 Neu-Anspach | Germany Phone: +49 6081 9419-0 | adamhall.com REV: 02...