Publicité
Liens rapides
USE THIS MANUAL IF YOU ARE INSTALLING YOUR SHOWER IN AN ALCOVE. THIS MANUAL IS ONLY FOR ALCOVE
INSTALLATION. DO NOT USE THIS MANUAL IF YOU HAVE A SIDE PANEL, IN THAT CASE USE THE OTHER MANUAL
UTILISEZ CE MANUEL POUR UNE INSTALLATION DE DOUCHE EN ALCÔVE. CE MANUEL NE PEUT ÊTRE UTILISÉ QUE
POUR INSTALLATION EN ALCÔVE. SI VOUS INSTALLEZ LA DOUCHE AVEC UN PANNEAU LATÉRAL, NE PAS UTILISER
CE MANUEL, UTILISEZ L'AUTRE MANUEL FOURNI AVEC LA BASE DE DOUCHE.
UTILICE ESTE MANUAL PARA INSTALAR UNA DUCHA EN ALCOBA. ESTE MANUAL SÓLO SE PUEDE UTILIZAR PARA LA
INSTALACIÓN DE ALCOBA. SI INSTALA LA DUCHA CON UN PANEL LATERAL, NO UTILICE ESTE MANUAL, USE EL OTRO
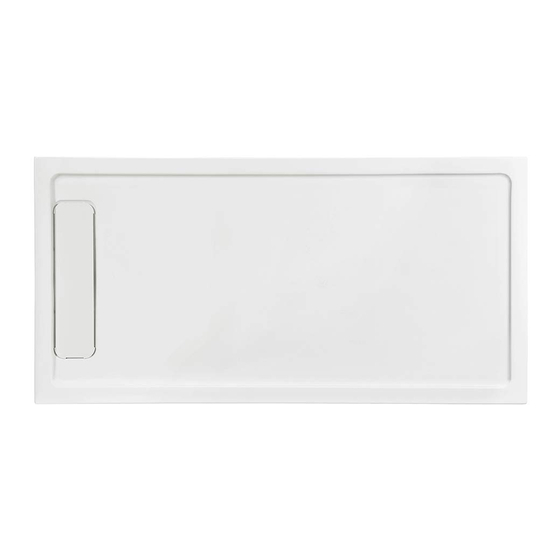
36" [914]
Measures: inch [millimeter]
Mesures: pouce [millimètre]
Medidas: pulgadas [milímetros]
OVE 2019-07-11
60.00x36.00x2.76" ADENA DSH
INSTALLATION MANUAL FOR SHOWER BASE - ALCOVE
MANUEL D'INSTALLATION POUR BASE DE DOUCHE - ALCÔVE
MANUAL DE INSTALACIÓN PARA PLATO DE DUCHA - ALCOBA
SUPPLIED IN YOUR SHOWER BASE PACKAGE.
MANUAL SUMINISTRADO CON EL PLATO DE DUCHA.
60" [1524]
Questions, problems, need help?
Call our customer service department at
1-866-839-2888, 9 a.m. - 5 p.m., EST, Monday - Friday
Questions, problèmes ou besoin d'aide?
Contactez notre service à la clientèle au
1-866-839-2888, du lundi au vendredi de 9h00 à 17h00 HNE.
Preguntas, problemas o necesita ayuda?
Llame a nuestro departamento de servicio al cliente al
1-866-839-2888, 9 am. – 5 pm., HDE, Lunes a Viernes.
18" [457]
2 3/8" [60]
PAGE 1
Publicité

Manuels Connexes pour OVE ADENA


Sommaire des Matières pour OVE ADENA
- Page 1 60.00x36.00x2.76” ADENA DSH INSTALLATION MANUAL FOR SHOWER BASE - ALCOVE MANUEL D’INSTALLATION POUR BASE DE DOUCHE - ALCÔVE MANUAL DE INSTALACIÓN PARA PLATO DE DUCHA - ALCOBA USE THIS MANUAL IF YOU ARE INSTALLING YOUR SHOWER IN AN ALCOVE. THIS MANUAL IS ONLY FOR ALCOVE INSTALLATION.
- Page 2 START WITH THIS INSTALLATION MANUAL 1) FIRST, INSTALL YOUR SHOWER BASE (USING THIS MANUAL) 2) SECOND, INSTALL YOUR SHOWER ENCLOSURE. COMMENCER PAR CE MANUEL D’INSTALLATION 1) PREMIÈREMENT, INSTALLEZ VOTRE BASE DE DOUCHE (EN VOUS SERVANT DE CE MANUEL). 2) DEUXIÈMEMENT, INSTALLEZ VOTRE CABINE DE DOUCHE. COMIENCE CON ESTE MANUAL DE INSTALACIÓN 1) PRIMERO, INSTALE SU PLATO DE DUCHA (QUE UTILIZAN ESTE MANUAL) 2) SEGUNDO, INSTALE SU PUERTA DE DUCHA.
- Page 3 SAFETY INFORMATION INFORMATION SUR LA SÉCURITÉ INFORMACIÓN DE SEGURIDAD CAUTION Please carefully read the following important safety information before handling or installing this shower. There is a risk of serious injury while handling this product. To minimize these risks, please note: •...
- Page 4 SAFETY NOTICE AVIS DE SÉCURITÉ AVISOS DE SEGURIDAD NOTICE • Any modification or alteration from what is specified in this instruction manual will void any and all warranty on this product. • The distributor is not responsible for any damage to the unit or personal property caused by improper installation. If you disregard instructional warnings, you will void your warranty and possibly deal with water damage.
- Page 5 PART LIST LISTE DES PIÈCES LISTA DE PIEZAS PART # DESCRIPTION QUANTITY CODE # DE PIÈCE DESCRIPTION QUANTITÉ CODE PARTE # DESCRIPCIÓN CANTIDAD CÓDIO Shower base and drain cover Base de douche et couvercle pour drain Plato de ducha y tapa de drenaje Flange (long) Bride (longue) Brida (larga)
- Page 6 BASE INSTALLATION: OVERVIEW INSTALLATION DE LA BASE: UN APERÇU INSTALACIÓN DEL PLATO: VISIÓN GENERAL A. Before you start the installation of your shower base, consult the illustration A below showing a side-view of the completed installation. B. Illustration B shows the recommended wall structure and measurements for the shower base installation. NOTE: Customer must follow and comply with the local and national building and plumbing code.
- Page 7 BASE INSTALLATION INSTALLATION DE LA BASE INSTALACIÓN DEL PLATO Depending on the location of the drain, assemble the flanges on the base following the below illustration. Determine the side of the shower base that will be installed on the back wall. This is the side where you will install the long tiling flange.
- Page 8 BASE INSTALLATION INSTALLATION DE LA BASE INSTALACIÓN DEL PLATO A. Ensure that the wall structure is leveled. B. Place the shower base (A) on the floor and mark the outline using a pencil. A. Assurez-vous que la structure du mur soit nivelée. B.
- Page 9 BASE INSTALLATION: SHOWER DRAIN GUIDELINES INSTALLATION DE LA BASE: DRAIN DE DOUCHE INSTALACIÓN DEL PLATO: DESAGÜE DE LA DUCHA A. Ensure that the waste pipe plumbing is completed. B. The shower drain is not supplied, these illustrations are for reference only. It is recommended that you review the drain installation from the manufacturer before continuing.
- Page 10 BASE INSTALLATION INSTALLATION DE LA BASE INSTALACIÓN DEL PLATO A. Apply cement (1” to 1 1/2” [25 to 38mm] thick) within the traced contour of the shower base. This will help level the base in subsequent steps. The thickness of the cement layer varies depending on your floor. B.
- Page 11 BASE INSTALLATION INSTALLATION DE LA BASE INSTALACIÓN DEL PLATO A. The shower base flange is slightly slopped by design. At the locations where you will screw the shower base to the studs, it is recommended that you use wood shims to fill the gap between the base flange and the drywall. B-C.
- Page 12 BASE INSTALLATION INSTALLATION DE LA BASE INSTALACIÓN DEL PLATO A. Cut the protruding part of the wood shims. B. Let the cement dry for 24h before continuing. A. Coupez la partie saillante des cales de bois. B. Laissez le ciment sécher pendant 24h avant de continuer. A.
- Page 13 BASE INSTALLATION: DRYWALLS INSTALLATION DE LA BASE: MURS DE PLACOPLÂTRE INSTALACIÓN DEL PLATO: PANELES DE YESO A. Ensure that the wall structure is leveled. Measure the location of the existing shower plumbing, as exemplified by the measures W1, W2, W3 and W4 below.
- Page 14 BASE INSTALLATION: DRYWALLS INSTALLATION DE LA BASE: MURS DE PLACOPLÂTRE INSTALACIÓN DEL PLATO: PANELES DE YESO A-B. Fix the drywalls to the studs using drywall screws. Follow the applicable building code requirements. C. Note that the drywalls have to rest on top of the shower base flange. A-B.
- Page 15 BASE INSTALLATION INSTALLATION DE LA BASE INSTALACIÓN DEL PLATO A. Install the tiles on your wall. B. Seal all joints with silicone. A. Posez les carreaux sur votre mur. B. Scellez tous les joints avec du silicone. A. Instale los azulejos en su pared. B.