Horizon Hobby Axial SCX24 Deadbolt Manuel D'utilisation
Masquer les pouces Voir aussi pour Axial SCX24 Deadbolt:
Table des Matières

Publicité

Les langues disponibles

Les langues disponibles

Liens rapides

AXI90081 T1/T2
INSTRUCTION MANUAL
BEDIENUNGSANLEITUNG
MANUEL D'UTILISATION
MANUALE DI ISTRUZIONI

Publicité

Table des Matières
loading

Sommaire des Matières pour Horizon Hobby Axial SCX24 Deadbolt

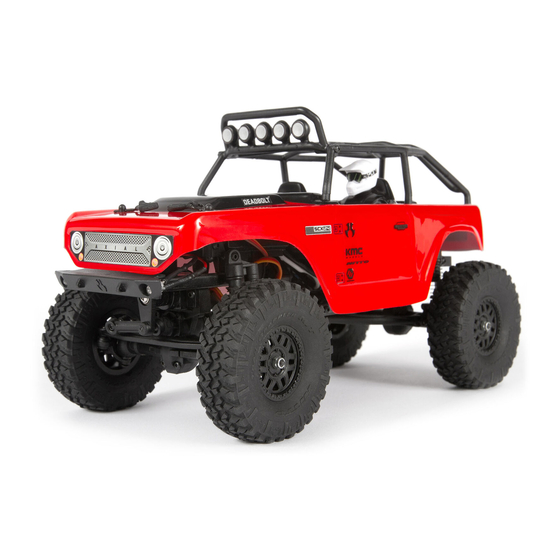
  • Page 1 AXI90081 T1/T2 INSTRUCTION MANUAL BEDIENUNGSANLEITUNG MANUEL D’UTILISATION MANUALE DI ISTRUZIONI...
  • Page 2 This product is not intended for use by children without direct adult supervision. Do not use with incompatible components or alter this product in any way outside of the instructions provided by Horizon Hobby, LLC. This manual contains instructions for safety, operation and maintenance.
  • Page 3: Table Des Matières

    WATER-RESISTANT VEHICLE WITH WATERPROOF ELECTRONICS Your new Horizon Hobby vehicle has been designed and built with a combination of waterproof and water-resistant components to allow you to operate the product in many “wet conditions,” including puddles, creeks, wet grass, snow and even rain.
  • Page 4: Box Contents

    WET CONDITIONS MAINTENANCE • Drain any water that has collected in the tires by spinning them at high speed. With the body removed, place the vehicle upside down and pull full throttle for a few short bursts until the water has been removed. CAUTION: Always keep hands, fingers, tools and any loose or hanging objects away from rotating parts when performing the above drying technique.
  • Page 5: Usb Charging Warnings

    • Always disconnect the battery after charging, and let the charger cool between charges. • Always charge in a well-ventilated area. • Always terminate all processes and contact Horizon Hobby if the product malfunctions. • Charge only rechargeable batteries. Charging non-rechargeable batteries may cause the batteries to burst, resulting in injury to persons and/or damage to property.
  • Page 6: Transmitter Layout

    TRANSMITTER LAYOUT Use the diagram below to familiarize yourself with the different parts of your transmitter. The transmitter antenna is mounted internally and is located in the front portion of the transmitter. When you are driving your model, hold the transmitter so it is oriented as close to vertical as possible. Do not try to follow your model with the transmitter.
  • Page 7: Install The Transmitter Batteries

    INSTALL THE TRANSMITTER BATTERIES 1. Press the battery compartment latch and rotate the batter cover to open. 2. Install 4 AA alkaline batteries (or Ni-Cd or Ni-MH), verifying correct polarity. 3. Close the battery cover until it latches. CAUTION: NEVER remove the transmitter batteries while the vehicle is powered ON.
  • Page 8: Install The Vehicle Battery

    INSTALL THE VEHICLE BATTERY POWER ON THE TRANSMITTER...
  • Page 9: Power On The Vehicle

    POWER ON THE VEHICLE TEST THE CONTROLS With the vehicle wheels off the ground, test the throttle and steering controls. Ensure the wheels spin in the proper direction and the front wheels turn in the proper direction with steering input. After checking for proper direction of controls, start driving slowly.
  • Page 10: After Driving

    AFTER DRIVING When you are finished driving your vehicle: 1. Power off the vehicle. 2. Power off the transmitter. 3. Remove the vehicle battery and charge if necessary. BINDING THE TRANSMITTER AND RECEIVER Binding is the process of programming the receiver to recognize a specific transmitter signal, thus preventing interference from other transmitters.
  • Page 11: Troubleshooting

    Product, (iv) attempted either (i) service, or (ii) replace, any Product determined service by anyone other than a Horizon Hobby authorized by Horizon to be defective. Horizon reserves the right to service center, (v) Product not purchased from an authorized inspect any and all Product(s) involved in a warranty claim.
  • Page 12 Limitation of Liability is available at http://www.horizonhobby.com/content/ service-center_render-service-center. If you do not have HORIZON SHALL NOT BE LIABLE FOR SPECIAL, INDIRECT, internet access, please contact Horizon Product Support INCIDENTAL OR CONSEQUENTIAL DAMAGES, LOSS OF to obtain a RMA number along with instructions for PROFITS OR PRODUCTION OR COMMERCIAL LOSS IN submitting your product for service.
  • Page 13: Warranty And Service Contact Information

    If this equipment does cause Supplier’s Declaration of Conformity harmful interference to radio or television reception, Axial SCX24 Deadbolt 1/24 Scale Electric 4WD RTR which can be determined by turning the equipment (AXI90081) off and on, the user is encouraged to try to correct the...
  • Page 14: Compliance Information For The European Union

    Axial SCX24 Deadbolt 1/24 Scale EU Manufacturer of Record: Electric 4WD RTR (AXI90081); Hereby, Horizon Hobby, LLC Horizon Hobby, LLC declares that the device is in 2904 Research Road compliance with the following: EU Low Voltage Directive Champaign, IL 61822 USA 2014/35/EU;...
  • Page 16 Weise betrieben, kann dies zu Verletzungen oder Schäden am Produkt oder anderen Sachwerten führen. Versuchen Sie nicht ohne Genehmigung durch Horizon Hobby, LLC, das Produkt zu zerlegen, es mit inkompatiblen Komponenten zu verwenden oder auf jegliche Weise zu erweitern. Diese Bedienungsanleitung enthält Anweisungen für Sicherheit, Betrieb und Wartung.
  • Page 17 Fahrzeug einschalten ............23 WASSERGESCHÜTZTES FAHRZEUG MIT WASSERDICHTER ELEKTRONIK Ihr neues Horizon Hobby Fahrzeug wurde mit einer Kombination von wasserfesten und spritzwassergeschützen Komponenten ausgestattet, die den Betrieb des Fahrzeuges unter nassen Bedingungen inklusive Pfützen, Bächen, nassem Gras, Schnee oder sogar Regen ermöglichen.
  • Page 18: Packungsinhalt

    WARTUNGSANLEITUNG NACH FAHRTEN IN NASSER UMGEBUNG • Entfernen Sie Wasser in den Reifen durch Gas geben. Nehmen Sie die Karosserie ab, drehen das Fahrzeug auf den Kopf und geben ein paar Mal kurz Vollgas bis das Wasser aus dem Reifen entfernt ist. ACHTUNG: Halten Sie immer die Hände, Finger, Werkzeuge und andere lose oder hängende Objekte weg von drehenden Teilen wenn Sie diese Technik des Trocknens praktizieren.
  • Page 19: Akku-Warnhinweise

    • Laden Sie stets in einem gut belüfteten Bereich. • Beenden Sie bei Fehlfunktion sofort alle Prozesse und kontakten den technischen Service von Horizon Hobby. • Laden Sie nur wiederaufladbare Akkus. Dass Laden von nicht aufladbaren Batterien kann diesem zum Platzen bringen und Verletzungen und Sachschäden zur Folge haben.
  • Page 20: Sender Anordnung

    SENDER ANORDNUNG Machen Sie sich mithilfe der nachstehenden Grafik mit den verschiedenen Teilen Ihres Senders vertraut. Die Senderantenne ist intern montiert und befindet sich im vorderen Teil des Senders. Den Sender beim Fahren Ihres Modells so senkrecht wie möglich halten. Versuchen Sie nicht, Ihrem Modell mit dem Sender zu folgen. Auf diese Weise wird das beste HF-Signal zwischen Sender und Empfänger gewährleistet.
  • Page 21: Einsetzen Der Senderbattereien

    EINSETZEN DER SENDERBATTEREIEN 1. Die Verriegelung des Akkufachs hinunterdrücken und die Akkuabdeckung zum Öffnen aufklappen. 2. 4 AA-Alkali-Batterien einsetzen (oder Ni-Cd oder Ni-MH) und die korrekte Polarität sicherstellen. 3. Die Akkuabdeckung schließen, bis sie einrastet. ACHTUNG: NIEMALS die Sender-Akkus entfernen, während das Fahrzeug EINgeschaltet ist.
  • Page 22: Den Fahrzeug-Akku Einsetzen

    DEN FAHRZEUG-AKKU EINSETZEN DEN SENDER EINSCHALTEN...
  • Page 23: Fahrzeug Einschalten

    FAHRZEUG EINSCHALTEN ÜBERPRÜFEN DER BEDIENELEMENTE Während der Überprüfung der Lenk- und Gassteuerelemente dürfen die Räder des Fahrzeugs den Boden nicht berühren. Stellen Sie sicher, dass sich die Räder in die richtige Richtung drehen und dass die Vorderräder bei einer Lenkeingabe in die richtige Richtung zeigen. Nach dem Überprüfen der korrekten Steuerungsrichtung, beginnen Sie langsam zu fahren.
  • Page 24: Nach Dem Fahren

    NACH DEM FAHREN Wenn Sie mit dem Fahren Ihres Fahrzeugs fertig sind: 1. Das Fahrzeug ausschalten. 2. Den Sender ausschalten. 3. Den Akku aus dem Fahrzeug nehmen und gegebenenfalls aufladen. BINDEN VON SENDER UND EMPFÄNGER Das Binden ist der Vorgang, durch den der Empfänger darauf programmiert wird, ein bestimmtes Sendersignal zu erkennen, um so Störungen durch andere Sender zu vermeiden.
  • Page 25: Problemlösung

    Kaufnachweis erbracht wird. Horizon behält sich das Recht vor, diese Garantiebestimmungen ohne Garantiezeitraum Ankündigung zu ändern oder modifizieren und widerruft Exklusive Garantie Horizon Hobby LLC (Horizon) dann bestehende Garantiebestimmungen. garantiert, dass dasgekaufte Produkt frei von Material- (b) Horizon übernimmt keine Garantie für die Verkaufbarkeit und Montagefehlern ist.
  • Page 26 Sollte sich ein Garantiefall bestätigen wird das Produkt Ansprüche für in der folge auftretende Verletzungen oder repariert oder ersetzt. Diese Entscheidung obliegt einzig Beschädigungen. Mit der Verwendung und dem Einbau Horizon Hobby. des Produktes akzeptiert der Käufer alle aufgeführten Kostenpflichtige Reparaturen Garantiebestimmungen ohne Einschränkungen und Liegt eine kostenpflichtige Reparatur vor, erstellen wir einen Vorbehalte.
  • Page 27: Garantie Und Service Kontaktinformationen

    Horizon Hobby, LLC Axial SCX24 Deadbolt 1/24 Scale 2904 Research Road Electric 4WD RTR (AXI90081); Hiermit Champaign, IL 61822 USA erklärt Horizon Hobby, LLC, dass das Gerät den folgenden Richtlinien entspricht: EU-Richtlinie Offizieller EU-Importeur: über Niederspannung 2014/35/EU; EU-Richtlinie Horizon Hobby, GmbH über elektromagnetische Verträglichkeit 2014/30/EU;...
  • Page 28 REMARQUE Toutes les instructions, garanties et autres documents de garantie sont sujets à la seule discrétion de Horizon Hobby, LLC. Veuillez, pour une littérature produits bien à jour, visiter www.horizonhobby.com ou www.towerhobbies.com et cliquer sur l’onglet de support de ce produit.
  • Page 29 Vues éclatées ..............51 VÉHICULE ÉTANCHE AVEC COMPOSANTS ÉLECTRONIQUES ÉTANCHES Votre nouveau véhicule Horizon Hobby a été conçu et fabriqué en combinant des composants étanches et des composants résistants à l’eau vous permettant d’utiliser ce produit dans plusieurs “Conditions Humides” incluant les flaques d’eau, les ruisseaux, l’herbe humide, la neige et même la pluie.
  • Page 30: Contenu De La Boîte

    MAINTENANCE EN CONDITIONS HUMIDES • Evacuez l’eau collectée par les pneus en les faisant tourner à haute vitesse. Retirez la carrosserie, retournez le véhicule et donnez des courts coups d’accélérateur plein gaz jusqu’à ce que l’eau soit retirée. ATTENTION: Tenez toujours éloigné des parties en rotation, les mains, les doigts, les outils ou autre objet lâches/pendants.
  • Page 31: Avertissements Relatifs À La Charge Usb

    • Débranchez toujours la batterie après le chargement et laissez le chargeur refroidir entre les charges. • Chargez toujours dans une zone bien aérée. • Interrompez toujours tous les processus et contactez Horizon Hobby si le produit fonctionne mal. • Chargez uniquement les batteries rechargeables. Si vous chargez des batteries non rechargeables, celles-ci pourraient exploser et provoquer des dommages corporels et/ou matériels.
  • Page 32: Disposition De L'émetteur

    DISPOSITION DE L’ÉMETTEUR Utilisez le schéma ci-dessous pour vous familiariser avec les différentes pièces de votre émetteur. L’antenne de l’émetteur est montée en interne et elle est située dans la partie avant de l’émetteur. Lorsque vous conduisez votre modèle, maintenez l’émetteur pour qu’il soit orienté aussi verticalement que possible. N’essayez pas de suivre votre modèle avec l’émetteur.
  • Page 33: Installation Des Piles De L'émetteur

    INSTALLATION DES PILES DE L’ÉMETTEUR 1. Appuyez sur le verrou du compartiment de batterie et faites tourner le cache de batterie pour l’ouvrir. 2. Installez 4 piles alcalines AA (ou Ni-Cd ou Ni-MH), en vérifiant si la polarité est correcte. 3.
  • Page 34: Installez La Batterie Du Véhicule

    INSTALLEZ LA BATTERIE DU VÉHICULE METTEZ L’ÉMETTEUR EN MARCHE...
  • Page 35: Mettez L'véhicule En Marche

    METTEZ L’VÉHICULE EN MARCHE TESTEZ LES COMMANDES Sans contact des roues du véhicule avec le sol, testez les commandes des gaz et de direction. Assurez-vous que les roues tournent dans la bonne direction et que les roues avant tournent dans la bonne direction avec la saisie de direction.
  • Page 36: Après La Conduite

    APRÈS LA CONDUITE Lorsque vous avez fini de conduire votre véhicule : 1. Éteignez le véhicule. 2. Éteignez l’émetteur. 3. Retirez la batterie du véhicule et chargez-la si nécessaire. AFFECTATION DE L’ÉMETTEUR ET DU RÉCEPTEUR L’affectation est le processus de programmation du récepteur afin de reconnaître un signal d’émetteur spécifique, en empêchant ainsi l’interférence d’autres émetteurs.
  • Page 37: Guide De Dépannage

    GARANTIE ET RÉPARATIONS Durée de la garantie garantie. Les revendications en garantie seront acceptées Garantie exclusive - Horizon Hobby, LLC (Horizon) garantit sur fourniture d’une preuve d’achat valide uniquement. que le Produit acheté (le « Produit ») sera exempt de Horizon se réserve le droit de modifier les dispositions de...
  • Page 38 10/15 C’est uniquement ainsi qu’il sera possible d’éviter une manipulation erronée et des accidents entraînant des blessures et des dégâts. Horizon Hobby ne saurait être tenu responsable d’une utilisation ne respectant pas les lois, les règles ou  règlementations en vigueur.
  • Page 39: Informations De Contact Pour Garantie Et Réparation

    Adresse Horizon Technischer Service service@horizonhobby.eu Hanskampring 9 Union européenne D 22885 Barsbüttel, Germany Sales: Horizon Hobby GmbH +49 (0) 4121 2655 100 INFORMATION IC IC: 8786A-VKMT203 CAN ICES-3 (B)/NMB-3(B) Ce dispositif contient un/des émetteur(s)/récepteur(s) 1. Cet appareil ne doit pas causer d’interférences.
  • Page 40 Non tentare di smontare, utilizzare componenti incompatibili o modificare il prodotto in nessun caso senza previa approvazione di horizon hobby, llc. Questo manuale contiene le istruzioni per la sicurezza, l’uso e la manutenzione del prodotto. È fondamentale leggere e seguire tutte le istruzioni e le avvertenze del manuale prima di montare, impostare o utilizzare il prodotto, al fine di utilizzarlo...
  • Page 41: Veicolo Resistente All'acqua Con Elettronica Impermeabile

    VEICOLO RESISTENTE ALL’ACQUA CON ELETTRONICA IMPERMEABILE Il vostro nuovo veicolo Horizon Hobby è stato progettato e costruito con una combinazione di componenti impermeabili e resistenti all’acqua, per consentirvi di utilizzare il prodotto in molte situazioni “umide,” incluse pozze, ruscelli, erba bagnata, neve e anche pioggia.
  • Page 42: Contenuto Della Scatola

    MANUTENZIONE IN CONDIZIONI UMIDE • Scaricare l’acqua raccolta negli pneumatici facendoli girare ad alta velocità. Togliere la carrozzeria e rovesciare il veicolo, poi dare alcune brevi accelerate finché l’acqua non viene rimossa. ATTENZIONE: Durante l’operazione precedente, tenere sempre lontano dalle parti rotanti mani, dita, attrezzi o altri oggetti liberi di muoversi.
  • Page 43: Avvertenze Sulla Ricarica Usb

    ATTENZIONE: assicurarsi sempre che la batteria che si sta caricando sia compatibile con le specifiche del caricabatterie. In caso contrario, vi è il rischio di surriscaldamenti e altri malfunzionamenti del prodotto che possono causare lesioni all’utente o danni materiali. Si prega di contattare Horizon Hobby o i rivenditori autorizzati per eventuali domande sulla compatibilità.
  • Page 44: Layout Del Trasmettitore

    LAYOUT DEL TRASMETTITORE Usare il seguente schema per familiarizzare con le varie funzioni della trasmittente. L’antenna è montata internamente ed è posizionata nella parte anteriore della trasmittente. Durante l’utilizzo del modello, reggere la trasmittente in modo tale da tenerla in posizione il più possibile verticale. Non cercare di seguire il movimento del modello con la trasmittente.
  • Page 45: Installare Le Batterie Del Trasmettitore

    INSTALLARE LE BATTERIE DEL TRASMETTITORE 1. Per aprire, premere il fermo del vano batteria e ruotare il coperchio delle batterie. 2. Installare 4 batterie alcaline AA (o Ni-Cd o Ni-MH) prestando attenzione alla polarità. 3. Chiudere il coperchio delle batterie e farlo scattare. ATTENZIONE: non rimuovere MAI le batterie dalla trasmittente mentre il veicolo è...
  • Page 46: Installare La Batteria Del Veicolo

    INSTALLARE LA BATTERIA DEL VEICOLO ACCENDERE LA TRASMITTENTE.
  • Page 47: Avviare Il Veicolo

    AVVIARE IL VEICOLO TESTARE I COMANDI Tenendo il veicolo con le ruote sollevate da terra, testare i comandi del motore e dello sterzo. Assicurarsi che le ruote girino nella direzione corretta e che le ruote anteriori svoltino in modo coerente con i movimenti dello sterzo.
  • Page 48: Dopo L'uso

    DOPO L’USO Terminato l’uso del veicolo: 1. Spegnere il modello. 2. Spegnere la trasmittente. 3. Rimuovere la batteria del veicolo e, se necessario, caricarla. COLLEGAMENTO TRASMITTENTE-RICEVITORE La connessione (binding) è la procedura di programmazione del ricevitore per il riconoscimento del segnale di una trasmittente specifica, evitando l’interferenza di altre trasmittenti.
  • Page 49: Elenco Componenti

    Periodo di garanzia superficiali o danni per cause di forza maggiore, uso errato del Garanzia esclusiva - Horizon Hobby, LLC (Horizon) garantisce prodotto, un utilizzo che viola qualsiasi legge, regolamentazione che il prodotto acquistato (il “Prodotto”) sarà privo di difetti...
  • Page 50: Garanzia E Assistenza - Informazioni Per I Contatti

    Horizon Technischer Service service@horizonhobby.de Hanskampring 9 Unione Europea D 22885 Barsbüttel, Germany Sales: Horizon Hobby GmbH +49 (0) 4121 2655 100 DICHIARAZIONE DI CONFORMITÀ PER L’UNIONE EUROPEA Dichiarazione di conformità UE: Axial SCX24 Deadbolt 1/24 Scale Produttore ufficiale dell’UE: Electric 4WD RTR (AXI90081);...
  • Page 51: Viste Esplose

    EXPLODED VIEWS // EXPLOSIONSZEICHNUNGEN // VUES ÉCLATÉES // VISTE ESPLOSE AXI31612 AXI31611 SCX24 Shock Set (assembled) SCX24 Driveshaft Set (short, medium, long) SCX24 Stoßdämpfersatz (montiert) SCX24 Antriebswellensatz (kurz, mittel, lang) Ensemble d’amortisseurs SCX24 (assemblés) Ensemble d’arbre SCX24 Set ammortizzatori (assemblati) de transmission SCX24 (court, moyen, long) SCX24 Set albero di trasmissione (corto, medio, lungo)
  • Page 52 AXI31610 SCX24 Rear Axle (assembled) SCX24 Hinterachse (montiert) Essieu arrière SCX24 (assemblé) SCX24 Assale posteriore (assemblato) AXI31609 SCX24 Front Axle (assembled) SCX24 Vorderachse (montiert) Essieu avant SCX24 (assemblé) SCX24 Assale anteriore (assemblato)
  • Page 53 AXI31613 SCX24 Suspension Links (short, medium, long) SCX24 Aufhängeglieder (kurz, mittel, lang) Bras de suspension SCX24 (court, moyen, long) SCX24 Bielle sospensioni (corte, medie, lunghe)
  • Page 54 AXI31614 SCX24 Chassis Set AXI31614 SCX24 Karosseriesatz Ensemble de carrosserie SCX24 SCX24 Set telaio AXI31616 DYNS1217 AXI31608 AXI31611 AXI31611 AXI31614 AXI31614 AXI31609 AXI31613 AXI31611 AXI31620 DYNB0012 AXI31619 AXI31612...
  • Page 55 AXI31608 SCX24 Deadbolt Body Set (clear and cut) SCX24 Deadbolt--Karosseriesatz (durchsichtig und zugeschnitten) Carrosserie SCX24 Deadbolt (transparente et coupée) SCX24 Deadbolt set carrozzeria (Clear and Cut) AXI31620 DYNB0012 AXI31619 AXI31612 AXI31615 AXI31567...
  • Page 56 OFFICIALLY LICENSED BY: facebook.com/axialinc | instagram.com/axialracing | twitter.com/axialrc youtube.com/axialvideos | flickr.com/axialrc ©2021 Horizon Hobby, LLC. Axial, the Axial logo, Deadbolt, Dynamite and the Horizon Hobby logo are trademarks or registered trademarks of Horizon Hobby, LLC. ® ® Nitto and Trail Grappler are registered trademarks of Nitto Tire U.S.A., Inc.

Ce manuel est également adapté pour:

Axi90081 t1Axi90081 t2

Table des Matières