Table des Matières
Publicité
Les langues disponibles
Les langues disponibles
Liens rapides
Библиотека СОК
Zanzibar
F
GB
D
NL
SP
P
PL
N
otice d'utilisation et d'installation
User and installation manual / Gebrauchs- und Installations-anweisung / Gebruiks- en instal-
latiehandleiding / Manual de utilización e instalación / Manual do Utilizador e de Instalação /
Instrukcja obslugi i montazu
Guide à conserver par l'utilisateur
Guide to be kept by the user / Vom Benutzer aufzubewahrendes Hanbuch / Door de gebruiker te bewaren gids /
Guía que deberá conservar el usuario / Guia a conservar pelo utilizador / Instrukcja, ktora uzytkownik powinien
zachowac
Radiateur sèche-serviettes électronique programmable
Modèles Classique et Ventilo
Programmable electronic towel-drying heater - Conventional and fan models / Programmierbarer elektronischer
Handtuchtrockner - Modelle Classique und Ventilo / Programmeerbare elektronische droogradiator - Klassieke en
Ventilatie modellen / Radiador secatoallas electrónico programable - Modelos Clásico y Ventilo / Toalheiro electrónico
programável - Modelos "Classique" e "Ventilo" / Grzejnik lazienkowy elektroniczny z regulacja temperatury - Modele
Classique i Ventilo
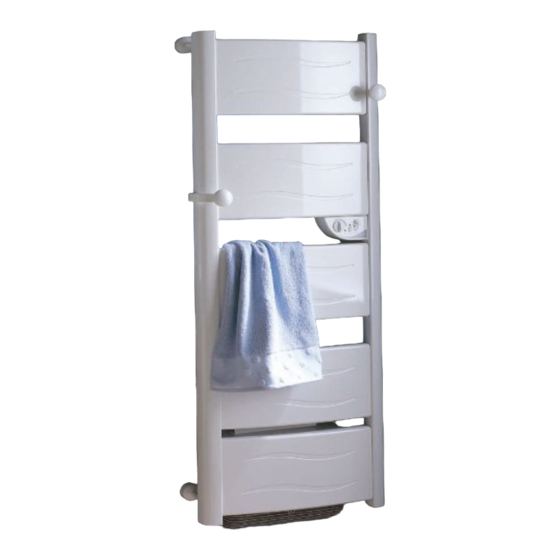
Zanzibar, modèle Ventilo 1750 W
.
.
Publicité
Table des Matières

Manuels Connexes pour Atlantic Zanzibar Ventilo 1750 W


Sommaire des Matières pour Atlantic Zanzibar Ventilo 1750 W
- Page 1 Библиотека СОК otice d’utilisation et d’installation User and installation manual / Gebrauchs- und Installations-anweisung / Gebruiks- en instal- latiehandleiding / Manual de utilización e instalación / Manual do Utilizador e de Instalação / Instrukcja obslugi i montazu Guide à conserver par l’utilisateur Guide to be kept by the user / Vom Benutzer aufzubewahrendes Hanbuch / Door de gebruiker te bewaren gids / Guía que deberá...
-
Page 3: Table Des Matières
Installation de l’appareil - - - - - - - - - - - - - - - - - - - - - - - - - - - - - - - - - - - - - - - -2 Utilisation de l’appareil - - - - - - - - - - - - - - - - - - - - - - - - - - - - - - - - - - - - - - - - -4 Conseils d’utilisation - - - - - - - - - - - - - - - - - - - - - - - - - - - - - - - - - - - - - - - - - -6 Mise en garde - - - - - - - - - - - - - - - - - - - - - - - - - - - - - - - - - - - - - - - - - - - - - - -6... -
Page 4: Quelques Conseils
L’appareil que vous venez d’acquérir a été soumis à de nombreux tests et contrôles afin d’en assu- rer la qualité. Nous vous remercions de ce choix et de votre confiance. Nous espérons qu’il vous apportera une entière satisfaction. Quelques conseils: Lisez la notice avant de commencer l’installation de l’appareil. -
Page 5: Comment Raccorder L'appareil
* : Puissance d’appoint Puissance Cote (A) Cote (B) Cote (C) ventilée. 600 +1000* 1108 750 +1000* 1433 900 +1000* 1758 Nota: Les chevilles livrées avec l’appareil sont de type stan- dard. En cas de sup- port particulier, utili- chevilles adaptées. -
Page 6: Programmation
5) Programmation Par fil pilote : L’appareil peut être commandé à distance si son fil pilote est raccordé à un appareil équipé d’un pro- grammateur, à une centrale de programmation ou à un gestionnaire d’énergie. Tableau des ordres que l’appareil peut recevoir sur son fil pilote (à... -
Page 7: Mode Hors Gel
3) Mode Hors Gel C’est le mode qui permet de maintenir la température à environ 7°C dans la pièce lors d’une absence prolongée de la maison. a) Laissez l’interrupteur sur la position Marche. b) Réglez la molette 4) Mode Turbo C’est le mode qui permet de mettre l’appareil en Marche Forcée pour augmenter rapidement la tem- pérature de la pièce pendant la durée définie (maximum de la puissance pour les modèles sans souffle- rie et mise en marche du ventilateur pour les modèles avec soufflerie). -
Page 8: Utilisation
’ ONSEILS D UTILISATION - Lorsque vous aérez la pièce, coupez le chauffage en mettant l’interrupteur sur la position Arrêt. - Si vous vous absentez pendant plusieurs heures, pensez à baisser la température. Absence de: Moins de 24 heures : ne pas toucher aux commandes. Plus de 24 heures ou l’été... -
Page 9: En Cas De Problèmes
N CAS DE PROBLÈME Problèmes rencontrés Vérifications à faire - Assurez-vous que les disjoncteurs de l’installation sont enclenchés, ou bien que le délesteur (si vous en avez un) n’a pas coupé l’alimentation de l’appareil. - Vérifiez la température de l’air de la pièce. - Eteignez, puis rallumez votre chauffage (Interrupteur L’appareil ne chauffe pas Si le témoin... - Page 10 F i l t r e Voyant rouge A n t i - P o u s s i è r e (pour modèle équipé d’un ventilateur) Le ventilateur est équipé d’un filtre anti-pous- sière qui, lorsqu’il est saturé, peut provoquer son arrêt (voyant rouge allumé...
-
Page 11: Installing The Device
The device you have just purchased was submitted to many tests and checks ensuring its quality. We thank you for your choice and trust.We hope you will be fully satisfied. A few recommendations: Read the instructions before installing the device. Power the device off before intervening on it, and check the power supply voltage. -
Page 12: Connecting The Device
Measurement Measurement Measurement Power (W) 600 +1000 1108 750 +1000 1433 900 +1000 1758 Note: The pins supplied with the device are of the standard type. In case of a parti- cular stand, use appropriate pins. Panel heater cable 3) Connecting the device Live=brown LIVE - The device must be supplied with 230V, 50Hz. -
Page 13: Using The Device
5) Programming With a pilot wire: The device can be controlled remotely if its pilot wire is connected to an device fitted with a pro- grammer, to a central programming unit or to an energy control system. Chart indicating the orders the device can receive over its pilot wire (to be measured between the pilot wire and the neutral). -
Page 14: Turbo Mode
3) Standby (Hors Gel) Mode It is the mode enabling to maintain a temperature of approximately 7°C in the room in case of pro- longed absence from the house. a) Leave switch on the Marche position. b) Set the knob 4) Turbo mode It is the mode enabling to set the device into Forced Operation, ensuring prompt temperature increase in the room over the time defined (maximum power for conventional models and fan acti-... -
Page 15: Recommendations On Use / Warning
ECOMMENDATIONS OF USE - When ventilating the room, switch off the heating by setting the switch to the Arrêt position. - If you leave for several hours, lower the temperature. Leaving for: Less than 24 hours :do not touch the controls. More than 24 hours or during summer :set the temperature knob to ARNING - This device is not intended for use by persons (including children) with physical, sensory or mental... -
Page 16: In Case Of Problem
N CASE OF PROBLEM Problem Check - Check that the premise circuit breakers are triggered or that the shedder (if you have one) has not interrupted the device’s power supply. - Check the air temperature in the room. - Switch the heating off, then back on (switch The device does not heat If the indicator blinks 3 times: the measurement probe is... -
Page 17: Antidust Filter
A n t i d u s t Red indicator f i l t e r ( m o d e l f i t t e d w i t h a f a n ) The fan is fitted with an antidust filter which, when clogged, can result in its stoppage (red indicator lit on the device). -
Page 18: Warranty Conditions
........... . * This information can be found on the information plate situated on the left-hand side of the device. FOR SALES IN AUSTRALIA ATLANTIC AUSTRALASIA PTY LTD Free Call: 1800 677 857 4/13-25 Church Street... -
Page 19: Geräteinstallation
Das Gerät, dass Sie gerade gekauft haben, wurde auf einwandfreie Qualität getestet und kontrol- liert. Wir danken Ihnen für diese Wahl und Ihr Vertrauen und hoffen, dass es Ihren Erwartungen entspricht. Ein paar Tips: Lesen Sie die Bedienungsanleitung, bevor Sie das Gerät installieren. Schalten Sie vor jeder Arbeit am Gerät den Strom ab und überprüfen Sie die Spannung der Stromquelle. - Page 20 Maß (B) Maß (C) Leistungen Maß (A) Befestigungspratzen (mm) Befestigungspratzen (mm) Befestigungspratzen (mm) 600 +1000 1108 750 +1000 1433 900 +1000 1758 Hinweis: Die mit- gelieferten Dübel sind Standarddübel. Bei Spezialhaltern, müssen andere geeignete Dübel verwendet werden. 3) Geräteanschluss Gerätekabel - Das Gerät muss mit einer Spannung von 230V 50 Phase=braun PHASE...
-
Page 21: Gerätebedienung
5) Programmierung Per Pilotleiter: Das Gerät kann mit einer Fernbedienung gesteuert werden, wenn sein Pilotleiter an ein Gerät ange- schlossen ist, das mit einem Programmierer versehen wurde, an eine Programmierzentrale oder an ein Energiemanagementsystem. Tabelle der Befehle, die das Gerät auf seinem Steuerdraht empfangen kann. (zwischen dem Steuerdraht und dem Nulleiter messen). - Page 22 3) Frostschutz-Betrieb Diese Einstellung sorgt dafür, dass bei längerer Abwesenheit der Raum auf einer Temperatur von etwa 7°C bleibt. a) Den Schalter in Stellung Ein lassen. b) Den Rändelknopf stellen. 4) Turbo-Betrieb Diese Einstellung erzwingt eine schnelle Temperaturerhöhung des Raums innerhalb der definierten Dauer (höchste Stufe für die herkömmlichen Modelle und Einschalten des Ventilators für die Modelle mit Gebläse).
-
Page 23: Bedienungshinweise
EDIENUNGSHINWEISE - Wenn Sie den Raum lüften, positionieren Sie den Schalter auf AUS, um die Heizung auszuschal- ten. - Falls Sie ein paar Stunden lang abwesend sind, nicht vergessen, die Temperatur herabzusetzen. Abwesenheit von: Weniger 24 Stunden :die Bedienelemente nicht berühren. Über 24 Stunden oder im Sommer:den Temperaturregler-Rändelknopf stellen. -
Page 24: Im Problemfall
M PROBLEMFALL Angetroffenes Problem Was tun - Vergewissern Sie sich, dass die Leistungsschalter der Anlage eingeschal- tet sind oder dass der Lastabwurfschalter (sofern vorhanden) nicht die Stromversorgung des Geräts unterbrochen hat. - Überprüfen Sie Lufttemperatur des Raums. - Schalten Sie die Heizung aus und dann wieder ein (Schalter Das Gerät heizt nicht Wenn die Anzeigelampe 3 Mal blinkt, ist die Messsonde beschä-... -
Page 25: Staubschutz-Filter
S t a u b s c h u t z - Rote Lampe F i l t e r (bei Modellen mit Ventilator) Der Ventilator ist mit einem Staubschutzfilter ausgerüstet, welches starker Verschmutzung den Stillstand des Ventilators bewirken kann (die rote Anzeigelampe unter dem Gerät leuchtet). -
Page 26: Garantiebedingunden
* Diese Angaben befinden sich auf dem Geräteschild auf der hinteren Geräteseite. STEMPEL DES INSTALLATEURS ATLANTIC INTERNATIONAL Tel: (33) 146836000 Fax: (33) 146836001 SCHWEIZ ATLANTIC SUISSE AG Heiz und Industriekessel Wolhuserstrasse 31/33 6017 RUSWIL Tel: 41 49 63 323 Fax: 41 49 69 353... -
Page 27: Het Apparaat Installeren
Het apparaat dat u zojuist heeft gekocht is veelvuldig getest en gecontroleerd voor een optimale kwaliteit.Wij danken u voor uw keuze en uw vertrouwen.Wij hopen dat u veel plezier zult bele- ven aan het apparaat. Enkele tips: Raadpleeg de meegeleverde gebruiksaanwijzing alvorens het apparaat te installeren. Sluit de stroom af voor elke ingreep of servicebeurt aan het apparaat en controleer de voedingsspan- ning. -
Page 28: Het Apparaat Aansluiten
Maat (B) bevestigingshaken Maat (B) bevestigingshaken Vermogen Maat (A) bevestigingshaken (mm) (mm) (mm) 600 + 1000 1108 750 + 1000 1433 900 + 1000 1758 Opmerking:De bij het appa- raat meegeleverde plugs zijn standa- ardmodellen. In geval van een bijzonder steunstuk, dient u passende plugs te gebruiken. -
Page 29: Gebruik Van Het Apparaat
5) Programmering Het apparaat kan op afstand worden aangestuurd als de stuurdraad is aangesloten op een apparaat met scheduler, een programma-eenheid of een energiebeheerder. Tabel van de commando's die het apparaat kan ontvangen via de stuurdraad (te meten tussen de stuurdraad en de neutrale geleider). Negatieve Ontvangen com- Volledige halve... - Page 30 3) Vorstvrij functie Met deze functie handhaaft u een temperatuur van ongeveer 7°C in het vertrek als u voor langere tijd afwezig bent. a) Laat schakelaar op Aan staan. b) Zet schakelaar 4) Turbo functie Met deze functie kunt u het apparaat Geforceerd Activeren om snel de temperatuur van het vertrek te verhogen gedurende bepaalde tijd (maximaal vermogen voor de klassieke modellen en aanzetten van de ventilator voor de modellen met blaasinrichting).
-
Page 31: Tips Voor Gebruik / Waarschuwing / Onderhoud
IPS VOOR GEBRUIK - Als u het vertrek lucht, moet u de verwarming uitzetten door de schakelaar op stand Uit te zet- ten. - Vergeet niet om de temperatuur te verlagen als u enkele uren van huis gaat. Afwezigheid van: Minder dan 24 uren :de instellingen niet veranderen. -
Page 32: Problemen Oplossen
ROBLEMEN OPLOSSEN Problemen Controles - Controleer of de hoofdzekeringen van de installatie zijn ingescha- keld of het ontlastsysteem (als u dat een hebt) de voeding van het apparaat niet heeft uitgeschakeld. - Controleer de luchttemperatuur van het vertrek. - Zet de verwarming uit en dan weer aan (Schakelaar Het apparaat verwarmt niet Als het controlelampje 3 maal knippert: de meetelektrode... -
Page 33: Stoffilter
S t o f f i l t e r Rood controlelampje (voor modellen met ventilator) De ventilator is uitgerust met een stoffilter die wanneer hij vol is het apparaat kan uitschakelen (rood controlelampje brandt aan de onderkant van het apparaat). Voor een optimaal gebruik, de filter regelmatig schoonmaken overeenkomstig de aanwijzingen: 2.Trek aan de filter aan de achterkant van het appa-... -
Page 34: Garantievoorwaarden
ARANTIEVOORWAARDEN DOCUMENT DAT DE GEBRUIKER MOET BEWAREN (de verklaring alleen overleggen in geval van een klacht) - De garantie geldt voor een duur van twee jaar met ingang van de datum van installatie of aankoop. - De duur kan de 30 maanden vanaf de fabricagedatum niet overschrijden indien er geen bewijs aan wezig is. -
Page 35: Instalación Del Aparato
El aparato que acaba de adquirir ha sido sometido a numerosas pruebas y controles con el fin de garantizar la calidad. Le agradecemos por su elección y su confianza. Esperamos que le aporte una entera satisfacción. Algunos consejos: Lea el manual antes de comenzar la utilización del aparato. Corte la corriente antes de efectuar cualquier intervención en el aparato y verifique la tensión de alimenta- ción. -
Page 36: Conectar El Aparato
Cota (A) Cota (B) Cota (C) Potencia (W) patas de fijación (mm) patas de fijación (mm) patas de fijación (mm) 600 +1000 1108 750 +1000 1433 900 +1000 1758 Nota: Las clavijas suministradas con el aparato son de tipo estándar. En caso de soporte particular, utilice... -
Page 37: Programación
5) Programación Por cable piloto: El aparato se puede dirigir a distancia si su cable piloto está conectado a un aparato equipado con un programador, a una central de programación o a un administrador de energía. Cuadro de las órdenes que el aparato puede recibir en su hilo piloto (a medir entre el hilo piloto y el neutro). -
Page 38: Modo Turbo
3) Modo Fuera de Hielo Es el modo que permite mantener la temperatura a aproximadamente 7ºC en la pieza durante una ausencia prolongada de la casa. a) Deje el interruptor en la posición Marcha. b) Ajuste la moleta 4) Modo Turbo Es el modo que permite poner el aparato en Marcha Forzada para aumentar rápidamente la tempe- ratura de la habitación durante el tiempo definido (a la máxima potencia para los modelos clásicos y puesta en marcha del ventilador para los modelos con soplador). -
Page 39: Consejos De Utilización / Advertencia / Mantenimiento
ONSEJOS DE UTILIZACIÓN - Cuando ventile la habitación, corte la calefacción poniendo el interruptor en la posición Parada. - Si se ausenta durante varias horas, piense en bajar la temperatura. Ausencia de: Menos de 24 horas :no tocar los comandos. Más de 24 horas o en verano :poner la moleta de temperatura en DVERTENCIA... -
Page 40: En Caso De Problemas
N CASO DE PROBLEMAS Problemas encontrados Verificaciones por realizar - Cerciórese de que los disyuntores de la instalación estén enclava- dos, o bien que el deslastrador (si posee uno) no haya cortado la alimentación del aparato. - Verifique la temperatura del aire de la habitación. - Apague y vuelva a encender la calefacción (Interruptor El aparato no calienta Si el testigo... -
Page 41: Filtro Antipolvo
F i l t r o Indicator rojo a n t i p o l v o (para modelo equipado de un ventilador) El ventilador está equipado de un filtro anti- polvo que, cuando se satura, puede provocar su parada (piloto rojo encendido debajo del apa- rato). -
Page 42: Condiciones De Garantía
ONDICIONES DE GARANTÍA Documento a conservar por el usuario, (Presentar el certificado sólo en caso de reclamación) - La duración de la garantía es de dos años a contar a partir de la fecha de la instalación o de la com- pra y en ningún caso superior a los 30 meses a partir de la fecha de fabricación sin justificación. -
Page 43: Instalação Do Aparelho
O aparelho que acaba de adquirir foi submetido a diversos testes e controlos de maneira a asse- gurar um alto nível de qualidade. Estamos gratos pela sua escolha e pela sua confiança, e espe- ramos que este produto lhe traga total satisfação. Alguns conselhos: Antes de iniciar a instalação do aparelho, leia o manual. -
Page 44: Ligação Do Aparelho
Potências Cota (A) Cota (B) Cota (C) partes de fixação (mm) partes de fixação (mm) partes de fixação (mm) 600 +1000 1108 750 +1000 1433 900 +1000 1758 Nota: Las clavijas suministradas con el aparato son de tipo estándar. En caso de soporte particular, utilice clavijas adapta- das. -
Page 45: Utilização Do Aparelho
5) Programação O aparelho pode ser comandado à distância, se o fio piloto de programação estiver ligado a um apa- relho equipado com programador, a uma central de programação ou a um sistema de gestão de ener- gia. Quadro dos 6 comandos de programação que o aparelho pode receber através do fio piloto (a medir entre o fio piloto e o neutro). -
Page 46: Modo Anti-Gelo
3) Modo Anti-Gelo Este modo permite manter a temperatura do cómodo a cerca de 7°C durante ausências prolonga- das. a) Deixar o interruptor na posição Liga. b) Ajustar o selector 4) Modo Turbo Este modo permite colocar o aparelho em funcionamento forçado para aumentar rapidamente a tem- peratura do cómodo durante um tempo definido (máximo da potência para os modelos clássicos e colo- cação em funcionamento do ventilador para os modelos com foles). -
Page 47: Conselhos De Utilização
ONSELHOS DE UTILIZAÇÃO - Quando ventilar a peça, cortar o aquecimento pondo o interruptor na posição “desligar”. - Ao sair durante várias horas, lembre de baixar a temperatura. Ausência de: Menos de 24 horas :não alterar os comandos. Mais de 24 horas ou durante o verão :colocar o selector de tempera- tura na posição RECAUÇÕES DE UTILIZAÇÃO... -
Page 48: Em Caso De Problema
M CASO DE PROBLEMA Problemas encontrados Verificações a efectuar - Certifique-se de que os disjuntores da instalação estão accionados ou verifique se o deslastrador (se presente) cortou a alimentação do aparelho. - Verifique a temperatura ambiente do cómodo. - Desligar, depois voltar a ligar o seu aquecimento (interruptor O aparelho não aquece Se o sinal luminoso piscar 3 vezes : a sonda de medição está... -
Page 49: Filtro Anti-Po
F i l t r o Sinal luminoso vermelho a n t i - p ó (para modelos equipados com ventilador) O ventilador está equipado com um filtro anti-pó que, ao atingir a saturação, pode pro- vocar a sua paragem (iluminação de uma luz vermelha sob o aparelho). -
Page 50: Condições De Garantia
............. . *Estas informações encontram-se na placa de características situada no lado direito do aparelho. Carimbo do vendedor Atlantic Ibérica Pol. Industrial Cam í Real Paseo del Ferrocaril, 339 - 2°planta... -
Page 51: Garantie
La durée de garantie est de 2 ans à compter de la date d’installation ou d’achat et ne saurait excéder 30 mois à partir de la date de fabrication en l’absence de justificatif. Atlantic assure l’échange ou la fourniture des pièces reconnues défectueuses à l’exclusion de tous dommages et intérêts.