
Manuels Connexes pour EUROM MILANO de LUXE

Sommaire des Matières pour EUROM MILANO de LUXE
- Page 1 NL - Instructieboek GB - Manual FR - Manuel d’instructions MILANO e LUXE Ventilator op standaard met afstandsbediening Fan on standard with remote control Ventilateur sur pied avec télécommande...
- Page 2 DANK Hartelijk dank dat u voor de EUROM MILANO de LUXE ventilator gekozen hebt. U hebt daarmee een goede keus gemaakt! Wij hopen dat hij tot uw volle tevredenheid zal functioneren. Om het beste uit uw ventilator te halen is het belangrijk dat u dit instructieboekje vóór gebruik aandachtig en in zijn geheel doorleest...
- Page 3 BELANGRIJKE VEILIGHEIDSVOORSCHRIFTEN - Controleer voor gebruik of de spanning die het stopcontact, waarop u de ventilator wilt aansluiten, afgeeft, gelijk is aan het voltage dat op het typeplaatje van de ventilator staat. - Controleer ventilator, stekker en elektrokabel voor gebruik op beschadigingen.
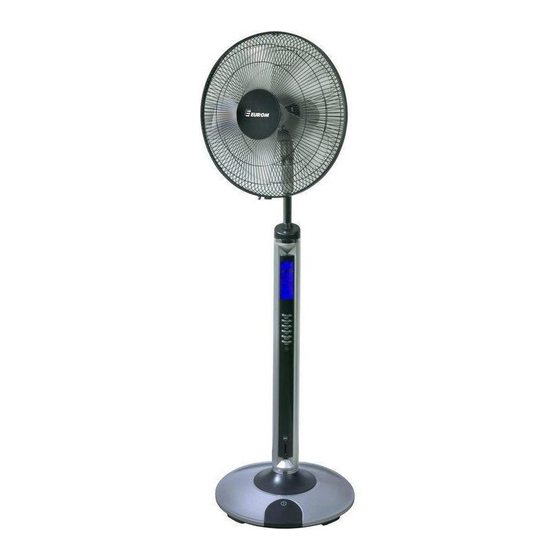
- Page 4 ONDERDELENTEKENING beschermrooster voorzijde bevestigings- schroef roosterclip roosterring kapje vinnenblad vinnenblad roostersluiting beschermrooster achterzijde motor-as 10. pen 11. motorkap voorzijde 12. motorkap achter 13. verbinding 14. afstandsbediening 15. hals 16. instelbare standaard 17. kap basisstandaard 18. controlepaneel 19. basisstandaard 20. voet basisstandaard 21.
- Page 5 SAMENSTELLING Zet de ventilator in elkaar volgens de onderstaande beschrijving. Bewaar de verpakking om die in de toekomst te kunnen gebruiken wanneer u de ventilator op wilt ruimen. 1. opbouwen van de basisstandaard • Schuif eerst decoratiering vervolgens de decoratieve voetkap op hun plaats over de onderzijde van de basisstandaard.
- Page 6 3. bevestiging van het vinnenblad • Plaats het vinnenblad zo ver mogelijk over de motor-as, zodat de roterende pen geheel wegvalt in de groef aan de achterkant van het blad. • Draai het kapje van het vinnenblad tegen de klok stevig vast op de motor-as, zie tekening.
- Page 7 • In ruimtes waar apparatuur met een groot vermogen werkzaam is zal de afstandsbediening slecht of niet functioneren. • Plaats geen obstakels tussen afstandsbediening en ventilator. • Behandel de afstandsbediening met zorg, laat hem niet vallen. • Gebruikt u de afstandsbediening langere tijd niet, neem de batterijen er dan uit.
- Page 8 INGEBRUIKNAME EN WERKING Overtuig u ervan dat ventilator, elektrokabel en stekker geen beschadigingen vertonen en dat het stopcontact, waarop u de ventilator wilt aansluiten de spanning afgeeft die op het typeplaatje vermeld staat. Steek dan de stekker in het stopcontact. •...
- Page 9 • Met de TIMER-knop (tijdklok) stelt vooraf de tijdsduur in die de ventilator zal werken. Door éénmaal op de knop te drukken is dat een half uur, elke keer dat u vaker drukt wordt er half uur toegevoegd tot een maximum van 8 uur (16 x drukken). Drukt u voor de 17 keer, dan schakelt u de timerfunctie weer uit.
- Page 10 TECHNISCHE GEGEVENS Model MILANO de LUXE Aansluitspanning 220 – 240V / 50Hz Opgenomen vermogen 50 Watt Luchtverplaatsing 47 / 66 / 69 m3 / uur...
- Page 11 IMPORTANT SAFEGUARDS · Before use, check if the voltage complies with the specifications marked on the voltage label attached at the fan. · Before use, please check the fan, the power cable and plug for damage. · Do not use it before assembling. ·...
- Page 12 PARTS EXPLOSIVE VIEW Front guard Locking screw Guard clip Guard ring Blade cap Fan blade Guard lock Rear guard Motor shaft Pillar Front motor cover Rear motor cover Connector Remote controller Neck Adjustable stand Upper corer Control panel Base stand Base plate Decorative ring Decorative base cap...
- Page 13 ASSEMBLY METHOD Please assemble correctly according to following sequence. Please keep the package properly for future storage. 1. Assembly of the stand • Shove at first the decorative ring and then the decorative base cap over the base stand • Connect the little plug (coming out of the base stand) with the socket (coming out of the base) •...
- Page 14 3. Assembly of the blade • Insert the motor shaft into the fan blade to the uttermost so that the rotating pin falls in total in the groove at the backside of the blade. • Anti-clockwise clock the blade cap into the motor shaft and fix it tightly, as illustrated.
- Page 15 • If used in a room with high power machine running, the remote controller will be not function. • Do not put any obstruction between the remote controller and receiver. • Please keep the remote controller with care, do not drop it. •...
- Page 16 START AND WORKING Make sure that fan, power cable and plug are not damaged and that the voltage complains with the specifications on the label of the fan. Plug in. • By pushing the ON/OFF-button of the control-panel or the remote-control you set the fan in use.
- Page 17 • With the SWING-button you make the fan oscillating from left to right (and back). Pressing one time you activate this function, pressing another time de-activates it. • With the IONIZER-button you make that the fan emits +/-ions to clean and purify the air. The fan has a memory-function.
- Page 18 Alternations carried out at the equipment and repairs, not carried out by authorized people do expire the guarantee and responsibility of the dealer, importer end manufacturer. TECHNISCHE GEGEVENS Model MILANO de LUXE Voltage 220 – 240V / 50Hz Power 50 Watt...
- Page 19 PRESCRIPTIONS EN MATIERE DE SECURITE - Avant l’utilisation, contrôlez si la tension fournie par la prise d’alimentation, à laquelle vous voulez raccorder le ventilateur, est identique au voltage qui est indiqué sur la plaque signalétique du ventilateur. - Avant l’utilisation, vérifiez que le ventilateur, la fiche et le cordon électrique ne sont pas endommagés.
- Page 20 DESSINS DES COMPOSANTS 1. grille de protection face avant 2. vis de fixation 3. clip de la grille 4. anneau de la grille 5. écrou borgne de la turbine 6. turbine 7. accessoire de blocage de la grille 8. grille de protection face arrière axe du moteur ergot capot moteur face avant...
- Page 21 ASSEMBLAGE Assemblez les éléments du ventilateur selon la description figurant ci-dessous. Conservez l’emballage afin de pouvoir l’utiliser à l’avenir lorsque vous voulez remiser le ventilateur. 1. montage du socle du pied • Insérez d’abord la bague décorative et ensuite le capot décoratif du pied à leur emplacement partie...
- Page 22 3. fixation de la turbine • Placez la turbine aussi loin que possible sur l’axe du moteur, de manière à ce que l’ergot rotatif disparaisse entièrement dans la gorge à l’arrière des pales. • Faites tourner l’écrou borgne de la turbine dans le sens contraire des aiguilles d’une montre manière...
- Page 23 • La distance maximale entre le ventilateur et la télécommande peut aller jusqu’à 5 mètres environ; une distance supérieure affaiblit le signal. • Dans les locaux où travaille de l’appareillage avec une puissance élevée, la télécommande fonctionnera mal ou pas du tout.
- Page 24 MISE EN MARCHE ET FONCTIONNEMENT Assurez-vous quant à savoir si le ventilateur, cordon électrique et fiche ne présentent pas de dommage et que la prise à laquelle vous voulez raccorder le ventilateur donne la tension qui est indiquée sur la plaque signalétique. Enfoncez alors la fiche dans la prise. •...
- Page 25 • Au moyen du bouton TIMER (minuterie) vous réglez à l’avance la durée de fonctionnement du ventilateur. En pressant le bouton à nouveau, celle-ci sera d’une demi-heure, une demi-heure venant s’ajouter chaque fois que vous pressez jusqu’à un maximum de 8 ème heures (après avoir pressé...
- Page 26 Des modifications apportées à l’appareil et des réparations effectuées d’une manière incompétente rendent caduques la garantie et la responsabilité du fournisseur, de l’importateur et du fabricant. DONNEES TECHNIQUES Modèle MILANO de LUXE Tension de raccordement 220 – 240V / 50Hz Puissance consommée 50 Watt Déplacement d’air...
- Page 27 Merk / Mark / Marque: Eurom Model / Model / Modèle: Milano de Luxe Omschrijving / Descriptio / Descriptionn: Ventilator op standaard / Fan on standard / Ventilateur sur pied In overeenstemming is met de eisen van de EMC Directive (2006/95/EC) en de Low Voltage Directive 2006/95/EC.
- Page 28 EUROMAC BV. Kokosstraat 20, 8281 JC Genemuiden tel. 038-3854321 fax 038-3856464 e-mail: info@euromac.nl www.euromac.nl...