Télécharger Imprimer la page

Publicité

Les langues disponibles

Les langues disponibles

Liens rapides

TWO
2 Channel 2-Way Stereo Sound System
Bedienungsanleitung............................3
User Manual.........................................9
Mode d'emploi....................................15

Publicité

loading

Sommaire des Matières pour Wavemaster TWO

  • Page 1 2 Channel 2-Way Stereo Sound System Bedienungsanleitung......3 User Manual.........9 Mode d'emploi........15...
  • Page 3 Sie das Lautsprecher-System von gewählt haben und gratulieren Ihnen zu dieser Entscheidung. wavemaster TWO Sie haben mit dem ein gleichermaßen anspruchsvolles wie attraktives Audioprodukt erworben. Wir sind überzeugt, dass Ihnen unser Produkt viele Jahre nützliche Dienste erweisen und vor allem eine Menge Spaß bereiten wird.
  • Page 4 Deutsch Aufbau & Bedienung wavemaster TWO Der Aufbau und die Bedienung des sind sehr einfach. Bitte beachten Sie, alle Anschlüsse nur im ausgeschalteten Zustand (POWER OFF) durchzuführen. • Stellen Sie die Lautsprecher an den gewünschten Platz und beginnen Sie mit der Verkabelung.
  • Page 5 (WLAN) oder Bluetooth Audio Systemen: Sie können das kabellose System nutzen und das Sound System aktiviert und deaktiviert sich automatisch, gemäß den zugespielten Audiosignalen. • Das TWO Sound System bietet USB powered- und Netzspannungs- (AUX AC OUTLET) Anschlüsse zur Energieversorgung verschiedenster Quellengeräte. Zusammen mit dem AUDIO...
  • Page 6 Deutsch Verbindung zu einer MP3 Player Dockingstation (z.B. iPod Universal Dock) 1. Platzieren Sie die Dockingstation auf oder nahe bei dem rechten Lautsprecher. Es empfehlen sich besonders die Dockingstationen mit Fernbedienung. 2. Verbinden Sie das USB-Kabel der Dockingstation mit der USB POWER OUTPUT Buchse auf Rückseite.
  • Page 7 Deutsch Verbindung mit WLAN Audio Geräten (z.B. Airport Express): 1. Verbinden Sie das Audiokabel mit dem Audio-Ausgang des WLAN-Geräts. 2. Verbinden Sie die RCA-Stecker des Audiokabels mit dem INPUT B Ihres Systems 3. Stecken Sie den Netzspannungsanschluß des WLAN Audio Geräts in die AUX AC OUTLET Netzbuchse des Systems.
  • Page 8 • Abmessungen (BxHxT): je Box 180 x 256 x 205 mm • Systemanforderungen: analoge Stereoquelle mit RCA- oder Klinken-Anschlüssen CE - Erklärung wavemaster Wir erklären hiermit, dass das Lautsprechersystem mit den folgenden Normen bzw. normativen Dokumenten übereinstimmt: EMC Direktive (2004/108/EC) EN 55013: 2001 + A1: 2003 + A2: 2006;...
  • Page 9 TWO With this you have acquired a modern piece of audio technology that is in equal measure attractive and of high quality. We are sure that this product will provide useful service and a lot of fun to you over the coming years.
  • Page 10 English Assembly and operation Assembly and operation of your speaker system is very easy to do. General connections are shown in the following drawing. Please connect all components only when the mains power switch is switched OFF. • Place the speakers at their target area and start connecting. •...
  • Page 11 English • Switch on the main switch on the back. Switching ON/STANDBY as well as VOLUME control of your sound system can be done by the • front control knob of the right speaker box. • Adjust the BASS and TREBLE level by the controls at the rear panel, if required. If you emphasize the bass control too much, the maximum total volume will be limited since the woofer may run at overstroke earlier.
  • Page 12 Connection of all products with RCA outputs: 1. Connect the source by a RCA-to-RCA audio cable to the RCA INPUT at the TWO rear panel – or use the included RCA to mini phono cable to connect from RCA source to the mini phono socket.
  • Page 13 English Connections with WLAN audio devices (e.g. Airport Express): 1. Plug mini phono plug of the audio cable into your Wlan audio device audio output. 2. Plug the other end of the audio cable into AUDIO INPUT jack at rear of the RIGHT speaker. 3.
  • Page 14 Dimensions (WxHxD): each 180 x 256 x 205 mm • • System requirements: analogue stereo source with RCA or mini phono terminals CE - Declaration of conformity wavemaster TWO We herewith declare, that the active speaker system complies with the following standards or normative documents: EMC Directive (2004/108/EC) EN 55013: 2001 + A1: 2003 + A2:2006;...
  • Page 15 
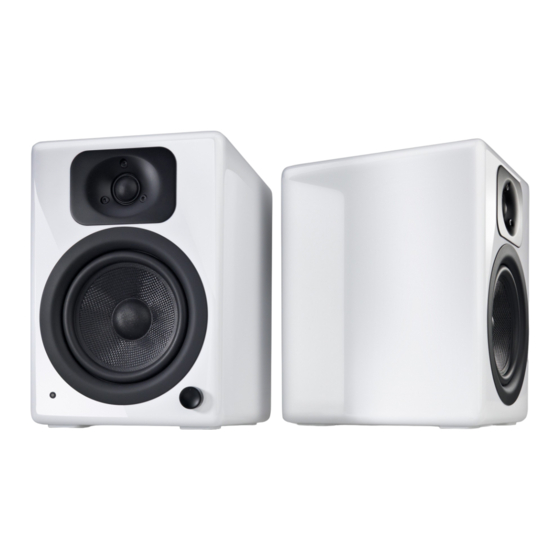
Francais Mode d'emploi Cher utilisateur, wavemaster Vous avez opté pour le kit stéréo . Nous vous félicitons et sommes heureux de vous compter parmi nos clients. Lorsque vous avez fait l’acquisition du kit stéréo , vous avez fait le choix d’un matériel audio de haute technologie à...
  • Page 16 Francais Assemblage et fonctionnement L’assemblage et le fonctionnement du kit stéréo est extrêmement simple. Veuillez trouver les connexions disponibles sur les dessins suivants. Ne branchez les composants que lorsque l’interrupteur est en position OFF. • Installez les haut-parleurs à l’endroit où vous les voulez et commencez les branchements. •...
  • Page 17 Francais • Vous pourrez allumer et mettre en veille les haut-parleurs ainsi que régler le volume sonore grâce au bouton de réglage situé sur la façade du boîtier du haut-parleur droit. • Réglez les BASSES et les AIGUS grâce aux boutons situés à l’arrière. Si vous réglez les basses trop fortes, le volume maximal sera diminué...
  • Page 18 Francais Branchements sur une station d’accueil d’un lecteur MP3 (p. ex.iPod Universal Dock) 1. Placez la station d’accueil au-dessus ou près du haut-parleur de droite. Nous vous conseillons fortement d’utiliser une station d’accueil avec télécommande. 2. Branchez le câble Apple 30-pin de la station d’accueil à la prise USB du haut-parleur prévue à a cet effet.
  • Page 19 Francais Branchement sur les appareils audio WLAN (p. ex. Airport Express): 1. Branchez la prise jack 3,5mm du câble audio sur la sortie audio de votre appareil audio WLAN. 2. Branchez l’autre extrémité du câble audio sur la prise d’entrée audio à l’arrière du haut-parleur droit 3.
  • Page 20 • Configuration requise: source stéréo analogue avec RCA ou prise jack 3,5mm Déclaration de la CE wavemaster TWO Nous déclarons par ce présent document que le produit Sound System correspond aux normes ou éléments normatifs suivants: Directive de compatibilité électromagnétique (2004/108/EC) EN 55013: 2001 + A1: 2003 + A2: 2006;...