Horizon Hobby ECX Torment Manuel D'utilisation
Table des Matières
Les langues disponibles
Les langues disponibles
Liens rapides
1/10 electrIc
short course truck
ecX4000s | ecX4000sau | ecX4000seu
ecX4100s | ecX4100sau | ecX4100seu
InstructIon Manual
BedIenungsanleItung
Manuel d'utIlIsatIon
Manuale
™
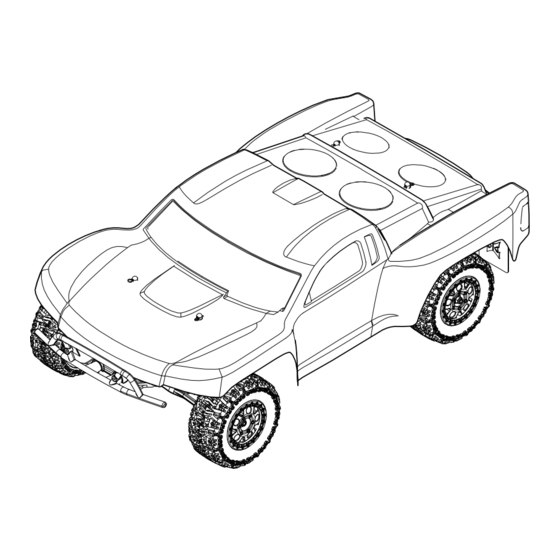
Congratulations on your purchase of the ECX
Torment
Short Course Truck. This 1/10-scale
™
model introduces you to the sport of
RC driving.
Herzlichen Glückwunsch zum Kauf des ECX
Torment
Short Course Truck. Dieses 1/10 Scale
™
Model öffnet Ihnen die Welt des RC Car Sports.
Nous vous félicitons pour l'achat du ECX
Torment
Short Course Truck. Ce modèle
™
1/10 vous initie à la conduite RC.
Congratulazioni per l'acquisto di questo Torment
Short Course Truck ECX. Questa vettura in scala
1/10 vi introdurrà nel mondo dei modelli RC.
™
™
™
™
Chapitres
Table des Matières
Dépannage

Manuels Connexes pour Horizon Hobby ECX Torment


Sommaire des Matières pour Horizon Hobby ECX Torment
- Page 1 ™ 1/10 electrIc Congratulations on your purchase of the ECX ™ Torment Short Course Truck. This 1/10-scale ™ short course truck model introduces you to the sport of RC driving. ecX4000s | ecX4000sau | ecX4000seu Herzlichen Glückwunsch zum Kauf des ECX ™...
-
Page 26: Signification De Certains Mots
Toutes les instructions, garanties et autres documents de garantie d’utilisation afin de vous familiariser avec les caractéristiques du sont sujets à la seule discrétion de Horizon Hobby, Inc. Veuillez, produit avant de le faire fonctionner. Une utilisation incorrecte du pour une documentation produit bien à jour, visiter le site produit peut avoir comme résultat un endommagement du produit... -
Page 27: Véhicule Résistant À L'eau Équipé D'une Électronique Étanche
VéhIculE RéSISTANT à l’EAu équIPé d’uNE élEcTRoNIquE éTANchE Votre nouveau véhicule Horizon Hobby a été conçu et fabriqué en Maintenance en conditions humides combinant des composants étanches et des composant résistants à • Evacuez l’eau collectée par les pneus en les faisant tourner l’eau vous permettant d’utiliser ce produit dans plusieurs “Conditions... -
Page 28: Caractéristiques
0.23s sur 60° de course Masse 34–36 g Dimensions 40,5 x 20 x 36,8mm EléMENTS 1. ECX Torment Short Course 1/10 2. Emetteur ECX 2.4GHz 3. Piles AA (4) 4. Chargeur DYN4113 2A à détection de peak 5. Batterie Dynamite Speedpack 7.2V Ni-Mh (DYN1050EC) -
Page 29: Installation Des Piles De L'emetteur
INSTAllATIoN dES PIlES dE l’éMETTEuR ATTENTIoN : Si vous utilisez des batteries rechargeables ne rechargez que celles-ci. Si vous tentez de charger des piles (non-rechargeables), vous vous exposez à un risque d’explosion entraînant des blessures corporelles et des dégâts matériels. Installez 4 piles alcalines dans l’émetteur en suivant Ne JAMAIS installer des piles ou batteries endommagées, des piles ou les instructions fournies pour votre système radio. -
Page 30: Fonctions De L'émetteur
FoNcTIoNS dE l’éMETTEuR Interrupteurs d’inversion Indication du niveau des piles Rouge et verte allumées fixes : La tension des piles est correcte (Supérieure à 4V) Rouge fixe seule : La tension des piles est faible (en Permet d’inverser le sens de la direction (ST.REV) dessous de 4V). -
Page 31: Mise En Fonctionnement
MISE EN FoNcTIoNNEMENT 1. Mettez l’émetteur sous tension. 3. Effectuer un test des commandes de l’émetteur en soulevant du sol les roues du véhicule. 2. Mettez le contrôleur sous tension. 4. Commencez par rouler lentement et si le véhicule ne roule pas droit, réglez la direction à... -
Page 32: Utilisation
uTIlISATIoN • TOUJOURS mettre l’émetteur sous tension avant le • TOUJOURS utiliser votre véhicule dans un endroit dégagé. récepteur du véhicule. TOUJOURS mettre le récepteur Faire fonctionner le véhicule dans des petites zones ou en hors tension avant l’émetteur. intérieur peut entraîner une sur-chauffe du véhicule. Un fonctionnement à... -
Page 33: Maintenance
MAINTENANcE RéglAgE dE l’ENTRE dENTS 4. Faites tourner l’engrenage pour retirer le morceau de papier. Il doit y avoir un léger jeu entre le pignon et la couronne. L’entre-dent est déjà réglé à l’usine. Ce réglage est seulement néces- 5. Replacez le capot de protection. saire quand vous changez le moteur, la couronne ou le pignon. -
Page 34: Nettoyage De L'amortisseur
NETToyAgE dE l’AMoRTISSEuR AMoRtiSSEUR AMoRtiSSEUR ARRièRE AVAnt Rear Shock Front Shock Les amortisseurs à huile nécessitent un entretien régulier en raison du ECX1037 ECX1037 vieillissement de l’huile ou de son encrassement. Cet entretien devrait ECX1043 être effectué après toutes les 3 à 5 heures de fonctionnement, cette ECX1043 durée variant en fonction des conditions dans lesquelles le véhicule ECX1057... -
Page 35: Affectation
• Emetteur mis accidentellement en mode affectation Le récepteur passe en • Contrôlez l’état de l’antenne du • Contactez le service technique Horizon Hobby mode failsafe à une courte récepteur • Vérifiez que l’antenne est bien dans un tube qui distance dépasse de la carrosserie... -
Page 36: Garantie Et Réparations
Indications relatives à la sécurité Garantie exclusive - Horizon Hobby, Inc. (Horizon) garantit que le Ceci est un produit de loisirs perfectionné et non un jouet. Il doit être Produit acheté (le « Produit ») sera exempt de défauts matériels et utilisé... -
Page 37: Coordonnées De Garantie Et Réparations
Land des Kauf Horizon Hobby Adresse telefon / E-mail Adresse France Horizon Hobby SAS 14 Rue Gustave Eiffel +33 (0) 1 60 47 44 70 Zone d’Activité du Réveil Matin infofrance@horizonhobby.com 91230 Montgeron INFoRMATIoNS dE coNFoRMITé PouR l’uNIoN EuRoPéENNE déclaration de conformité... - Page 50 PARTS diAgRAm | ExPloSioNSZEicHNuNg | VuE ÉclATÉE dES PiEcES | ESPloSo dEl modEllo coN REFERENZA PEZZi...
- Page 51 PARTS diAgRAm | ExPloSioNSZEicHNuNg | VuE ÉclATÉE dES PiEcES | ESPloSo dEl modEllo coN REFERENZA PEZZi...
-
Page 52: Beschreibung
Part # | Nummer Description Beschreibung Description Descrizione Numéro | Codice DYN4113 2A Peak Charger 2A Peak Ni-MH Ladegerät 2A Chargeur à détection de pics 2A Caricabatterie a rilevamento di picchi DYN1050EC Ni-MH battery Ni-MH akku Batterie Ni-MH Batteria Ni-MH ECX2008 Main Chassis ...